


How to Add Video Testimonials to Your WordPress Website


A written review tells visitors your product is good. A video testimonial shows them a real person saying so, face and voice included, and that is much harder to fake or ignore.
This guide covers why video testimonials convert, how to collect and record them, and how to add video testimonials to your WordPress website step by step.
The TL;DR:
- 79% of people have watched a video testimonial to learn about a company, product, or service.
- 2 in 3 people say they are more likely to buy after watching a testimonial video.
- Video testimonials work because they feel authentic, show the product in use, and put a real face on social proof.
- You can collect video testimonials remotely, with no camera crew, using a simple request and a few guiding questions.
- WP Social Ninja lets you add video testimonials to WordPress by upload or a YouTube/Vimeo link, and display them in grid, slider, or masonry layouts.
What are Video Testimonials?
A video testimonial is a short clip of a real customer talking about your product or service in their own words. Instead of a line of text, visitors see the person, hear their tone, and read their body language. That combination is why video customer testimonials carry more weight than a quote on a page.
They come in a few forms. Customer video testimonials and client video testimonials are the most common: a buyer explains the problem they had and how you solved it.
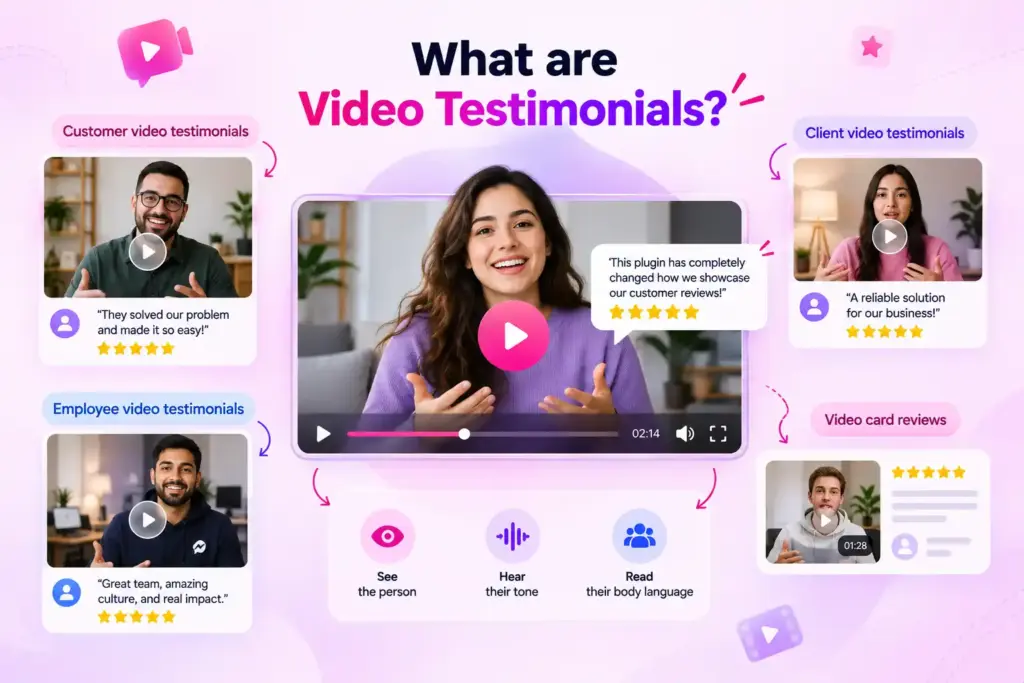
Employee video testimonials put your team on camera, which helps for recruiting and culture pages. Some brands also use short video card reviews, a rating and a quick clip shown together in a compact card.
The point is the same across all of them. A real person vouching for you on camera is the strongest form of social proof a website can show.
Why Video Testimonials Work
Video raises that effect. Wyzowl found that 79% of people have watched a video testimonial to learn about a company, product, or service, and 2 in 3 say they would be more likely to buy after watching one.
The benefits of video testimonials come down to trust. People believe other people far more than they believe your marketing. Testimonial research shows that 95% of people say reviews influence their buying decisions, and 9 in 10 trust what a customer says about a business more than what the business says about itself.

When asked why testimonial videos work, 47% said it helps them see how the product actually works, 42% valued seeing a real person’s story, and 37% found video more authentic than a brand’s own pitch.
Trust in people over ads is not new. Nielsen’s long-running research shows recommendations from people we know are among the most trusted forms of influence.
Video testimonials borrow that same credibility and put it on your site, working for you around the clock. That is why video testimonials for marketing have moved from “nice to have” to a core conversion asset.
Video testimonials and conversions
Social proof video testimonials do more than build warm feelings. They move numbers. Testimonials can lift conversions on sales pages by as much as 34% in tested cases, and video tends to hold attention longer than text, which keeps visitors on the page while they decide.
Video testimonials and SEO
Video testimonials also help with SEO in a few indirect ways. Rich media keeps visitors on your pages longer, which signals relevance. Testimonial pages can earn featured snippets and structured-data stars when marked up correctly.
And a dedicated testimonials page builds topical trust around your brand name, the exact thing people search when they are close to buying. Treat video testimonials SEO as a side benefit of good social proof, not a trick.
How to Collect Video Testimonials From Customers
The hardest part is not the tech. It is the ask. Most happy customers are willing to help; they just need a clear, low-friction request. Here is how to get video testimonials from customers without a studio or a camera crew.
Ask at the right moment. The best time to request a testimonial is right after a win: a successful launch, a renewal, a support ticket resolved well, or a milestone they just hit. That is when goodwill is highest.
Make it easy to say yes. Collecting video testimonials remotely is now the norm. Send a short request by email explaining what you need, roughly how long it should be, and the handful of questions you want answered.
Remote video testimonials recorded on a phone or webcam feel more authentic than an over-produced studio clip anyway.
Use a collection method that fits your customer. A few common routes for collecting video testimonials:
- A simple request asking them to record on their phone and send the file
- A dedicated video testimonials software or service that records in-browser, so there is nothing to install
- A short call you record with permission, then trim into a clip
- A branded request page where they answer set questions one by one
Video testimonials software and services
There is a healthy market of tools built just for this. Video testimonials software and services like Vouch, VideoAsk, and Trustmary let customers record answers in the browser and hand you a clean file.
If you have searched for video testimonials or compared a video testimonial service, those are the kind of tools that handle collection and hosting.

WP Social Ninja sits at the display end of that workflow. You collect the clip however you like, host it on YouTube, Vimeo, or your own media library, then use WP Social Ninja to show it on your WordPress site with the rest of your social proof.
That separation keeps you flexible: swap collection tools anytime without touching how your site displays the results.
Video Testimonial Questions to Ask
Good video testimonial questions do most of the work. Vague prompts produce rambling clips. Specific ones produce clips you can actually use. Here are the must-ask questions that map to a natural story arc:
- Who are you, and what do you do?
- What problem were you trying to solve?
- What has working with us been like?
- What results have you seen, in numbers if possible?
- Would you recommend us, and to whom?
Send all the questions at once so the customer can prepare. Keep each one tight.
The results in numbers question is the one most people skip and the one that convinces buyers most, so nudge for a concrete figure.
How to Record Video Testimonials
You do not need professional gear. You need clear audio and a watchable frame. Share these quick notes when you ask, and the quality of what comes back jumps immediately.
Here is how to record video testimonials that look credible, not corporate:
- Record in landscape for a website; portrait only if it is headed for social
- Face a window or a light source so the face is lit, never backlit
- Get close to the mic; clean audio matters more than video quality
- Film against a simple background with no clutter or glare
- Keep it to 50 to 70 seconds, one story per clip
- Let them speak naturally; a few ums read as real, not amateur
Authenticity beats polish. A slightly rough, genuine clip outperforms a glossy scripted one, because the whole value of video testimonials for social proof is that they feel real.
How to Add Video Testimonials to Your WordPress Website with WP Social Ninja
Once you have your clips, you need a clean way to show them. WP Social Ninja is an all-in-one social proof plugin for WordPress, and its Testimonials feature lets you create video testimonials and display them anywhere on your site.
Video testimonials are a Pro feature, added in WP Social Ninja 4.4.0, with playback handled through FluentPlayer.
Here is how to add video testimonials on your website, step by step. Each step matches one screen in the plugin.
Step 1: Open the Testimonials tab and add a testimonial
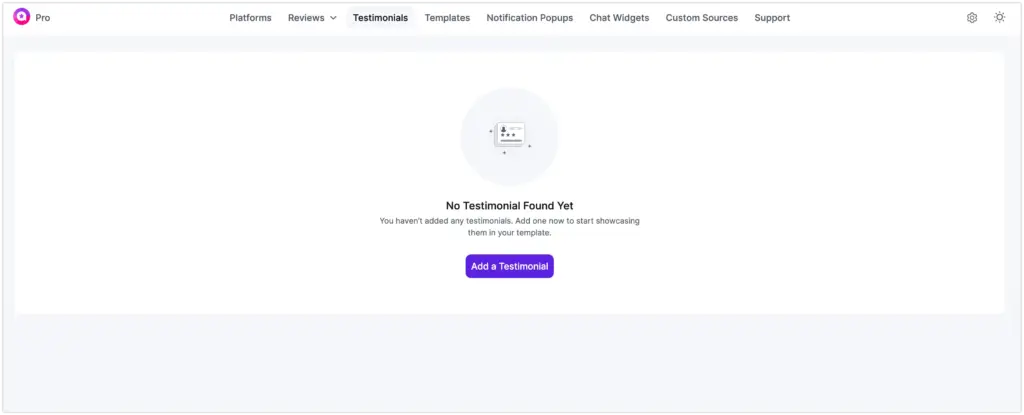
In your WordPress dashboard, open WP Social Ninja and go to the Testimonials tab. If you have not added any yet, you will see an empty state. Click Add a Testimonial to open the editor.
Step 2: Fill in the author details
In the Add Testimonial window, enter the details that frame the clip: Author Name, Author URL, Author Image, Author Position, Company Name, Website Logo, and Website URL.
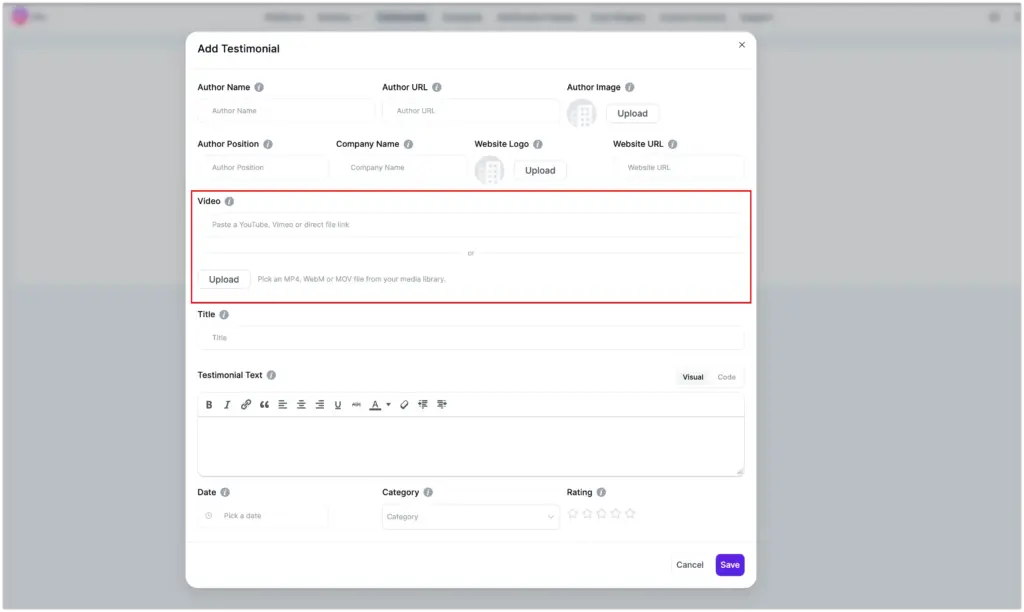
These build credibility, so a visitor sees exactly who is speaking and where they work.
Step 3: Add the video
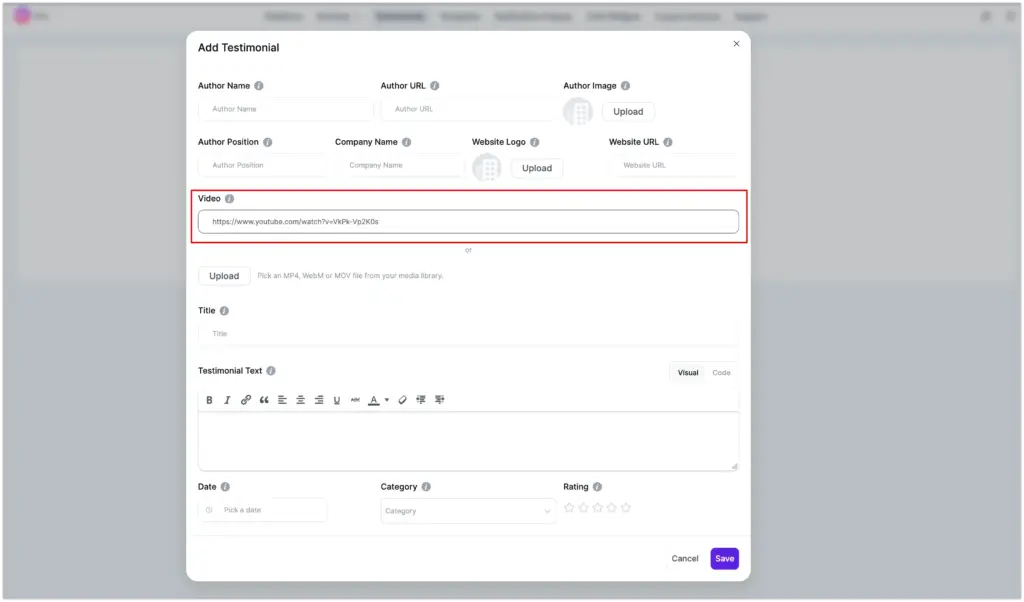
This is the core step. In the Video field, you have two options. Paste a link to a YouTube, Vimeo, or direct file URL, or click Upload to pick an MP4, WebM, or MOV file from your media library.
Use a link when the clip already lives on YouTube or Vimeo; use upload when you want to host it yourself.
If you upload a file rather than paste a YouTube or Vimeo link, add a Video Thumbnail too. Without one, an uploaded video can show as a black box before it plays. YouTube and Vimeo links bring their own thumbnails, so the field is hidden for them.
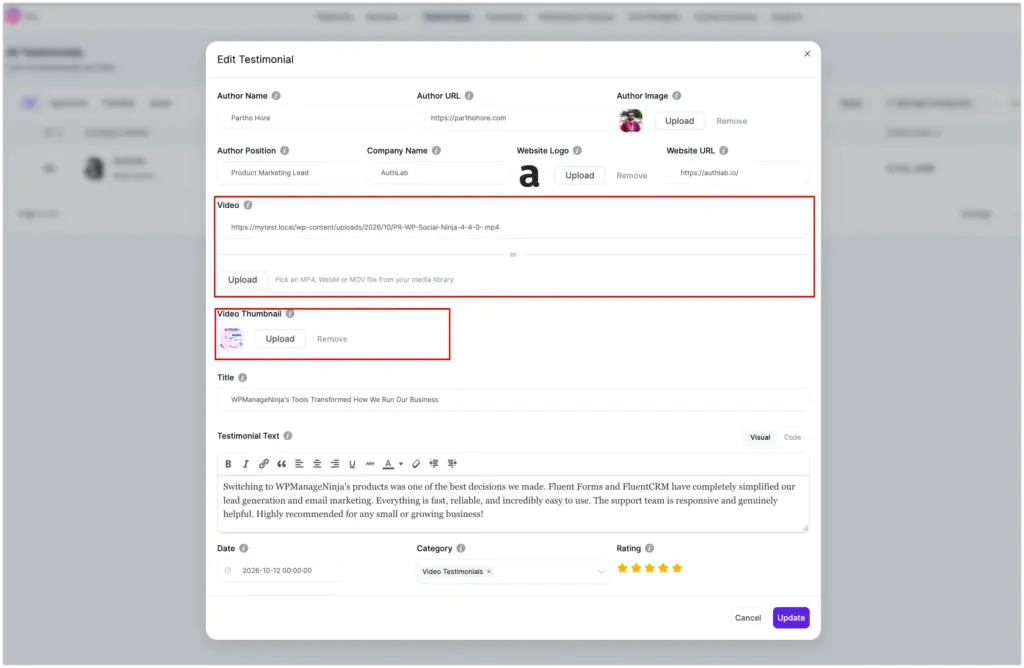
Step 4: Add the title, text, rating, and category
Round out the testimonial. Add a Title, the Testimonial Text (A short written version of what they said helps SEO and accessibility), a Date, a Category such as Video Testimonials, and a star Rating. Then click Save.
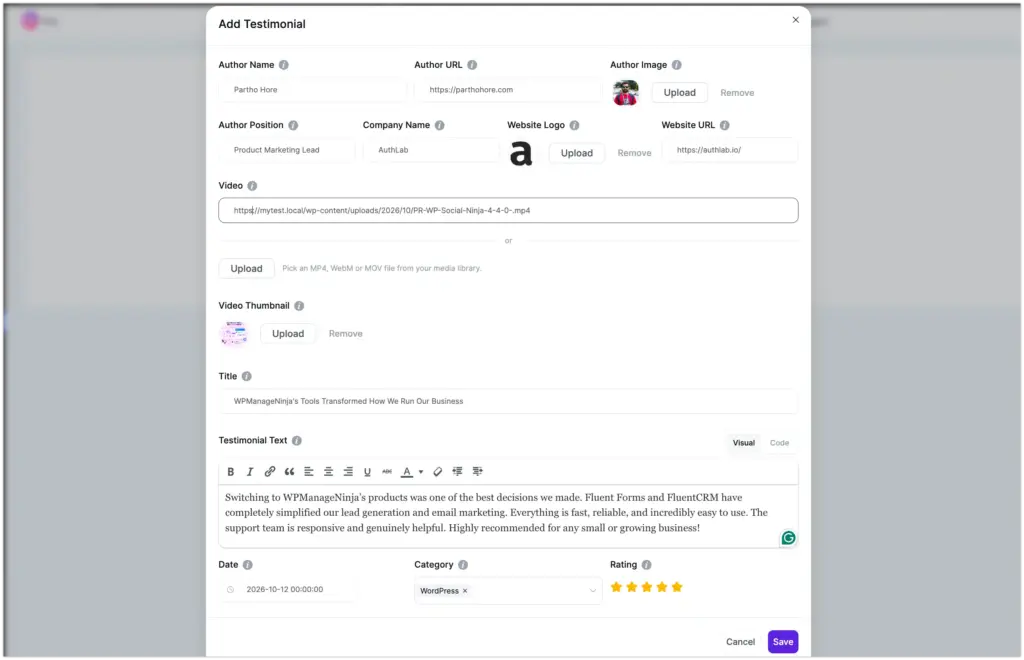
Step 5: Create a testimonial template
A testimonial on its own does not show on your site yet. You display it through a template. Go to the Templates tab, click Create Template, and choose Add Testimonial Template.
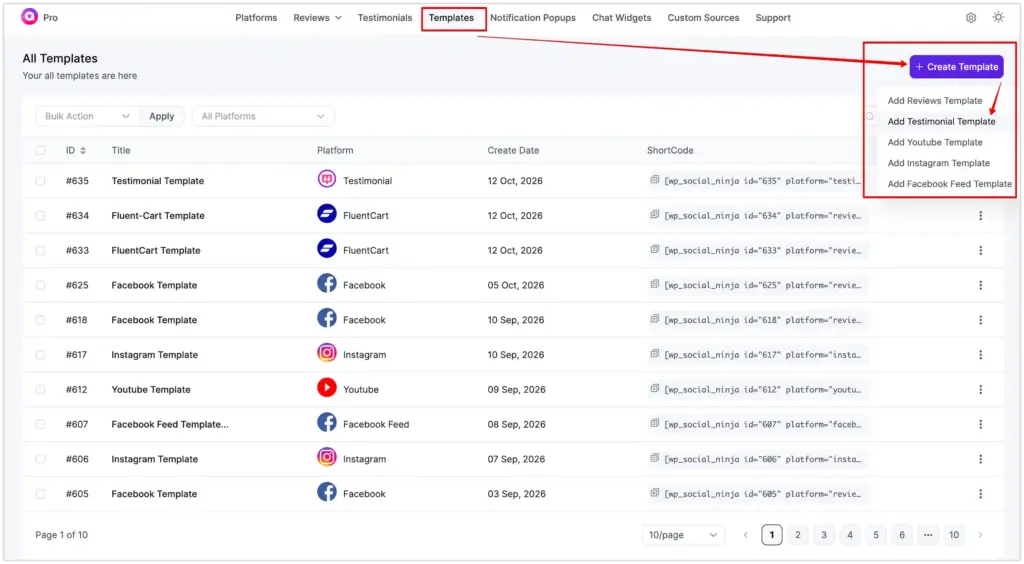
Step 6: Pick a layout and template design
In the template editor, choose a layout: Grid, Slider, or Masonry. Then pick a design, such as Testimonial 1 or Testimonial 2, and set the number of columns.
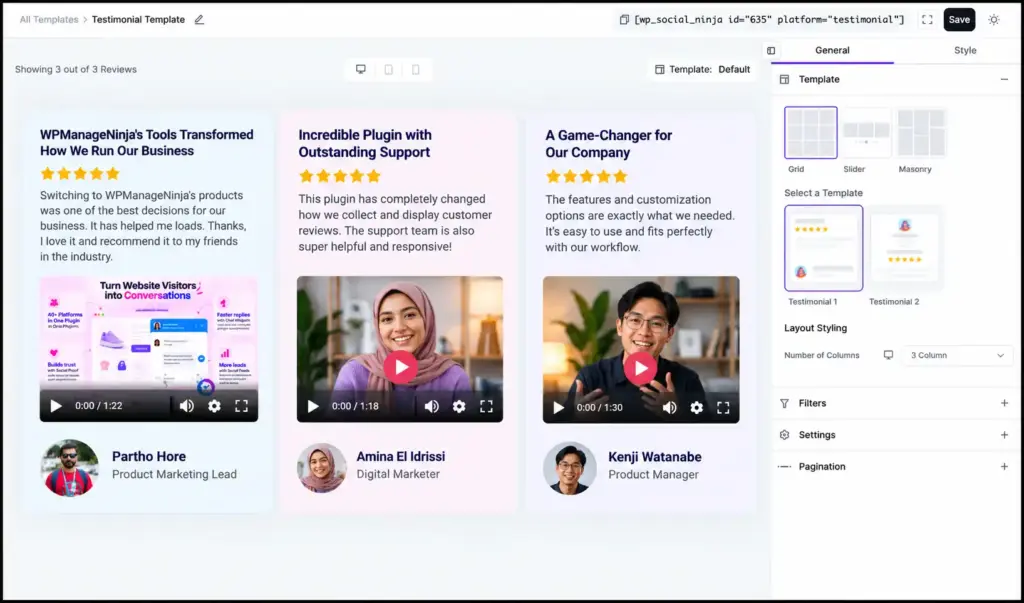
The live preview shows your video testimonial card exactly as visitors will see it, video player included.
Step 7: Filter which testimonials appear
Open the Filters panel to control what shows. Set the number of testimonials, filter by minimum rating, choose the order, and let visitors search and sort if you want.
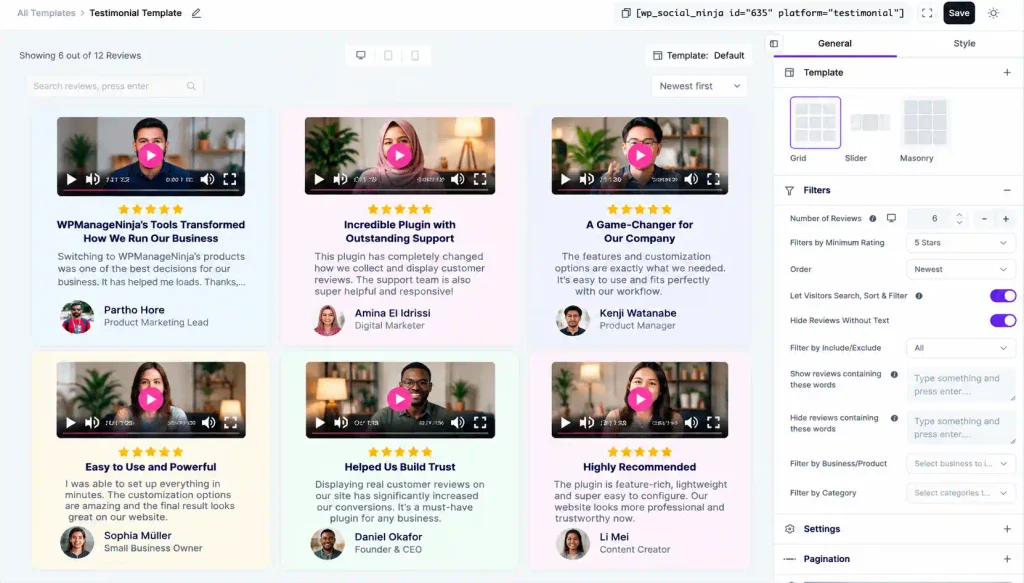
You can also filter by category, so a template can show only your Video Testimonials category.
Step 8: Turn on video display in Settings
In the Settings panel, confirm Display Video is toggled on, along with the details you want shown: rating, author name, position, website logo, title, and testimonial text.
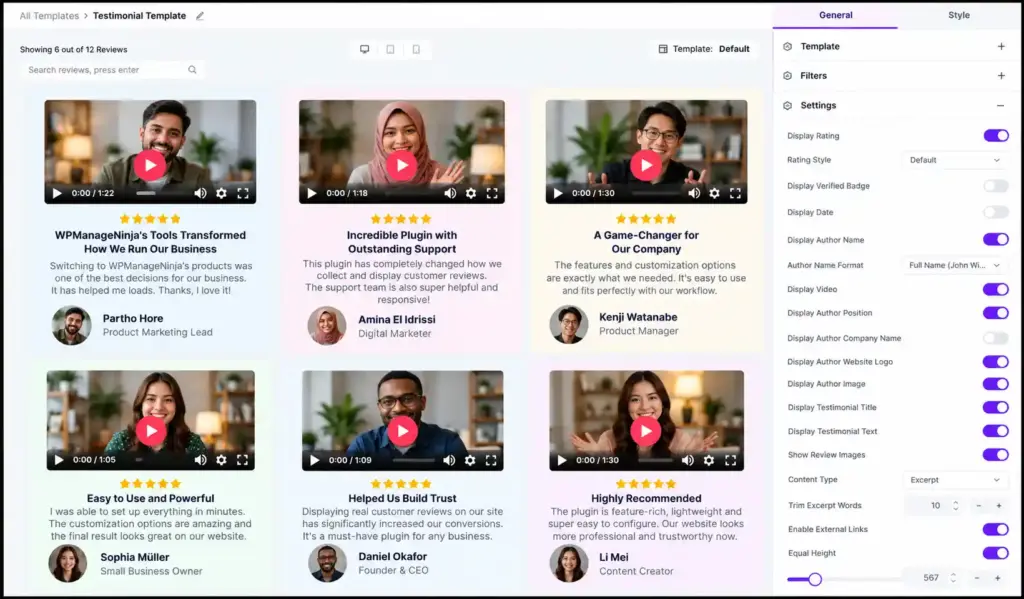
This is where you make sure the video actually appears in the card.
Step 9: Style the cards and set pagination
Open the Style tab to match the cards to your brand: header, star rating, reviewer name, title, content, and the review box itself.
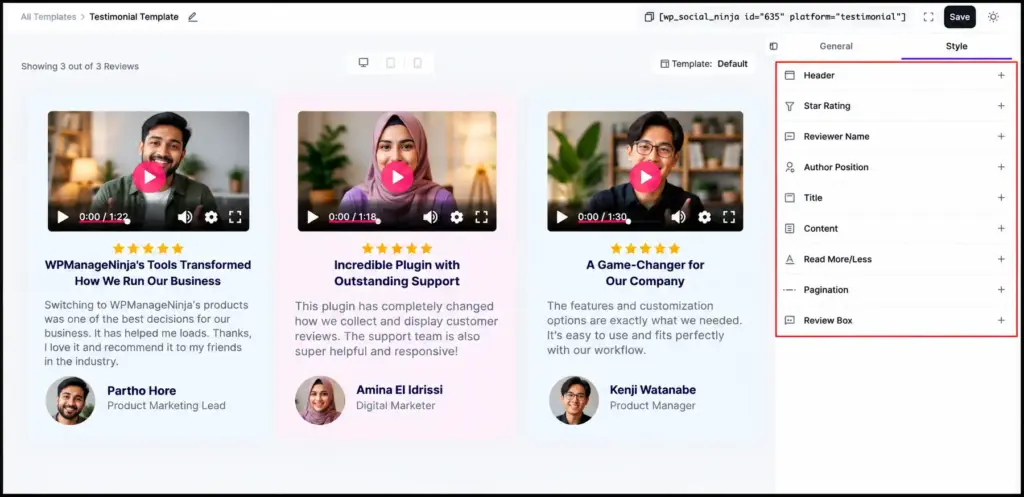
Then set Pagination, such as a Load More button with a set number of testimonials per page, so a long list stays tidy.
Step 10: Embed with the shortcode
When it looks right, click Save and copy the shortcode at the top of the editor, for example .
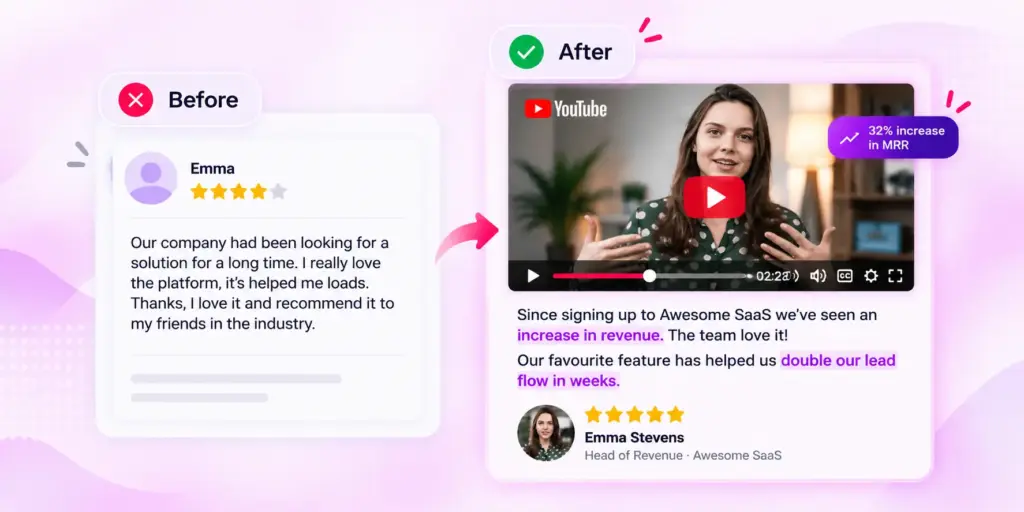
Paste it into any page, post, or widget, and your video testimonials go live on your website. You can reuse the same shortcode anywhere you want that set of testimonials to appear.
Video Testimonials Best Practices
A few habits separate video testimonials that convert from ones that just sit there. Keep these video testimonials best practices in mind as you build your library:
- Lead with your strongest clip on high-intent pages: pricing, product, and checkout
- Pair each video with a short written quote for skimmers and for SEO
- Show a real name, photo, role, and company so the proof is verifiable
- Keep clips short; one clear story beats a five-minute monologue
- Group testimonials by use case or industry so visitors see someone like them
- Refresh them; a testimonial from this year carries more weight than one from three years ago
What Actually Moves the Needle
I have spent years marketing WordPress plugins, and the pattern is consistent; a single honest video from a customer who sounds like your buyer outperforms a wall of five-star text.
When I set up our own testimonials, I led with the clip that named a concrete result, not the one with the nicest lighting. Specific beats polished every time.
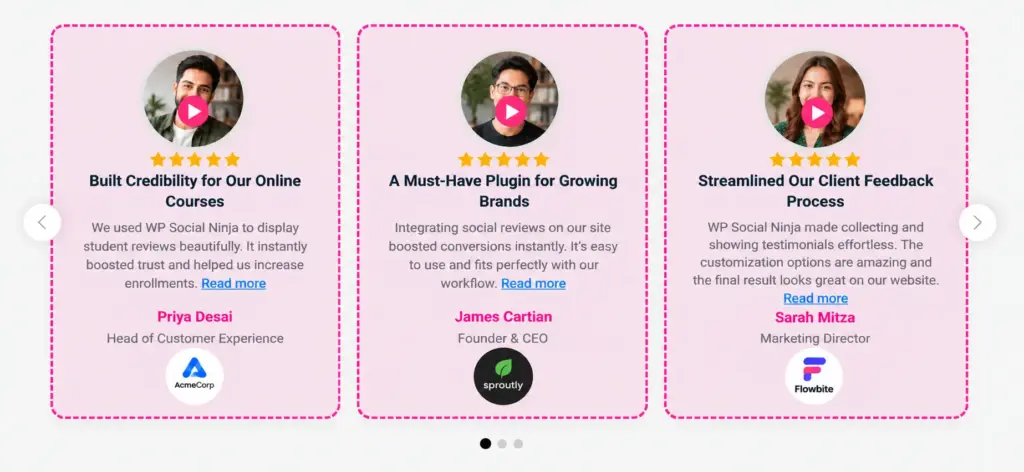
My practical advice: do not wait until you have a dozen perfect videos. Start with one real client video testimonial on your most important page, measure what happens, then build from there.
The businesses that win with video testimonials are the ones that ship one and iterate, not the ones still planning a studio shoot six months later.
Put Your First Video Testimonial Live
You do not need a studio, a budget, or a dozen perfect clips to start. You need one honest customer video and a clean way to show it, and that display step is exactly what WP Social Ninja solves.
Collect your clip, paste the link or upload the file, and publish it on WordPress in minutes with grid, slider, or masonry layouts and full styling.
Add video testimonials to your site with WP Social Ninja, start with your single best story, and let your customers do the convincing.

Subscribe To Get
Weekly Email Newsletter
Connect, Customize, and Display Social Feeds, Reviews, and Chat widgets










Leave a Reply