

How to Add a Click-to-Call Button in WordPress Websites


A visitor lands on your page ready to buy, but they have one question first. If the fastest way to reach you is a phone number they have to copy, retype, and dial, most of them will not bother. A click-to-call button removes that friction. One tap starts the call.
This guide shows you how to add a click-to-call button to your WordPress site using WP Social Ninja, with no code. We set it up on a test store to confirm every step and click path below.
TL;DR
- A click-to-call button lets visitors start a phone call to your business with a single tap, straight from your website.
- WP Social Ninja adds one through its Chat Widget, alongside WhatsApp, Messenger, and other channels in the same plugin.
- The Phone channel is a Pro feature. WP Social Ninja is free on WordPress.org, and Pro unlocks the click-to-call button plus 15+ chat channels.
- Setup takes about 2 minutes: install the plugin, create a chat widget, add the Phone channel with your number and country code, style it, and publish.
- For ecommerce stores, set the button to the bottom right, keep it on every page, and write a short welcome message so shoppers know help is one tap away.
What is a click-to-call button?
A click-to-call button is a link or icon on your website that starts a phone call to your small business when a visitor taps or clicks it.
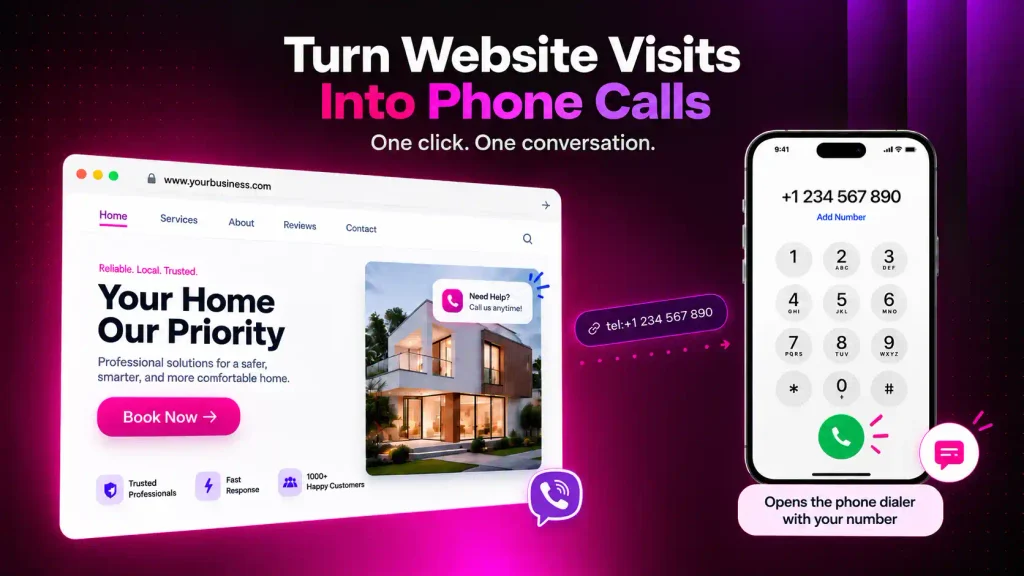
On phones, it opens the dialer with your number already filled in. It runs on the standard tel: link, so it works across browsers without any extra software. It is one of the simplest ways to turn website traffic into direct conversations.
Why add a click-to-call button to your website?
A click-to-call button shortens the path from interest to contact. That matters most for the people already on your site with a question about a product, a booking, or a price. Here is what it solves in practice:
- It fixes the copy and dial drop-off. Without a call button, a mobile visitor has to memorize or copy your number, switch apps, and type it in. Every extra step loses people. One tap removes all of it.
- It avoids the broken hand-coded link problem. Plenty of site owners try to build a call link by hand with a tel: tag. It is easy to get wrong. A missing colon, a stray dash, or a number without the country code, and the link stops working on some phones. Guides across the web warn that phone numbers with dashes are not always recognized and that you should include the + and country code to be safe. A plugin handles the formatting for you, so the link works the first time.
- It keeps you off single-purpose plugins. Most “call now” plugins do one thing and only show on mobile. If you also want WhatsApp, Messenger, or a contact form, you end up stacking plugins. WP Social Ninja puts the call button in the same widget as your other chat channels, so visitors can pick how they want to reach you.
Common businesses that benefit:
- Ecommerce and WooCommerce stores where a quick call closes a hesitant buyer.
- Local services like clinics, salons, repair shops, and agencies that book by phone.
- Restaurants and hotels are taking reservations and direct bookings.
- Any site where the sale or booking happens in a conversation, not a cart.
What you need before you start
You need two things: the WP Social Ninja plugin and a Pro license.
The free version of WP Social Ninja lives on WordPress.org and covers social feeds, reviews, and the top messaging chat channels. The Phone channel that powers the click-to-call button is part of the Pro version. Pro also unlocks 15+ chat channels, full styling, and the settings that control where and when the button shows.

Pricing is annual, and a flat 20% discount is live right now:
| Plan | Regular Price | With 20% off | Best for |
| Single Site | $89/yr | $71/yr | Solo/Creators |
| Agency | $249/yr | $199/yr | Small Businesses |
| Unlimited | $399/yr | $319/yr | Agency Owners |
How to add a click-to-call button in WordPress (step by step)
Adding a click-to-call button with WP Social Ninja takes about 2 minutes and no code. You install the plugin, build a chat widget, drop in the Phone channel with your number, style it to match your site, and publish.
The steps below cover the full process from a fresh install to a live button, in the order you will do them:
Step 1: Install and activate WP Social Ninja
From your WordPress dashboard, go to Plugins > Add New. Search for WP Social Ninja, click Install Now, then Activate.
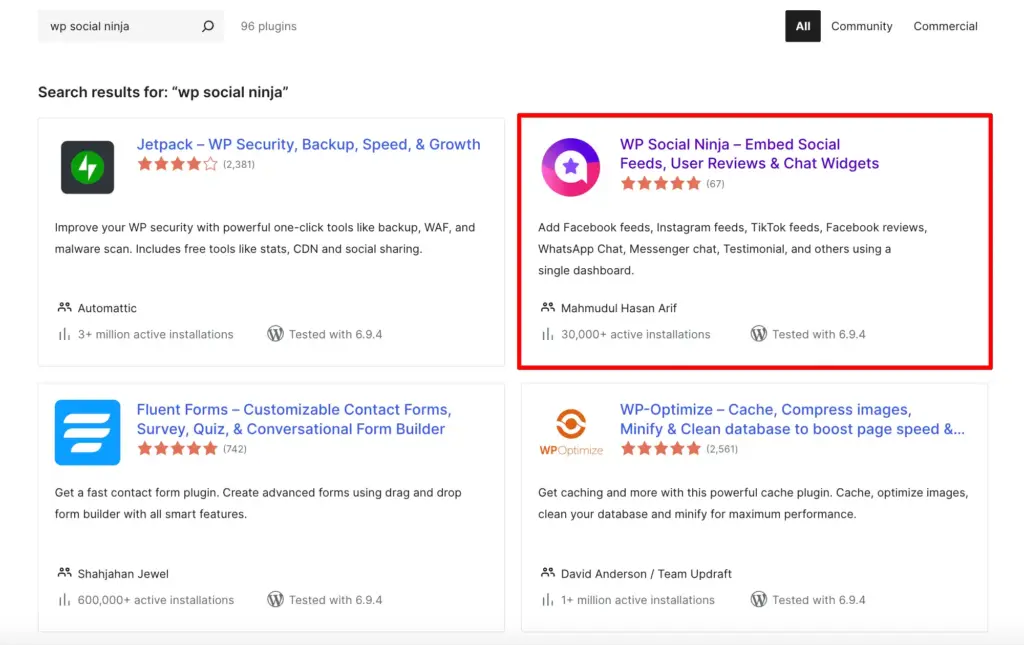
You can also download it from the WordPress.org repository and upload it manually.
Step 2: Activate your Pro license
Purchase Pro from the pricing page, where the 20% discount is applied at checkout through the active deal.
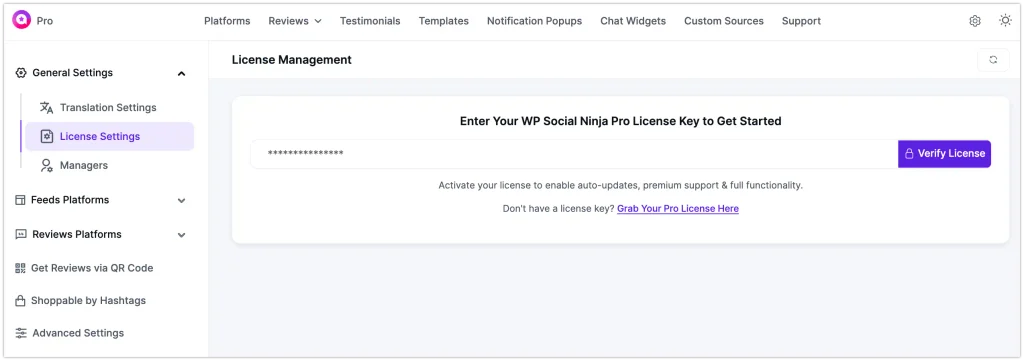
After buying, install the Pro plugin and enter your license key to unlock the Phone channel and the rest of the chat, review and feed features.
Step 3: Create a chat widget
You have two ways to reach the widget builder.
Option A (onboarding): If you are new, the onboarding setup wizard walks you through choosing a category. Pick Chat, and select your preffered platform from the list, and continue with our guided process.
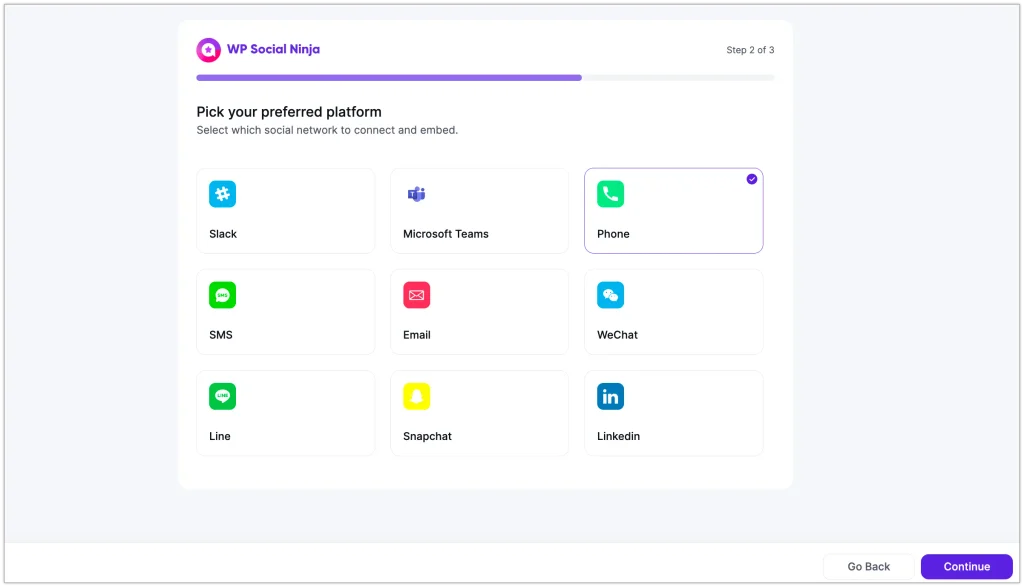
Option B (from the dashboard): Go to WP Social Ninja > Chat Widgets Section and click to create a Chat Widget. This opens the chat template editor.
Step 4: Now Pick the Phone channel
Inside the editor, open the Social Chat tab. A pop-up appears showing every available chat platform. Select the Phone icon to build your click-to-call button and then press the Create a Chat Widget button.
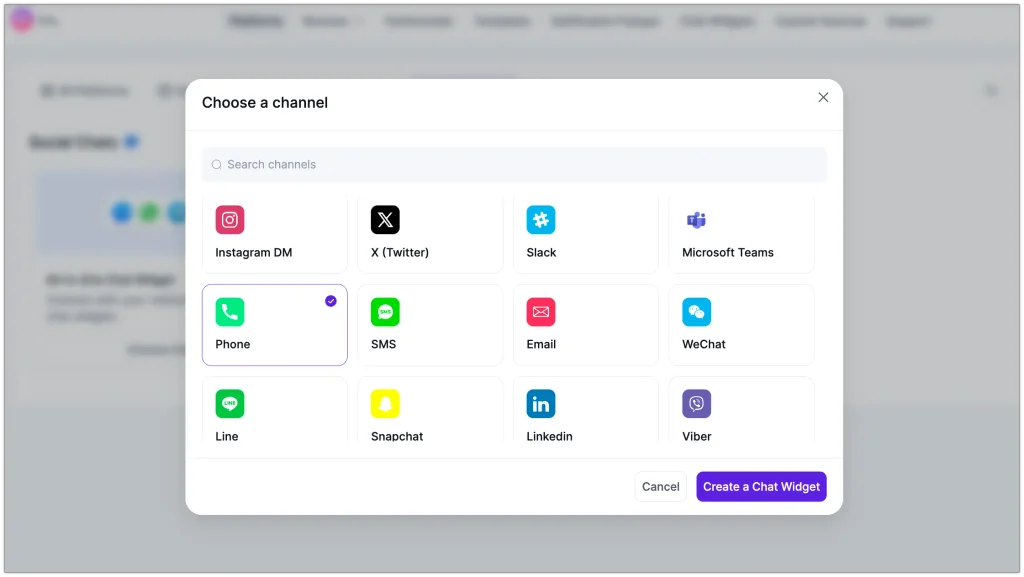
Step 5: Enter your phone number with country code
In the editor panel, now type your phone number including the country code (for example: +13 or +88 followed by your number). The country code is not optional. It is what makes the link dial correctly for visitors on any device.
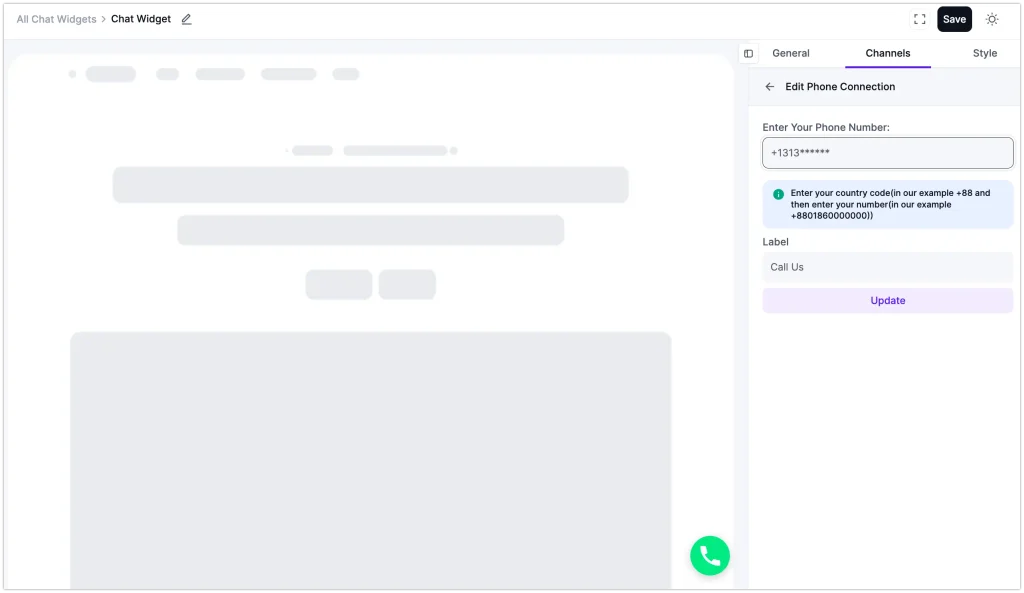
If you want the button to read something other than the number, add a custom name in the Label field, then click Save.
Step 6: Customize the widget for your store
Once the Phone channel is added, the General tab is where you shape how the button looks, what it says, and when it shows. Every panel here has a job, and each one nudges more visitors to tap and call. Here is what they do and how they help you.
Template: Start from a ready-made layout: General, Support, or Feedback. This sets the base look so you are not styling from a blank screen. Pick the one closest to your goal, then adjust the details in the panels below.
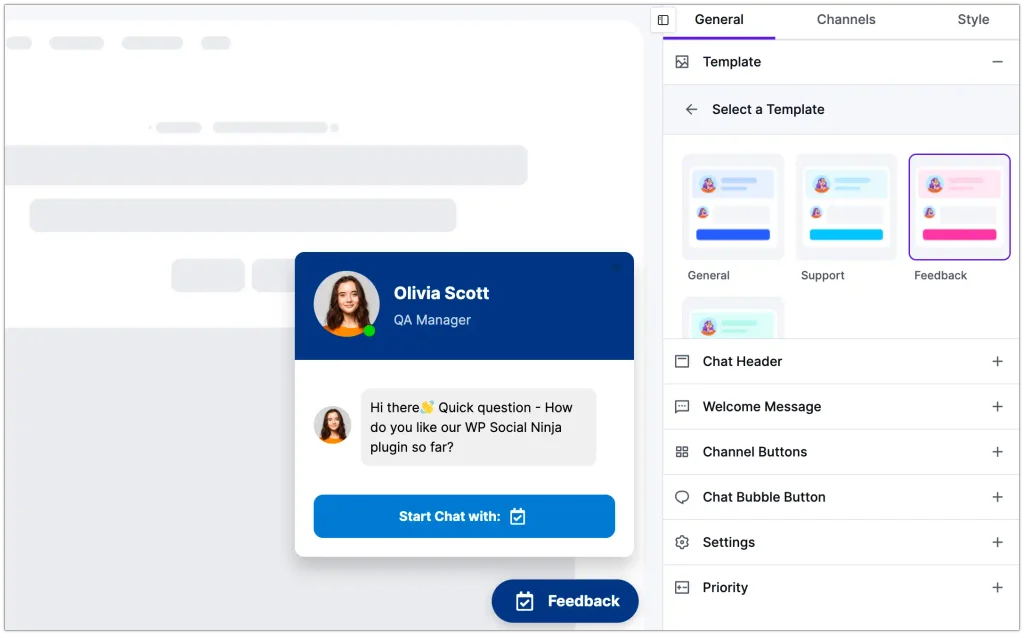
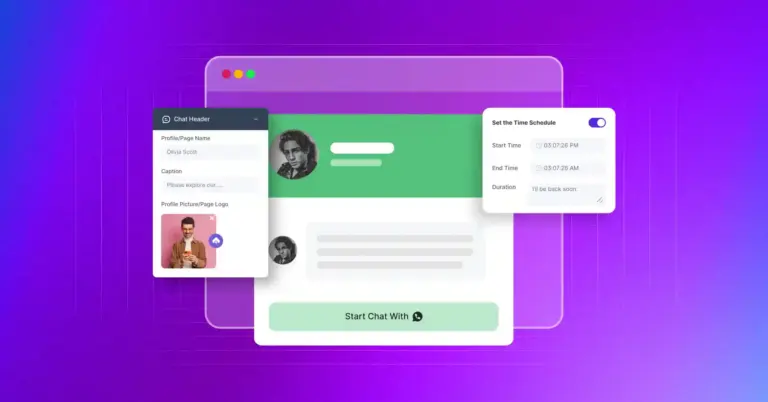
Chat Header: Add a name, a short caption, and a profile picture or your page logo to the top of the widget. A real face or a brand mark makes it feel like a person is ready to pick up, not an empty button. That small touch of trust makes visitors more willing to start a call.
Welcome Message: Write the greeting people see when the widget opens. You get a visual editor with bold, italics, links, and lists, plus a code view if you want finer control. Use it to point straight at the call: “Hi 👋 Have a question before you buy? Tap below to call us.” A clear line does more work than a silent icon.
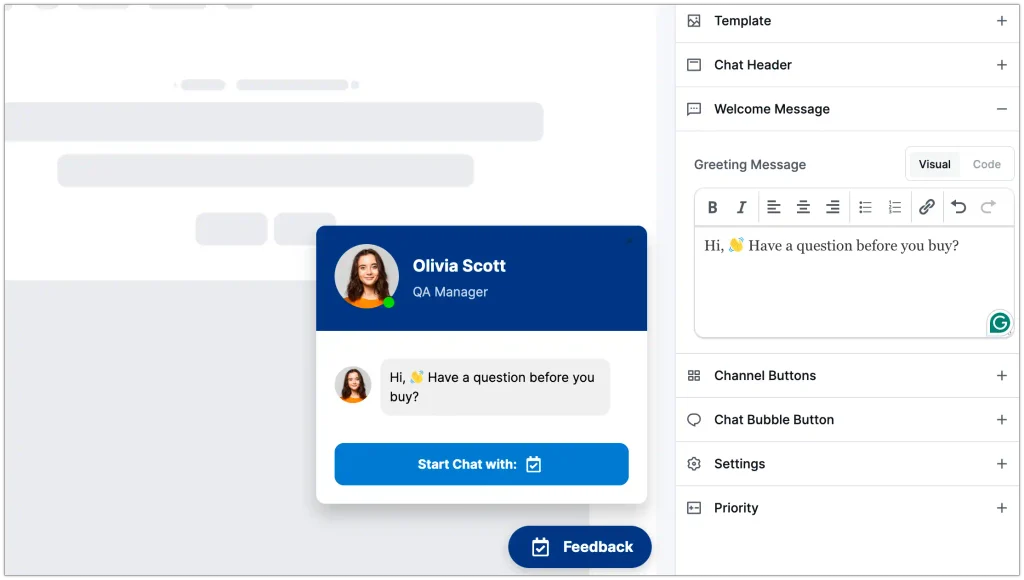
Channel Buttons: Control the buttons visitors tap to reach you. Turn on the Display Chat Icon to show the channel, and set the Chat Button Text (for example, “Start Chat with:”) so people know what comes next. If you later add a messaging channel like WhatsApp or SMS alongside the call button, the Prefilled Message option (Pro) can auto-fill the first message with the page or product a shopper is viewing. That context does not apply to a phone call, but it is handy when the call button shares the widget with a chat channel.
Chat Bubble Button: Design the floating bubble that sits on your pages. Choose one of the built-in icons or upload your own to match your brand, and add Bubble Text like “Call us” so the button states its purpose before anyone taps. This bubble is the first thing visitors notice, so make it obvious and on-brand.
Settings: This panel decides where and when the button appears, and it holds the options that matter most for a call button:
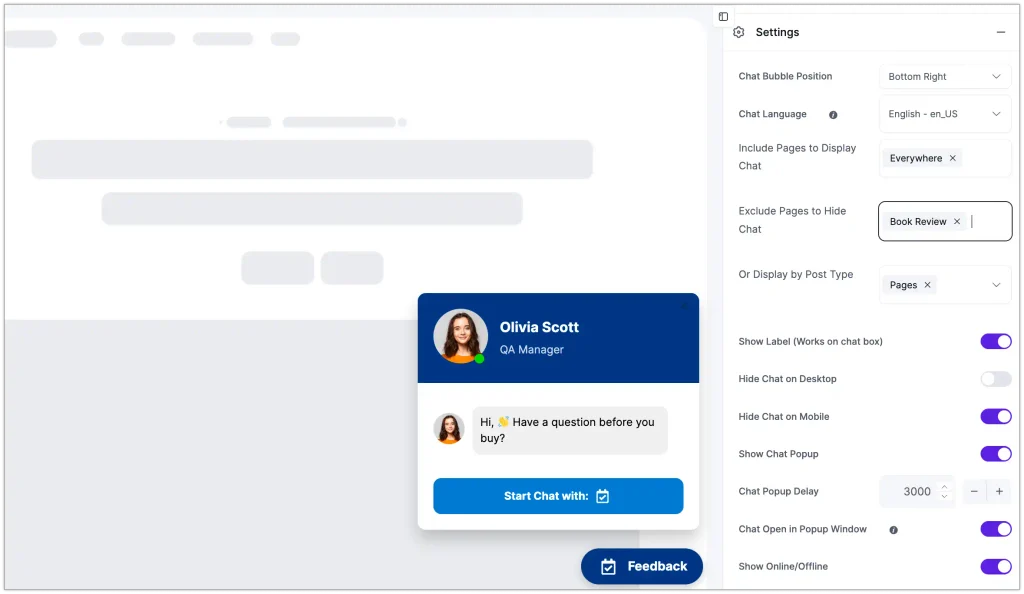
- Chat Bubble Position: Place it in the bottom right, where users expect chat, or wherever it fits your layout.
- Include/Exclude Pages and Display by Post Type: Show the button everywhere, or target it to product and pricing pages and hide it at checkout. You choose where a call makes sense.
- Hide Chat on Desktop / Mobile: A tap-to-call button shines on phones, where it opens the dialer instantly. If calling from a desktop is awkward for your audience, hide it on desktop and keep it mobile-only.
- Show Chat Popup and Chat Popup Delay: Auto-open the widget after a set delay (3000 means three seconds) so the call option surfaces on its own instead of waiting to be found.
- Show Online/Offline with a Time Schedule: Set the exact days and hours you answer calls. The widget shows an online or offline status to match, so visitors know when a live call will connect, and you cut down on missed-call frustration.
Work through each panel, watch the live preview update as you go, then click Save when it looks right.
Step 7: Add it to your website
WP Social Ninja displays the floating widget site-wide once it is set to show Everywhere. If you want the call button in a specific spot instead, use the chat widget on any page, post, or page builder (Elementor, Gutenberg, Oxygen, and Beaver are supported).
Save and publish, then open your site on a phone to test the tap-to-call.
Setting up the click-to-call button for an e-commerce store
In a store, a call button does more than sit there. It catches the shopper who is close to buying but stuck on one question about sizing, shipping, stock, or a bulk order.
That is a high-intent moment, and a phone call closes it faster than a form or an email thread. The default setup works, but a few deliberate choices turn the button into a real sales channel.
Here is how to set it up for ecommerce:
- Keep it visible on every page: Buying questions come up on product pages, shipping pages, and demo pages. Set the display rule to Everywhere so the button follows the shopper.
- Use the bottom right and a soft welcome line: The bottom right is where users expect chat. A message like “Not sure about sizing? “Call us” turns a passive button into an invitation.
- Pair the call button with other channels: Not everyone wants to call. In the same widget, you can add WhatsApp, Messenger, or a Fluent Forms contact form, so each visitor picks their channel. The call button covers the buyers who want an answer now.
- Test on a real phone: Desktop click-to-call behavior varies by browser. On a computer, the link may ask to open another app. On a phone, it opens the dialer. Always confirm on a mobile device before you call it done.
Click to call button vs a hand-coded tel: link
WordPress does not add a click-to-call button on its own, so you have two routes: write a tel: link into your HTML by hand, or use a plugin.
Hand-coding is free and fine for a single static link, but it breaks easily and stops at the link itself. A plugin handles the formatting, styles the button, and manages where it shows across your whole site.
Here is how the two compare:
| Hand-coded tel: link | WP Social Ninja click-to-call button | |
| Setup | Edit HTML on every page | Add once, shows site-wide |
| Formatting errors | Easy to break with a bad number | Handled for you |
| Styling | Manual CSS | Built-in styling panel |
| Extra channels | None | WhatsApp, Messenger, Instagram, and more in one widget |
| Display rules | Manual per page | Include or exclude pages from settings |
If all you will ever need is one static link in a footer, hand-coding works. The moment you want it floating, styled, on every page, and next to your other chat options, the widget saves the hassle.
Bring your call button live today
A click-to-call button is one of the quickest wins for a WordPress site. It costs nothing in visitor effort and gives people ready to talk a one-tap path to reach you.
Win your customers’ hearts with exceptional features
Discover how WP Social Ninja can assist you in designing outstanding customer experiences.
With WP Social Ninja, you add it in minutes, style it to match your brand, and pair it with your other chat channels in a single widget.
FAQ
Q: How do I add a click-to-call button in WordPress?
Install WP Social Ninja, activate a Pro license, then go to WP Social Ninja > Chat Widgets and create a chat widget. Open the Channels tab, click Add New Channel, choose Phone, enter your number with country code, and save. Style it and publish.
Q: Is the click-to-call button free in WP Sociclick-to-call
The plugin is free on WordPress.org, but the Phone channel that creates the click-to-call button is a Pro feature. Pro starts at $71 per year for a single site with the current 20% discount.
Q: Do I need to include the country code?
Yes. Always enter your number with the country code and the + prefix. It is what makes the call link dial correctly across different phones and browsers.
Q: Will the click-to-call button work on desktop?
On mobile, it opens the phone dialer. On desktop, behavior depends on the browser and may prompt the visitor to open a calling app like their phone or a VoIP client. Test on both.
Q: Can I show the call button only on certain pages?
Yes. In the widget settings, you can set it to display everywhere or use the include and exclude page rules to show it only where you want, such as product and checkout pages.
Q: Can I add WhatsApp or Messenger to the same button?
Yes. WP Social Ninja lets you add multiple chat channels to one widget, so visitors can choose to call, message on WhatsApp, or open Messenger from the same place.

Subscribe To Get
Weekly Email Newsletter
Connect, Customize, and Display Social Feeds, Reviews, and Chat widgets






Leave a Reply