Instagram Graph API: Complete Developer Guide for 2026


If you’ve worked with Instagram APIs before, the year 2024 must have been stressful. The Basic Display API was shut down on 4th December. No extensions, no fallback. Tokens stopped working, and apps relying on personal account data just broke.
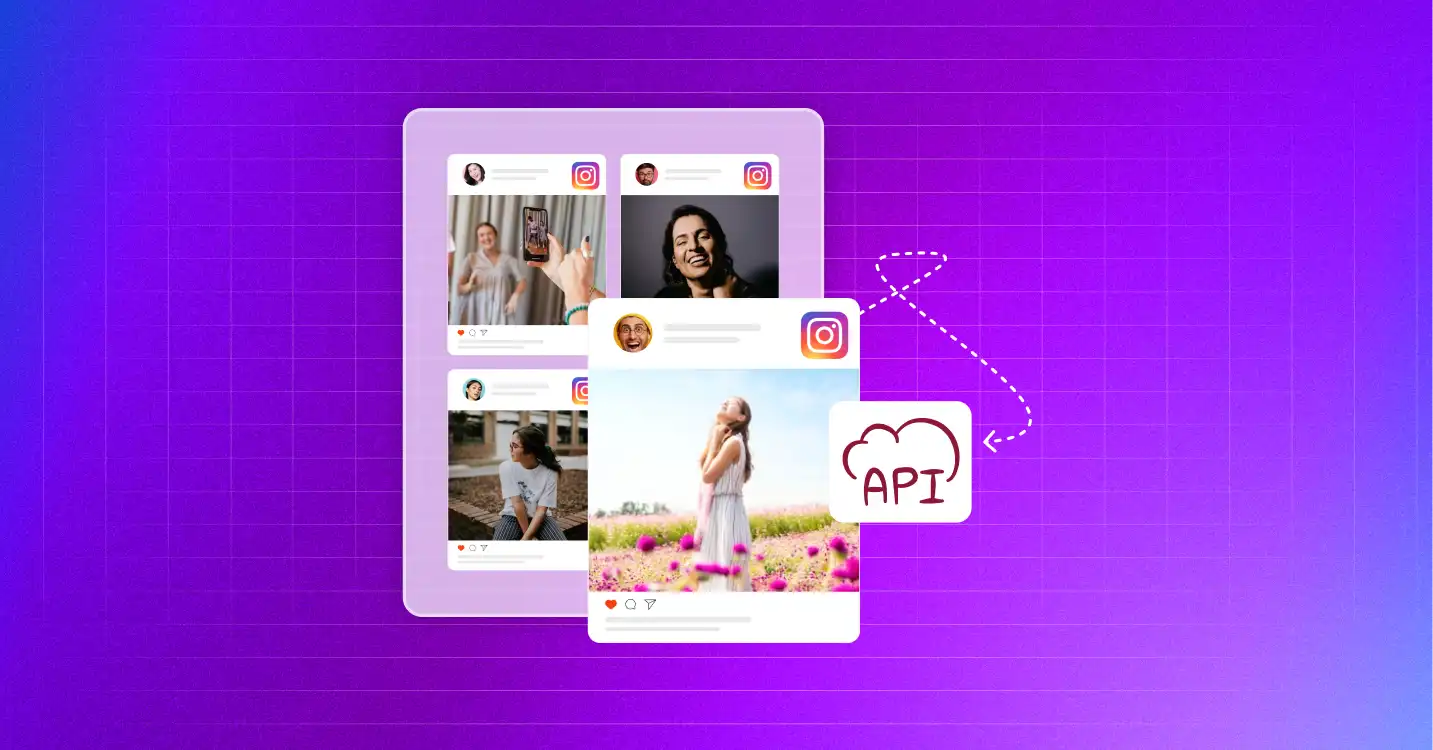
Now, the Instagram Graph API is the only way to access Instagram data in 2026. If you’re building anything that connects with Instagram, this is what you’ll be working with.
This guide covers what actually matters: authentication, access tokens, rate limits, key endpoints, and common errors. It will also help you migrate from older setups if needed.
Whether you’re building a tool, dashboard, or eCommerce integration, this will help you get started without confusion.
TL;DR
- The Instagram Graph API is Meta’s official API that lets developers read data, publish content, manage comments, and access analytics from Instagram programmatically
- It is now the only supported way to access Instagram data after the Basic Display API shutdown
- Only Business and Creator accounts are supported, so personal accounts must be converted before integration
- Every request requires a valid Instagram access token, obtained through proper authentication flows
- There are two main authentication methods: Instagram Business Login (simpler) and Facebook Login for Business (more powerful)
- Rate limits are strict at 200 calls per hour per account, so inefficient requests can quickly cause failures
- Use techniques like batching, caching, and requesting only required fields to reduce API usage
- Webhooks are the preferred way to handle real-time events instead of polling endpoints repeatedly
- Core endpoints cover media, comments, insights, hashtags, and more, but advanced use cases need additional APIs
- Features like messaging, ads, and shopping require separate APIs within the Meta ecosystem
- Migrating from the Basic Display API involves changes in accounts, authentication, endpoints, and permissions
- If you’re using WordPress, WP Social Ninja can handle authentication, data fetching, and display without manual API setup
What is the Instagram graph API (and who is it for)?
The Instagram Graph API is Meta’s main interface for accessing Instagram data programmatically. It’s built for developers who need to interact with Instagram at scale, whether that’s reading media, publishing content, managing comments, or pulling analytics.
One thing to be clear about: it only works with Instagram Business and Creator accounts. Personal accounts don’t have API access anymore.
In most cases, the Instagram account also needs to be connected to a Facebook Page. This setup is required for authentication and for features like advanced insights and Instagram Shopping.
If you’ve gone through the Instagram API documentation, you’ll notice that this structure is not optional. It’s part of how the API graph is designed, especially for apps that need consistent data access and permissions.
Who actually needs to use the Instagram Graph API the most?
If you’re building anything that connects with Instagram programmatically, the Instagram Graph API is where you start. Especially if you work with:
- Social media management platforms that publish content, schedule posts, and track engagement across multiple accounts
- Analytics and reporting tools that pull data into dashboards for performance tracking
- Ecommerce businesses are managing product catalogs and tagging items while setting up an Instagram Shop for their business
- Agencies handling multiple client accounts and needing centralized access
- Content teams and creators are automating publishing workflows and measuring results
- Customer support tools that bring Instagram messages into helpdesk systems
- Data-focused teams analyzing Instagram trends through hashtags and public content
How do different types of Instagram Graph API authentication work
Before making any requests with the Instagram Graph API, you need a valid Instagram access token. The API supports two authentication methods- Instagram Business Login and Facebook Login for Business.
Here’s a quick comparison of these two authentication methods:
| Feature | Instagram Business Login | Facebook Login for Business |
| Setup complexity | Moderate | Higher |
| Best for | Single account tools, creator apps, simple integrations | Multi-account platforms, agencies, and SaaS tools |
| Login experience | Direct Instagram login | Facebook login required |
| Facebook account needed | No | Yes |
| Facebook Page required | No | Yes |
| Token source | Instagram OAuth | Facebook Page access token |
| Account access | One account per login | Multiple accounts via Pages |
| Permissions required | Instagram-specific scopes | Facebook + Instagram scopes |
| Implementation effort | Easier to set up and maintain | More complex flow and setup |
| Advanced features | Limited access to some features | Full access to the Meta ecosystem features |
| Instagram Shopping support | Not fully supported | Fully supported |
| Cross-platform integration | Limited | Supports Facebook + Instagram workflows |
| Token lifespan | 60 days (long-lived) | 60 days (long-lived) |
| Ideal use case | Lightweight apps, creator tools, quick integrations | Scalable products, dashboards, enterprise tools |
Method 1: Instagram Business Login (Direct OAuth)
This method lets users log in directly with their Instagram account. No Facebook account or Page connection is required.
Here is how the standard OAuth 2.0 flows work and return access tokens:
- Redirect the user to Meta’s authorization endpoint with your app ID, redirect URI, and requested scopes
- The user authenticates with Instagram and approves permissions
- Instagram redirects back to your URI with an authorization code
- You exchange that code for a short-lived access token
- You exchange the short-lived token for a long-lived token
Here’s what the authorization URL looks like:
https://api.instagram.com/oauth/authorize
  ?client_id={app-id}
  &redirect_uri={redirect-uri}
  &scope=instagram_business_basic,instagram_business_manage_messages
  &response_type=code
Once you have the authorization code, exchange it for a short-lived token:
curl -X POST https://api.instagram.com/oauth/access_token \
  -F client_id={app-id} \
  -F client_secret={app-secret} \
  -F grant_type=authorization_code \
  -F redirect_uri={redirect-uri} \
  -F code={auth-code}
The response gives you a short-lived token (valid for 1 hour). Immediately exchange it for a long-lived token (valid for 60 days).
Here’s an exchanged long-lived token:
curl -X GET "https://graph.instagram.com/access_token
  ?grant_type=ig_exchange_token
  &client_secret={app-secret}
  &access_token={short-lived-token}"
Key scopes for Instagram Business Login:
- instagram_business_basic: read profile and media
- instagram_business_manage_media: create, publish, and delete media
- instagram_business_manage_comments: read and reply to comments
- instagram_business_manage_insights: access account and media insights
- instagram_business_manage_messages: send and receive DMs
When you should use the Instagram Business Login flow:
- Building single-account tools or creator-focused apps
- When you want a simple login without Facebook
- Mobile or consumer-facing applications
This flow is easier to implement, but some advanced features still require the Facebook-based setup.
Method 2: Facebook Login for Business
This method uses Facebook Login and works through a connected Facebook Page. It’s more complex but gives access to deeper features in the Instagram API and Meta ecosystem.
Here’s how the OAuth flow works for Facebook login at a high level:
- User logs in with Facebook and grants your app the necessary Instagram permissions
- You retrieve the user’s Page Access Token for the relevant Facebook Page
- From the Page, you fetch the connected Instagram Business Account ID
- You use that IG User ID along with the Page Access Token (or a derived token) to make Graph API calls
Here’s how fetching the connected Instagram account ID looks like:
curl -X GET "https://graph.facebook.com/v22.0/{page-id}
  ?fields=instagram_business_account
  &access_token={page-access-token}"
Key scopes for Facebook Login for business:
- pages_show_list: list Pages the user manages
- instagram_basic: read basic IG account info
- instagram_manage_insights: access insights
- instagram_content_publish: publish media
- instagram_manage_comments: manage comments
- pages_read_engagement: read Page engagement data
When you should use Facebook Login flow:
- Multi-account platforms like agencies or social media tools
- Apps that manage accounts through Facebook Pages
- Use cases involving Instagram Shopping or advanced analytics
This is the required approach if your app depends on Facebook Page connections.
Token refresh logic for Instagram Graph API
Long-lived tokens in the Instagram Graph API expire after 60 days, but you can refresh them before they expire to keep your integration active.
curl -X GET "https://graph.instagram.com/refresh_access_token
  ?grant_type=ig_refresh_token
  &access_token={long-lived-token}"
Each refresh resets the 60-day validity from the time of the request. So as long as you refresh tokens on time, you don’t need users to log in again.
In practice, it’s safer to refresh tokens every 30 to 45 days instead of waiting until the last moment. Store the expiry time along with the token so your system can handle this automatically.
If a token does expire, the only option is to send the user through the authentication flow again to generate a new token. It’s better to notify users in advance so this doesn’t interrupt your app.
Instagram Graph API rate limits explained
Rate limits are where most Instagram Graph API integrations run into issues. The limits are stricter than they look, and if you don’t plan around them, you’ll start seeing 429 errors when your app is actively in use.
The core limit: 200 calls per hour per account
The Instagram API uses a Business Use Case (BUC) model. The main limit is 200 API calls per hour per Instagram Business account.
This limit is applied per account, not per app or per user. So if multiple users or systems are connected to the same account, they all share the same pool of requests.
It also works on a rolling window. Requests made in the last 60 minutes are continuously counted, not reset at the top of the hour.
Every request counts toward this quota, including:
- Pagination calls
- Insights and metadata requests
- Even failed requests that return a valid API response
There’s no free request type. Everything uses the same pool.
DM-specific limits for Instagram Graph API
If your integration includes messaging, there are additional limits:
- Up to 200 automated DMs per hour per account
- A 24-hour messaging window, meaning you can only message users who contacted you within the last 24 hours
These limits apply alongside the main BUC limit. A single DM request counts toward both limits. If your app relies heavily on messaging, this overlap can reduce your available API calls faster than expected.
How to read Instagram Graph API usage data
The Instagram API documentation provides rate limit usage through response headers. The key one is: X-Business-Use-Case-Usage
Here’s a sample of how the snippet should look like:
"X-Business-Use-Case-Usage": {
  "{ig-user-id}": [
    {
      "call_count": 28,
      "total_cputime": 10,
      "total_time": 20,
      "type": "INSTAGRAM",
      "estimated_time_to_regain_access": 0
    }
  ]
}
The call_count shows how much of your quota is used. For example, 28 means around 28% of your hourly limit. Once usage reaches around 80 to 90 percent, it’s a good idea to slow down requests. At 100 percent, the API starts returning 429 errors.
If you’re building for scale, log these headers and track them. This helps you identify accounts that are close to hitting limits before they actually do.
What you can do with 200 requests per hour
The limit might seem restrictive at first, but it depends on how efficiently you use the Instagram Graph API rate limits. A few examples:
- Fetching a list of 50 recent media items: 1 call (with fields parameter)
- Fetching insights for 10 media items individually: 10 calls
- Fetching insights for 10 media items via batch: 1 call
- Checking 20 comment threads: up to 20 calls
- Refreshing an access token: 1 call
For simple use cases like displaying a feed or updating a dashboard, 200 requests per hour is usually enough. For heavier use cases like comment monitoring or analytics tools, efficiency becomes critical.
What most developers get wrong about rate limits
Understanding limits is one thing. Designing around them is where most integrations fail.
- Treating limits as global instead of per account. Each account has its own quota. If multiple systems connect to the same account, they all share it.
- Re-fetching the same data repeatedly. Calling the same endpoints frequently without changes wastes your quota.
- Not using batch requests or field expansion. Fetching data one item at a time quickly increases API usage.
- Ignoring pagination costs. Each page is a new request. Large datasets can drain your quota faster than expected.
- Not tracking usage in real time. If you’re not monitoring headers, you only notice problems after hitting limits.
- Sending too many parallel requests. High concurrency can spike usage and trigger limits faster.
Designing around Instagram Graph API rate limits
To work reliably with the Instagram Graph API, you need to design your system with limits in mind. A few patterns from our experience that work well:
- Handle requests per account, not globally
- Use caching to avoid repeated calls
- Reduce polling and rely on webhooks where possible
- Queue or throttle high-frequency operations
- Prioritize critical requests over background updates
Instead of trying to avoid limits, build your system assuming they exist.
Pro Tips: The Instagram Graph API rate limits are strict but predictable. Most issues don’t come from the limits themselves, but from inefficient request patterns. If you batch requests, cache responses, and plan per account, you can handle even complex use cases without running into problems.
Key Instagram Graph API endpoints and what they do
The Instagram Graph API is built around different endpoints, each designed for a specific type of data or action. Once you understand how these are grouped, it becomes much easier to build features.
Media management
The / {ig-user-id} /media endpoint returns all media for a Business or Creator account.
curl -X GET "https://graph.facebook.com/v22.0/{ig-user-id}/media
  ?fields=id,media_type,media_url,thumbnail_url,caption,timestamp,like_count,comments_count
  &limit=25
  &access_token={token}"
You can control the response using the fields parameter. This helps reduce unnecessary data and keeps responses faster. Media types include:
- IMAGE
- VIDEO
- CAROUSEL_ALBUM
- REELS
Each type supports different fields. For example:
- thumbnail_url is only available for video and reels
- children is used for carousel posts
Publishing content
Publishing works through a two-step container process.
Step 1: Create container
curl -X POST "https://graph.facebook.com/v22.0/{ig-user-id}/media" \
  -d "image_url=https://example.com/photo.jpg" \
  -d "caption=Your caption here" \
  -d "access_token={token}"
Step 2: Publish
curl -X POST "https://graph.facebook.com/v22.0/{ig-user-id}/media_publish" \
  -d "creation_id={container-id}" \
  -d "access_token={token}"
For videos and reels, the container needs time to process. You have to check its status before publishing:
GET /{container-id}?fields=status_code
Only publish when the status is FINISHED. If you try earlier, the request will fail.
Comments
To fetch comments:
curl -X GET "https://graph.facebook.com/v22.0/{ig-media-id}/comments
  ?fields=id,text,timestamp,username,like_count,replies{id,text,timestamp,username}
  &access_token={token}"
To reply to a comment:
curl -X POST "https://graph.facebook.com/v22.0/{ig-media-id}/comments" \
  -d "message=Thanks for your comment!" \
  -d "access_token={token}"
For nested replies, use:
POST /{ig-comment-id}/replies
You can also:
- Hide comments: POST /{ig-comment-id}?hide=true
- Delete comments: DELETE /{ig-comment-id}
Insights and analytics
Insights are available at both media and account levels.
Media-level insights:
curl -X GET "https://graph.facebook.com/v22.0/{ig-media-id}/insights
  ?metric=impressions,reach,likes,comments,shares,saved
  &access_token={token}"
Account-level insights:
curl -X GET "https://graph.facebook.com/v22.0/{ig-user-id}/insights
  ?metric=impressions,reach,profile_views,follower_count
  &period=day
  &since=1710000000
  &until=1710604800
  &access_token={token}"
Important note: Some metrics were removed in newer API versions. Always check the version you’re using (v22.0 as of 2026). Calling deprecated metrics can lead to missing data or errors.
Hashtag search
To search for a hashtag, first get its ID:
curl -X GET "https://graph.facebook.com/v22.0/ig_hashtag_search
  ?user_id={ig-user-id}
  &q=photography
  &access_token={token}"
Then fetch media:
curl -X GET "https://graph.facebook.com/v22.0/{hashtag-id}/recent_media
  ?user_id={ig-user-id}
  &fields=id,media_type,media_url,caption,timestamp
  &access_token={token}"
There’s a key limitation here: You can query up to 30 unique hashtags per week per account. So it’s better to cache hashtag IDs instead of requesting them repeatedly.
Business discovery
This endpoint lets you fetch public data from other Business or Creator accounts.
curl -X GET "https://graph.facebook.com/v22.0/{ig-user-id}
  ?fields=business_discovery.fields(username,name,biography,followers_count,media_count,website)
  &access_token={token}"
This only works for:
- Public accounts
- Business or Creator profiles
Personal or private accounts are not accessible.
Mentions and tags
To fetch posts where your account is mentioned:
curl -X GET "https://graph.facebook.com/v22.0/{ig-user-id}
  ?fields=mentioned_media.fields(caption,media_url,media_type,timestamp)
  &access_token={token}"
For comment mentions: Use mentioned_comment
This is useful for:
- Brand monitoring
- Engagement tracking
Stories
Stories are available through: /{ig-user-id}/stories
But there are limitations:
- Only accessible for 24 hours
- Fewer fields compared to regular posts
Insights for stories, like impressions, reach, exits, and replies, are available through the standard / {ig-media-id} /insights endpoint while the story is still live.
Key takeaway for the Instagram Graph API endpoint
The Instagram Graph API endpoints are structured, but not always intuitive at first. Once you understand:
- Which endpoint handles what
- How data is structured
- and where limits apply
you can combine them to build almost any Instagram-based feature.
How to use Instagram Graph API efficiently in real use cases
Knowing the endpoints is one thing. Using them efficiently is where most of the real work happens. These are the patterns that show up most often when building with the Instagram Graph API.
Fetching media with insights in one pass
A common mistake is fetching media first, then looping through each item to request insights separately. This quickly increases your API usage and can hit Instagram Graph API rate limits.
Instead, use field expansion to request both media and insights in a single call:
curl -X GET "https://graph.facebook.com/v22.0/{ig-user-id}/media
  ?fields=id,caption,media_type,timestamp,like_count,comments_count,
    insights.metric(impressions,reach,saved){data}
  &limit=10
  &access_token={token}"
This reduces multiple requests into one. For example, instead of making 11 calls (1 for media + 10 for insights), you only make 1.
Batch requests
The Instagram API supports batch requests through the Facebook Graph API. This allows you to combine up to 50 requests into a single HTTP call:
curl -X POST "https://graph.facebook.com/v22.0" \
  -d 'access_token={token}' \
  -d 'batch=[
    {"method":"GET","relative_url":"{ig-media-id-1}/insights?metric=impressions,reach"},
    {"method":"GET","relative_url":"{ig-media-id-2}/insights?metric=impressions,reach"},
    {"method":"GET","relative_url":"{ig-media-id-3}/insights?metric=impressions,reach"}
  ]'
The response returns a JSON array, with one result per request. Batch requests count as a single call against your rate limit, which makes them one of the most effective ways to reduce API usage.
Reading and replying to comments
For comment moderation, you can fetch comments along with replies in one request:
curl -X GET "https://graph.facebook.com/v22.0/{ig-media-id}/comments
  ?fields=id,text,timestamp,username,like_count,replies{id,text,timestamp,username}
  &filter=stream
  &access_token={token}"
The filter=stream parameter returns only top-level comments, without nesting replies inside them.
To reply to a comment:
curl -X POST "https://graph.facebook.com/v22.0/{ig-comment-id}/replies" \
  -d "message=@{username} Thanks for reaching out!" \
  -d "access_token={token}"
If you’re building a system that monitors comments at scale, using webhooks is more efficient than polling repeatedly. This is covered in the next section.
Publishing content via container workflow
Publishing content through the Instagram Graph API follows a container-based process.
Step 1: Create the container
curl -X POST "https://graph.facebook.com/v22.0/{ig-user-id}/media" \
  -d "media_type=REELS" \
  -d "video_url=https://example.com/video.mp4" \
  -d "caption=Check out this reel! #trending" \
  -d "share_to_feed=true" \
  -d "access_token={token}"
Save the container ID from the response, then check its status:
curl -X GET "https://graph.facebook.com/v22.0/{container-id}?fields=status_code&access_token={token}"Wait until the status_code is FINISHED.
Step 2: Publish
curl -X POST "https://graph.facebook.com/v22.0/{ig-user-id}/media_publish" \
  -d "creation_id={container-id}" \
  -d "access_token={token}"
For carousels, the process is slightly different:
- Create containers for each item
- Create a parent container referencing those items
- Publish the parent container
Key takeaway for Instagram Graph API use cases
Most performance issues with the Instagram Graph API don’t come from the API itself, but from how requests are structured.
You can reduce API usage significantly and stay within limits if you:
- combine requests
- avoid unnecessary loops
- and use batching or field expansion
How to work with Instagram Graph API webhooks properly
Polling endpoints to check for new comments or mentions can quickly consume your Instagram Graph API rate limits, even when nothing has changed. Webhooks solve this by switching the flow. Instead of your app asking for updates, Instagram sends events to your server when they happen.
To use Instagram Graph API webhooks, you need to set up:
- A publicly accessible HTTPS endpoint that can handle both GET (for verification) and POST (for incoming events)
- Subscription to Instagram webhook topics through the App Dashboard or API
The Verification step of webhook: When you configure the webhook, Meta sends a GET request with hub.mode=subscribe, hub.challenge, and hub.verify_token. Your endpoint must return the hub.challenge value to confirm.
You can subscribe to the following types of events using webhooks, depending on your use case:
- mentions: when your account is @mentioned in a comment or caption
- comments: new comments on your media
- messages: incoming DMs (via Messenger Platform)
- story_insights: story metrics 24 hours after posting
- feed: new media posts from connected accounts
A webhook POST payload for a new comment looks like:
{
  "object": "instagram",
  "entry": [
    {
      "id": "{ig-user-id}",
      "time": 1710000000,
      "changes": [
        {
          "value": {
            "from": { "id": "123456", "username": "user" },
            "media": { "id": "{media-id}" },
            "text": "Great photo!",
            "id": "{comment-id}"
          },
          "field": "comments"
        }
      ]
    }
  ]
}
Security Check: Always validate the X-Hub-Signature-256 header using your app secret before processing webhook data. This step ensures that the request actually came from Meta and not from a spoofed source.
How to optimize Instagram Graph API performance and usage
Staying within Instagram Graph API rate limits while keeping your integration responsive requires a bit of planning. In this section, we will discuss the patterns that make the biggest difference in real use cases.
Request only the fields you need
By default, API responses include a broad set of fields. These are designed for general use, not your specific needs. Instead of fetching everything, use the fields parameter to request only what you need:
# Instead of this:
/v22.0/{ig-user-id}/media

# Do this:
/v22.0/{ig-user-id}/media?fields=id,media_type,timestamp,like_count
Smaller responses mean:
- faster API calls
- less data to process
- better overall performance
Use caching based on data update frequency
Not all data changes at the same rate. If you treat everything the same, you’ll end up making unnecessary API calls. A better approach is to cache based on how often the data changes:
- Captions and media URLs: cache for hours or days
- Like and comment counts: cache for 15 to 30 minutes
- Follower counts: cache for 1 to 4 hours
- Story insights: cache until 24 hours after posting
- Access tokens: store and refresh before expiration (around 45 days)
Using an in-memory store like Redis works well here. Set different TTL values based on data type and refresh only when needed.
Use cursor-based pagination efficiently
Most list endpoints in the Instagram API use cursor-based pagination. Each response includes a cursor that you use to fetch the next page.
# First request
/v22.0/{ig-user-id}/media?limit=25&access_token={token}

# Next page
/v22.0/{ig-user-id}/media?limit=25&after={after-cursor}&access_token={token}
Each page request counts as a separate API call.
To reduce total requests:
- Use the highest reasonable limit value
- Avoid fetching more pages than necessary
Fetching 100 items in one call is more efficient than making multiple smaller requests.
Handle rate limit errors with exponential backoff
When you hit a 429 error, retrying immediately usually makes things worse. Instead, use exponential backoff to space out retries.
async function callWithBackoff(apiFn, maxRetries = 5) {
  let delay = 1000;
  for (let attempt = 0; attempt < maxRetries; attempt++) {
    try {
      return await apiFn();
    } catch (err) {
      if (err.code === 429 && attempt < maxRetries - 1) {
        await new Promise(resolve => setTimeout(resolve, delay));
        delay *= 2;
        delay += Math.random() * 500;
      } else {
        throw err;
      }
    }
  }
}
The small random delay (jitter) helps avoid multiple processes retrying at the same time, which can create spikes and trigger limits again.
Common Instagram API Errors and how to fix them
The Instagram Graph API returns structured error objects. Here’s what a typical error response looks like:
{
  "error": {
    "message": "Invalid OAuth access token.",
    "type": "OAuthException",
    "code": 190,
    "error_subcode": 460,
    "fbtrace_id": "AbCdEf123456"
  }
}
The most common error codes you’ll encounter:
| Code | Type | Meaning | Action |
| 190 | OAuthException | Invalid or expired token | Refresh token or re-authenticate user |
| 200 – 299 | OAuthException | Missing permissions | Request required scope from user |
| 100 | GraphMethodException | Invalid parameter or request | Check your request structure |
| 17 | OAuthException | Rate limit hit | Back off and retry |
| 368 | OAuthException | Account blocked or restricted | Contact Meta support |
| 10 | OAuthException | Permission denied (app-level) | App not approved for permission |
The error_subcode field provides more granular context within a top-level code. Code 190 with subcode 460 means the password was changed after the token was issued; subcode 467 means the token expired. Use subcodes for specific handling logic.
Save the fbtrace_id in your logs; it’s Meta’s internal trace ID and is required when filing support tickets about specific API errors.
A robust error handling wrapper in practice:
async function callGraphAPI(endpoint, params) {
  const response = await fetch(`https://graph.facebook.com/v22.0/${endpoint}`, {
    params: { ...params, access_token: getToken() }
  });
  const data = await response.json();

  if (data.error) {
    const { code, error_subcode, fbtrace_id } = data.error;
    logError({ code, error_subcode, fbtrace_id, endpoint });

    if (code === 190) {
      await refreshOrReauthenticate();
      return callGraphAPI(endpoint, params); // One retry after refresh
    }
    if (code === 17 || response.status === 429) {
      throw new RateLimitError(data.error);
    }
    throw new APIError(data.error);
  }

  return data;
}
How to migrate from Instagram Basic Display API to Graph API
If you have any integrations still running on the Basic Display API infrastructure, or built before December 2024, this section is for you. The migration isn’t optional: the API is gone, and old tokens have been invalid since December 4, 2024.
What changed from Basic Display API to Instagram Graph API
The Basic Display API provided access to personal Instagram accounts with minimal setup. You could read a user’s media feed, profile info, and basic metadata without requiring a Business account or Facebook Page connection. That’s all gone.
The Instagram Graph API replacement requires:
- Instagram Business or Creator account (not personal)
- Facebook Page connection (for most features)
- App review for permissions beyond basic read access
- Stricter token scoping and permission declarations
Migration steps from Basic Display API to Instagram Graph API
Follow these steps below to migrate from Basic Display API to Instagram Graph API:
- Step 1: Audit your existing integrations. List every integration point: what data you were fetching, which accounts were connected, and what your app was doing with that data. Map each use case to an equivalent in the Instagram Graph API.
- Step 2: Convert accounts. Every personal Instagram account your integration was accessing needs to be converted to a Business or Creator account. Users can do this in the Instagram app under Account Settings → Switch to Professional Account. There’s no API method for this.
- Step 3: Connect to a Facebook Page. Each Instagram Business account needs to be linked to a Facebook Page for most API features. This is done in the Instagram app under Account Settings → Linked Accounts → Facebook. Creator accounts have more flexibility, but Business accounts typically require this connection.
- Step 4: Update your OAuth flow. Replace the Basic Display API authorization endpoint with either Instagram Business Login or Facebook Login for Business. Update all scopes as well, since older scopes like user_profile and user_media are no longer supported.
- Step 5: Update your endpoints. Replace endpoints like graph.instagram.com/me/media with graph.facebook.com/v22.0/{ig-user-id}/media. You’ll also need to update field names and request structures, as some responses have changed.
- Step 6: Submit for app review. If your app is used by external users, you’ll need to go through Meta’s app review process. This includes providing a use case, a privacy policy, and details on how your app handles user data.
Common pitfalls while migrating from the Basic Display API
A common mistake is assuming you can just replace the base URL and keep everything else the same. In reality:
- ID formats are different
- Field names may not match
- Pagination works differently
- Response structures have changed
You’ll need to review each integration point instead of doing a quick swap.

Get exclusive social media marketing tips and tutorials in your inbox!
Advanced Instagram APIs for specialized use cases
The Instagram Graph API covers most core use cases, but some features like messaging, ads, and shopping are handled through separate APIs. You’ll need these when your integration goes beyond content and analytics.
Instagram Messaging API (via Messenger Platform)
The Instagram Messaging API works through the Messenger platform and is used for handling DMs programmatically. It’s commonly used in support systems, chat automation, and lead handling tools.
It allows you to:
- Receive messages in real time using webhooks
- Reply to users with text, media, and structured messages
- Manage conversations across multiple users
There are two important limits to keep in mind:
- You can only reply to users who message you first
- You can only respond within 24 hours of their last message
DM limits, like 200 automated messages per hour, also apply alongside general Instagram API rate limits.
Instagram Ads API (via Marketing API)
The Ads API is part of Meta’s Marketing API and is used for managing Instagram ad campaigns.
With this API, you can:
- Create and manage campaigns targeting Instagram users
- Track performance metrics like reach, clicks, and conversions
- Control budgets and bidding strategies programmatically
This is mainly useful for agencies, marketing platforms, and businesses running ads at scale. It also requires additional permissions and approval from Meta.
Instagram Shopping API
The Instagram Shopping API is used for eCommerce integrations. It allows you to connect a product catalog and tag products directly in posts and stories.
Product tagging happens during media creation:
curl -X POST "https://graph.facebook.com/v22.0/{ig-user-id}/media" \
  -d "image_url=https://example.com/product-photo.jpg" \
  -d "caption=Shop the look" \
  -d 'product_tags=[{"product_id":"123456","merchant_id":"789","x":0.5,"y":0.5}]' \
  -d "access_token={token}"
This setup relies on a Facebook Product Catalog connected to your Instagram account.
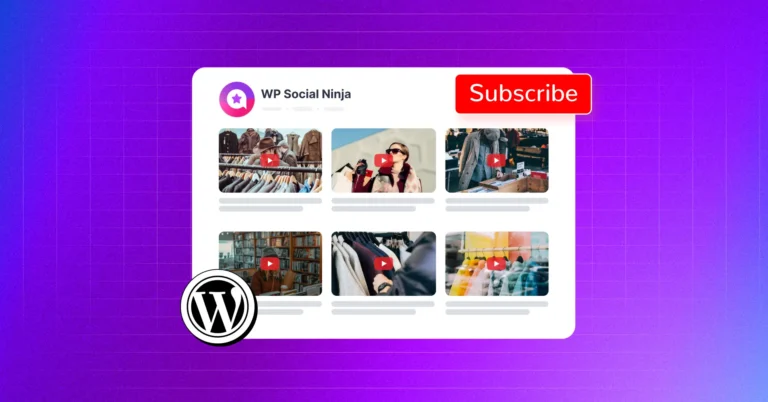
The easiest way to add Instagram feeds to WordPress
If you’re an agency or WordPress developer, building Instagram features with the Instagram Graph API can get complex and time consuming. WP Social Ninja removes that overhead so you can deliver working integrations without handling the backend.
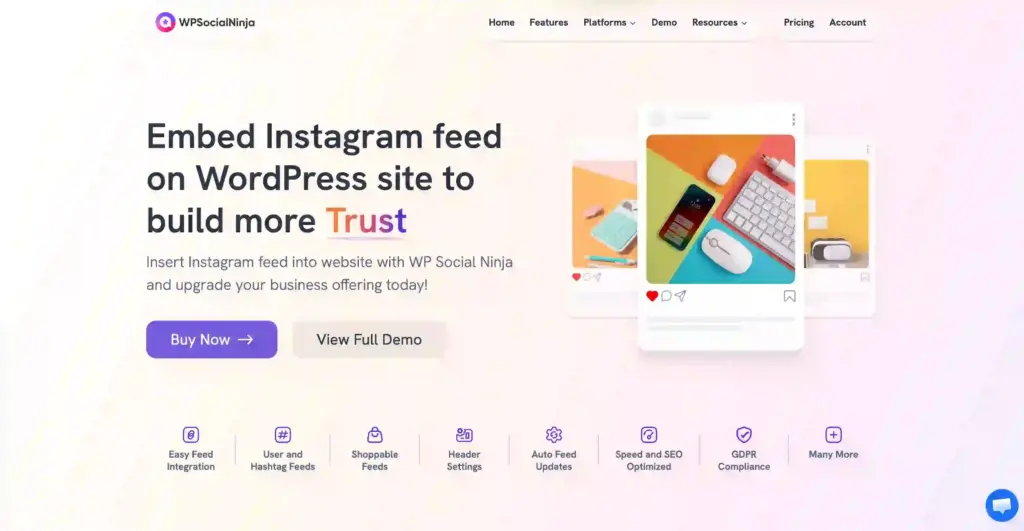
WP Social Ninja is a complete WordPress Instagram plugin that connects directly with the Instagram Graph API and handles everything in the background.
You can display feeds, videos, and hashtag content on your site with full control over layout and behavior. It’s built to be simple to set up, flexible to customize, and reliable in performance.
Key features of WP Social Ninja that you will like:
- Display multiple feeds from different Instagram accounts
- Filter feeds by hashtag, keyword, or content type
- Create shoppable feeds by linking posts to product pages
- Use ready-made templates for faster setup
- Customize layouts, headers, and profile sections
- Show posts in popups or redirect users to Instagram
- Built-in caching for better performance
- Image optimization and local storage for faster loading
- GDPR-compliant setup for user privacy
- No-code configuration with an easy dashboard
Most importantly, you can start for free with WP Social Ninja to embed Instagram feeds. To access its advanced features, you’ll need to upgrade to its pro version that starts from $44 per year after discount.
And if you need to visualize how far you can customize an Instagram feed on WordPress, feel free to check the demo page.
Win your customers’ hearts with exceptional features
Discover how WP Social Ninja can assist you in designing outstanding customer experiences.
Wrapping up
The Instagram Graph API is now the standard way to build on Instagram. With the Basic Display API gone, everything runs through Business and Creator accounts, structured authentication, and defined permissions.
To use it effectively, you need to understand how authentication, rate limits, endpoints, and webhooks work together. Once you apply batching, caching, and field filtering, managing the API becomes much easier.
If you don’t want to handle all that complexity, tools like WP Social Ninja simplify the process. Otherwise, the key is simple: design around the limits and structure your requests properly.

Subscribe To Get
Weekly Email Newsletter
Connect, Customize, and Display Social Feeds, Reviews, and Chat widgets


Leave a Reply