
How to Install Plugins for WordPress (3 Easy Ways)


If you’re a WordPress user, or a new fellow of WordPress, your query begins with the basic “how to install a WordPress plugin”? Calm down; you got the right place to get your answer!
So, why do you need to install plugins? Let us consider whether you are a business owner or a beginner in the WordPress ecosystem. And necessarily, before knowing how to use the deep functionalities of plugins, you need to know how to install plugins!
There are many plugins out there to explore and to make your WordPress journey smoother. Certainly, you don’t want to miss any of them!
Then, without wasting time, let’s see the simplest steps to install a WordPress plugin!
The simple way to install WordPress plugins
It is not so complicated that you cannot find it easy to install a WordPress plugin. Every procedure is different; you just need to follow the steps.
Let’s see then!
Install a plugin using the WordPress plugin search
This one is the easiest way to install a plugin from your WordPress dashboard. You can download any plugin in this way only if the plugin is free and available in the WordPress plugin directory.
- Step one, from your WordPress dashboard, find the Plugin >> Add New option.
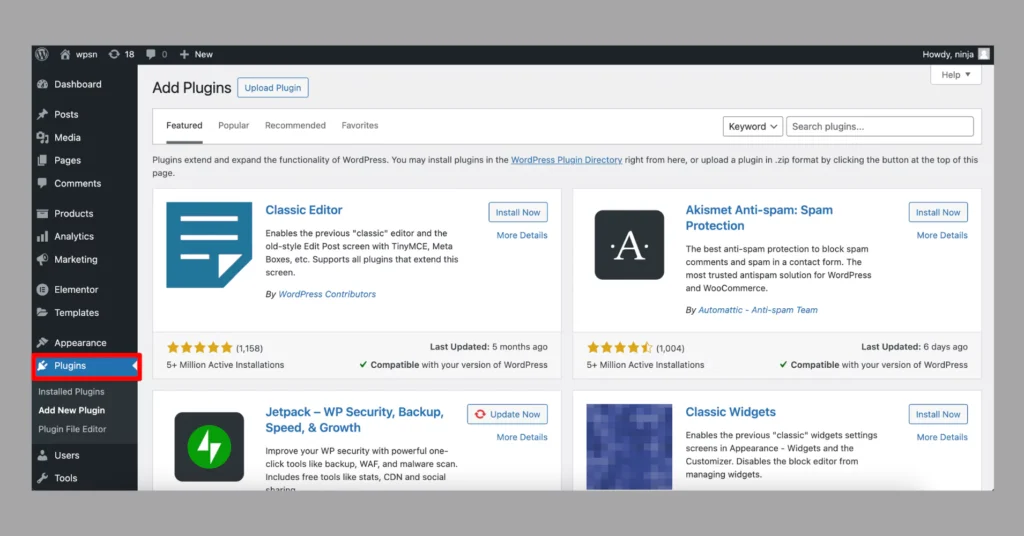
- Type the plugin name in the search bar, or you can use the functionality of the plugin you’re looking for (let’s say you are searching for a social media plugin). You can see several plugin lists appeared.
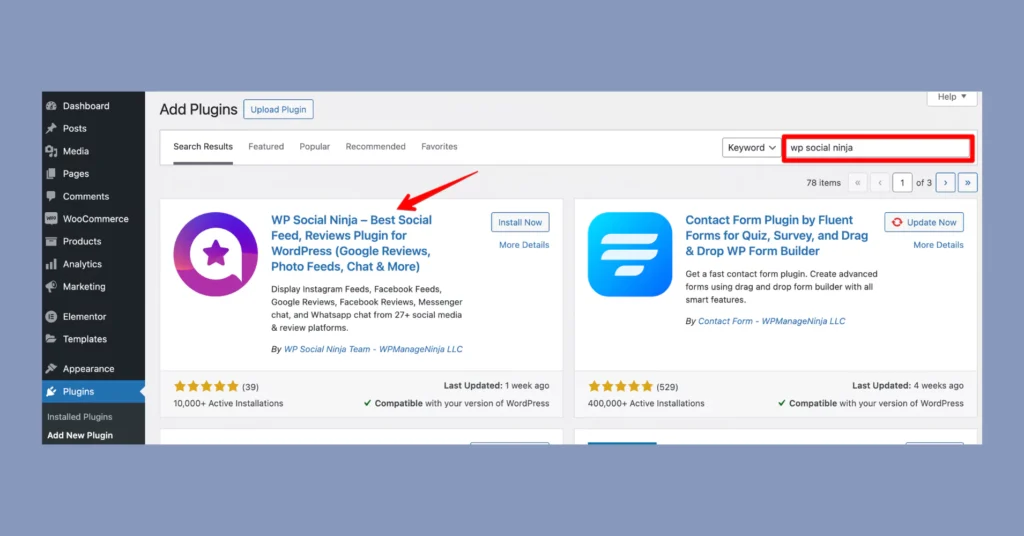
- From the list, choose any one of them that meets your needs. We are choosing WP Social Ninja as an example. Click the Install Now button next to the plugin title name.
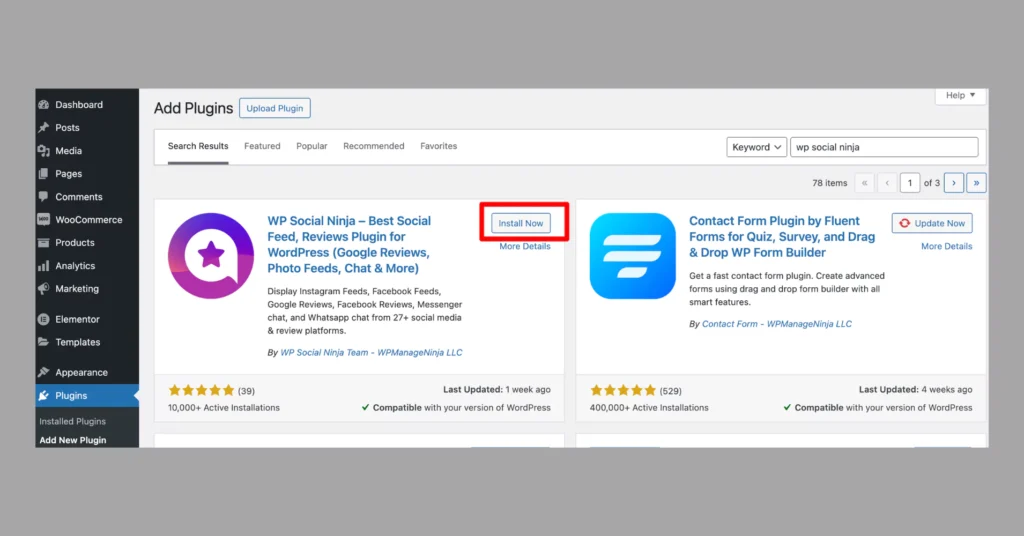
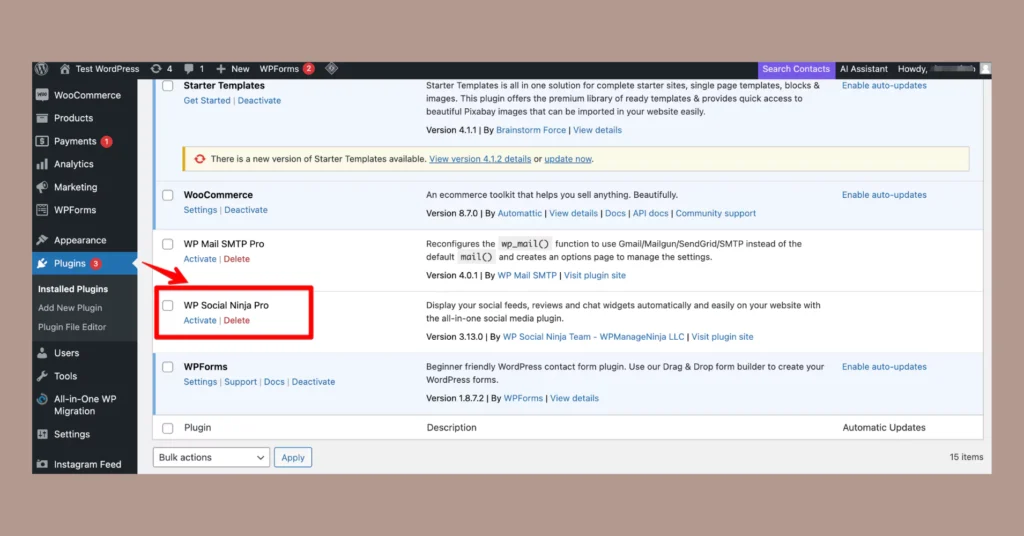
- After installing, you need to activate the plugin. The “Install Now” button will be changed to the “Activate” button. Click on that.
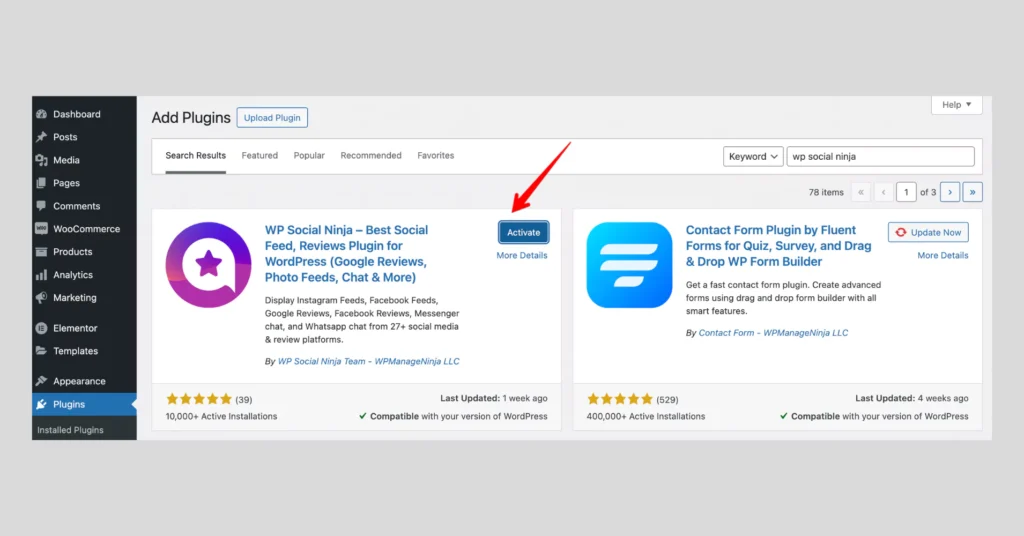
- And you’re done! You have successfully activated the free version of the WP Social Ninja. You can now access its dashboard and enjoy its features.
Win your customers’ hearts with exceptional features
Discover how WP Social Ninja can assist you in designing outstanding customer experiences.

Manually upload plugin in the WordPress dashboard
Sometimes, you might not find a plugin by searching it in the search bar of your browser. In that case, you need to upload the plugin manually using the zip file of the plugin.
Here’s how to install the WordPress plugin from a .zip format.
- First, similarly to the previous procedure go to your WordPress dashboard and visit Plugins >> Add New page.
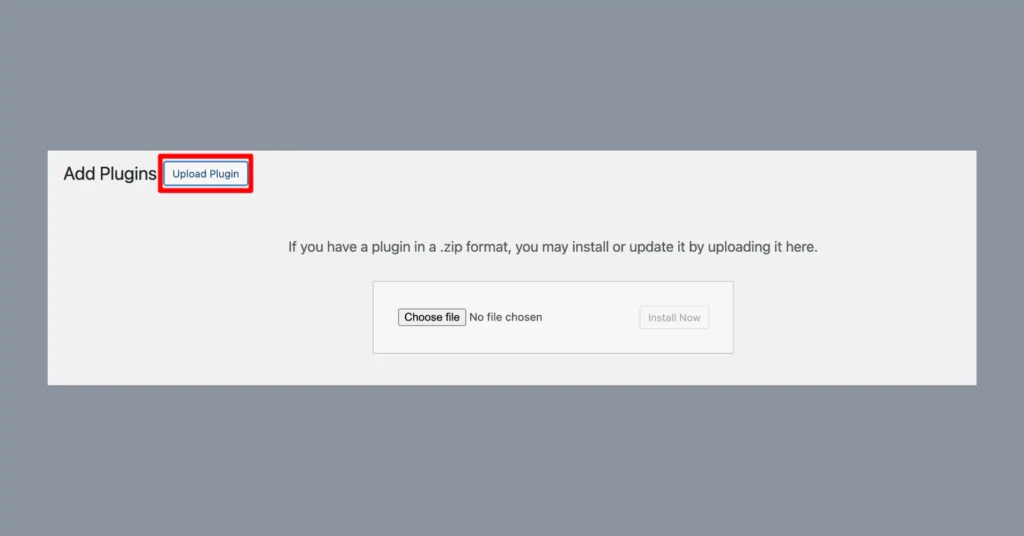
- The Upload Plugin option is at the top of the page. Click on it to add your plugin file.
- Now, you’ll see another button where you can drop your file. Click on the Choose File button and upload the .zip file.
- After you have uploaded the file, click the Install Now button. When the installation is completed, you will receive a success message.
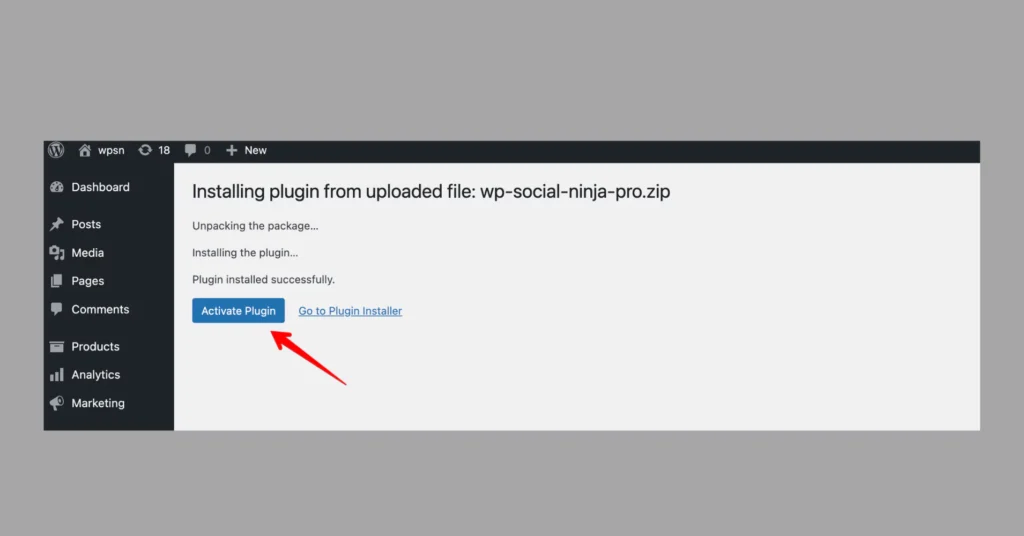
- And, when you’re done, you’ll find the Activate Plugin. To use the plugin, click on the button and get started!
Install a WordPress plugin via FTP
Next, you have an FTP client for manually uploading your plugin to your WordPress website. When do you need to follow this procedure?
There will be some cases where you won’t be able to install plugins from the WordPress admin area due to some file restrictions. In this case, using an FTP client (We’ll use FileZilla for example) would be the best solution to upload your plugin.
So, here are the steps:
- First, collect the plugin’s source file. If it’s in .zip format, extract it on your computer (you must upload this folder using the FTP client).
- As you need to access your host through the FTP manager, collect the FTP username and password, too.
- Now, to add your file, open the FTP client on your computer and connect it to your website with the login credentials you have collected. Then, go to your website’s directory /wp-content/plugins/folder.
- In the folder section, upload the folder you previously extracted from the .zip file.
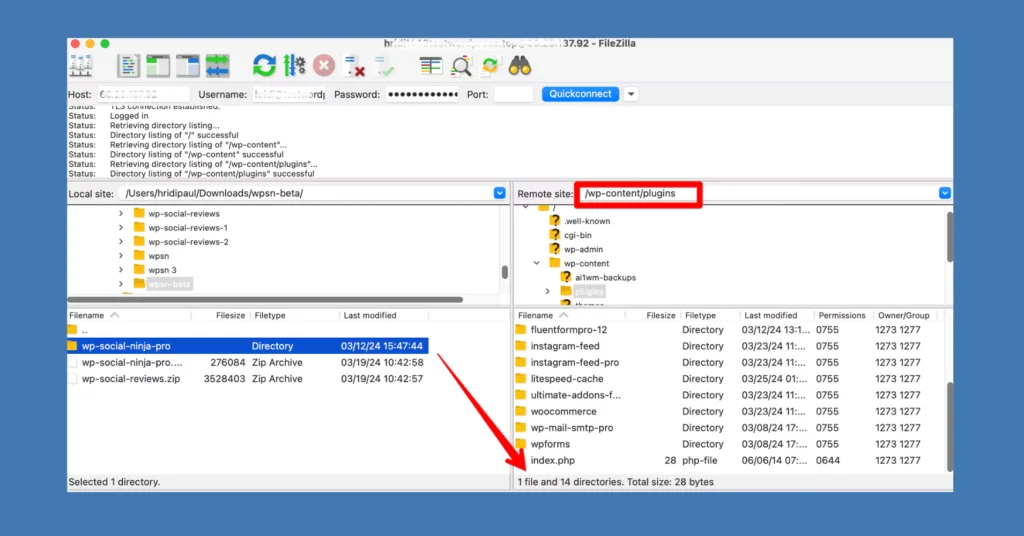
- Finally, the plugin is successfully installed on the plugins page of your WordPress dashboard. Hit the Activate button, and you are ready to go!
Bonus tips: Introducing WordPress social media plugin
Lastly, as you now know how to install plugins for WordPress, let us introduce an all-in-one social media plugin you might need for your business website!

If you’re a business owner or planning to have one, WP Social Ninja would be your best website companion to make your social media marketing experience better. For managing your social presence better than anyone else, you will have features like Social feeds, Social reviews, Chat widgets, Notification Popup, and many more that cover 30+ social media platforms.
It’s super easy like when you’re running a Facebook business account or Google Business profile, you can make stylish and customized Facebook Feeds, and Google review templates free with this social media tool. (The Facebook Messenger Chat widget also comes in free)
Win your customers’ hearts with exceptional features
Discover how WP Social Ninja can assist you in designing outstanding customer experiences.
For more features and functionalities, upgrade to the pro version of WP Social Ninja. You can give this blog a read: WP Social Ninja Free vs. Pro: Which is The Best for You?
Wrapping up
Whether you have a business or just a website, it requires new plugins on the dashboard every other day. So, whatever the necessity, knowing the installation process is a must!
We hope you’ve found your answer if your read came this far. Let us know which one is going to work for you!

Get exclusive social media marketing tips and tutorials in your inbox!
Frequently asked questions on how to install plugins for WordPress
How to install plugins on localhost?
To install a plugin on localhost, follow the steps:
- First, download the XAMPP software (You can use Local WP for Mac)
- Install and run your preferred server on localhost
- Do your server settings (creating server name, database, etc.)
- Install WordPress on the localhost (for XAMPP users). For Local WP, after creating your site, directly visit your site from the local server.
- Now, from the WordPress dashboard go to Plugins>>Add New and write your plugin name on the search bar. If you need upload a plugin, find the Add New option in the top of the page and click on it.
- Next, upload your plugin and install it.
How do I activate the plugin in WordPress?
To activate your plugin, sign in to your WordPress first. Find the Installed Plugins from the left-side menu, then Plugins >> Installed Plugins. Choose the one you want to activate, and click on the Activate option you find the under plugin name.
Where are plugins installed in WordPress?
When you have installed plugins in WordPress, you can find the plugins folder by navigating “wp-content/plugins”. That’s where you will find your all WordPress plugins are located.

Subscribe To Get
Weekly Email Newsletter
Connect, Customize, and Display Social Feeds, Reviews, and Chat widgets


Trending Posts
-

-
 Mashfik Upal Aumy
 -
 Mashfik Upal Aumy


Leave a Reply