
How to Make A Testimonial Slider in WordPress Website [Guided Steps & Example]


When was the last time you enjoyed swiping through visuals or posts on a slide? Most likely, it was on Instagram or X (Twitter).
Just like how sliding catches your attention there, Testimonial sliders work similarly!
We all know transparency matters in business. Using a Testimonial slider is a sleek way to display and rotate through your clients’ feedback. It saves space, especially with numerous Testimonials, and looks fantastic.
But wait! If you’re wondering how to make your Testimonial slider more appealing, we’ve got you covered.
In this blog, we’ll show you how easy it is to enhance it with the help of our social media plugin. Let’s begin!
What is a Testimonial slider?
Sliders are interactive displays of content featuring sliding blocks that can include graphics, images, videos, or text. Similarly, Testimonial sliders showcase customer feedback in a slideshow format, highlighting their Testimonials and details about them.

Customers feedback are like an open book of your social proof. When you embed social reviews you build the credibility of your brand. Besides that, when you present the customers’ reviews and feedback in eye-dazzling templates or Testimonial slider/carousel, you show authenticity to your audiences in more detail and organized manner.
If you want to know more about the differences between the Testimonials and reviews, have a quick read: Testimonial vs. Review: What’s The Difference?
Win your customers’ hearts with exceptional features
Discover how WP Social Ninja can assist you in designing outstanding customer experiences.

Before you delve into creating Testimonial sliders on WordPress, it’s crucial to understand that Testimonials can boost your strategy, leading to new customers and increased sales. Testimonial sliders provide an effective tool to achieve these goals!
How to use the Testimonial slider plugin?
If you want to have easy and quick steps to make your Testimonial widget, WP Social Ninja would be your best companion as the best Testimonial slider plugin for WordPress.
In case you don’t know about this all-in-one social media plugin, it’s packed with unlimited features that include features like Social feeds, Social reviews, Chat widgets, Notification Popup, Export/import reviews, and more.
So, how to make a Testimonial slider in WordPress? Follow the process below!
Step 1: Install & Activate WP Social Ninja
To start with WP Social Ninja for creating a Testimonial slider, go to the dashboard and install the plugin, and activate it.
Still, if you need help installing the plugin, you can check out the blog: How to Install Plugins for WordPress (3 Easy Ways)
Step 2: Create a Testimonial
Choose Testimonials from the navbar. Click on the Add Testimonial button. You will find it on the right side of the page.
A popup screen will appear, where you’ll find the empty boxes with the details of your new Testimonial and Author.
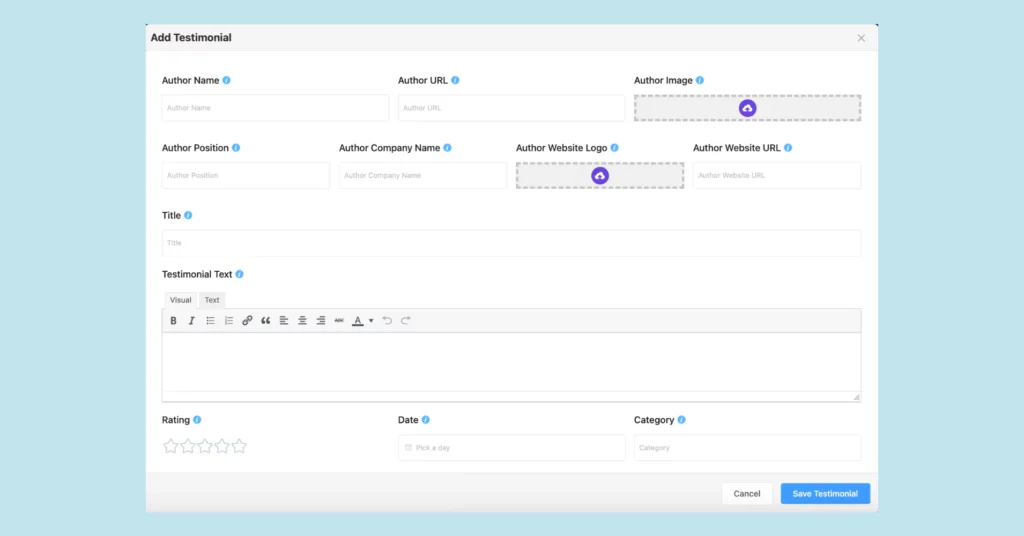
Show off your customers’ satisfaction with the Testimonials. Put the rating stars your customers gave you. Besides the Testimonial text, input the Author’s details to make it look more authentic by the Author’s name, URL, Image, and others.
Complete creating your template by clicking on the Save Template button.
(To show the complete process nicely, we have added a few more Testimonials)
Step 3: Customize Testimonial Slider Layout
What’s next? It’s time to decorate your Testimonial template and give the appearance the way you want.
Go to Templates > Filter by platform > Choose Testimonial. Welcome, now you are in the settings panel!

Then again, in General settings, you’ll find options to personalize the appearance of your Testimonial.
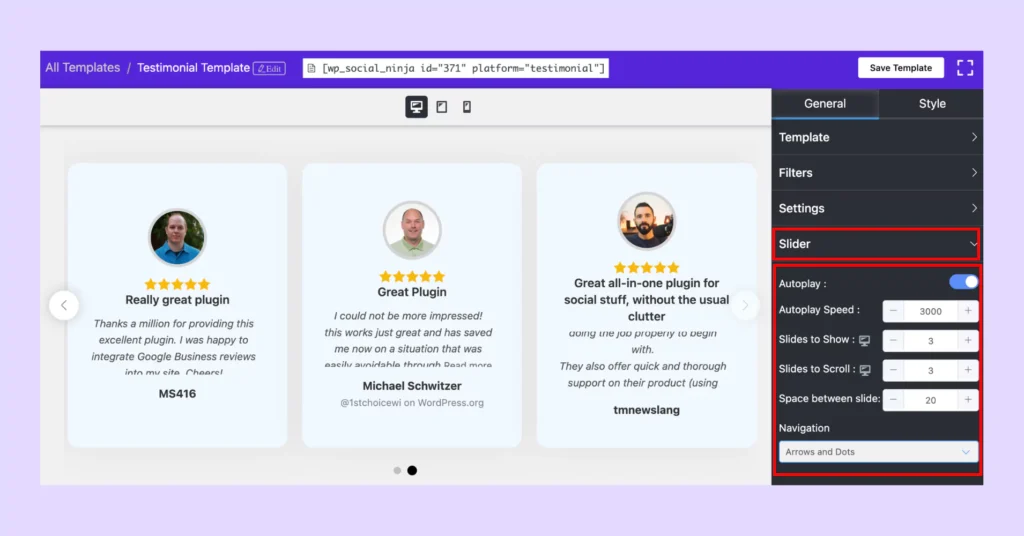
For Template, you have three layouts – Grid, Slider, and Masonry. As we’ll create a Testimonial slider, we are choosing Slider here.
Also, there are two types of Template. Choose one that matches your website theme.
If you have multiple Testimonials and wish to show or hide specific ones, you have the option to do so. Use the Filter to select the number of Testimonials, choose ascending or descending order, filter by rating, and include any keywords that the Testimonial contains to hide or show them.
For further Testimonial slider design, you will get more from here. You have an advanced Settings option, where you will find whether you want to display your Testimonials with details like Date, Author Name, Testimonial Text, Title, Company Name, etc.
And, lastly, to pop up your Testimonial slider with a dazzling preview, adjust the carousel settings with the Autoplay Speed, Number of slides to Show, Space between the sliders, and Navigation.
Step 4: Style the Testimonial slider
After the General settings, you have more to explore from this WordPress Testimonial slider plugin. Decorate your template more appealing way and custom CSS without doing a single code!
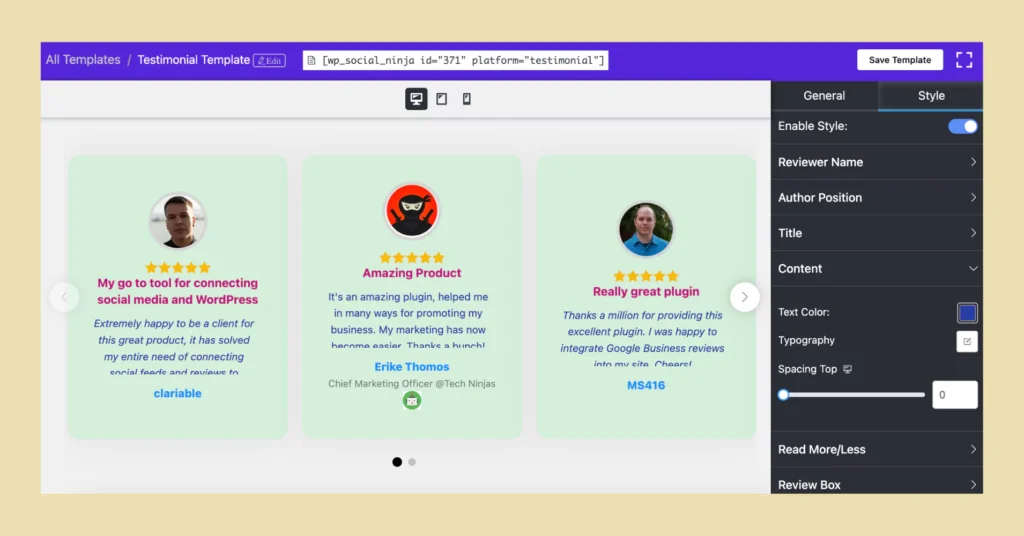
The styling options are available for each element of your Testimonial. Garnish your Testimonial slider with styles by modifying the color, typography, spacing, and more.
Step 5: Display your Testimonial slider
Finally, when you’re done Save the settings and copy the shortcode. Paste the shortcode on the page you want to showcase your Testimonial slider.
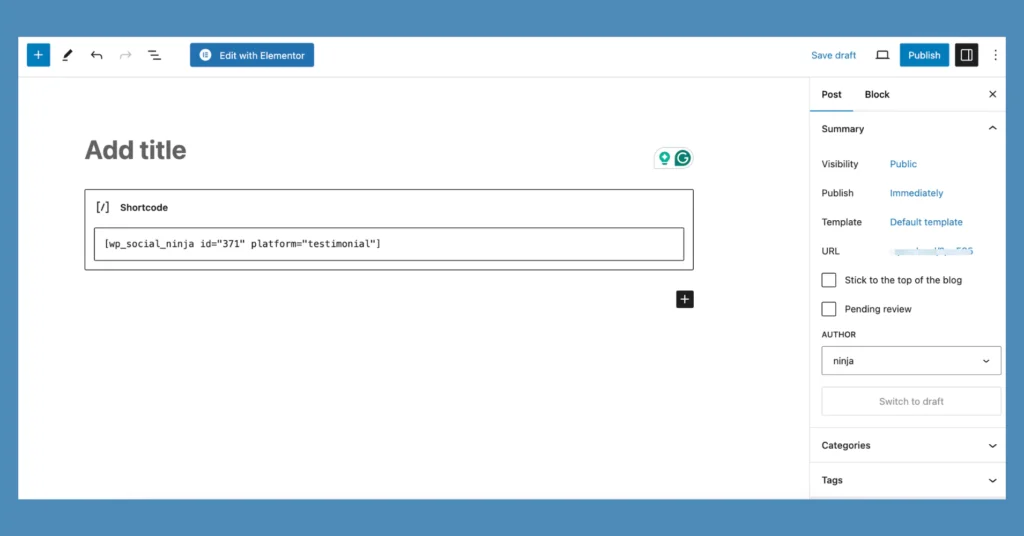
And, that’s all! We hope you won’t find it a big deal when you’re asked how to add a Testimonial slider in WordPress.

Benefits of a Testimonial slider: Is it worth displaying Testimonials?
Now you know how to add a Testimonial slider on WordPress, but if you still need to know how it will help you in your business, here you go:
Boost you conversion
Highlight genuine feedback and make it the key point of your message to customers. Display reviews exactly where clients decide to purchase your service or register on your website. This easily makes customers become the potential ones.
Gain more trust
Did one of your users leave a particularly convincing review about your business? Make the most of it and show your appreciation by displaying it on your website.
Additional social proof
While you’re adding details about Author that includes link from Facebook, Google, or the author’s website adds credibility and confirms that real people trust your business.
Ending thoughts
Alright, we’re nearing the finish line. We’ve just explored how to add Testimonial sliders in WordPress. Quite easy and quick it was with WP Social Ninja, wasn’t it?
Also, this all-in-one social media plugin comes with numerous other features to connect 30+ social media platforms to your WordPress website. So once you’re done with setting up your Testimonial sliders, rev up your marketing strategy with this feature-rich WordPress social media plugin for your business.
Enjoyed the blog post? Explore our related below!

Subscribe To Get
Weekly Email Newsletter
Connect, Customize, and Display Social Feeds, Reviews, and Chat widgets


Leave a Reply