
How To Connect and Customize Messenger Chat Widget in 2 Minutes


Do you want to embed Messenger integration on your WordPress website?
63% of consumers who have experienced social chat on a website say they are likely to return.
But to do that, you need a plugin that can further strengthen your website with robust features.
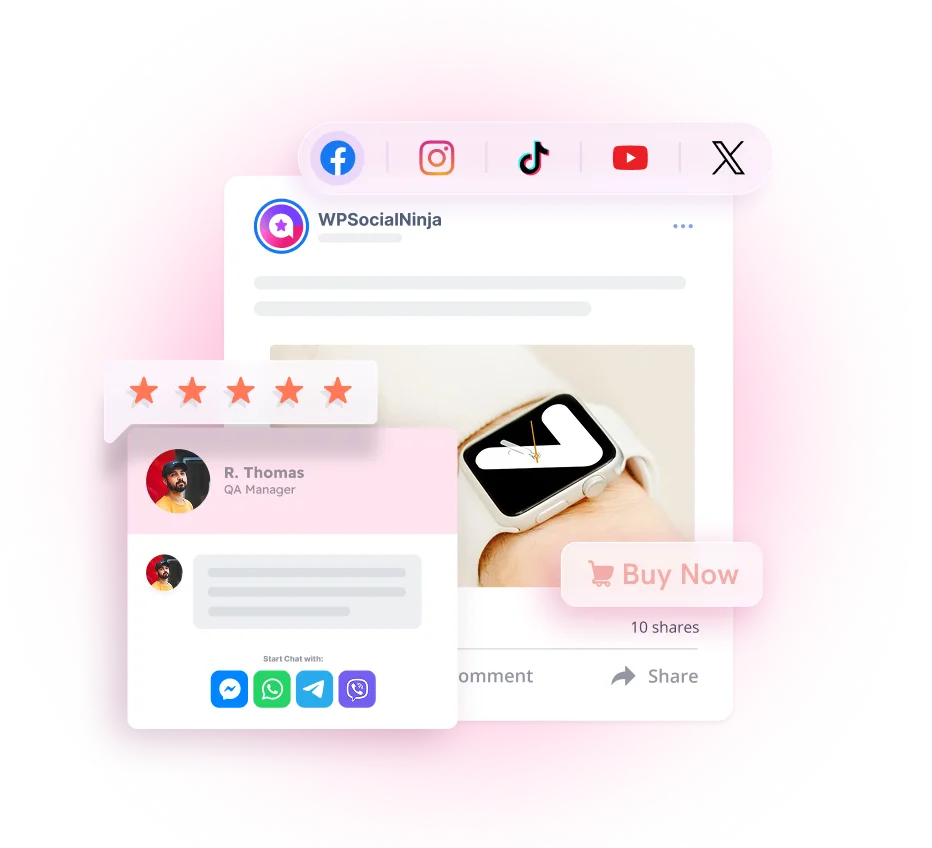
Social chat is a crucial feature for sales expansion and growth in website conversion rates. What if you could get three famous chat apps on your website for a Social chat using just one plugin?
Presenting WP Social Ninja, the all-in-one social media plugin for your WordPress website. With this tool, adding Messenger to your website is super easy. Moreover, it increases the chances of outreach to a bigger crowd. And for that, you don’t have to be a developer or tech person to install Messenger on your website.
In this article, we’ll guide you on how to add Messenger to your website by using WP Social Ninja.
WordPress Messenger integration
Messenger integration is hassle-free and highly secure with WP Social Ninja. It’s a free chat plugin for WordPress users with limited customization options. Moreover, Messenger is considered an informal communication channel.
What is the best part you connecting with your audience on Messenger?
When your client is breaking through that uncomfortable zone, that is where you get a loyal customer. Moreover, through your Facebook account, you gain insights into your customers. This is a vital sign that the relationship should move forward.
Messenger configuration
Customer satisfaction is essential for a business. Messenger integration enables websites to expand further.
To connect the Messenger chat on the website, click on Messenger. This will take you to the Messenger Configuration page. To begin the process, you need a Facebook Page ID/User ID/Group ID.
Let’s take a look at how you can obtain the ID’s.
Facebook Page ID
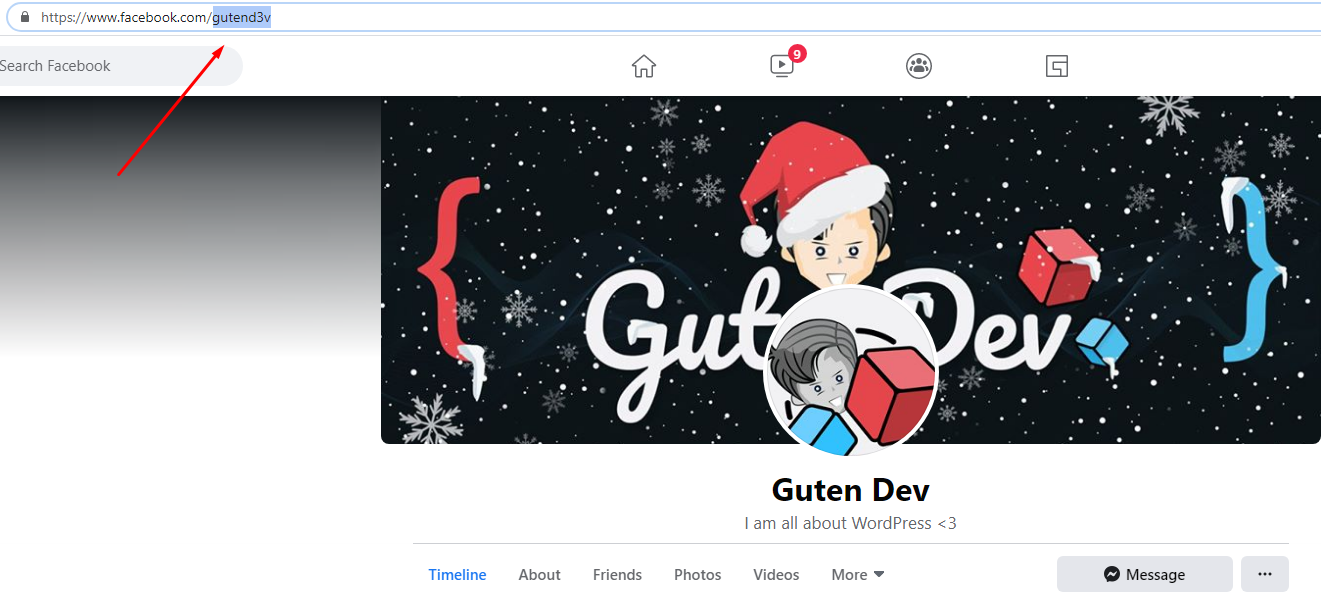
To get the Facebook Page ID to configure Messenger on your website, you need to check the Page URL first.
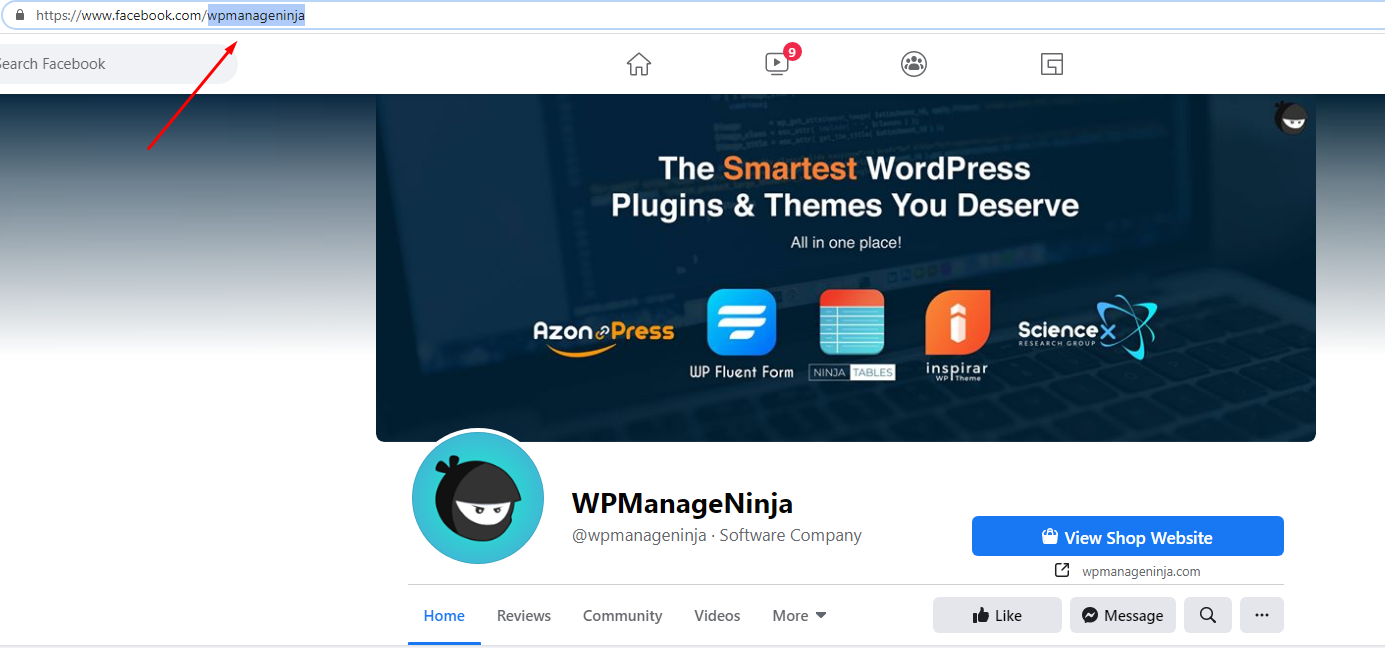
Now, click on the URL, and after the last slash, copy the ID. Then, you can paste it in Messenger Configuration and click on the Save button.
However, some IDs may vary. For example, if you take the AuthLab page, then the ID looks different from WPManageNinja.

Here, the Page URL structure is https://www.facebook.com/authLab/, and the Page ID is authLab/.
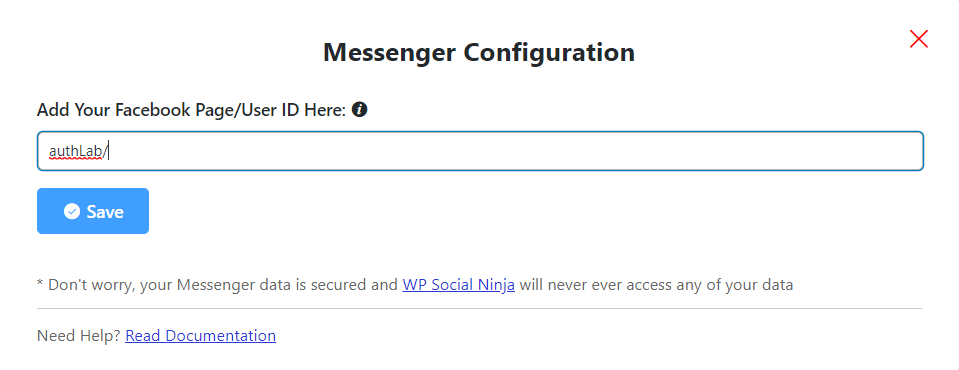
Don’t forget to click on the Save button, and you will be notified with a Success notification.
User ID
Similar to Facebook Page ID, you can also obtain the User ID. Click on the User ID URL after the last slash, and copy the ID.
Now, you can paste it in Messenger Configuration and click on the Save button.
Group ID
In addition to the User ID and Page ID, you may sometimes need the Group ID for Messenger integration. Now, you can copy the Page ID and insert it into the Messenger Configuration.
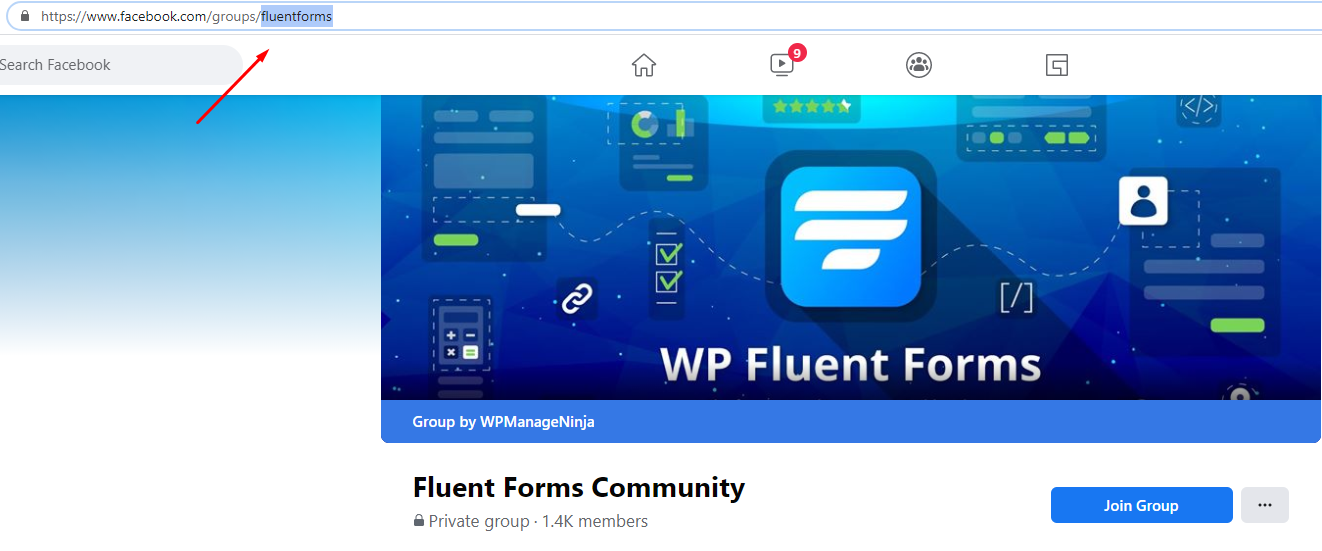
Copy the marked URL and paste it into the Messenger Configuration. Remember to click on the Save button after you are done.
Congratulations! You have successfully embedded the Messenger chat widget on your website.
Features and functionalities
Wp Social Ninja has a wide range of detailed layouts and styles of options from start to finish. You can display all the reviews/recommendations to boost your brand.
Moreover, all the platforms have similar settings. So you don’t have to worry about each platform.
Template layout
Similar to other platforms, Messenger integration of WP Social Ninja offers several pre-built templates for its users. You can choose any and change the outlook of your website according to your preference.
Let’s find out how to customize Messenger integration using WP Social Ninja-
Step 1: Template Types
To select your Templates, start by clicking on the right sidebar, then click on the Template button.
A drop-down menu will appear.
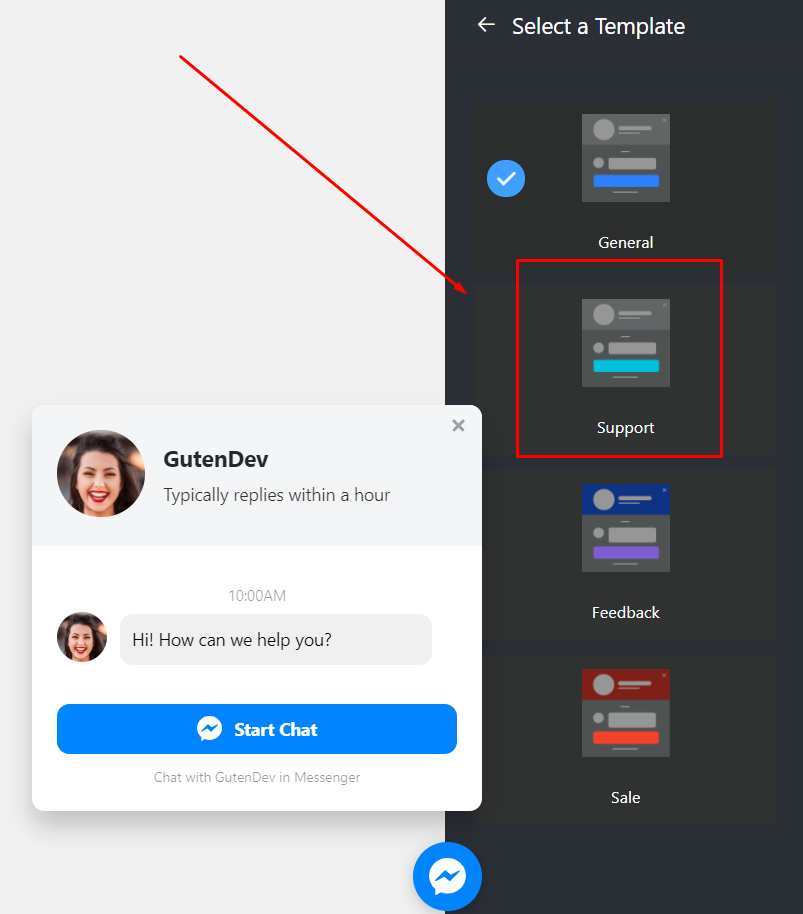
As you can see, it comes with some pre-built templates. Four types of Templates are available at the moment-General, Support, Booking, and Sale. Select any Template for your site!
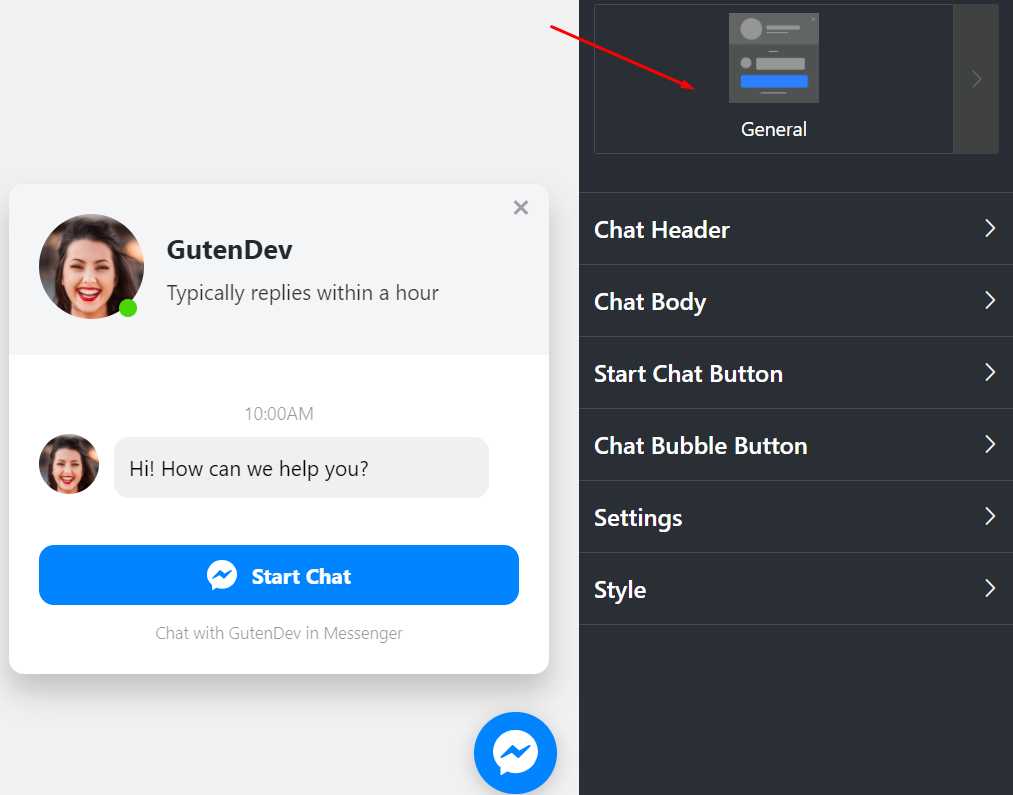
Step 2: Chat Header
After the Template, next comes the Chat Header. From the drop-down option, you can see three changeable items; two of them are input fields, and the other is an image upload option.
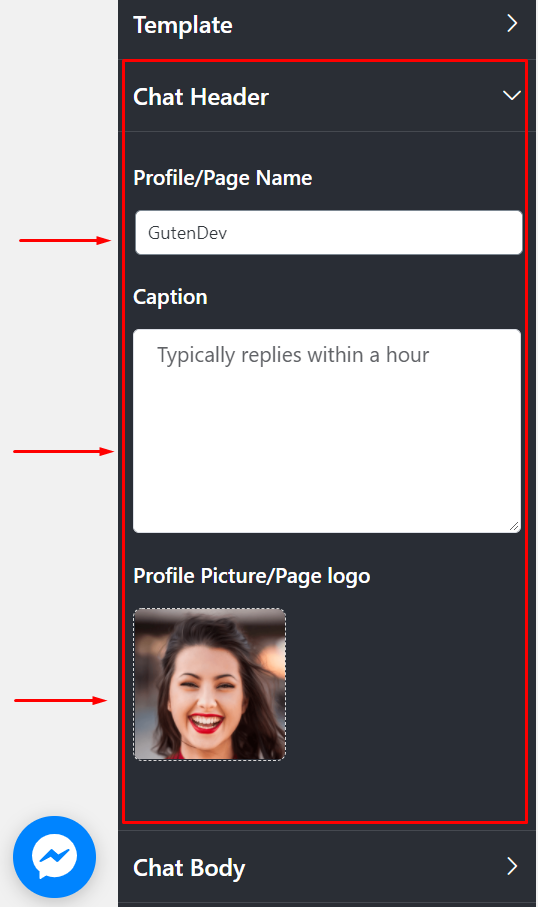
From the pointed Profile/Page Name, you can add the name, or you may change/edit the existing one.
The next is the Caption. From here, you can change the Caption. For example, instead of “Typically replies within an hour”, you can add something else.
In addition, your business has a unique identity that can be placed in the placeholder of a Profile Picture/Page Logo.
So you can add a profile picture that suits your brand.
Step 3: Chat Body
The next Layout is Chat Body. Here, in the Chat Body, you have the option to change your Greeting Message.
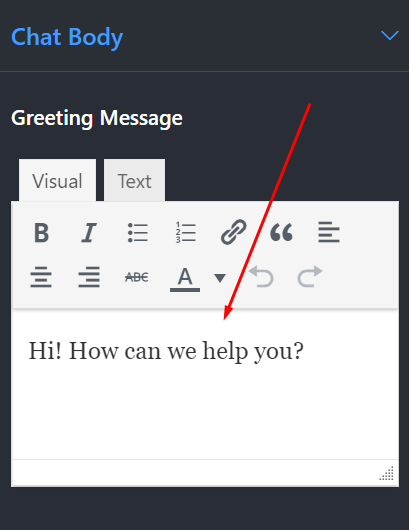
Instead of “Hi! How can we help you?” you can place your own custom Greeting Message.
Step 4: Start Chat Button
From the Start Chat Button, you can change two settings. Display Chat Icon and Chat Button Text.
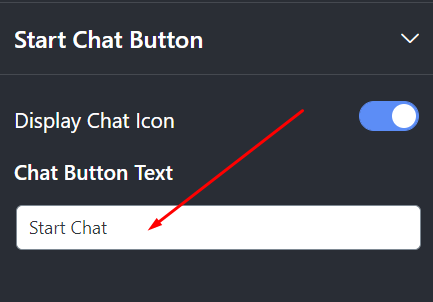
First, you can turn the Display Chat Button on or off. Secondly, in the Chat Button Text, you can replace the default text with a new customized text.
Step 5: Chat Bubble Button
Here, if you click the Chat Bubble Button, a drop-down list will appear.
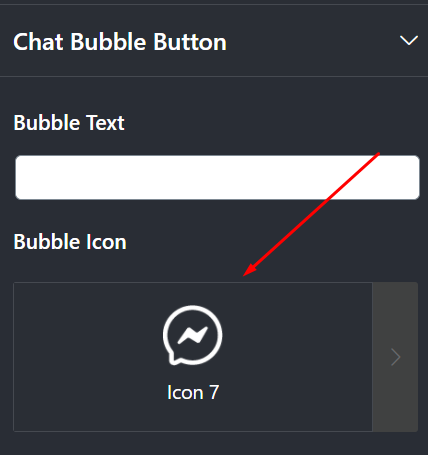
From this menu, you can write a Bubble Text, for instance, “Need Help?”
Next is the Bubble Icon. From the drop-down menu, you can change the Bubble Icon. We have seven Bubble Icons available at the moment.
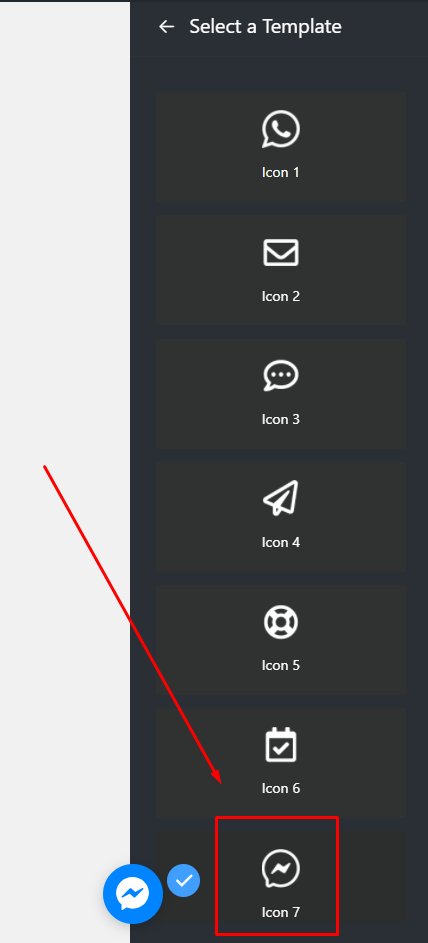
You can pick any icon and click on the Save Template button.
Messenger integration Settings
WP Social Ninja comes with different features. Don’t worry if this sounds complicated. We’ll walk you through that process next.
Here, if you click on the Settings of the Messenger integration, a drop-down menu with multiple options will appear. Let’s find out more about them.
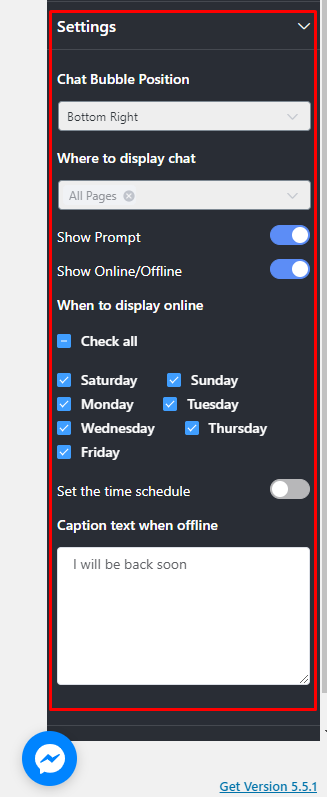
Step 1: Chat Bubble Position
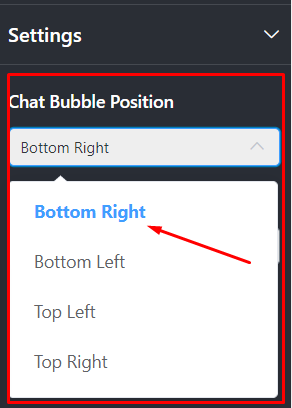
You can adjust your Chat Bubble Position in four different ways, from Bottom Right to Bottom Left and Top Left to Top Right.
Step 2: Where To Display Chat
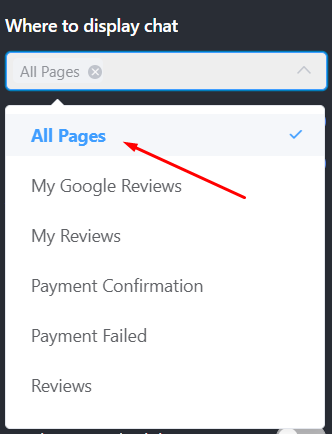
With this option, you will be able to select the pages where you would like to show your social chat option. If it helps your business, you can choose to hide your social chat options from specific pages.
From the drop-down menu, select a particular page, multiple pages, or all pages to add the Social Chat option.
Step 3: Show Prompt
After the display option, there are more customizing features like Show Prompt.
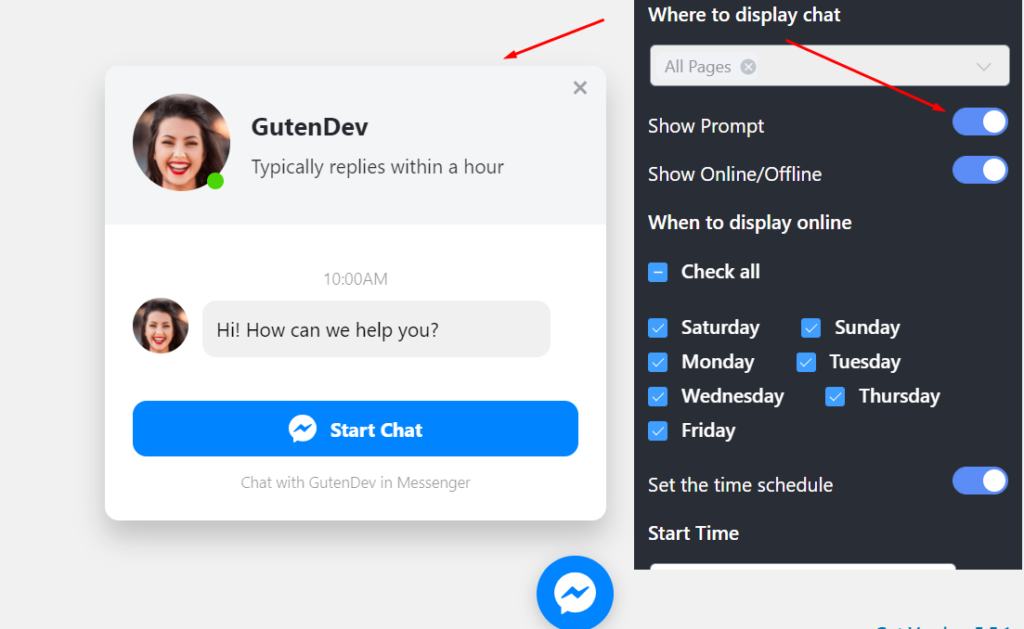
In this section, if you turn on the button, the chat window will automatically pop up. If you don’t want that, turn off the Show Prompt button.
Step 4: Show Online/Offline
The last Setting is Show online/offline. Here you can adjust two important settings: When to Display Online and Set the Time Schedule.

In When to Display Online, you can schedule the days you will be available. For this, you can tick the Check All option, or you can select the specific days that are applicable.
Next is Set the Time Schedule.
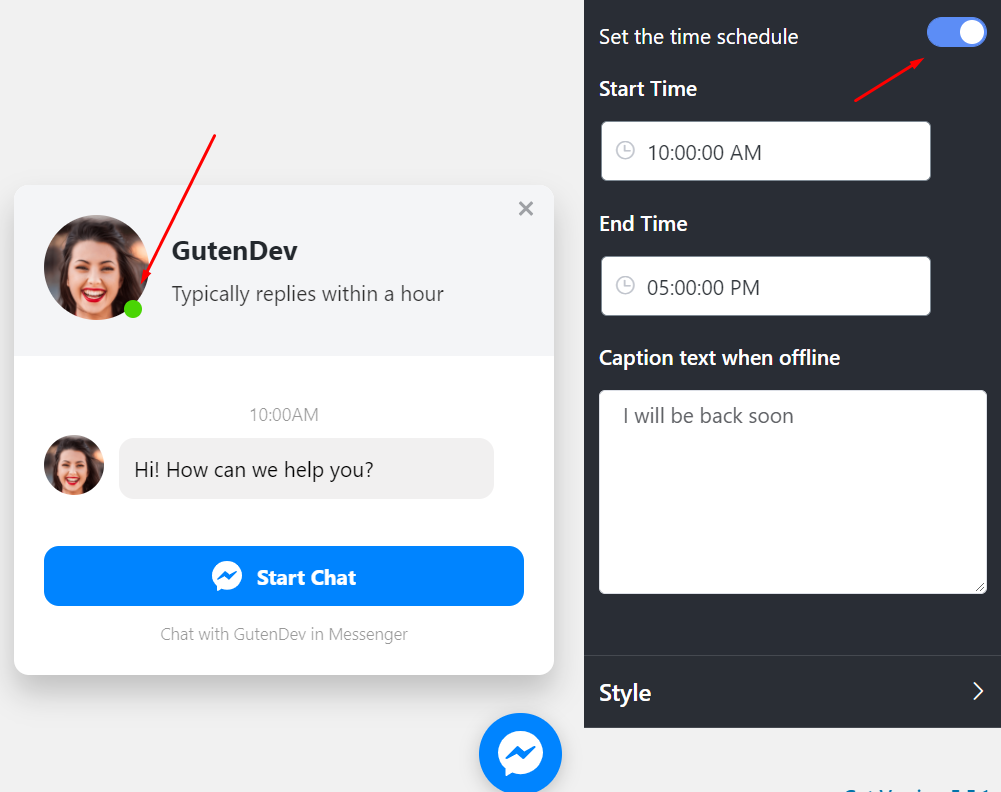
If you turn on the button, it will allow you to set a time that includes Start Time to End Time. This setting is for your users to understand the hours when you will be available to communicate.
Moreover, you have two more excellent caption-text options. So you can type your own Caption Text When Offline.
Messenger integration Style
The power of color and design can bring a significant difference to any brand. Along with your layouts, WP Social Ninja lets you adjust your Chat Body Style. After you are done with your settings panel, now it’s time to customize the Styles. WP Social Ninja has various Styles in messenger integration to offer for your label.
After you scroll down, start by clicking on the Style button, a drop-down menu will appear.
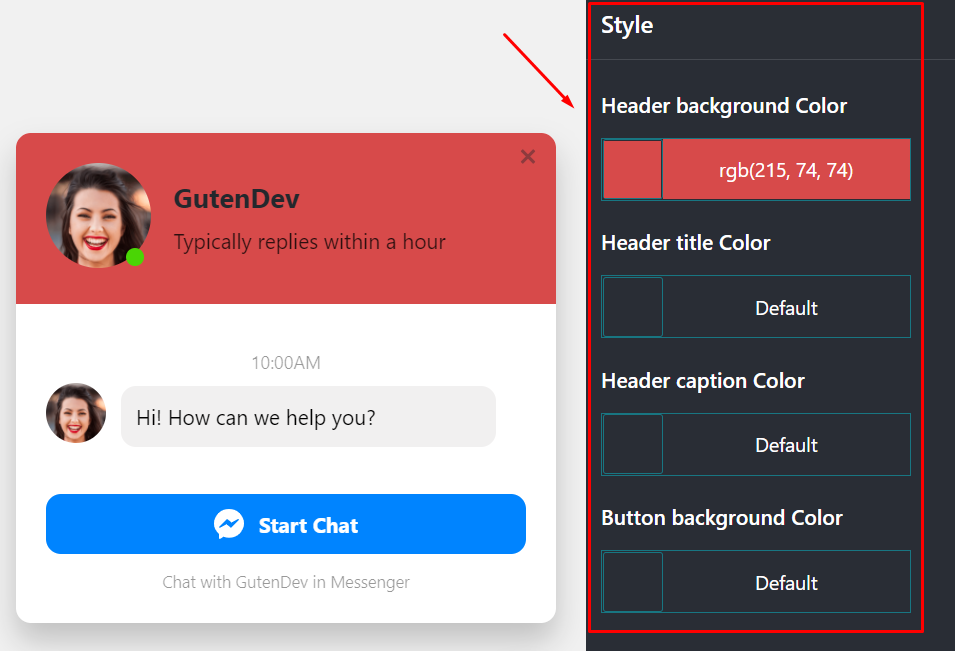
In this part, there are four color-changing sections: Header Background Color, Header Title Color, Header Caption Color, and Button Background Color.
Step 1: Header Background Color
First of all, if you want to change the Header Background Color, we have unlimited color options in the palette.
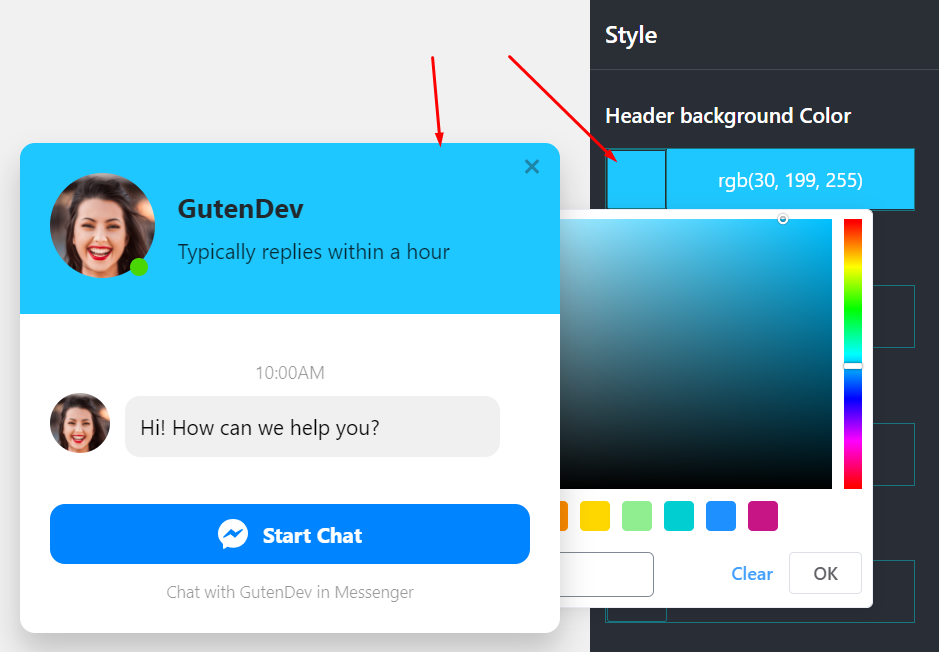
You can pick any color according to your brand.
Step 2: Header Title Color
Once you’re satisfied with your Header Background Color, you can scroll further down to the Header Title Color.
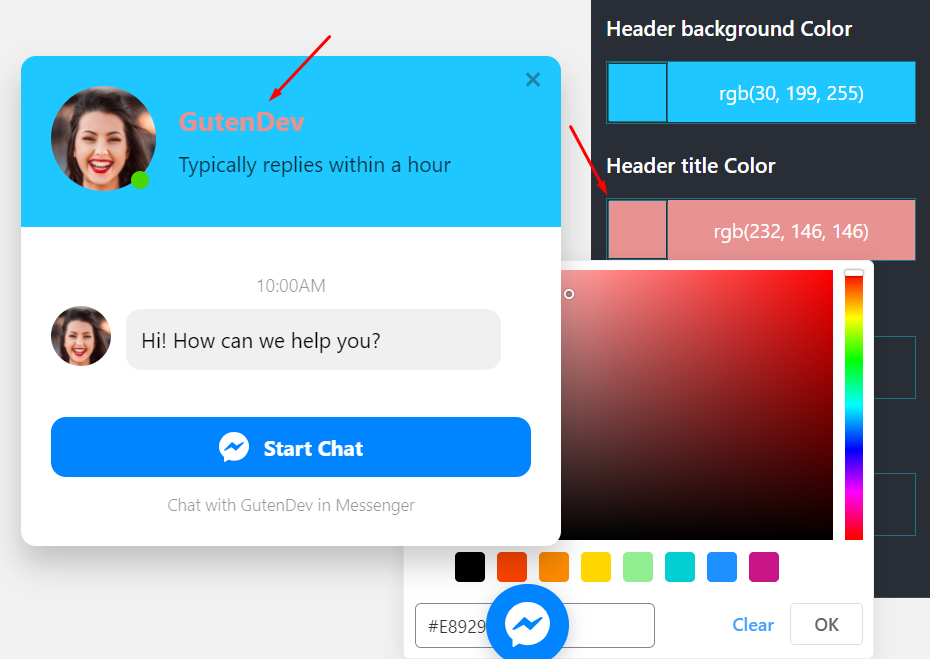
Similarly, you can change the Header Caption Color and Button Background Color.
So embedding Messenger on your website won’t take long. For more exciting features, try our Pro Version.
Finishing up
It is quite clear that Messenger integration using WP Social Ninja is an effortless task. I’m sure with all the elaborate guidelines, anyone can embed Social Chat on the website.
Win your customers’ hearts with exceptional features
Discover how WP Social Ninja can assist you in designing outstanding customer experiences.
Thriving in business takes a lot of hard work, and a comprehensive tool like WP Social Ninja will deliver the best results. So grab your plugin NOW!
For more information, check out our user guidelines.
Also, check out our article on- How to Add Social Chat on Your Site | WhatsApp Integration

Subscribe To Get
Weekly Email Newsletter
Connect, Customize, and Display Social Feeds, Reviews, and Chat widgets


Trending Posts
-
-
 Mashfik Upal Aumy
 -


Leave a Reply