How to Add Social Chat on Your Site | WhatsApp Integration
Do you know WhatsApp has 2.7 billion monthly active users worldwide?
It is the most familiar communication channel among all the platforms today. WhatsApp integration is effortless. And users usually look for a comfortable and user-friendly chatting service.
Moreover, it is the most reachable form of social chat for personal use and professional communication. In this digital world, online businesses have mandatory live chat options. And a commonly used app helps to reach more audiences.
WhatsApp integration is easy and time-saving. But for a non-techie, it’s essential to know the steps correctly. Here is a quick navigation of what we’re going to discuss here-
Shall we get started?
What is WhatsApp?
WhatsApp is a communication tool that started its journey in 2009. It became massively popular right after it launched. WhatsApp has an end-to-end encrypted instant text and calls service easily accessible in several mediums. Along with Android, iOS, and Windows smartphones, Mac, and Windows PCs.
WhatsApp integration is simple, and it is more than a texting app. WhatsApp has 1 billion active users daily. Moreover, every day 100 billion messages are sent through WhatsApp. All these facts clearly state that WhatsApp is an immensely desired platform for personal and commercial use today.
So in this article, you’ll learn the easiest way to add WhatsApp Social Chat on your WordPress website using WP Social Ninja on your website. Ready? Let’s jump in-
WhatsApp integration on your site
Social chat is considered an integral part of every business. Communication is inevitable, and social platforms like WhatsApp help boost business in many ways.
- Easy to reach out to WhatsApp users
- The user-friendly integration process for the customers
- WhatsApp increases conversion rates
- Expansion of sales
Below you’ll find the steps for WhatsApp configuration.
How to configure WhatsApp
WhatsApp integration is a piece of cake. All you need is a phone number to configure WhatsApp on your site.
To embed WhatsApp for spectacular chatting experiences, click on the WhatsApp button.
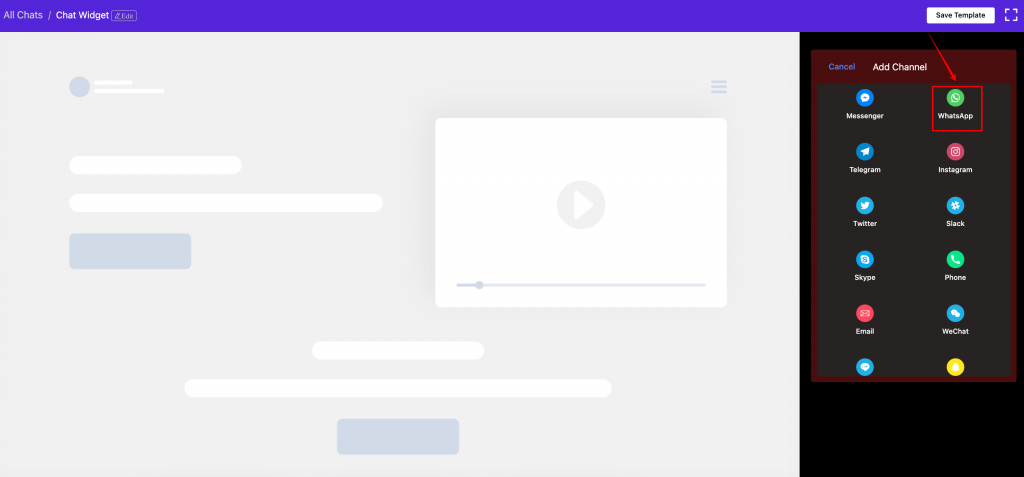
It will take you to the WhatsApp configuration panel.
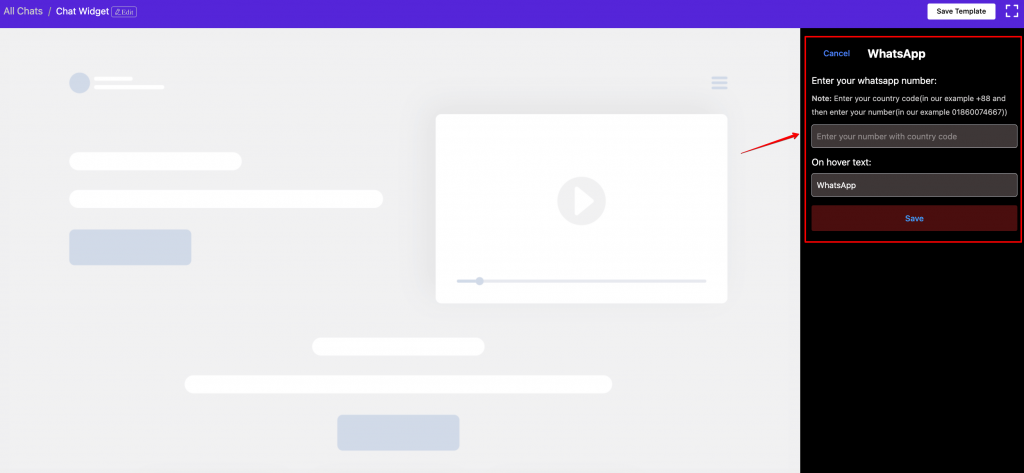
Enter a phone number and click the Save button to complete the configuration process. When you are done following the instructions, your account dashboard will display the Successful notification.
WhatsApp integration features and functionalities
WhatsApp integration is exceptionally straightforward with WP Social Ninja. It allows you to design your social chat feed according to your taste.
Template Layout
WhatsApp has multiple pre-built templates, so users can choose any that suits the website. To have a better understanding, see the steps below-
Step 1: Template Types
First off, click on the Template button from the right side of the Dashboard to select the Template Types.
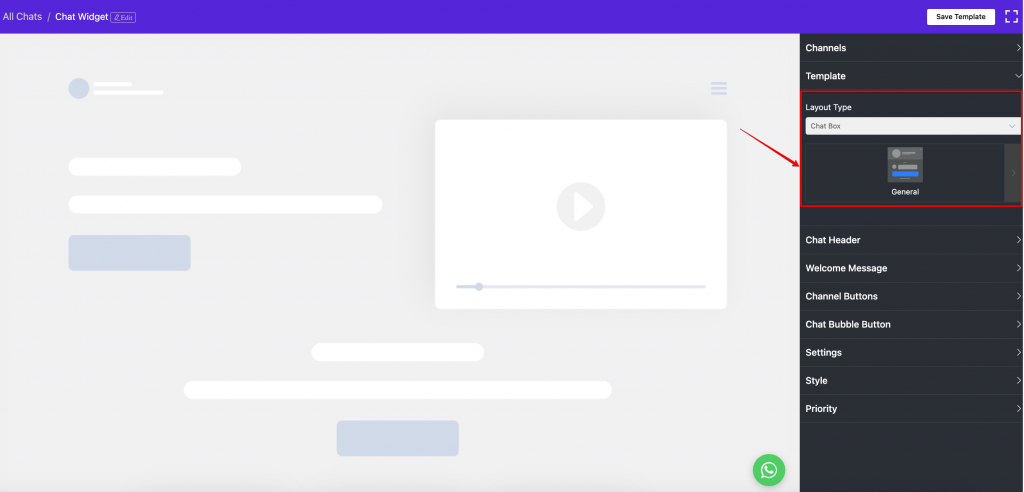
Once you click on the arrow sign, a drop-down menu will appear.
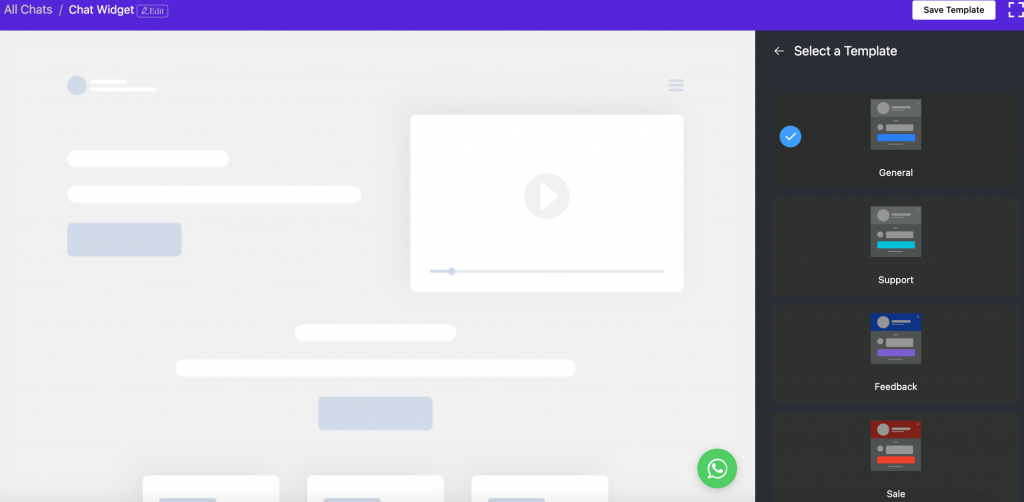
Four types of pre-built Templates are available at the moment – General, Support, Booking, and Sale. You can select any Template for your site!
For demonstration purposes, we have selected General.
Chat Header
Are you done with the templates? Now it’s time to check with the Chat Header. If you click on it, one drop-down menu will appear.
It has three editable options; Profile/Page Name, Caption, and Profile Picture/Page Logo.
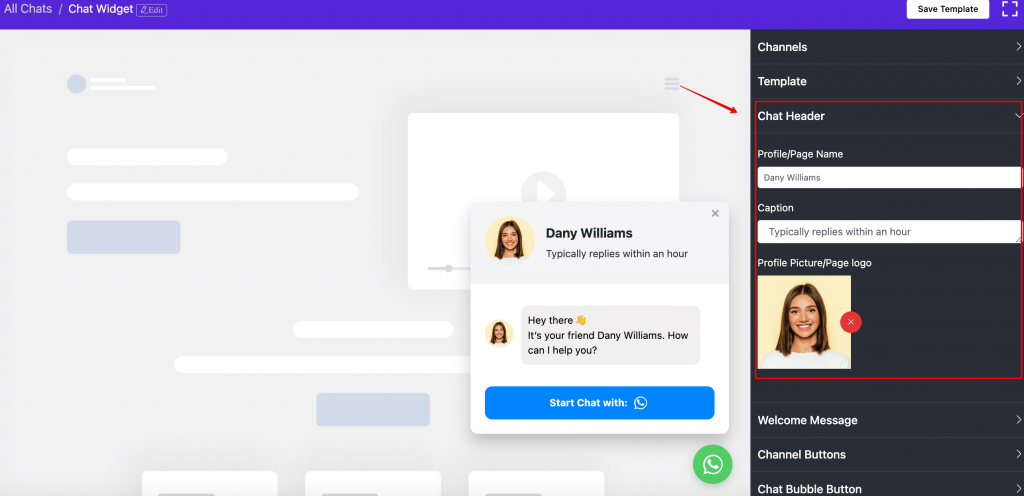
- To change the Profile/Page Name, add a name or edit/change the existing one.
- Next is the Caption. To change the Caption, for example – instead of “Typically replies within an hour,” you can add something else that suits your situation.
- After the Caption, you can also change Profile Picture/Page Logo. Every business has a distinctive image or logo. Change or add a new one!
Remember to click on Save Changes and move on to the next step.
Welcome Message
In the next section, you can adjust your Greeting Message.
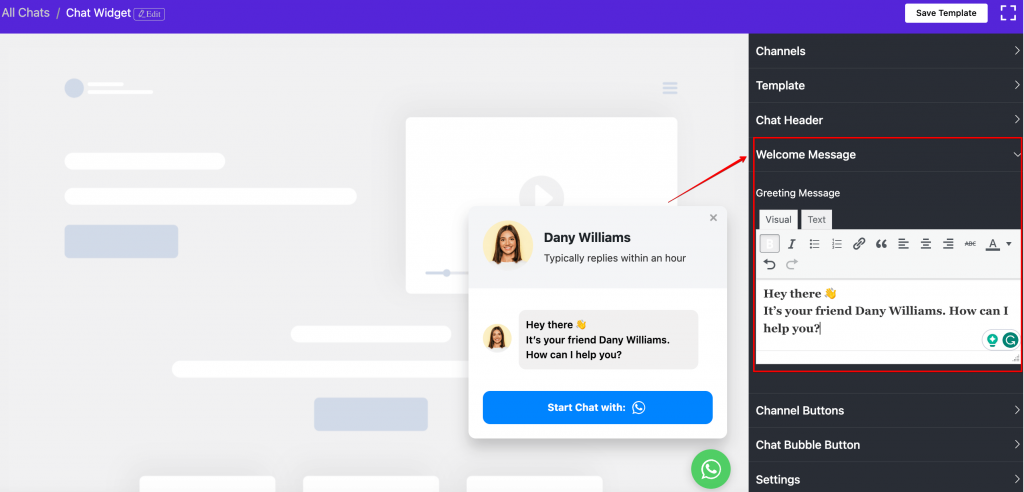
Here, you can add your customized Greeting Message. Instead of “Hi! How can we help you?” add a different text if you want.
Channel Buttons
Start Chat Button has two segments; Display Chat Icon and Chat Button Text.
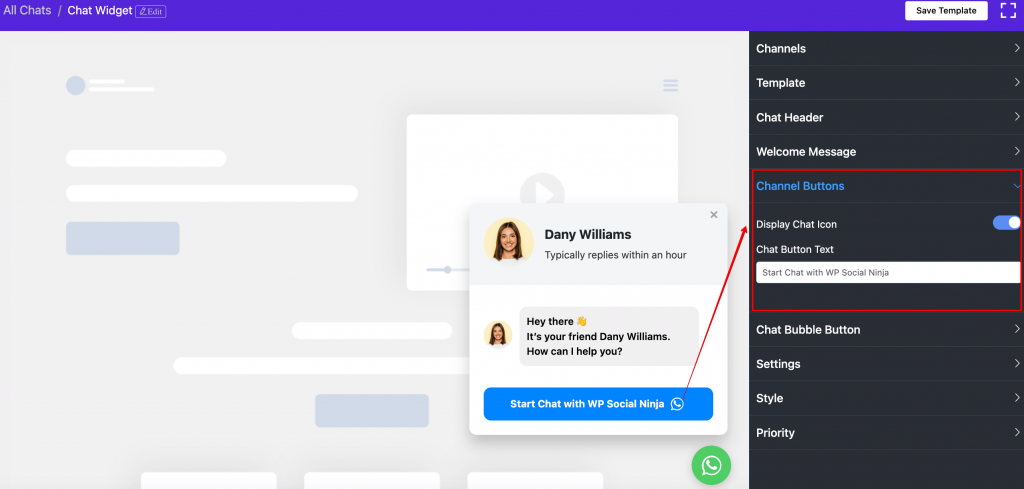
In the Display Chat Button, you can turn on/off the button. Next is the Chat Button Text. Here, you can replace the default text with a new customized text.
Chat Bubble Button
Finally, click the Chat Bubble Button, and a drop-down menu will come up.
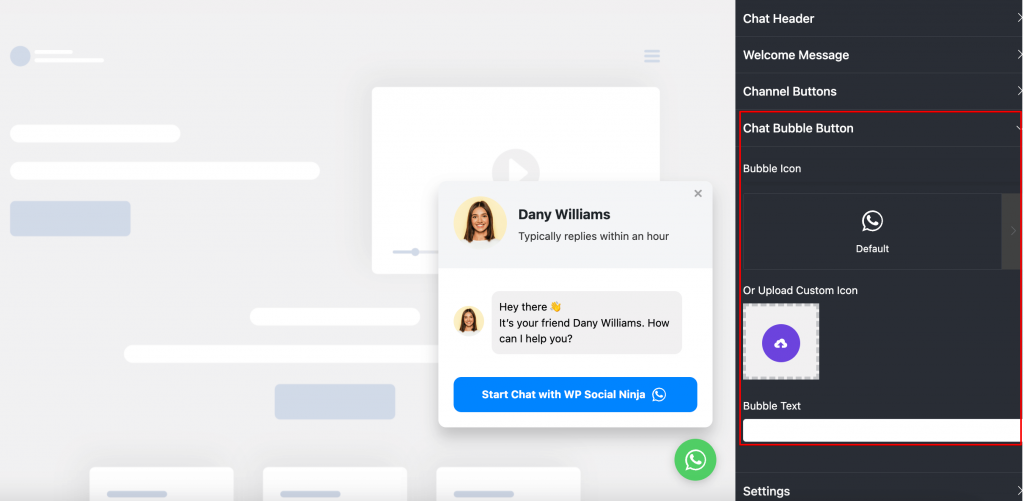
Here you can add Bubble Icons, Custom Logo, and Text, for instance, “Do You Need Any Help?”
In this section, you also have the option to change the Bubble Icon. Right now, we have 7 Bubble Icons available.
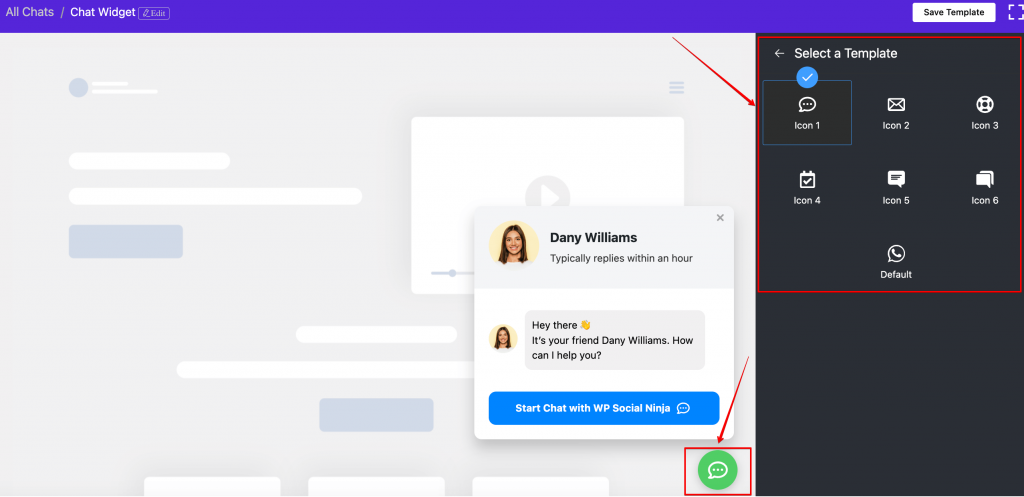
Pick the Bubble Icon and Click on the Save Template button.
Settings
WhatsApp integration with WP Social Ninja is a delightful process. Moreover, with several Settings options, you can give your site an entirely new elegant outlook.
Well, click on the Settings button, and a drop-down menu will come with multiple settings.
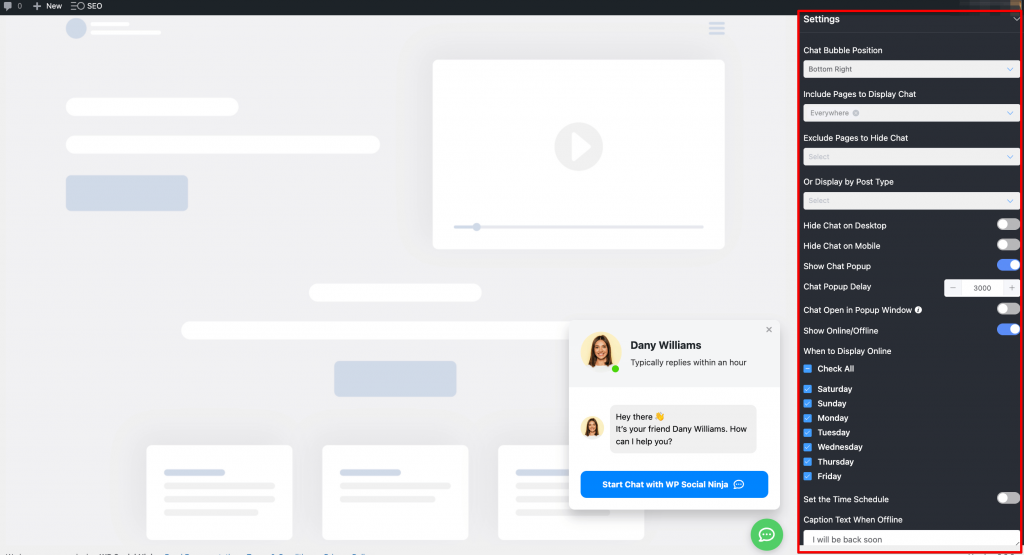
Here, we will show you how to change the settings-
Step 1: Chat Bubble Position
Chat Bubble Position has four options
From Bottom Right to Bottom Left and Top Left to Top Right. You can pick any.
To trigger the button, you can keep your chat widget Online/Offline. In this part, you can adjust two steps; When to Display Online and Set the Time Schedule.
- In When to Display Chat, you can schedule the available days you will be online. To do this, tick the Check All option. However, you can also select the specific days that are applicable.
- You can turn on the button in the Set the Time Schedule field. Here, you can set a time that includes Start Time to End Time. This setting lets the users understand the hours they will be available to communicate.
- The last one is the Caption Text When Offline. Instead of “I will be back soon,” you can add your custom text.
Style
WhatsApp integration on your website using WP Social Ninja is an effortless process. Did you know you have the freedom to decorate your website’s Style?
Scroll down and click on the Style button.
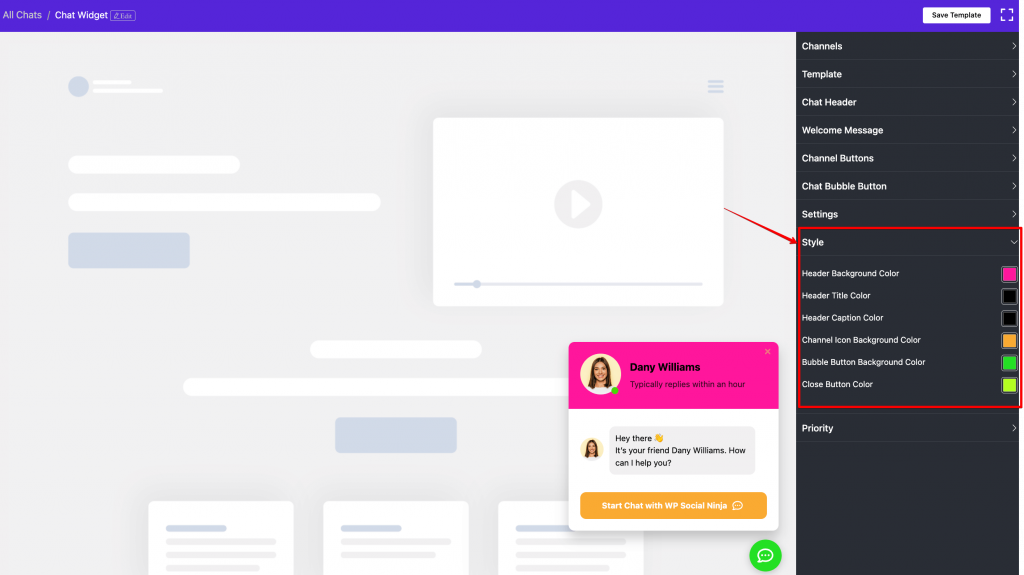
The Style has four unique settings to design your website; Header Background Color, Header Title Color, Header Caption Color, Bubble Button Background Color, and others.
- If you want to change the Header Background Color, click on the color palette, and various color options will appear. Pick any that goes with the brand.
- After Header Background Color, next is Header Title Color. We have unlimited color options in the palette; select any!
- Next, we have Header Caption Color and Button Background Color. Similar to the previous Style settings, you can change them too.
Conclusion
Communication is the base of any successful relationship. Without any doubt, WhatsApp is the best chatting platform for any business to get in touch with its users. With an easy-to-use configuration process, the WhatsApp chat widget has plenty of features for your company.
WhatsApp integration is a secure process; all the credentials are 100% safe with WP Social Ninja. It is a completely hands-on WordPress plugin that has several features. Moreover, WP Social Ninja is specially designed for consumers not to face any technical problems.
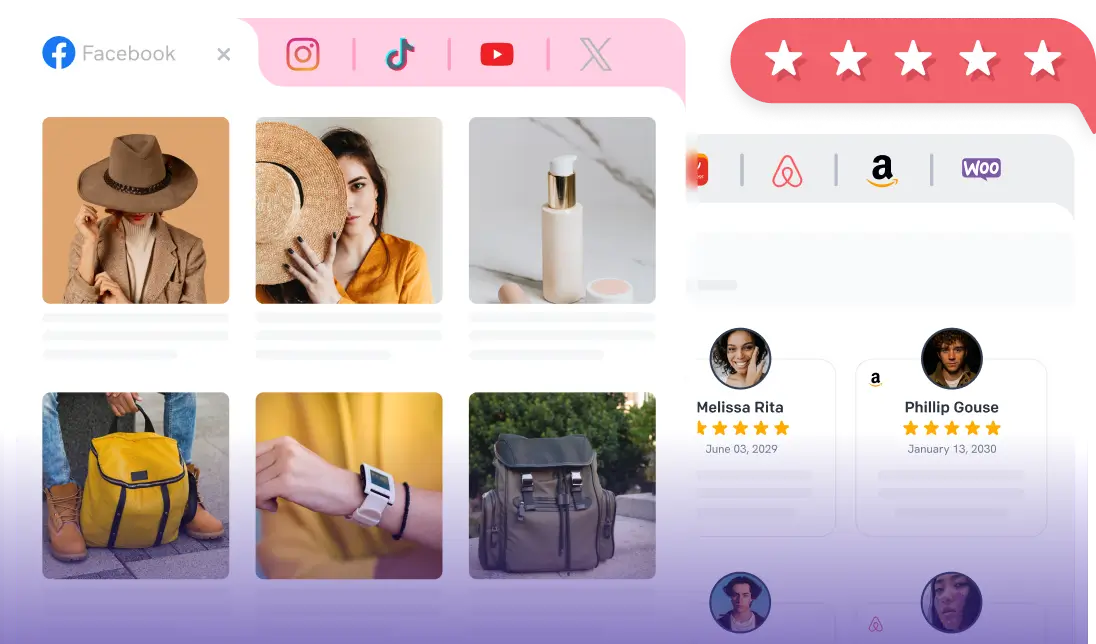
And WP Social Ninja not only has Social Chat options. It has Social Reviews and Social Feeds. So when you embed this plugin, you are getting a three-in-one service. For more information, check out our User Guidelines.
We hope you liked this post. If you found it helpful, you may also want to check out
- Social Media for Business | A Game-changing Factor
- Social Media Reviews: The Often Ignored Weapon to Build a Brand
- Successfully Manage Your Social Reviews to Skyrocket Your Business
These posts will definitely help you to boost your revenue and growth.

Subscribe To Get
Weekly Email Newsletter
Connect, Customize, and Display Social Feeds, Reviews, and Chat widgets




Leave a Reply