How to Get Instagram Access Token in 2 Minutes
Exhibiting a beautiful Instagram feed boosts your business to stand out and increases your follower count. You can display the social proof right on your WordPress website with a cross-channel promotion.
But how to embed the Instagram feed widget? To do this, you need to create an Instagram access token. Don’t panic, we are here to assist you.
What is an Instagram access token?
To embed Instagram feeds on your WordPress website, you need to use an Instagram API that requires authentication. The requests are made on behalf of the users. To do that, you need to create an Instagram access token generator.
This article will demonstrate how to get an Instagram access token in a few steps.
Why do you need to collect Instagram Access Tokens?
Access token Instagram collection sounds like a daunting task, but it’s a super simple process. Moreover, Instagram access token WordPress is a secure way to define your IG content and is protected from people who don’t have permission to use your photos.
So why do you need to collect an access token on Instagram? Sharing third-party photos on your Instagram account is not allowed. So to prove that you have permission, first and foremost, you need to collect the Instagram access token.
It’s essentially a set of characters that allows other users to access your Instagram account and share Instagram images on WordPress websites.
How to get an Instagram access token for WordPress
To create an access token for Instagram, you don’t need extra plugins. You will only need-
- A Facebook Developer Account
- An Instagram account with media
Let’s generate an Instagram access token for your WordPress websites. Ready?
Step: 1
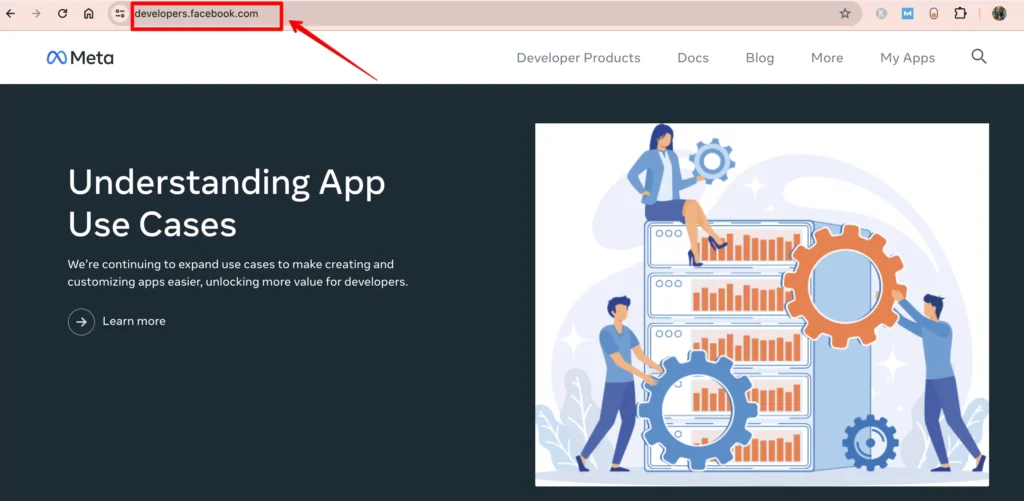
Navigate to developer.facebook.com to create an app.
Step: 2
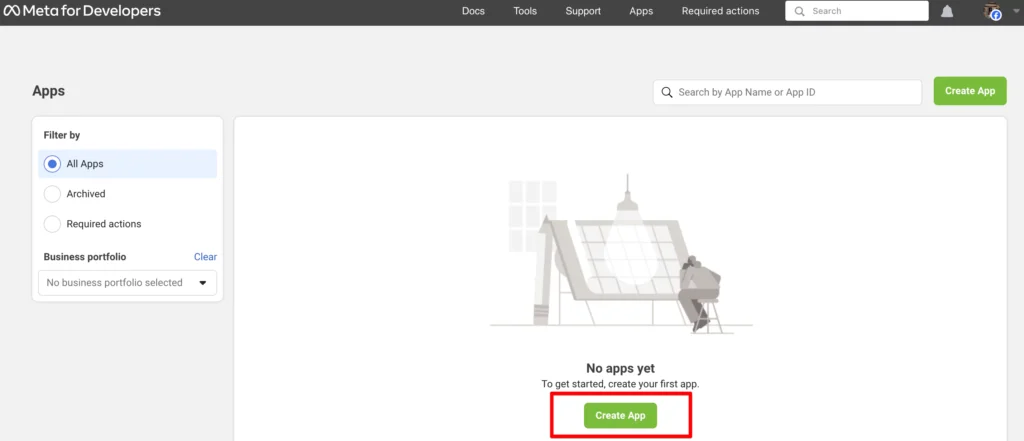
Then, click on My Apps to go further.
Step: 3
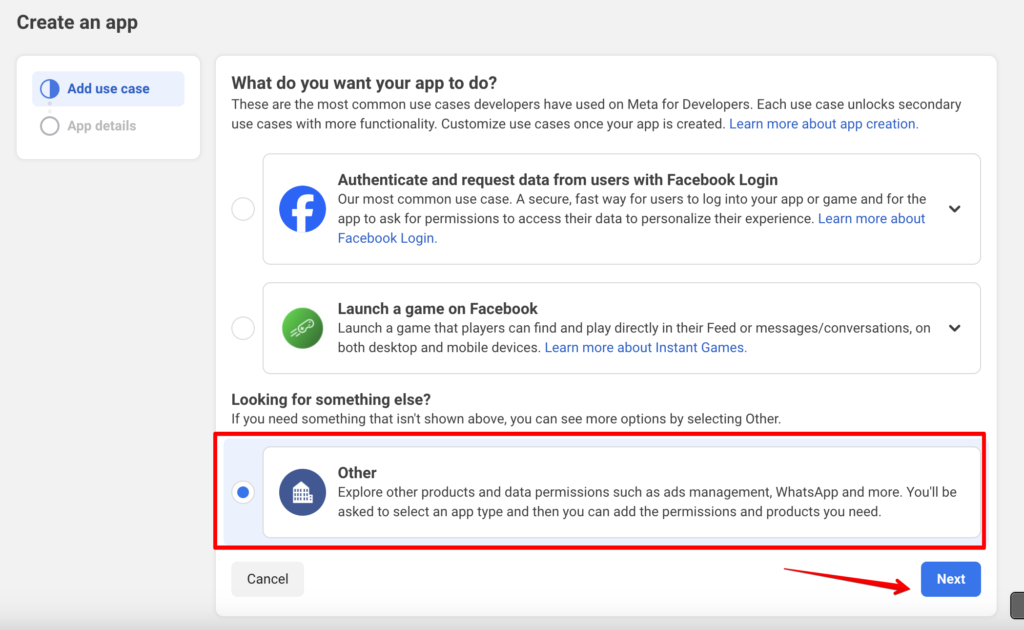
On the next page, you need to add a use case. Choose Other, and click on Next.
Step: 4
Now select an app type to go to the next steps. Choose Consumer and hit Next.
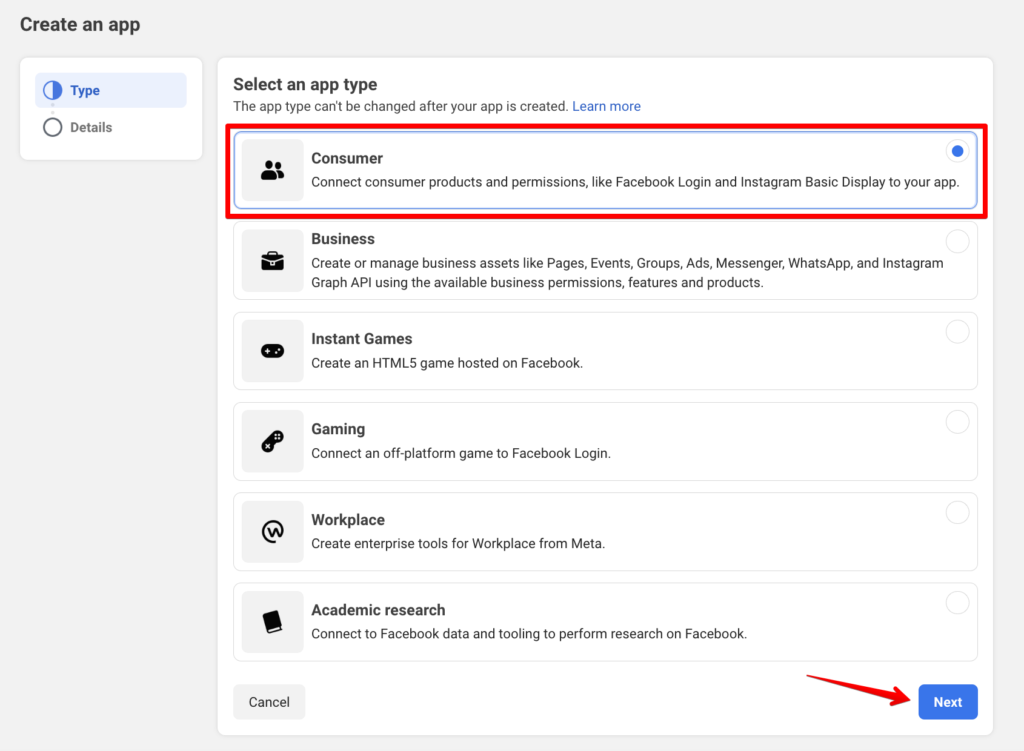
Step: 5
To create the App, provide your app name.
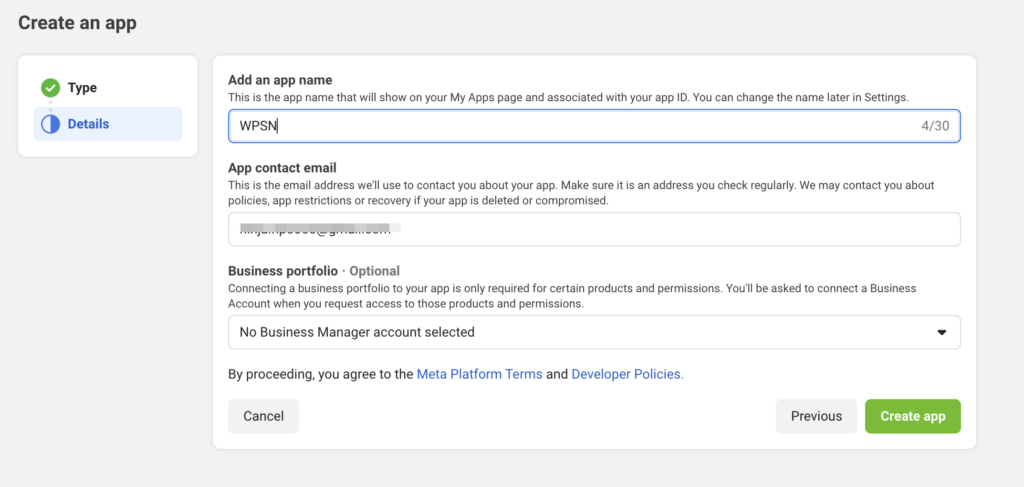
Now select the Create app button to continue.
Step: 6
Before setting up the Instagram Basic Display, click on Settings from the left side and select Basic.
Step: 7
Next, scroll down and click on the Add Platform button.
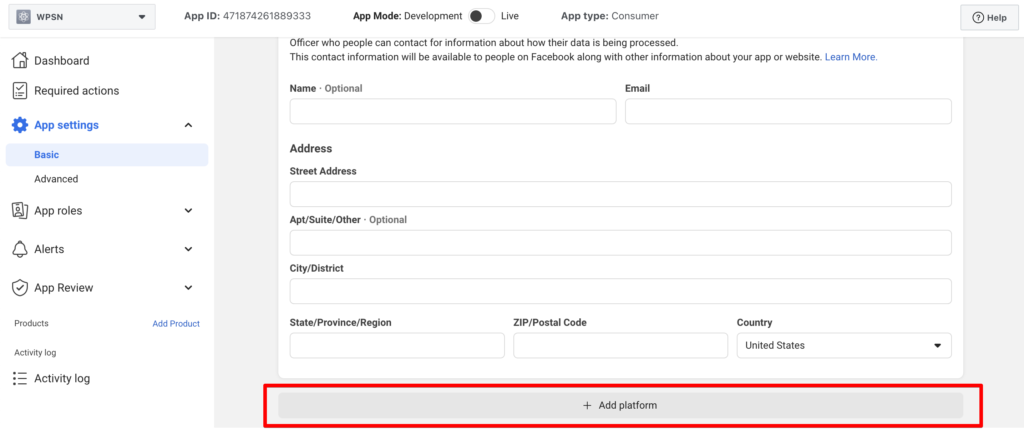
Now select the website to go to the next step.
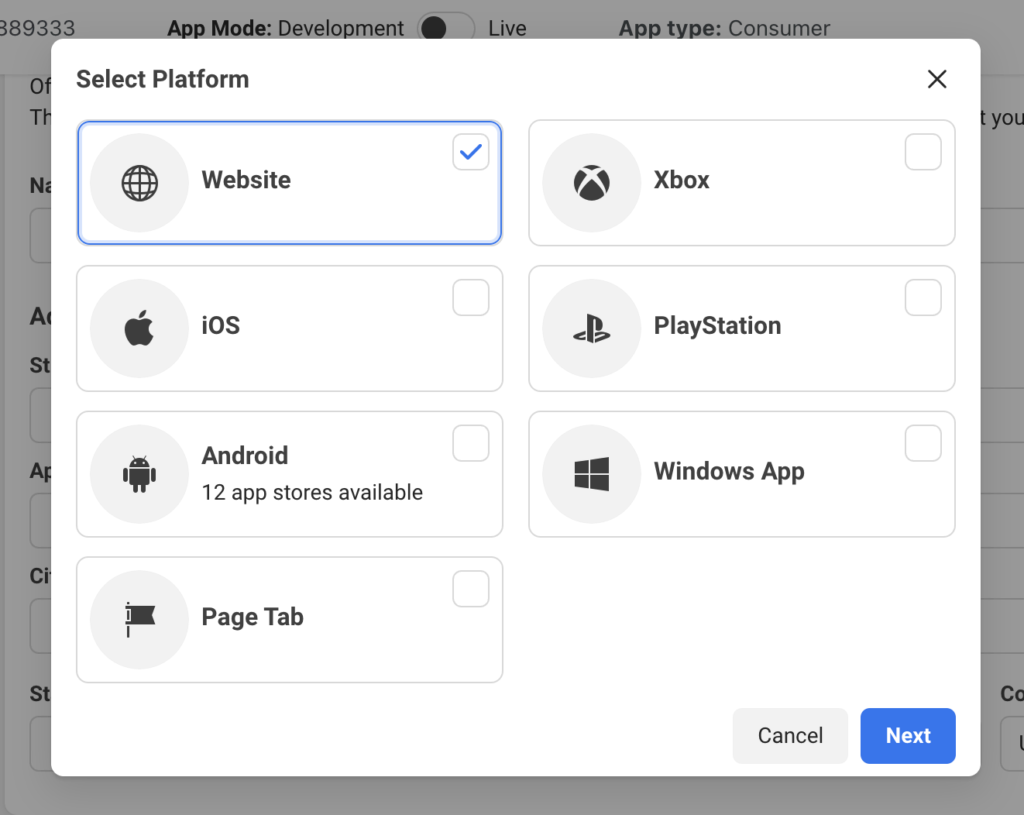
Step: 8
Click on the website; you will have to provide your website URL. For demonstration, we will provide our https://wpsocialninja.com/. You can put anything.
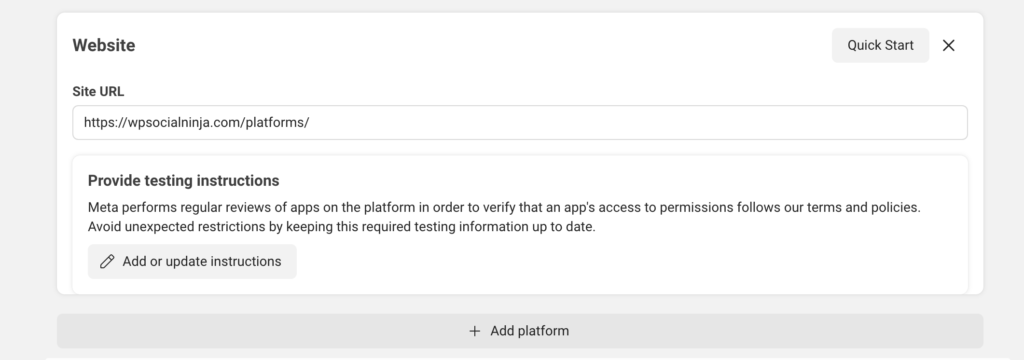
Now, click on the Save Changes button to preserve your settings.
Step: 9
Next, click on the Add Products from the left sidebar.
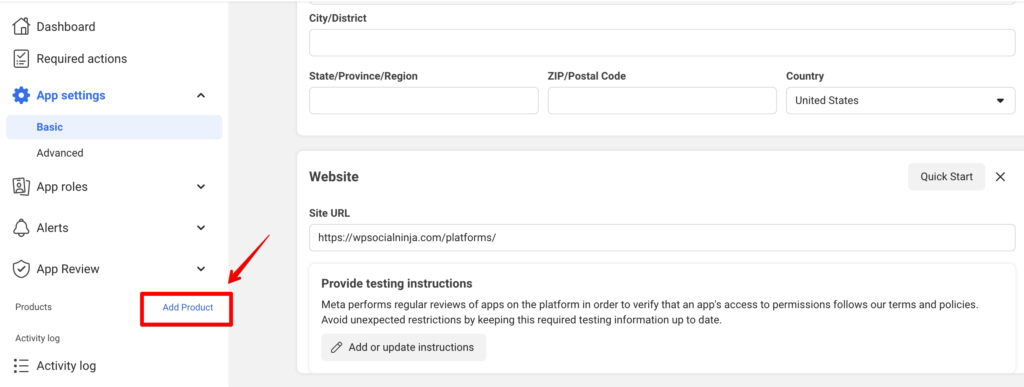
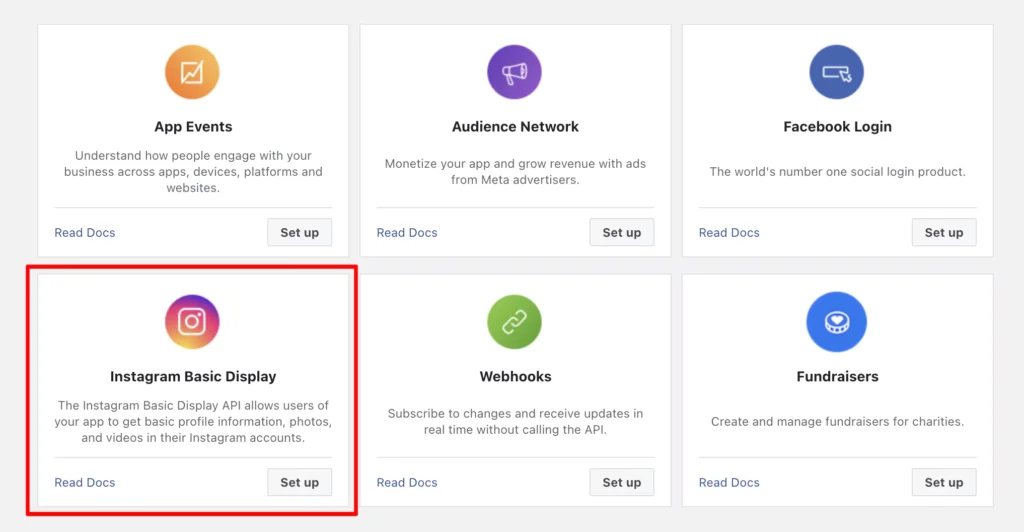
From the Products section, click the Instagram Basic Display Set Up button.
Scroll down and click on Create New App.
Next, put your Display Name. As we have already provided all the information, the Display Name is visible. Once you are done, click on the Create App button.
Step: 10
Here, insert your website URL in the input fields.
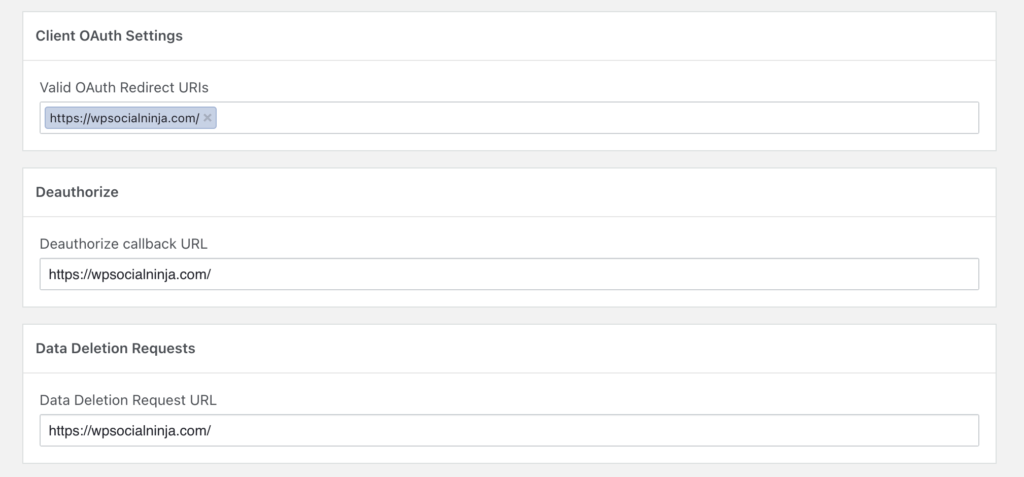
After that, click on Add People. A popup will appear, where you need to select the Instagram Tester and provide your Instagram account ID.
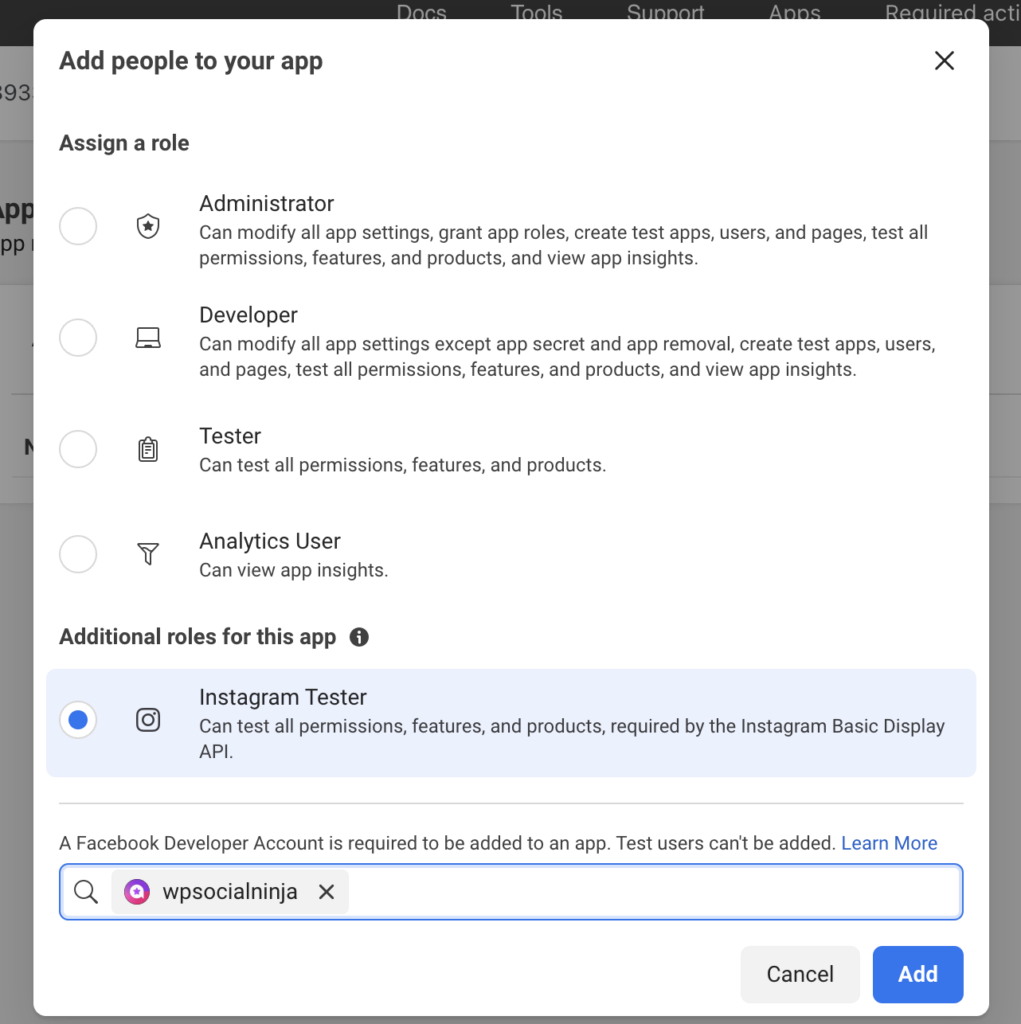
Finally, click on Add.
Step: 11
Next, you need to manage your Instagram Tester Invitations from your profile’s Apps and Websites section. If you are logged out of your Instagram profile, please log in.

This will take you to your Instagram profile Settings->Website permissions->Apps and websites->Tester Invites Section.
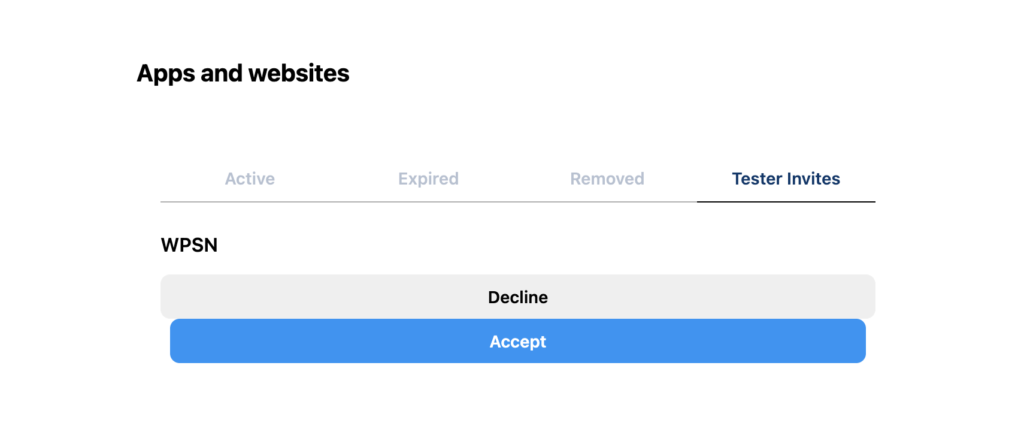
Now click on the Accept button to continue.
Step: 12
To generate the access token, go back to the developers.facebook.com. Go to Dashboard and select Products-> Instagram Basic Display-> Basic Display.
Next, scroll down, and you will see the field Generate Token. Click on the Generate Token field to retrieve the Instagram access token for WordPress.

Once you click on the Generate Token field, log in with your Instagram credentials.
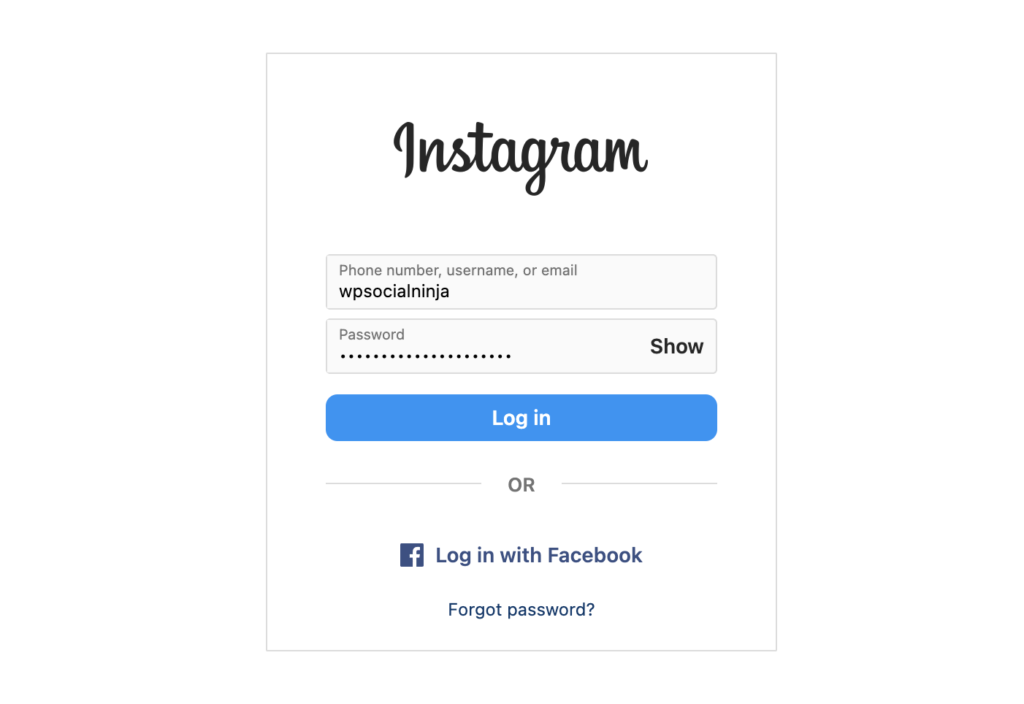
Click Continue to go to the next step.
Next, to get access to the Instagram token, click on the Authorize button.
Now tick the I understand box. If you want to copy the access token, click on the Copy button and hit Done.
And congratulations! You’ve got the Instagram access token.
Special Note: This is a step-by-step manual process of generating Instagram access tokens from developers.facebook.com. But you can generate it more easily right from the WP Social Ninja site. To know more, you can check this blog, where we have written the full process in detail: Discover the Easiest Way to Manually Connect Instagram on a Website.
Last words
This is how you can generate an Instagram access token and enhance your user engagement by showcasing your stunning Instagram videos and posts.
We hope this article was helpful. Follow us on X (Twitter), Facebook, and YouTube for more tips and tricks. Also, join our Facebook Community to reach us directly.
Win your customers’ hearts with exceptional features
Discover how WP Social Ninja can assist you in designing outstanding customer experiences.
Moreover, we have covered different topics on Instagram, Facebook, and TikTok feeds, so if you want to enhance your knowledge of this subject, don’t overlook the following blog posts.
Piya Choudhury
Being a social media enthusiast, I am passionate about real-life stories that connect with my readers. I mostly deal with social media marketing, user reviews, feeds & communication processes. And when I’m not writing, you’ll find me binge-watching on Netflix.

Subscribe To Get
Weekly Email Newsletter
Connect, Customize, and Display Social Feeds, Reviews, and Chat widgets

Trending Posts
Comments
-
it was very helpful , thanks
-
Super Helfpul, thank you!
-
Pleasure!
-
-
Thank you Piya, for the superbly detailed steps.
-
Welcome, Sunil. Glad it helped you!
-
-
Tutorial perfettamente accurato! Son riuscita a far funzionare tutto anche io <3
Grazie 🙂-
Welcome 🙂
-
-
This was very helpful. Do you have a second part of the tutorial on how to implement the access token to generate feeds on a web page? Currently, we don’t use WordPress, so we where thinking in something that can be embedded using jQuery or PHP.
-
Hello Raul, glad that you find the piece helpful.Unfortunately we don’t have the second part yet. But we will keep that in mind and prepare a content to help you. Thanks.
-
This article was VERY helpful, thank you for putting it together! I implemented it within my wordpress site. So you will copy the APP ID and the Access Token for elementkits. I set token expiry to 60 and the generation date far out in the future.
-
Glad to hear it was helpful! Let us know if you need any further assistance
-
-
-
Hi, I was wondering if there was an updated version of this page? It doesn’t appear to match what i’m seeing in 2024. Maybe i’m overlooking?
-
Yes, there have been some changes in the meta, which is why you may be experiencing differences with the steps. We are currently working on updating the blog to reflect these changes.
In the meantime, if you would like, you can generate an Instagram Access Code using WP Social Ninja. Check it out:
https://wpsocialninja.com/access-token-generator/?id=instagram-feed
-
-
Thank you for the tutorial, still working
-
Glad you’ve found it helpful 🙂
-
-
does this still work in August 2024? I get to the login window for Instagram in step 12 and it just stops. does not go further when adding the verification code sent by whatsapp.
-
Yes, it still works. There have been a few changes in the steps that we have already updated previously. Please follow the steps thoroughly, these should work accordingly. Still, it doesn’t work for you, try this out: Discover the Easiest Way to Manually Connect Instagram on Website (https://wpsocialninja.com/manually-connect-instagram).
-




Leave a Reply