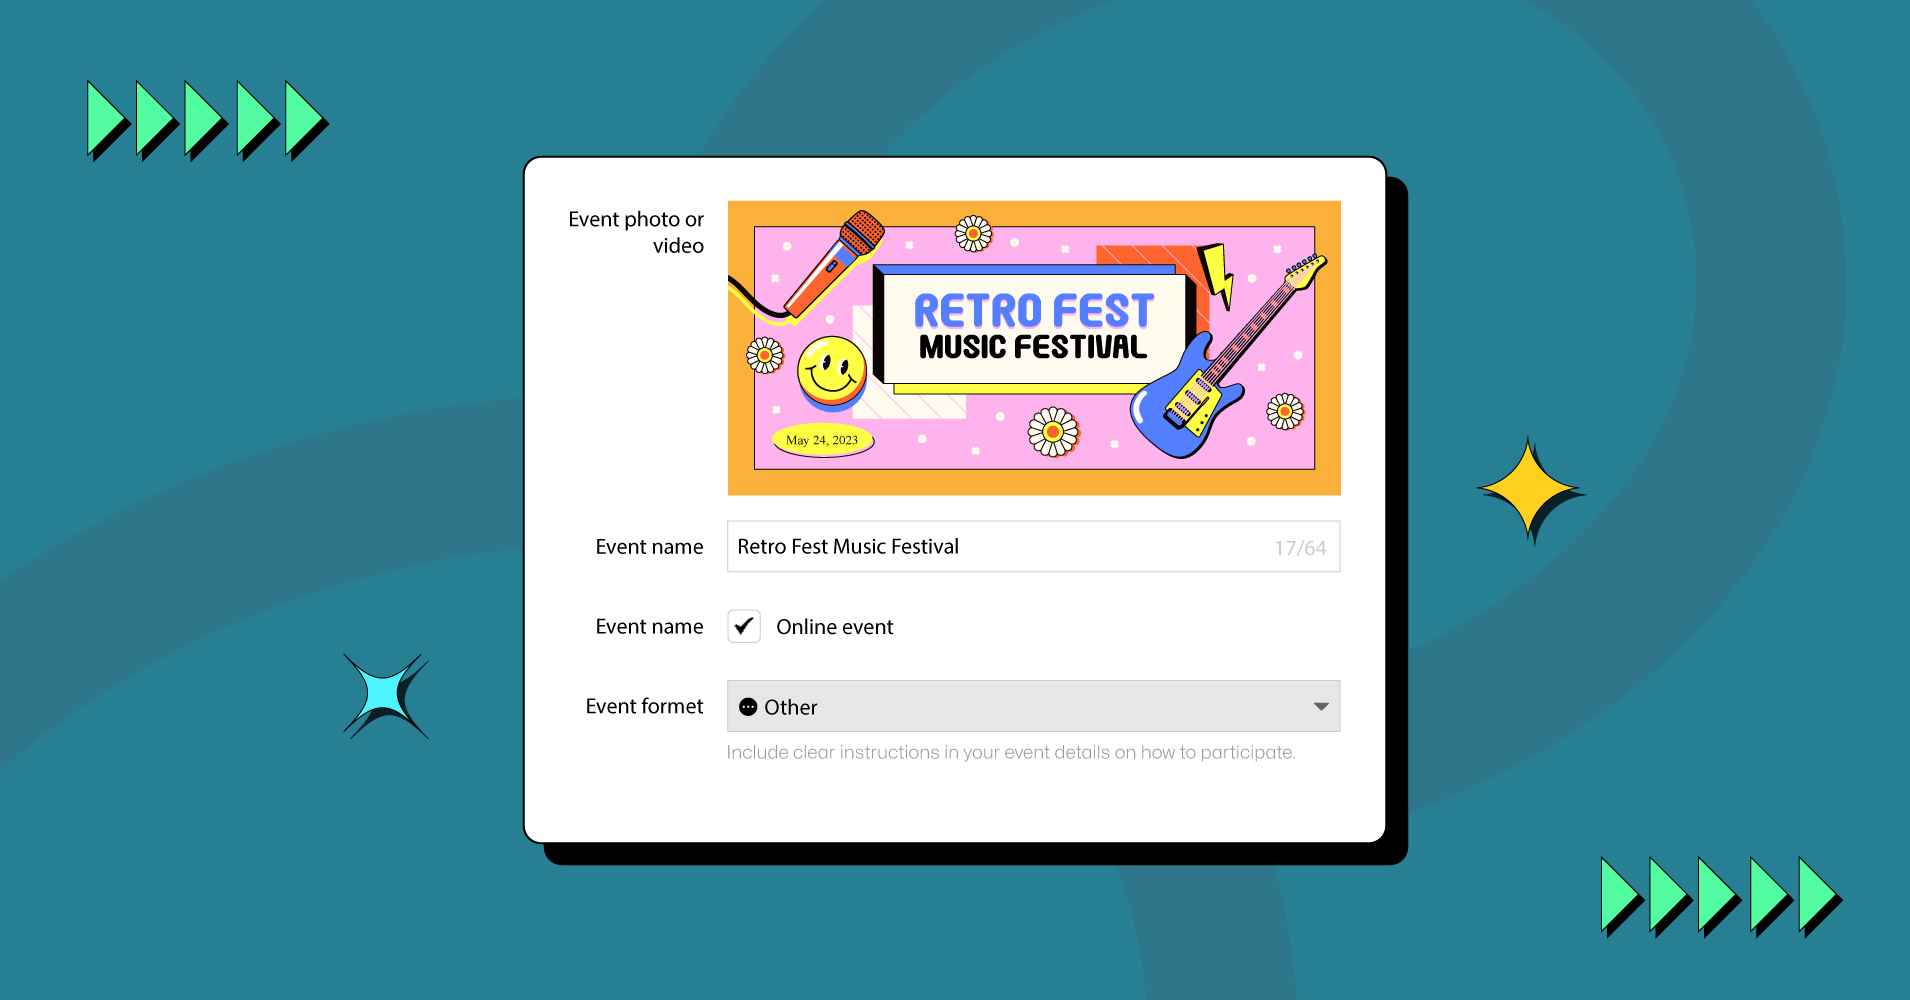
How to Create An Event on Facebook 2025 (Easy Guide)
Facebook allows you to create your own strategies and apply them with all its features and facilities. How about getting more engagement and reach through Facebook events?
However, if you’re looking for how to create an event on Facebook, you’ve got the right guide!
Fact that you cannot ignore, among all other social media platforms, Facebook alone has won 2.98 billion users worldwide. From personal use to business purposes, this social media channel has become the first choice of everyone with its incredible features.
Facebook events are one of them, and it has the popularity of engaging people in regular posts, events, ad campaigns, stories, etc. So you can choose any of these and even get the best out of them when it comes to promoting your business, products, and services.
Anyway, in this article, you can learn how to make an event on Facebook for both your personal and Facebook business page, and how to share your event with a larger audience by embedding your Facebook event on Facebook.
Let’s start then!
How do you create an event on Facebook?
So, Facebook users, creating a Facebook event isn’t rocket science or something that would be impossible to make. However, there are some criteria for creating events on Facebook.
Well, we’ve enlisted all of them; follow any of them that you need on how to create an event on the Facebook app or create an event for a Facebook business page.
Create an online event
- To create an online Facebook event, select Events from the left menu of your Feed. If you don’t find that option, find the See More option.
- You’ll find online events of different types. Choose any of them:
- Facebook Live: Choose this if your event is concluding with more than 50 guests.
- Rooms: This one is more interactive for the people in the groups. You can set up video calls with the members. Also, can accommodate up to 50 people, including hosts and co-hosts.
- External Link: You can use this if your event is off of Facebook. In this category, you can include everything that you want to inform your guests about in the event description.
- Other: For detailed information on how you want your participants to join.
After choosing the criteria, click on Next.
4. Give an event name and set the date and time.
5. In this step, choose your privacy preferences. Click on Privacy first. You will get the following options:
- Private: Your guests will be invited, but the event will remain hidden. If you want to make it available for more guests, you can toggle next to Guests Can Invite Friends. (N.B. Once you create the event, you cannot make any changes)
- Public: Choose public if you want to make it available for everyone.
- Friends: When you want the event to apply only to your Facebook friends.
- Group: On Facebook, even group has two types.
→ The Public group is for everyone.
→ The Private group is for the members of your Facebook group.
Finish the step by clicking on Next.
6. Now, add a description of the event, and click Next.
7. To complete the setting, upload a cover photo or choose an Illustration.
8. For adding a co-host, click Event Settings.
9. And finally, click Create Event.
Create a private Facebook event
You’ll need a private Facebook event only when you want an event to be visible to the people you invited. Only these limited people will be able to see your Facebook event description, posts, photos, videos, and all.
Remember: Once you create an event, you won’t be able to change the privacy setting. So decide first whether you want a public Facebook event or a private Facebook event.
In this setting, you can also choose to allow your guests to invite their friends, too, who are unknown to you, or people who don’t use Facebook or Messenger.
Here are the steps on how to create a private event on Facebook:
- Go to your Feed, find the Events option in the left menu, or from the See More.
- Click + Create new event, then select whether you want it in person or Online.
- On the left side, add your event details. Click Recurring Event if it’s a recurring event.
- At last, click Privacy to finalize your private event. Select Private.
Create an in person Facebook event
Have other thoughts on inviting Friends through Facebook events? Well, the Facebook event feature has made it even easier for you to invite your friends to any occasion or program to bring them together.
So if you’re planning to create an in-person event on Facebook, follow the steps:
- First, go to Events from your Facebook account.
- Click on the +Create option on the top left.
- Now, select the In-Person option.
- Next, set the event name, time, and date, and then tap on the next button.
- Select the location of the event, and click Next.
- Lastly, you can add additional information about the event. Add a photo and complete the settings by clicking on Create the event.
Facebook paid online events
With paid online events on Facebook, you can monetize your live online events by charging a one-time access fee that is taken when your visitors sign up online. With the help of our paid online events tool, you can organize events, charge people to attend, and advertise them to your target market, clients, and hosts all in one place.

Get exclusive social media marketing tips and tutorials in your inbox!
Let’s see how you can create paid online events on the computer.
- First, go to your Facebook business page and find Events to create your event. According to your event type, you’ll be prompted to choose Paid.
- Fill in the required information for the event, which can be the following:
- Do not include anything that might violate the Facebook advertising Standards, especially if you have ads that you want to promote.
- Make sure to mention your physical location. It will help you to let people find your online event.
- Now, choose your Price from the given drop-down options. You have to choose one price for one event. Be sure about choosing the price, because once you publish the event, you won’t be able to change the price.
- This step is optional. You will get an option to choose a co-host. If you want to add co-hosts, they can add an event to their calendar and promote the event to their Facebook page followers.
- Finally, complete the creation event process by giving the additional options of post promotions, messaging, and list visibility.
Once you’re done, click on Create Event to finish setting up your paid online event.
How to create events with WP Social Ninja
Above, you got to know how to create events on Facebook. But have you ever thought about bringing those events to your website?
Well, that’s not a big deal if you get the perfect guideline. With WP Social Ninja, you can easily fetch your Facebook events and display them on your website. Like the way you embed social media feeds from your social media handles for your business, you can embed Facebook events too!
Follow the steps, showcase your Facebook events to a larger audience, and get the most engagement from your customers.
Configuration
To begin with, you need to configure your Facebook account with WP Social Ninja. First, install WP Social Ninja on your WordPress website, and then go to your dashboard to take further steps.
You can connect your account with any of the given credentials in the configuration part.
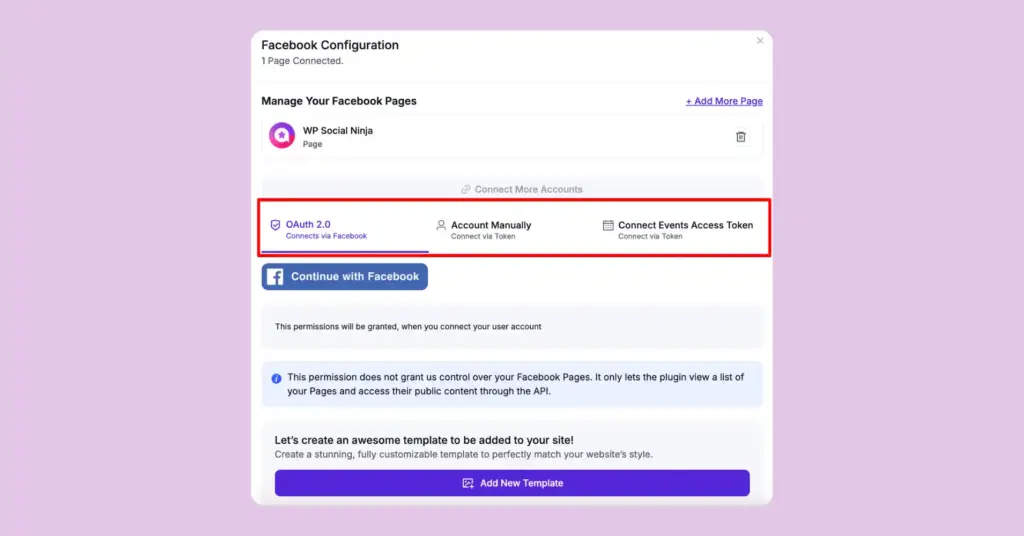
As you’re bringing Facebook events, select the Connect Events Access Token option. This will require you to take a few more steps to complete the configuration process.
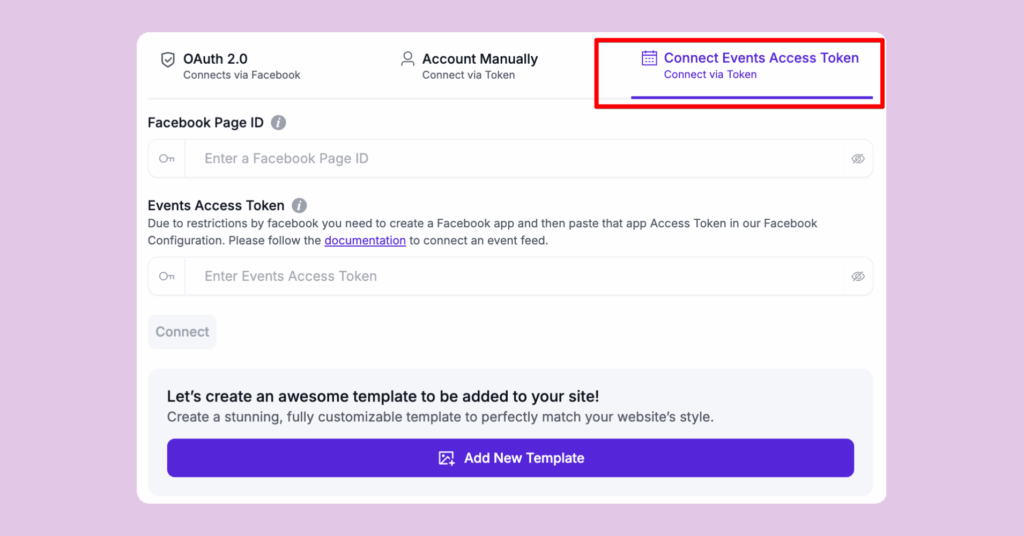
After choosing the credential type, the following box will appear on your screen. Fill in the boxes with the required credentials. Check out the documentation for completing the process.
Setting
So, when you’re done with the configuration part, it will take you to the settings panel.
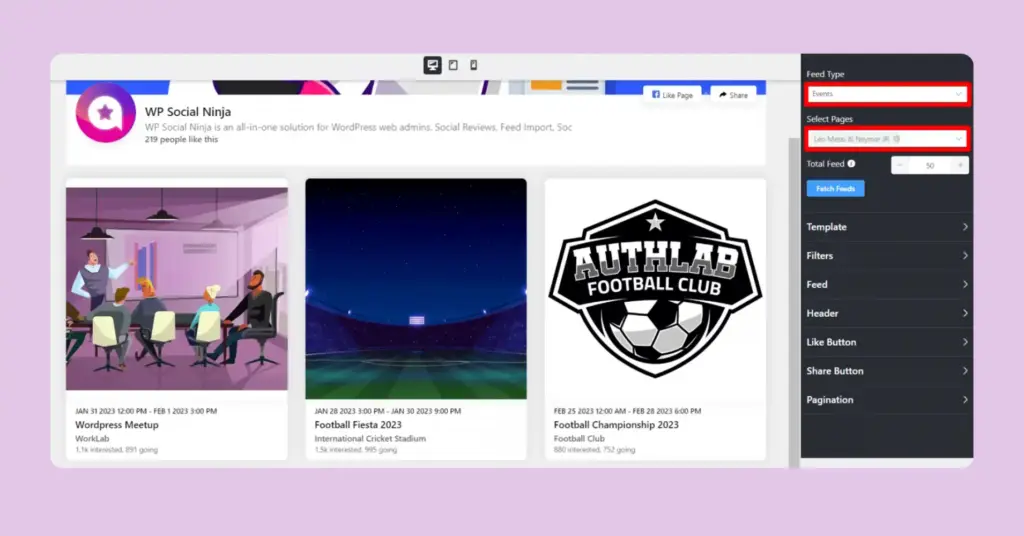
Here you will get a variety of customizing options to customize your Facebook events feed template. You can also style your template as you want to beautify your feed preview. And when you’re done, click on Save, and copy the shortcode.
Place the shortcode where you want to display the event page.
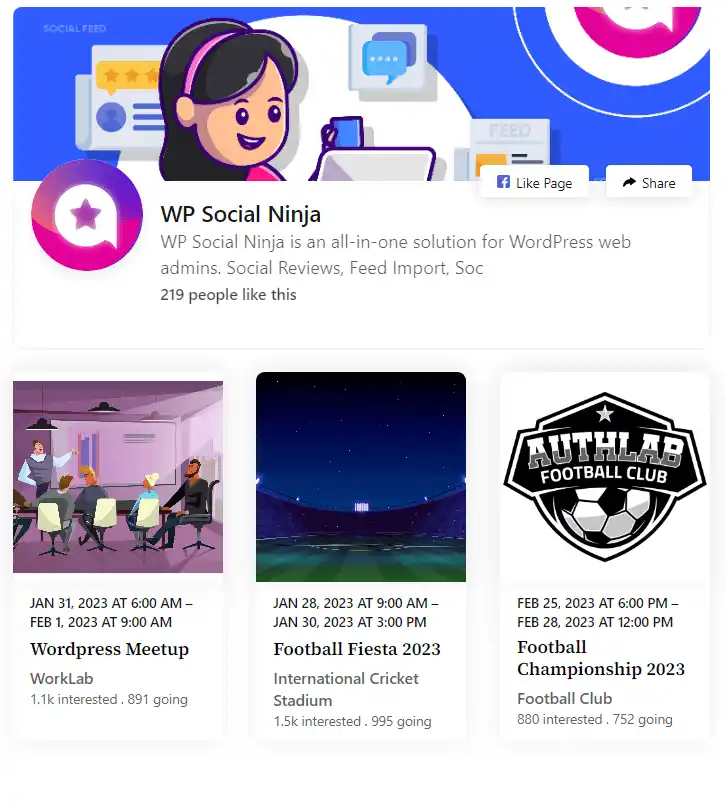
And that’s all! This is how you can embed Facebook events on your WordPress website.
Sum up
Creating a Facebook event isn’t that complicated, and when it comes to promoting your business and services through the events, you’re one step ahead of others. Because you’ve not limited the Facebook events on the Facebook for business page, also you’re sharing them through your website.
Win your customers’ hearts with exceptional features
Discover how WP Social Ninja can assist you in designing outstanding customer experiences.
So, how was your experience with creating Facebook events and promoting them to your audiences? Let us know what we miss and what you have learned!
FAQ
How to create an event on a Facebook group?
Step 1: Go to the Groups option from your menu bar, then select your group. If you don’t see Groups, tap See more.
Step 2: Tap on Write something… and then click on the Create event.
Step 3: Fill in the box with your detailed information about the event.
Step 4: You can invite all members of your group, select Invite all members of [group name]. If it’s your private group, you can only invite your friends to your group.
Step 5: Click Save event draft, and post your event.
How to create an event on Facebook on an iPhone?
Step 1: Go to the More tab in the bottom navigation of your Facebook app.
Step 2: Tap the dropdown arrow next to the Apps section to expand all options.
Step 3: Click on the Events from the Apps list.
Step 4: In the upper corner, find the + symbol and click on it.
Step 5: Finally, add detailed information about your event. Then finish it by clicking on the Done button in the upper right-hand corner.
How do I control who sees or joins my Facebook event?
Facebook has some privacy setting options; you can choose any of them while creating a Facebook event:
- Private: Choose this if you want to make it visible to the only people who are invited.
- Public: If you select this option, your event will be open/visible to everyone.
- Friends: This setting will only be for your Facebook friends.
- Group: You may want to have groups for individual members and Facebook friends. This option is for only those specific groups.
How do I cancel or delete a Facebook event?
- Go to the Events section first, either from the left menu of your feed or from the See More section.
- Now, visit your event page
- Find the three-dot from the event page and select Cancel Event or Delete Event.
To save it, click Confirm.
Hridi Paul
Hridi here, a curious mind navigating the exciting world of digital marketing with 3-years of experience in content writing, copywriting, and email marketing. I love exploring the ever-evolving world of marketing and finding creative ways to connect with audiences. When I’m off the clock, you’ll often find me enjoying music or seeking serenity in nature.

Subscribe To Get
Weekly Email Newsletter
Connect, Customize, and Display Social Feeds, Reviews, and Chat widgets




Leave a Reply