

How to Integrate Fluent Forms with WP Social Ninja


Have you ever thought of adding reviews with Fluent Forms and also a chat widget at the same time on your WordPress Website?
Furthermore, you must be aware of why you need this to add value to your brand. Because, while running a business, along with thinking about your profit, the customer’s convenience of using your product is equally important.
However, doing both isn’t a big deal when you’re in the right place. WP Social Ninja, as usual, provides you with the best social media solution; it obviously won’t let you down this time either.
In this article, you’ll see how you can embed reviews with Fluent Forms and display its chat widget by integrating WP Social Ninja.
So, without any other thoughts, let’s see what it says;
Why your website needs Fluent Forms?
First and foremost, when you are willing to reach your customers, you will need to show some positive reviews before you get the same from them. Here is the fact that customers today claim word-of-mouth and reviews greatly impact whether or not they buy from a company.
Yes, you heard that right! People also utilize the internet to search for businesses or go through their social media profiles to read feedback from other users.
86% of people read online reviews before they buy any product. So clearly, you can see the number indicates a larger part of the community.
Moreover, nothing is better than making your customers believe in you and giving them a better experience. This is the key to making your website visitors potential customers at the top of the marketplace.
Benefits of using social media tools for adding reviews
Fluent Forms, however, is here to make this job easy for you. It’s a form builder plugin for WordPress that’s easy to use, even for beginners. Anyone can make a form by tweaking around in the WordPress dashboard, as it comes with all the essential tools. You only need a few minutes to develop a personalized contact form or a basic review form.
But that’s not all. It will be easier for you and your customer to have a chat widget on your website. We will see how you implement the best strategy to do this well. But before that, at a glance, the benefits of adding social reviews and the Chat Widget–
- Attracts more visitors
- Gives a better experience
- Chance to provide exciting offers
- Increases conversion rate
- Fast Communication
- 24/7 support
And many more; Undoubtedly, the best outcome you’ll see for yourself when you start using it.
How to add reviews with Fluent Forms on website?
Collecting users’ reviews and then adding them to the website is not complicated if you know how to do it with the WP Social Ninja plugin.
However, we will definitely discuss the process of adding reviews to the website. We hope you have the pro version of Fluent Forms in your WordPress dashboard.
Now, let’s see how the steps work.
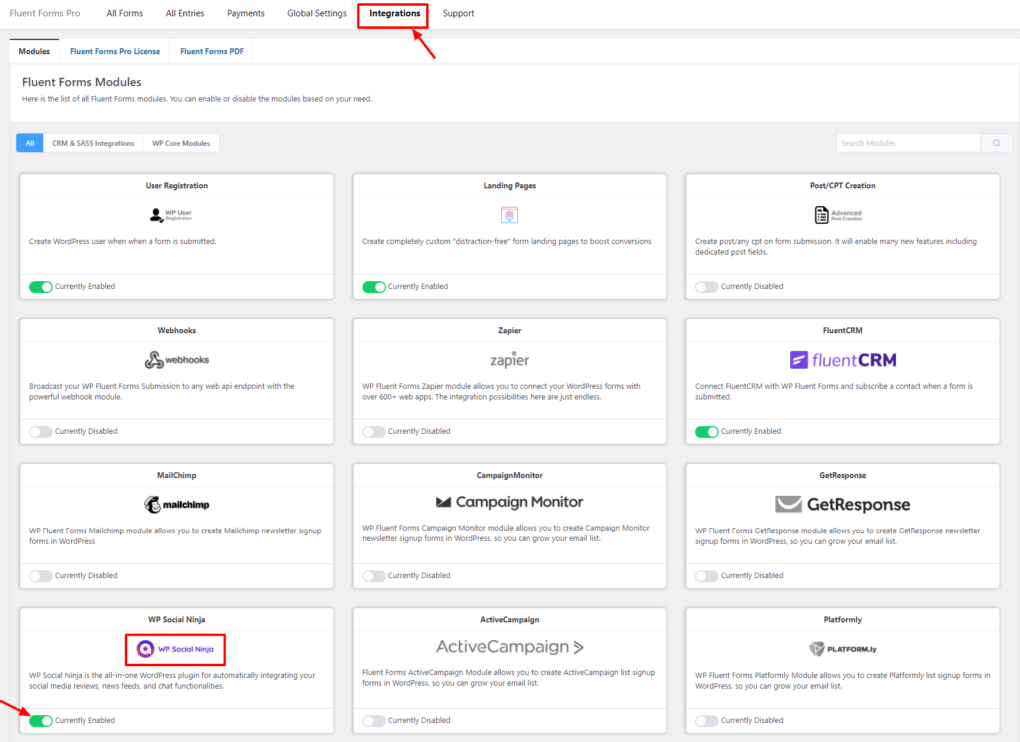
Fluent Forms Integration
To begin with, you need to go to the Fluent Forms dashboard. Go to Integration, Active integration with WP Social Ninja just by enabling the button.
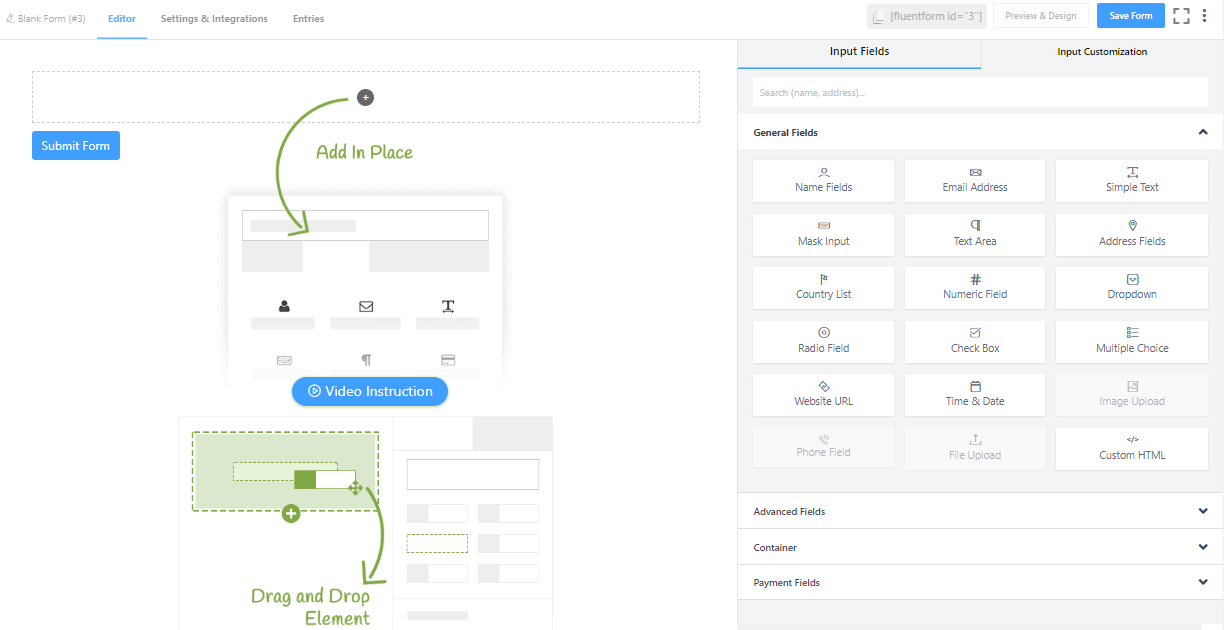
Afterward, go to the Fluent Forms Dashboard and make a form first. Click on Add a New Form. We will make a Review Form. You need to have the premium version to create review forms.
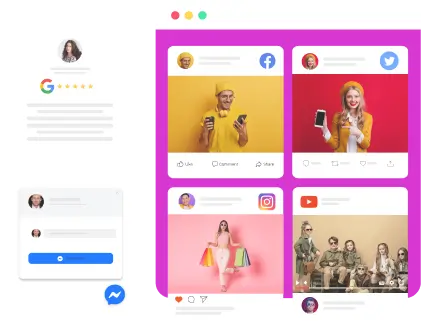
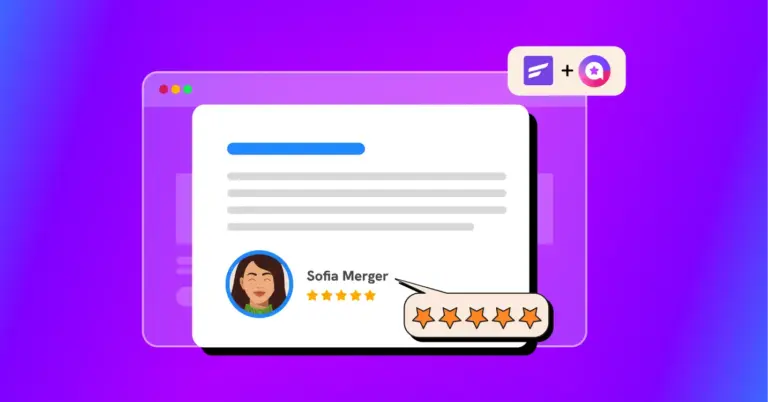
Win your customers’ hearts with exceptional features
Discover how WP Social Ninja can assist you in designing outstanding customer experiences.
Let’s see an example by creating a review form that includes the user Name, Email address, Review Title, Review Text, and Rating Field.
Make sure your dashboard has Fluent Forms Pro Version if you want to add the Rating option.
Now that you’re on the editor’s panel page, you’ll get the option Setting & Integration, click on that. To step ahead, choose Marketing & CRM Integration from the left side of the editor panel.
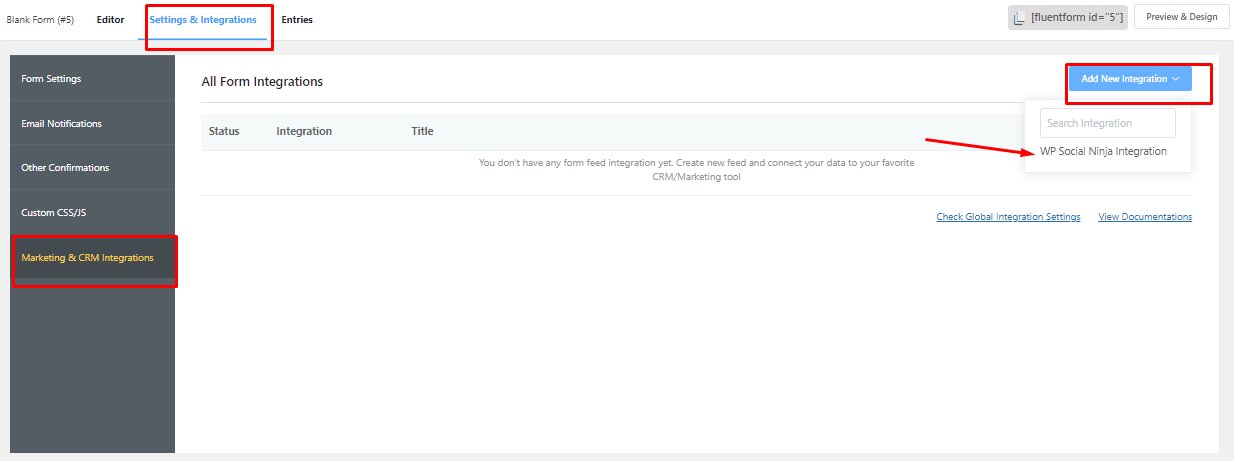
Now, as we are going to integrate Fluent Forms with WP Social Ninja, let’s select WP Social Ninja from the down of Add New Integration. This will take you to the new Integration feed page.

At this time, make a WP Social Ninja feed from here. Give an appropriate name for your feed. And fill the boxes with the Input options.

At the last part of the form, you have Conditional Logic; Tick on that if you want to get more features, like getting notifications.
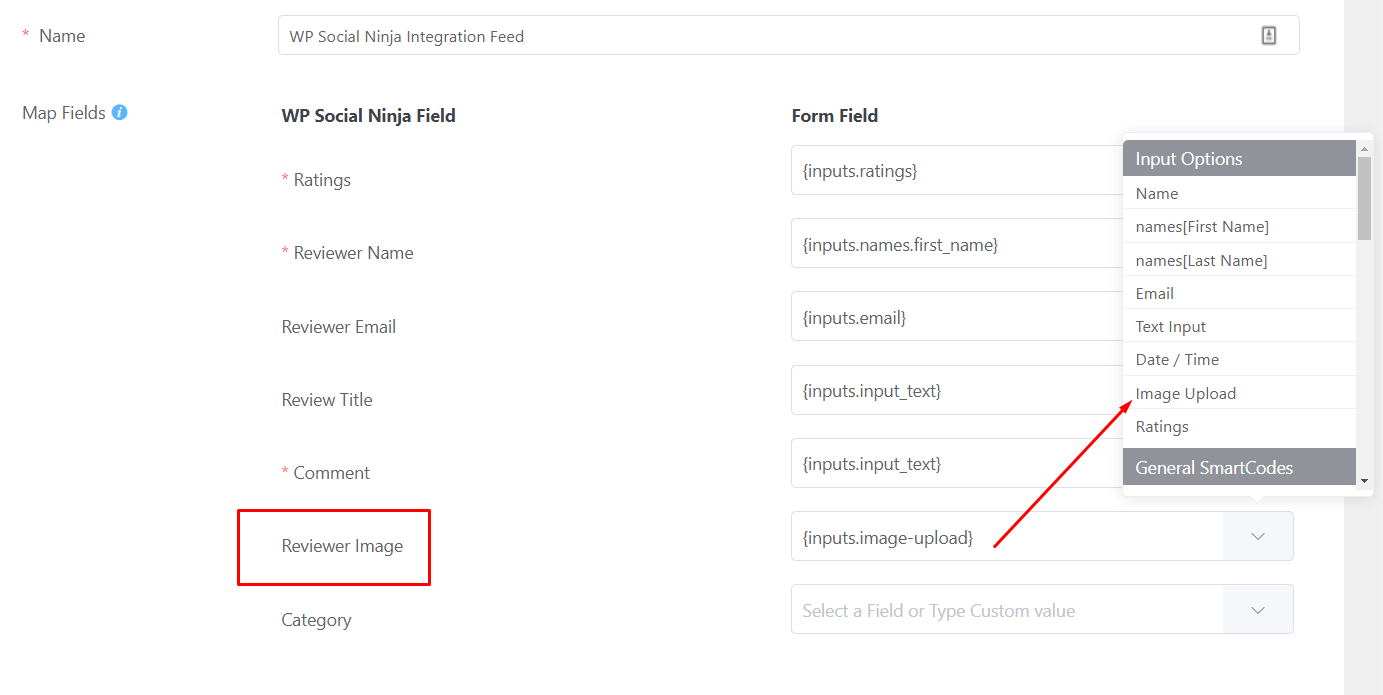
Furthermore, you have the Reviewer Image option; You can display the image from here if you want to.
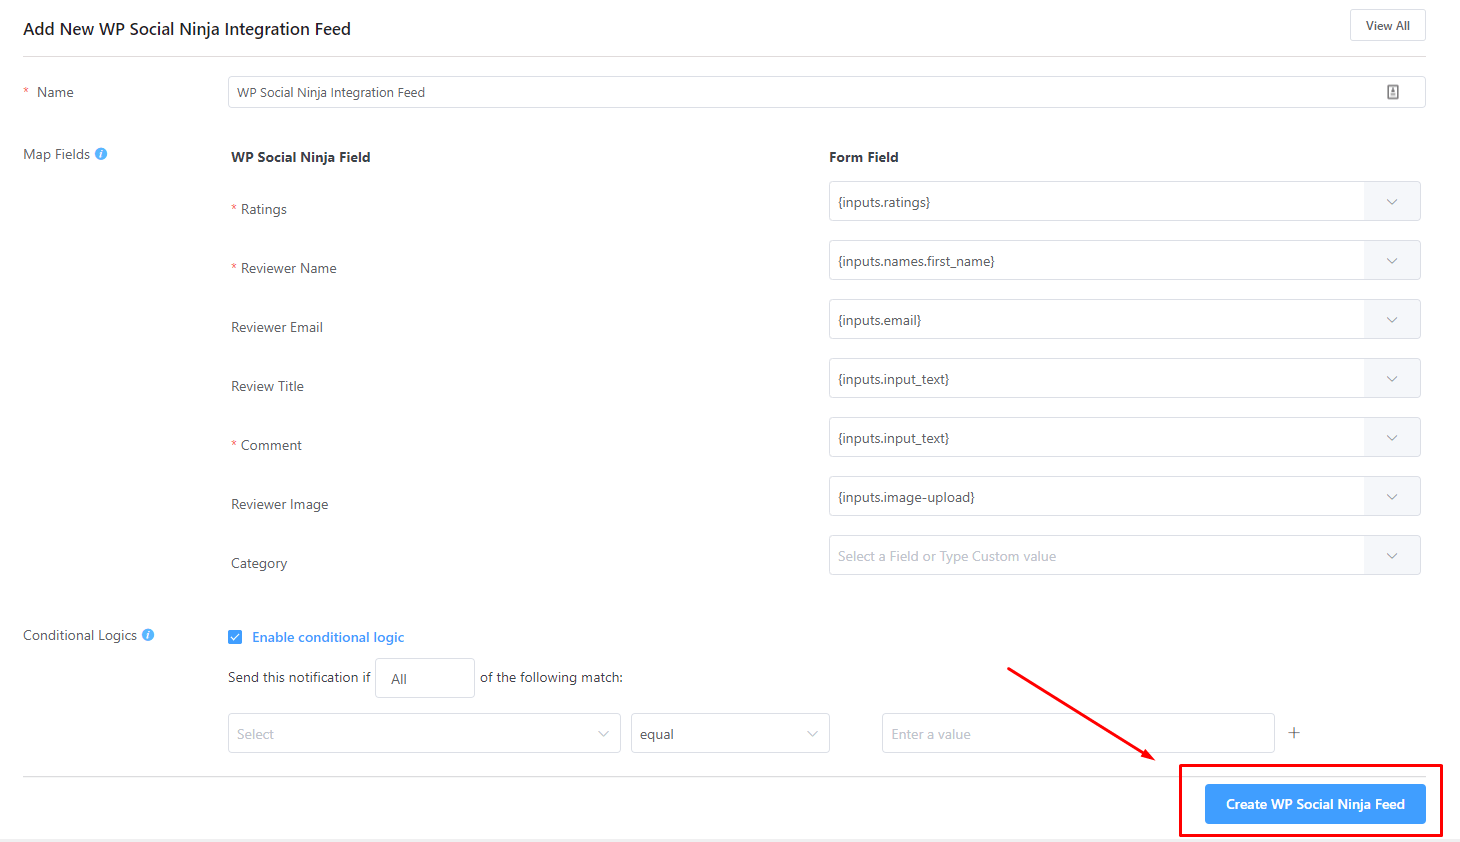
Once you’re done with creating the form, save it with the Create WP Social Ninja feed button. Now copy the shortcode and paste it to any new page/posts where you want to fill up your form.

Fluent Forms review template
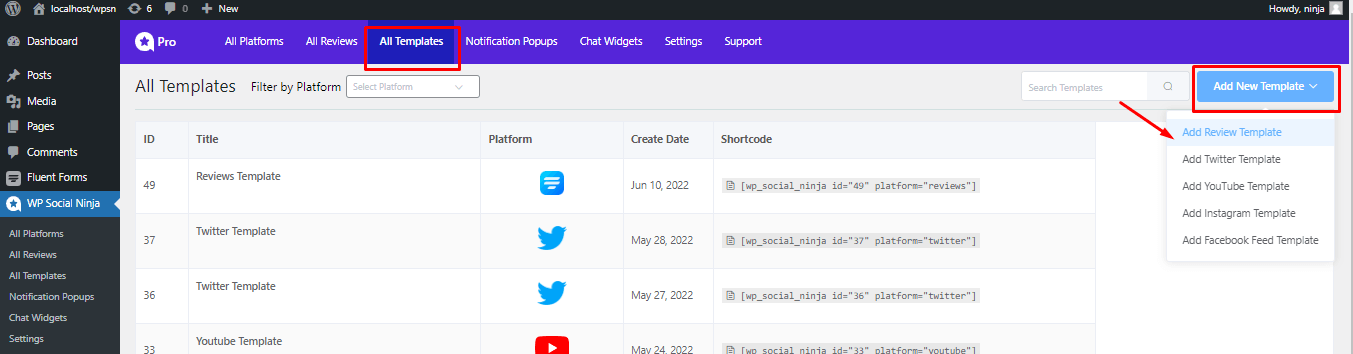
This is the next and last step, to set up your review template in WP Social Ninja and exhibit it on your website. So what you have to do first is go to All Templates in the WP Social Ninja dashboard.
Here you can see Add New Template; Choose Add Review Template.
After that, you’ll be in the Template editor’s panel. Then select Source; Here, under the Platform section, choose Fluent Forms.
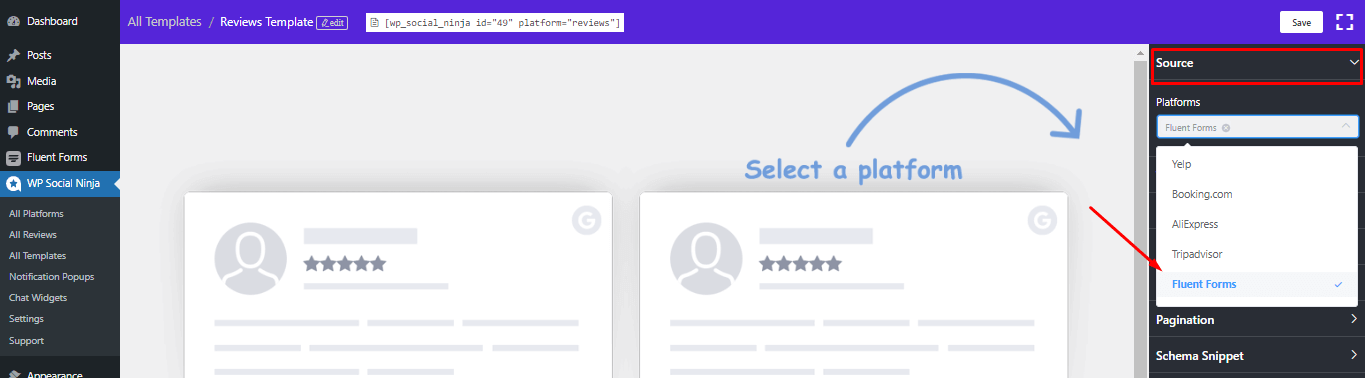
After you’ve chosen the platform, click on Save to save your template. Now you can see the reviews are automatically added to your website that have been created by the review form.
And that’s all about displaying the online reviews on your website and creating more value for your visitors.
How to add the Fluent Forms Chat Widget to a website?
As of now, you’ve got to know how to integrate Fluent Forms with WP Social Ninja and add reviews to the website; Don’t you want to add its chat widget to website like other social media WhatsApp, Messenger, etc.?

Get exclusive social media marketing tips and tutorials in your inbox!
With WP Social Ninja, you can do that too! Let’s add the Fluent Forms Chat Widget to the website.
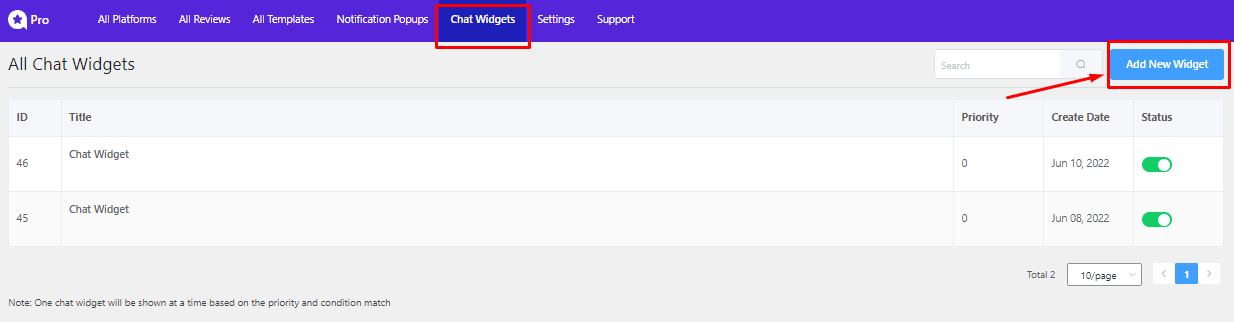
Add New Chat Widget
So, firstly, from the WP Social Ninja Dashboard, go to Chat Widget, and choose Add New Widget.
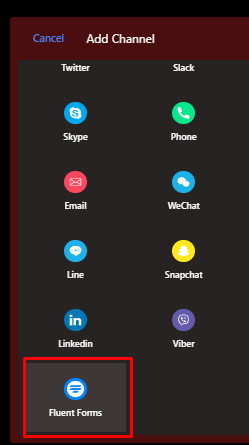
This option lets you select the chat widget. Select Fluent Forms from the Add Channel board.
Well, it’s time to connect Fluent Forms with the WP Social Widget. To do that, you need to paste the shortcode of the form into the box.
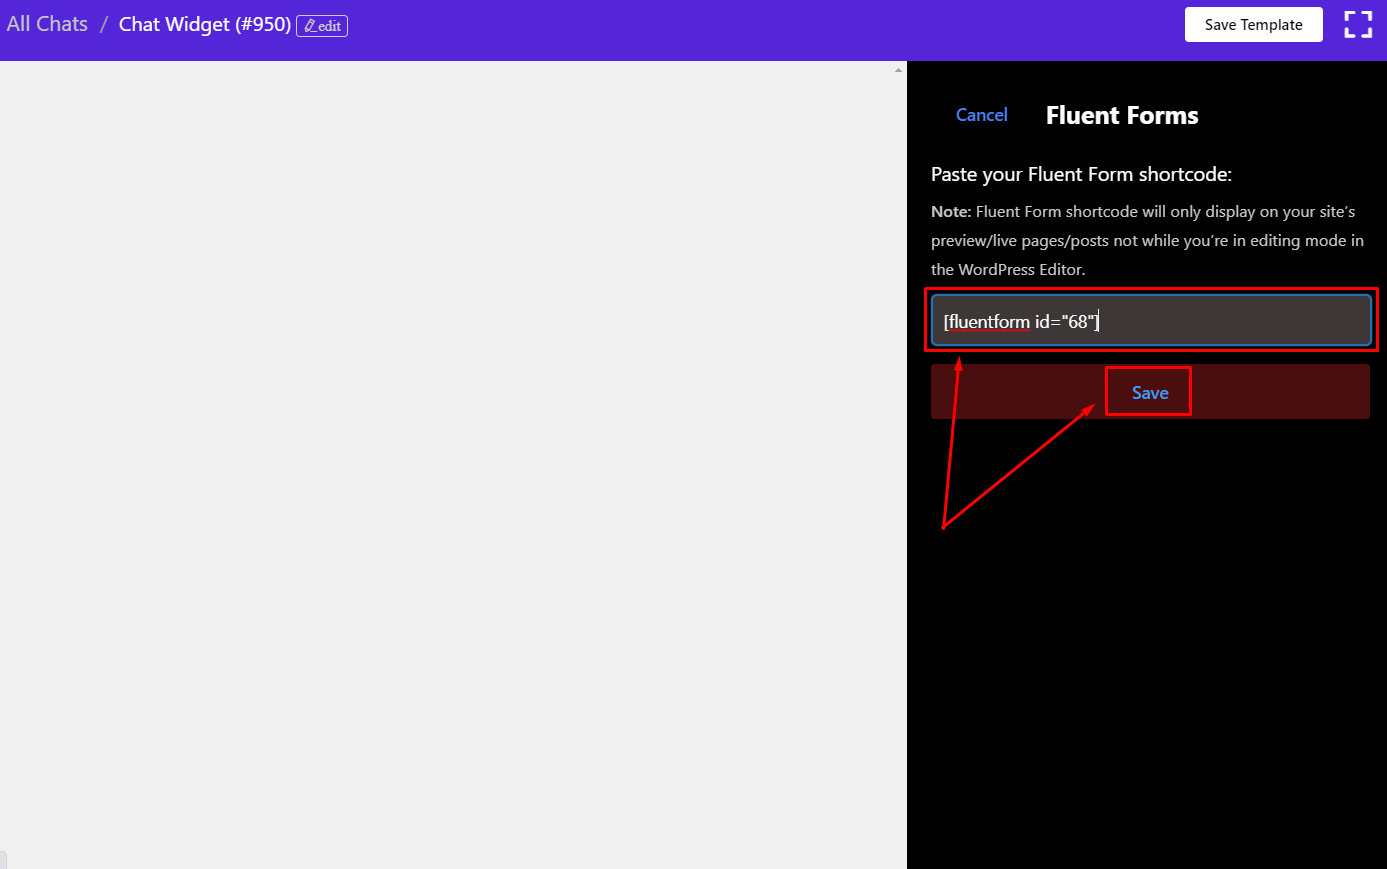
So paste the shortcode of the form you’ve created in the box you’re seeing above; And click on Save.
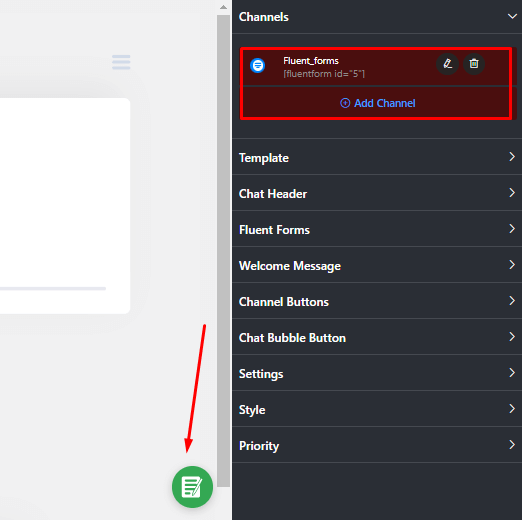
See, you’ve successfully connected the new Chat Widget. Next, we’ll see the Template settings.
Template settings
Since Fluent Forms is now connected to the WP Social Ninja, it’s time to do the Template settings. Let’s see what it offers.
Here, in the Template settings, choose the Layout Type the way want to show the Chat Widget.
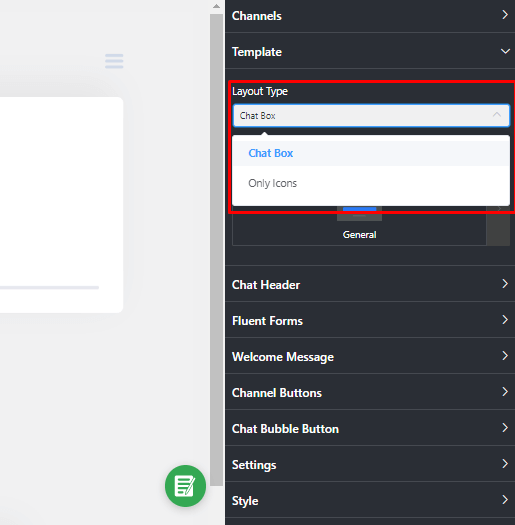
Similarly, you have so many other options to style your Chat Widget. You will get multiple options available in the settings bar.
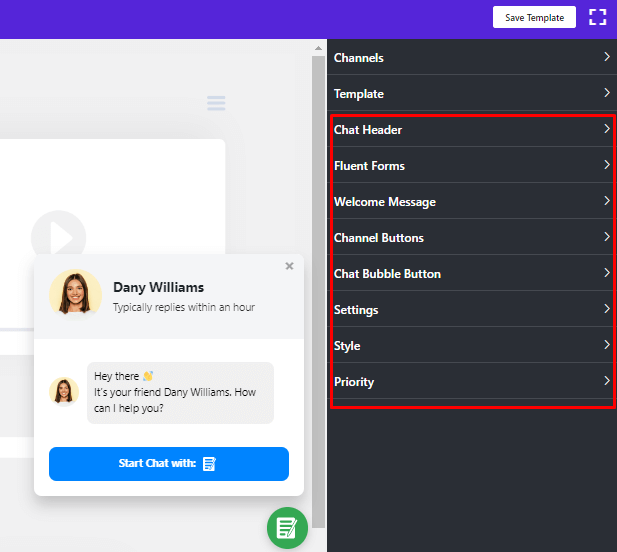
From here, customize your Chat Widget according to your choice and the interface your website demands.
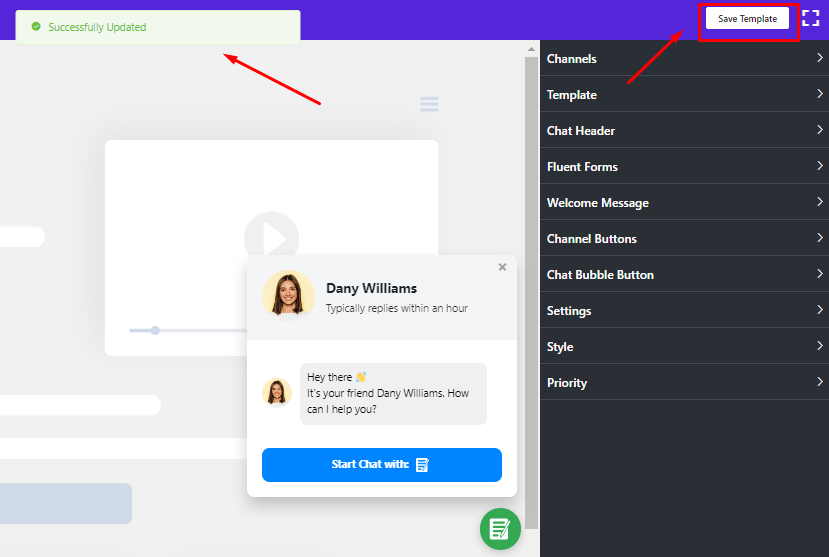
Once you’re done, make sure you’ve clicked on the Save Template button. When you are done, you will see the pop-up showing your Chat Widget is successfully updated.
Now, let’s see how it looks on the frontend. A Chat Box will pop up when you click on the Chat Icon. Here, your Fluent Forms chat icon will show you a pop-up box named Contact Us.
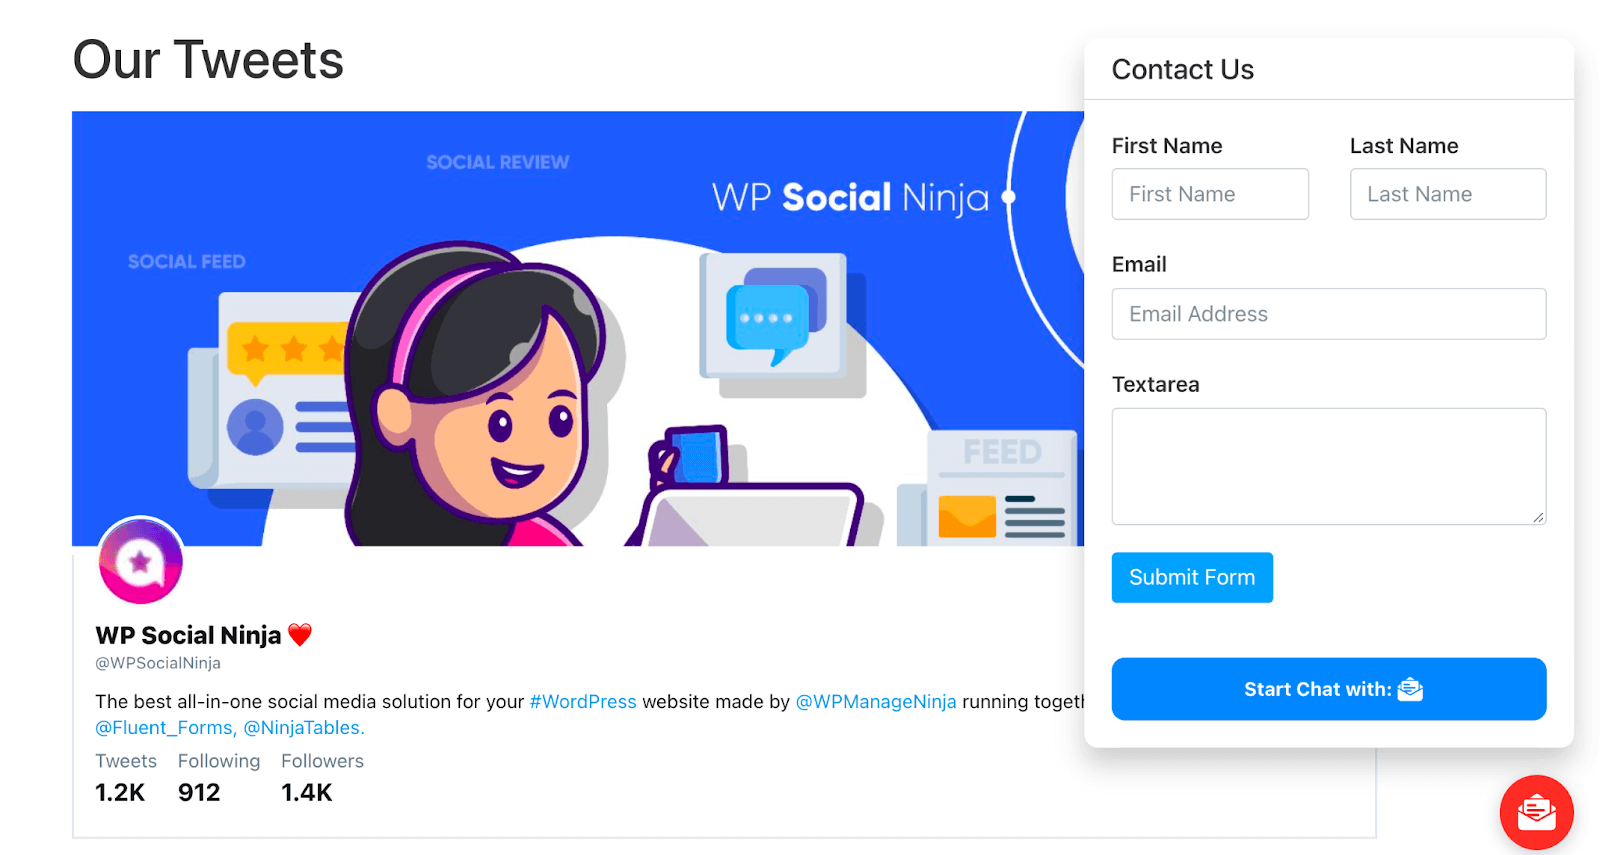
Finally, this is how the chat widget appears when you select Chatbox Layout Type. Additionally, there is another Layout Type – Chat Icon.
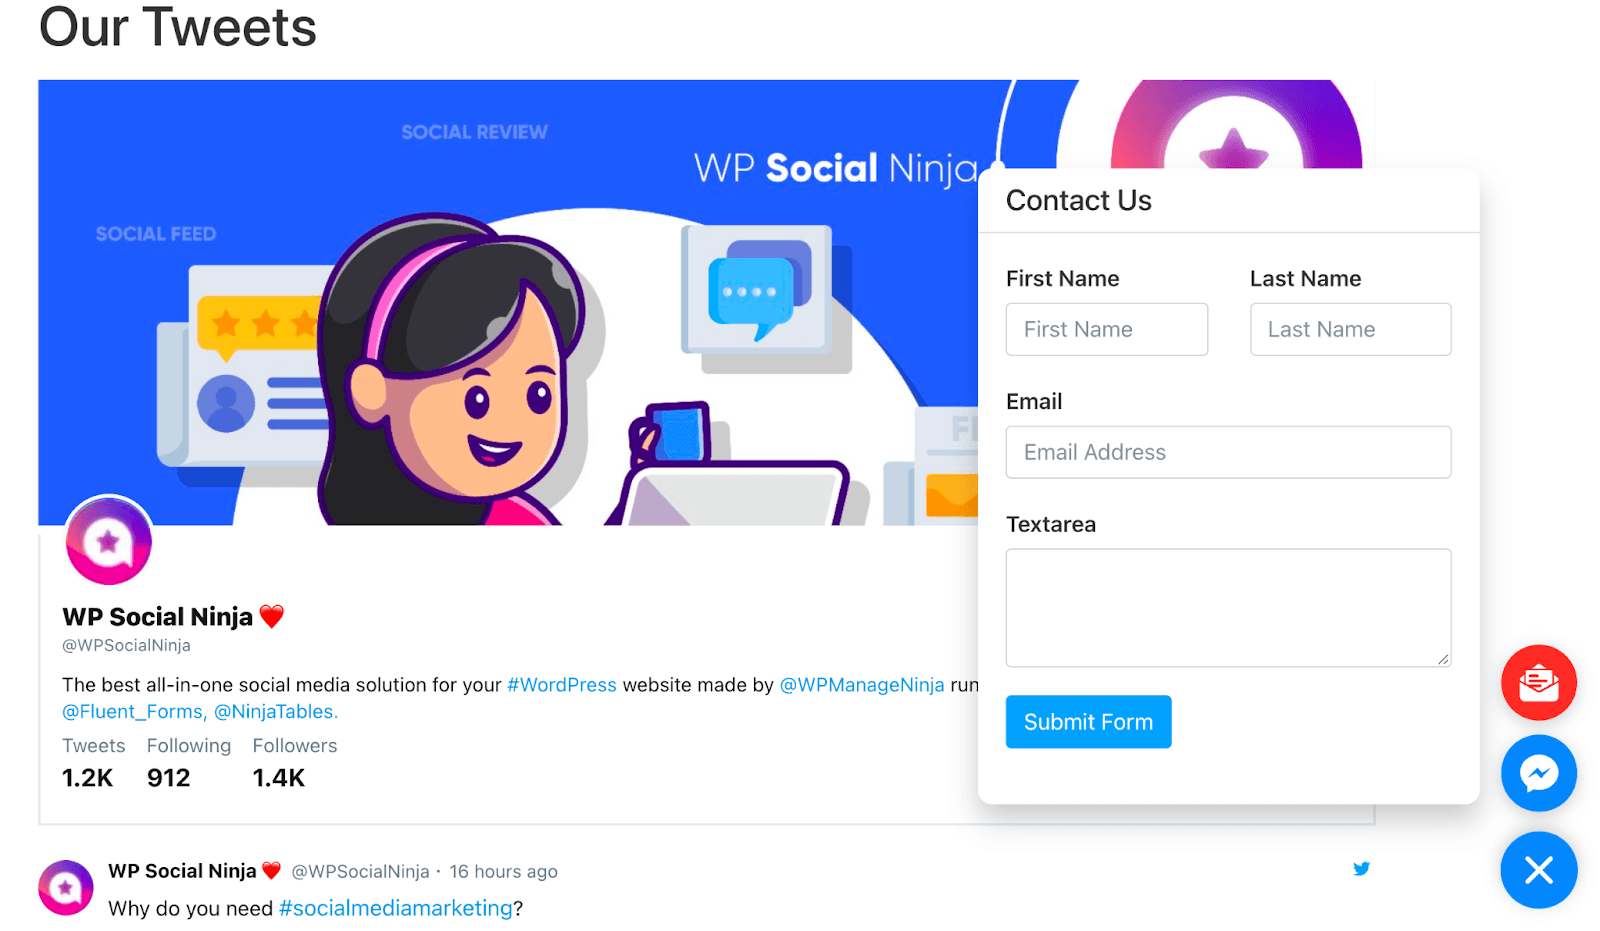
If you choose the second type, you will only see the Chat Icon on the frontend. To open the chat, click on the Fluent Forms Icon, and your Contact Us will be shown.
Sums Up
That’s all about creating Fluent Forms Integration with the best social media plugin and then adding a beautiful chat widget to the WordPress Website as well.
The importance of adding reviews to a website is never underrated. If you don’t offer your visitors a reason to remain, you won’t be able to maintain your website visitors or loyal clients for too long. Users are influenced by online reviews, which can increase traffic and revenue to your website.
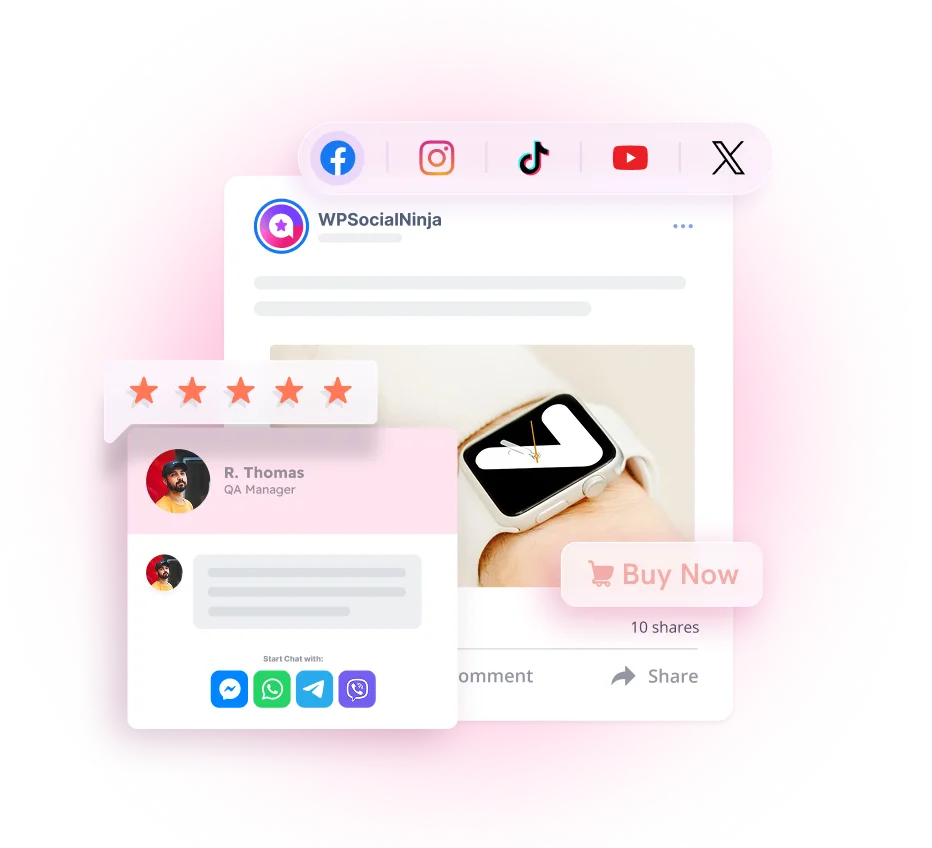
Win your customers’ hearts with exceptional features
Discover how WP Social Ninja can assist you in designing outstanding customer experiences.
So, if you’re wondering how to add reviews and contact forms to your website, you’ve got that covered. We hope you found this blog useful in creating reviews with Fluent Forms & chat widgets for your website.
For more information, please check out our social channels: X (Twitter), Facebook, and YouTube.

Subscribe To Get
Weekly Email Newsletter
Connect, Customize, and Display Social Feeds, Reviews, and Chat widgets


Trending Posts
-
-
 Mashfik Upal Aumy
 -


Leave a Reply