How to Add Instagram Feeds to Your WordPress Website (Part 1)
Do you want to fetch your Instagram feeds on your WordPress website?
Well, your Instagram feeds can undoubtedly add credibility to your audiences. Furthermore, this can increase your Instagram followers too. And eventually, it will increase the sales as well.
Moreover, Instagram is a platform where people can share content in real time. This opportunity has entirely transformed the brand’s game plan. Although there are a lot of marketing strategies, brands have still been focusing a lot on Instagram.
However, the digital world has plenty of social networking sites, and it makes sense if you need some guidance here! Sure, you can’t add Instagram feeds to your website manually. But there are multiple social media marketing tools to help you through it.
In this post, we’ll show you how to add your Instagram feeds to your WordPress website in the easiest way.
So, without any further ado, let’s dive in!
The easiest way to add Instagram feeds to WordPress websites
The easiest way to embed Instagram posts on WordPress is to use an Instagram feed plugin. Though you can manually connect your posts with custom HTML, you can not customize your posts, and there is no auto-synchronization.
But with the help of an Instagram feed plugin, you can showcase your posts and customize the feed to match your brand voice, and whenever you upload a new post, it will be automatically updated on your website.
There are plenty of Instagram feed plugins in the market but let us suggest you a compact plugin. Have you heard of the social media management tool WP Social Ninja? I bet it can relieve all your pressure regarding configuration.
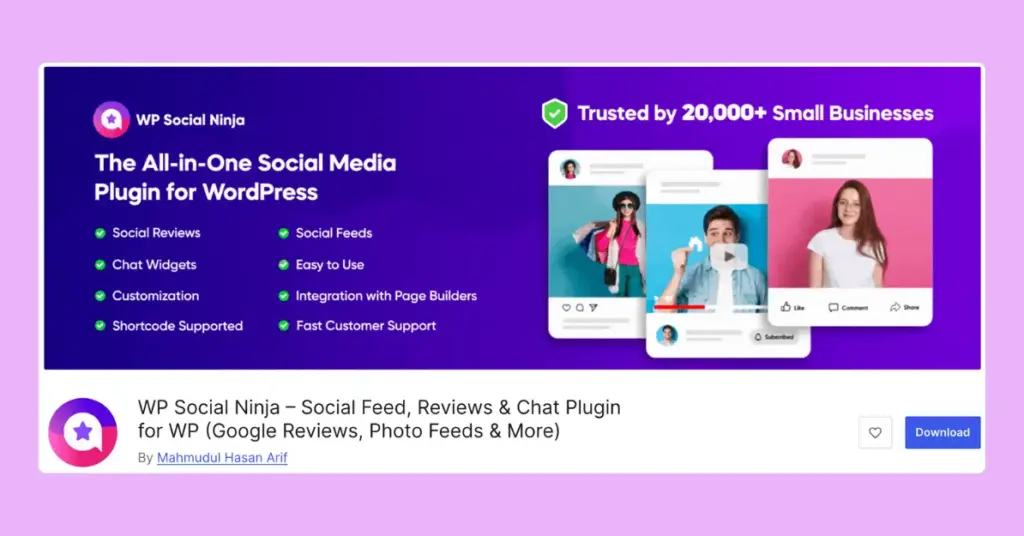
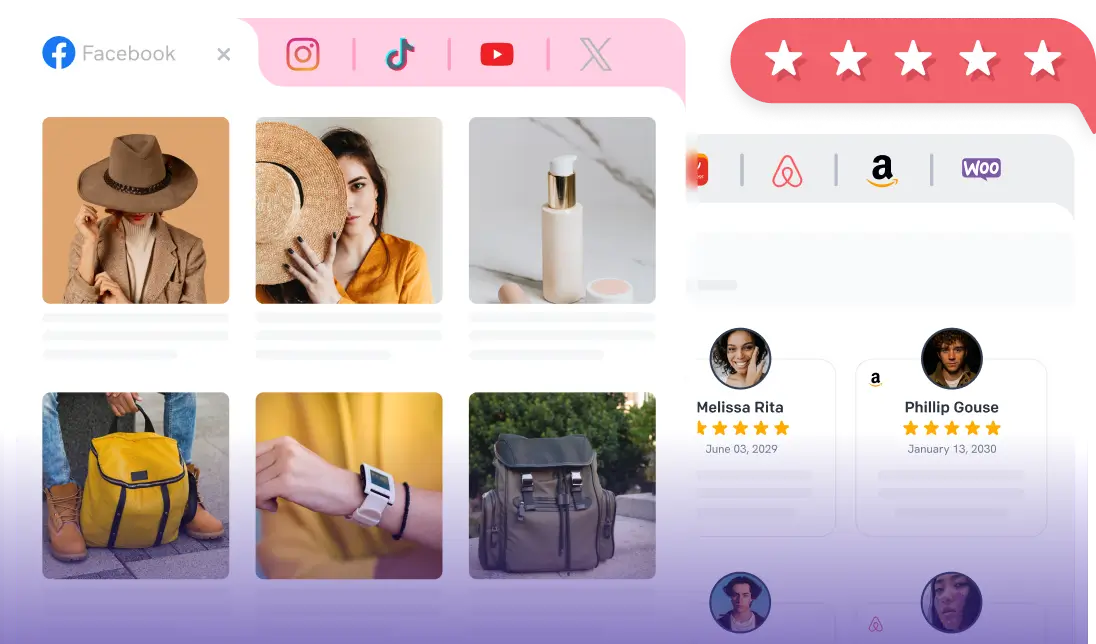
WP Social Ninja is a Swiss knife with more wholesome features. When you get this social tool to take care of your social feeds, you are getting a lot more extra here. Moreover, it will take charge of your social reviews, chat widgets, notification popups, and custom testimonials as well.
So, in this post, we’ll show you how to add your Instagram feeds to your website with WP Social Ninja.
How to install WP Social Ninja to connect Instagram feeds
If you are familiar with installing WordPress plugins, WP Social Ninja is no different. It will take only a few steps.
You can do that in two ways:
- From your Dashboard
- From WordPress Repository
Here’s how to install it from your Dashboard:
- Navigate to the WordPress Admin panel. From the WordPress Dashboard, go to Plugins > Add New
- Next, on the search input field, type WP Social Ninja and wait for a moment for it to come up
- Now click on the Install Now button
- Then Activate
If you decide to install from WordPress Repository:
- Search WP Social Ninja in the WordPress Repository, and it will appear on the top. Once you click it, hit the Download button
- Now go to the Dashboard and go to Plugins > Add New > Upload Plugin > Choose the zip file
- After that, click the Install Now button and then Activate
How to configure Instagram feeds with WP Social Ninja
Configuring an Instagram feed with WP Social Ninja is much easier. You have the full flexibility and multiple options to connect any type of account.
Whether it’s a personal account, a business account, or you want to connect an account manually without any password, the choice is yours!
It is a pretty easy task. You will get through this in no time!
First, go to the dashboard of WP Social Ninja and select Instagram in the Platforms section.

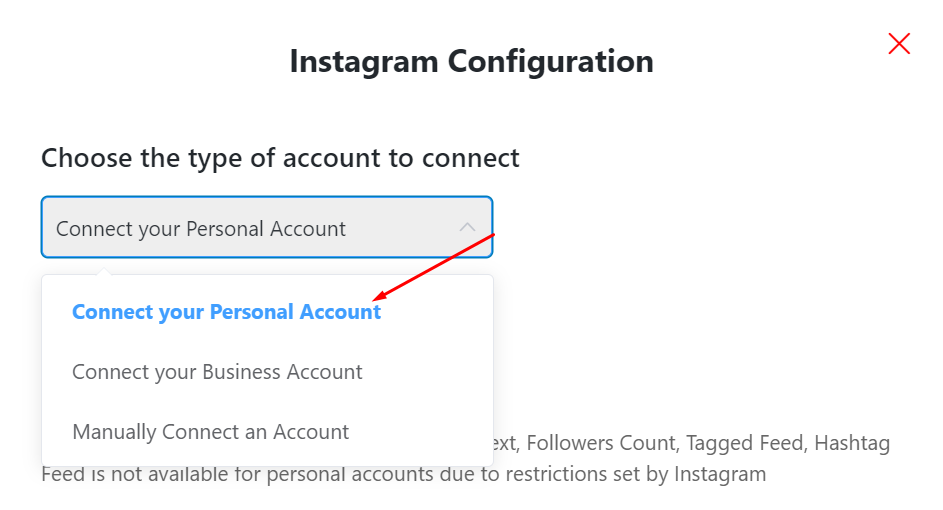
There, you will see three different account types for your Instagram feed connection. Let’s talk about them in detail.
Win your customers’ hearts with exceptional features
Discover how WP Social Ninja can assist you in designing outstanding customer experiences.
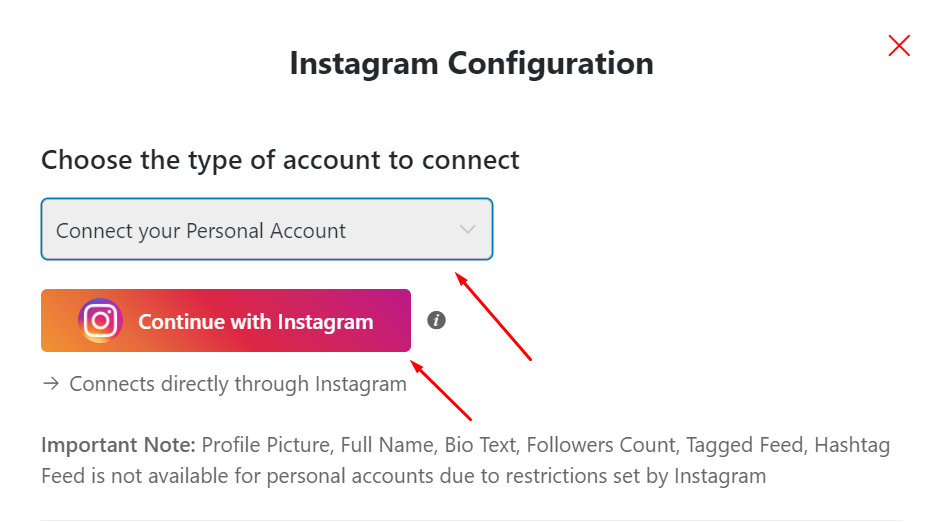
Connect your Personal Account
Click on the Connect your Personal Account button to start your Instagram feeds configuration.
Then, click on the Continue with Instagram button.
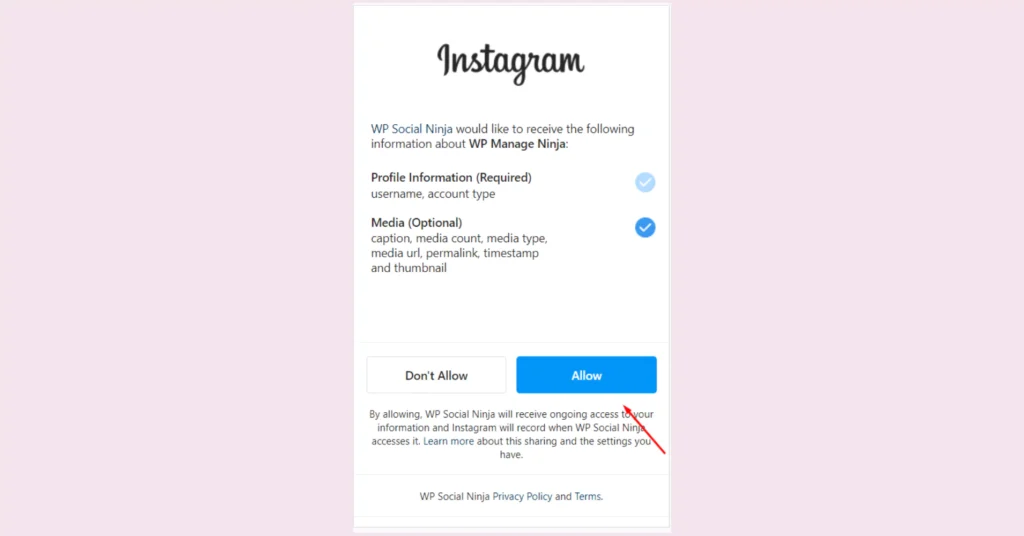
Next, click on the Allow button to Connect your Personal Account.
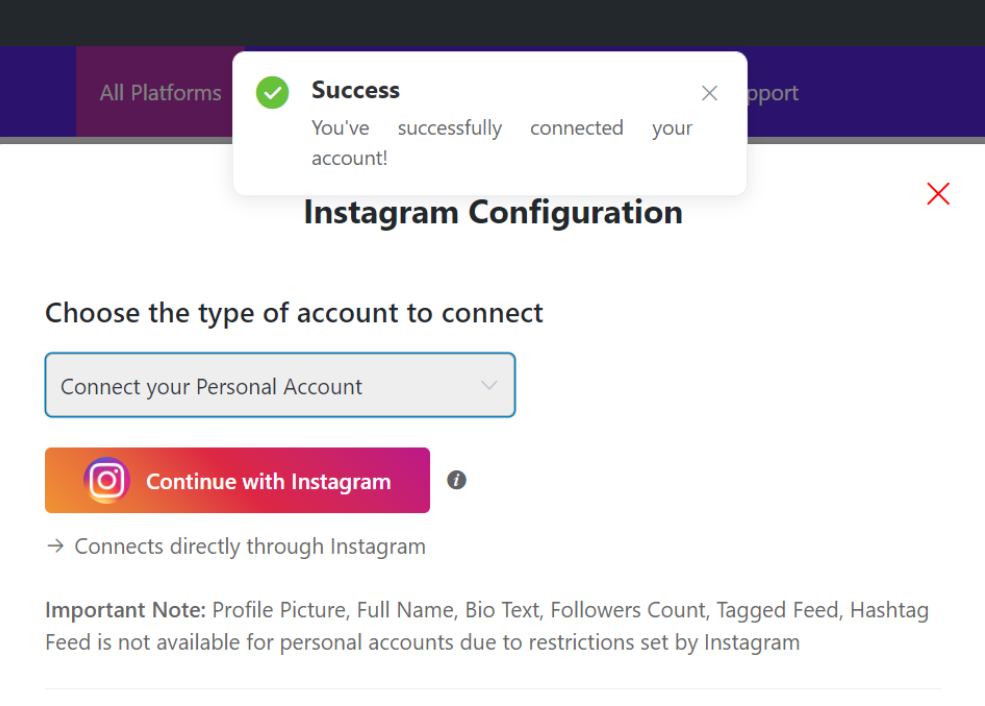
And congratulations! You’ve successfully connected to your Instagram Personal Account.
Told you it will be quick!
Connect your Business Account
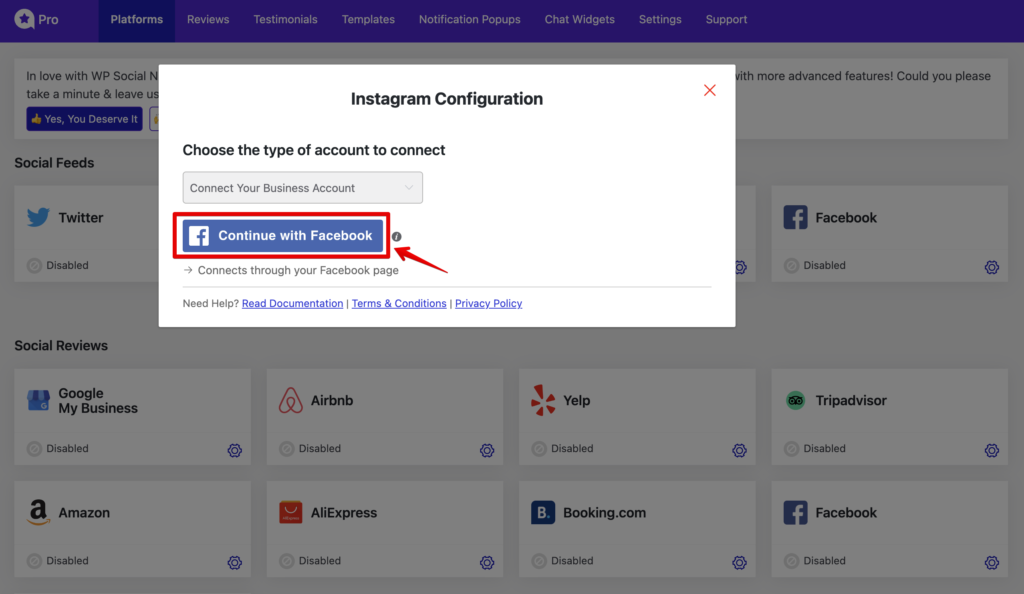
Select “Connect Your Business Account” from the options.
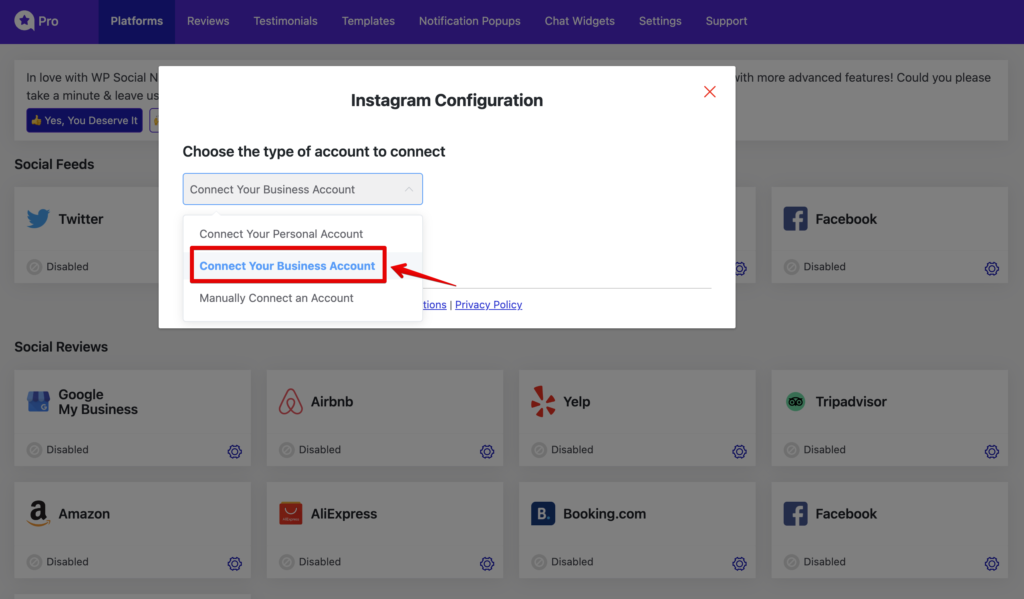
And then click “Continue with Facebook”.
Select the account you want to connect to. And then click the “Connect Accounts” button!
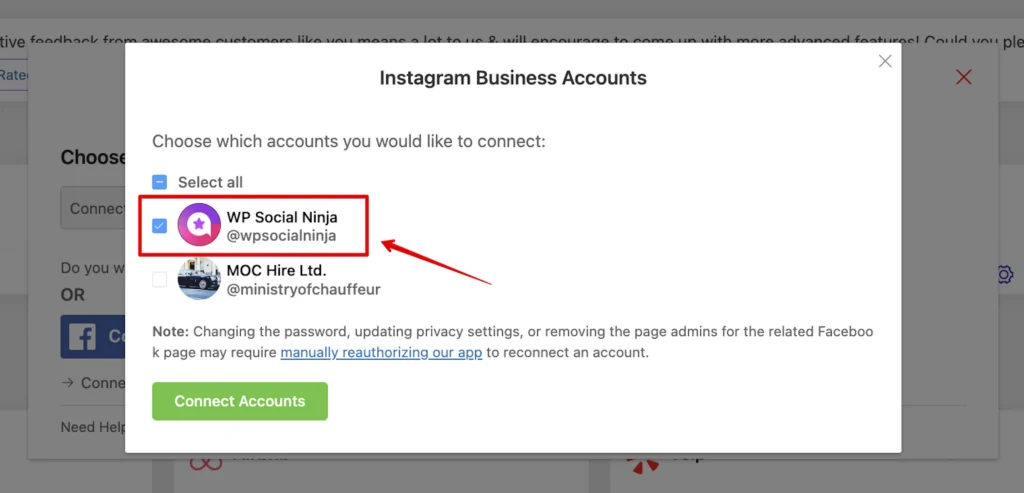
If you have come this far, you have connected your business account.
Manually Connect an Account
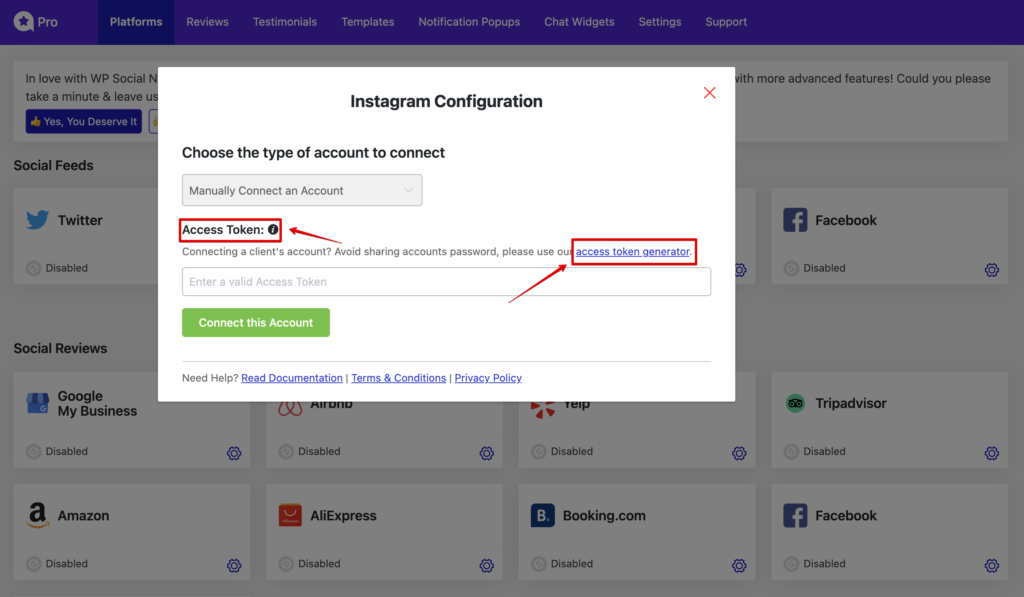
To do so, you need the Instagram Access Token.
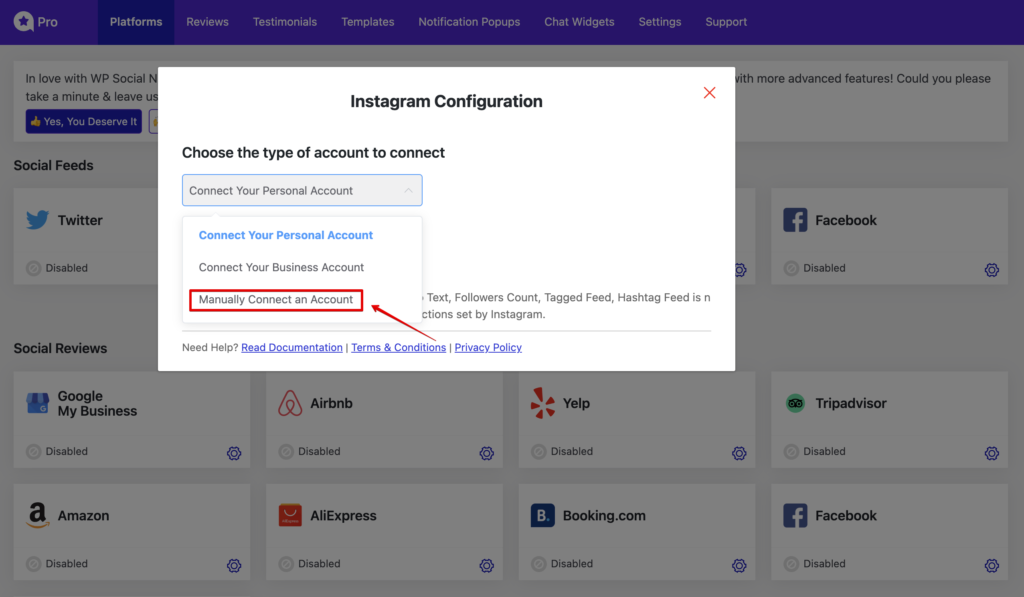
Click on the “Manually Connect an Account.” to start your configuration.
This section is important. Now, you will see the “Access Token” section. Click on the access token generator.
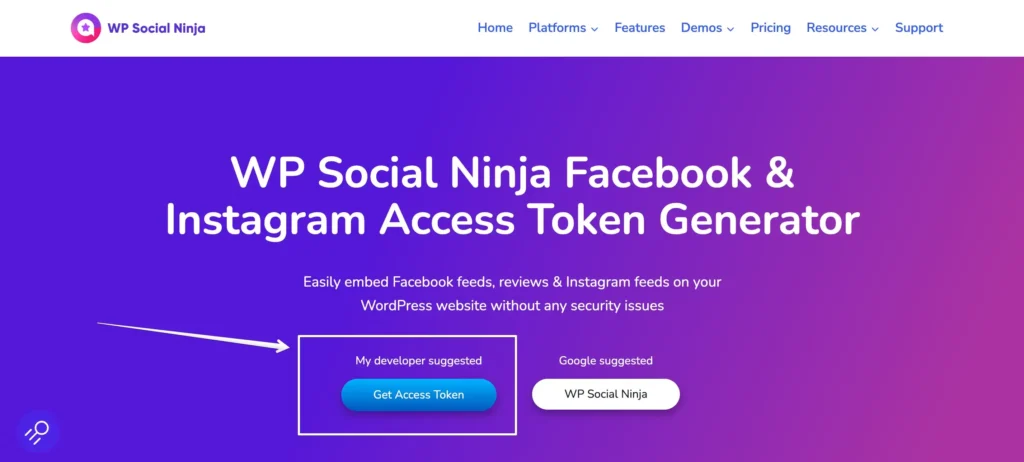
Then click the “Get Access Token” button.
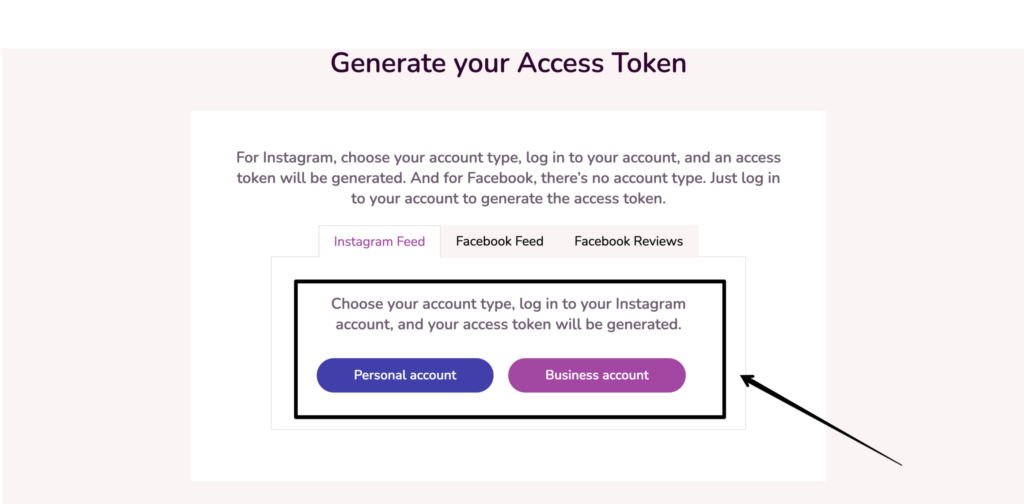
Now select the type of account. You will see two options there.
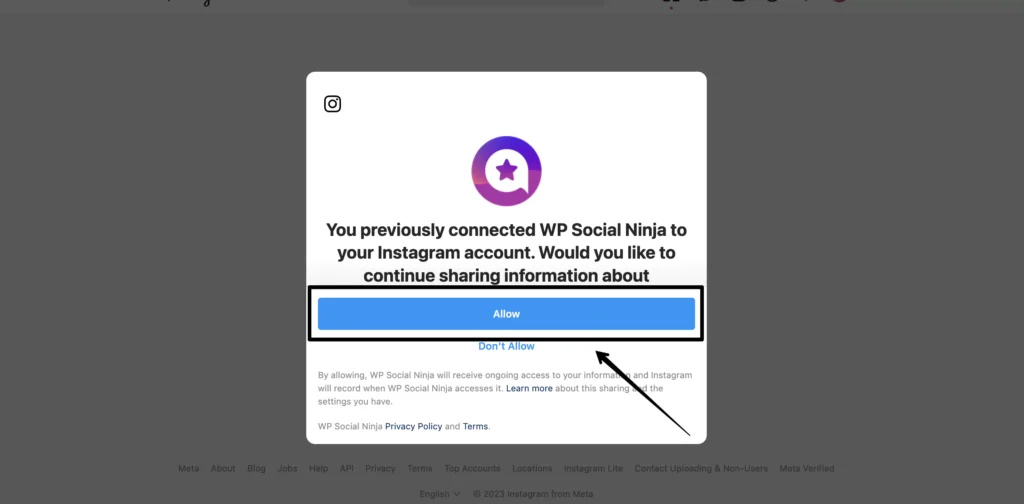
Click allow to proceed further!
Click “Show Connection Info,” and you will have your access token ready!
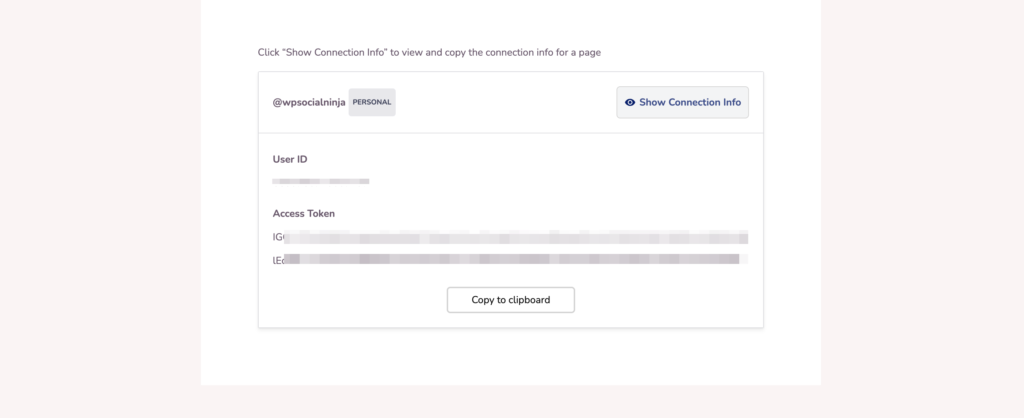
Now that you have your access token ready. Copy the token, go back to the dashboard, paste your token, and click “Connect this Account”.
Now you are ready to go to the next step to create a template. To do that, click on the Add New Template button.
Remember, you can connect with multiple Instagram accounts using WP Social Ninja.
So that’s it! Wondering about how to configure the Instagram settings? No worries we got an entire blog covering just that!
What did you learn?
To run a brand, you’ve to be regular on social media. However, at times, it’s quite challenging. But if you associate yourself with an expert tool, it can sort out all of the complicated procedures for you! And that’s where WP Social Ninja is the smartest among all. Moreover, you don’t need separate social media tools for marketing. Simply aggregate your reviews, feeds, and chat all under the same room with this one magic tool!
We hope you’ve learned about the different ways you can integrate Instagram feeds into your WordPress website. If you’re interested in more articles on Instagram configuration? You may want to have a look at this post on-

Subscribe To Get
Weekly Email Newsletter
Connect, Customize, and Display Social Feeds, Reviews, and Chat widgets





Leave a Reply