
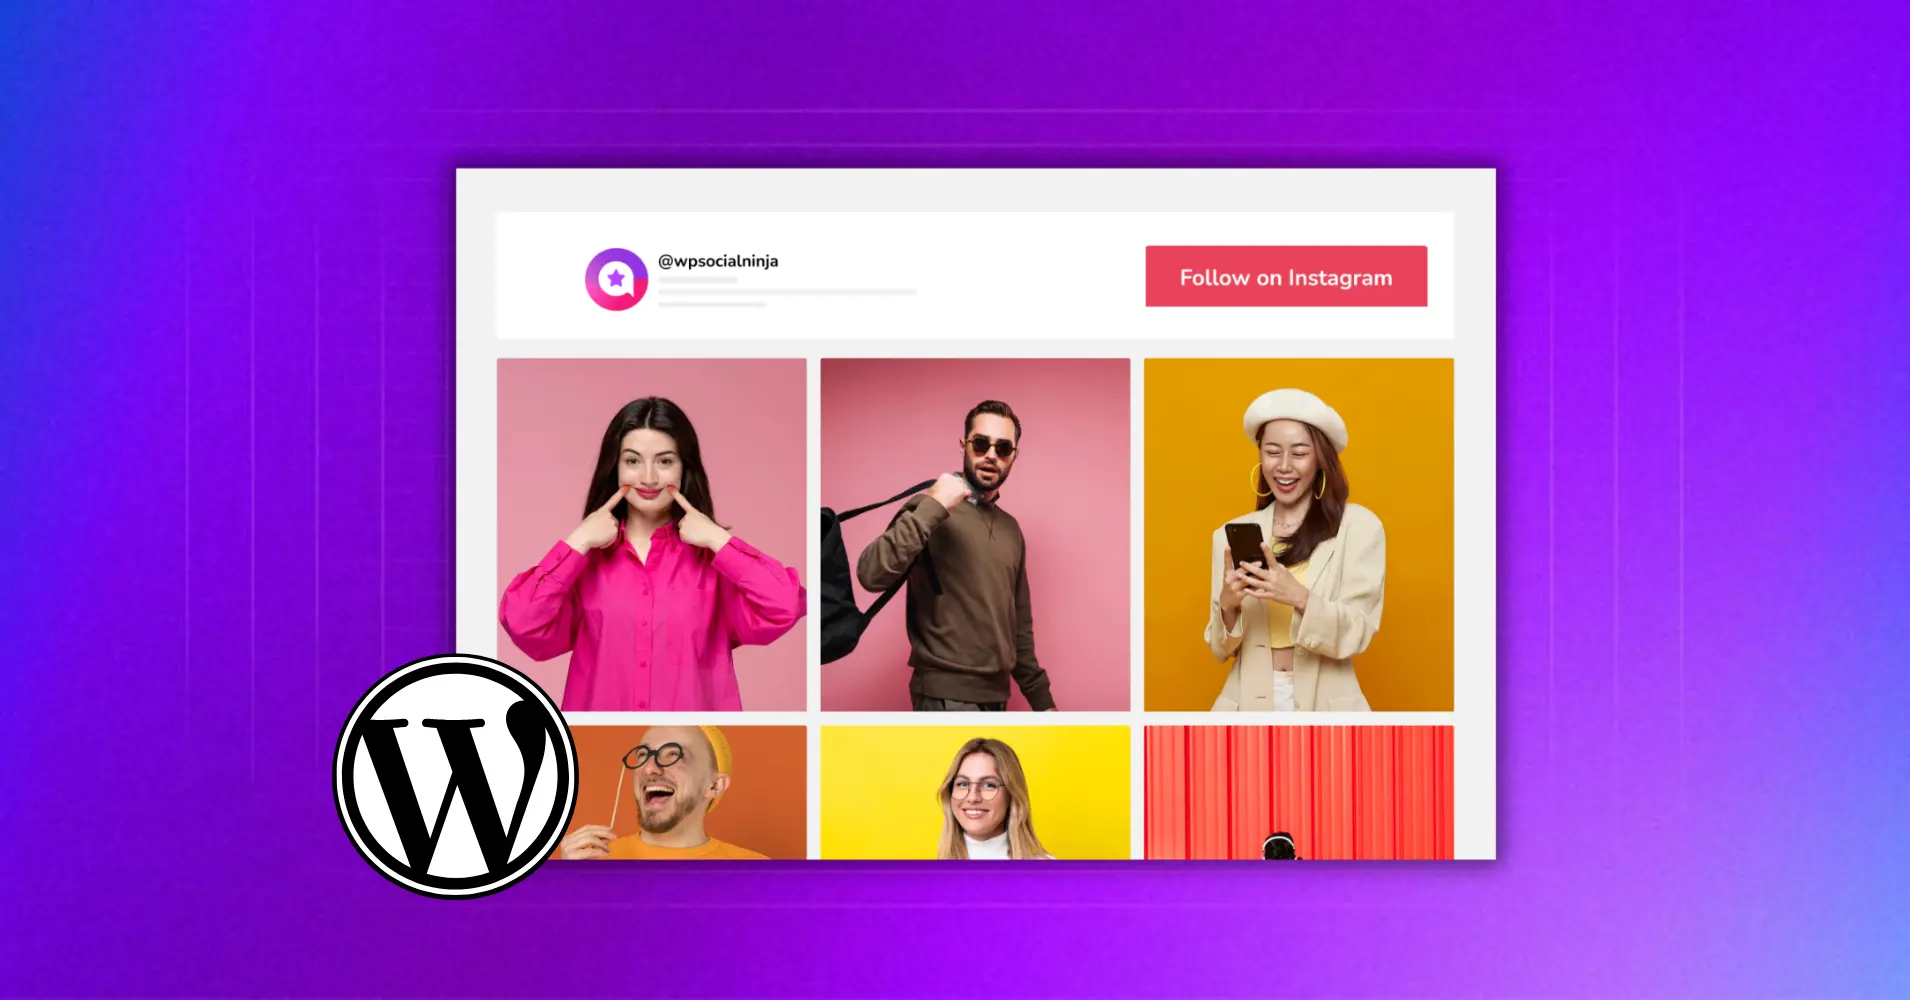
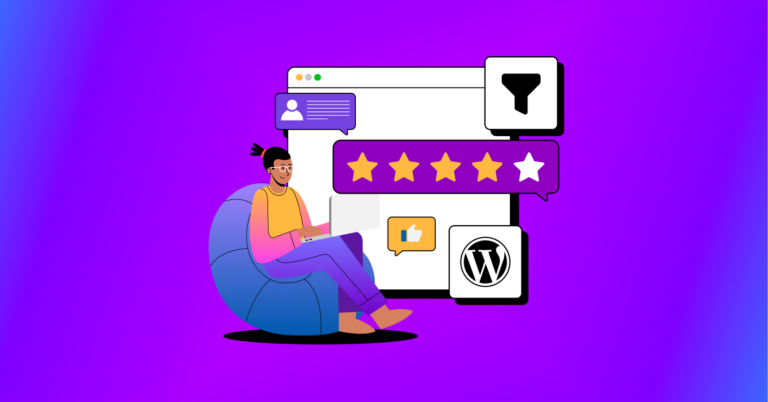
How to Embed Instagram Feeds on WordPress Website (Part 1)


Instagram posts can build trust and spark engagement, but only if they actually appear on your website. Posting regularly on Instagram is great, but if your website visitors never see that content, you’re leaving a lot of value unexplored.
When you embed Instagram feeds on your WordPress site, you bring your social presence directly to your audience. It keeps your website fresh with real-time content, adds authenticity through visual storytelling, and helps visitors connect with your brand without needing to leave your page.
In this guide (Part 1), we’ll walk through the first and most important step: connecting your Instagram account and getting your feed up and running on WordPress. We’ll use WP Social Ninja to demonstrate the process, as it makes the setup simple and beginner-friendly.
Let’s begin.
TL;DR
- An Instagram feed is a collection of your Instagram posts that can be displayed on a website to show photos, videos, and updates in one place
- Adding Instagram feeds to a WordPress site helps keep website content fresh and visually engaging for visitors
- Displaying social posts on your website also connects your social media activity with your website audience
- Installing and activating the WP Social Ninja plugin allows you to create and manage Instagram feeds easily
- After setup, you can connect your Instagram account to pull posts directly to your website
- Instagram posts can be placed anywhere on your site using shortcodes
- The plugin allows you to manage multiple feeds and update content automatically
- Showing Instagram feeds on a website helps display real-time social content without manually uploading posts
What Are Instagram Feeds on WordPress?
An Instagram feed on WordPress is a real-time display of posts from your Instagram account shown directly on your website. Visitors can see your latest photos or Instagram videos without leaving your site, and the feed updates automatically whenever you post something new.
Where you can use Instagram feeds:
- Homepage: Shows your site is active and current
- Sidebar: Keeps your feed visible on multiple pages
- Landing pages: Highlights products, promotions, or campaigns
- Product pages: Show real photos of customers using your products
Why Instagram Feeds Matter
Instagram feeds are more than just visuals; they act as social proof, showing visitors your brand is active, authentic, and engaging.
Here’s why they’re worth adding to your WordPress site:
- Instant Brand Credibility: Shows visitors your brand is real and active at first glance
- Builds trust: Visual content from your Instagram makes your business feel authentic
- Keeps your site fresh: A live feed updates automatically, even if your blog hasn’t
- Boosts engagement: Visitors spend more time browsing posts, exploring your products or content
- Grows your Instagram following: Interested viewers often click through to follow your account
Learn proven strategies to grow your audience and increase engagement directly from your WordPress site.
The Easiest Way to Add an Instagram Feed to WordPress
There are different ways to add an Instagram feed to WordPress.
You can manually embed individual posts using Instagram’s embed code. But this only shows one post at a time, doesn’t auto-update, and gives you almost no control over design.
The better and more reliable method is using a plugin.
An Instagram feed plugin connects your account once and then automatically displays your Instagram posts on your website. It keeps everything updated, organized, and customizable without touching code.
For this guide, we’ll use a plugin-based method.
Why Use WP Social Ninja?
WP Social Ninja is an Instagram feed plugin that makes the entire process simple, especially for beginners. Instead of dealing with API keys, tokens, or complicated settings, you just log in and approve access.
Here’s why we’re using it:
- Works with both personal and business Instagram accounts
- Handles the technical API connection automatically
- Keeps your feed updated when you post new content
- Beginner-friendly setup
- No coding required
Now, let’s connect your account.
How to Embed Instagram Feed on WordPress (Step-by-Step)
If you want to embed Instagram feed on WordPress, the process is actually simple. You don’t need to touch any code or deal with complex settings.
Once your plugin is installed, you just need to connect your Instagram account, create your feed layout, and place it on your page. The whole setup takes only a few minutes.
Follow the steps below and your Instagram feed will be live on your WordPress site in no time.
Step 1: Install and Activate WP Social Ninja
First, you need to install the plugin on your WordPress website.
- Go to your WordPress Dashboard and click on Plugins → Add New
- Search for WP Social Ninja in the search bar
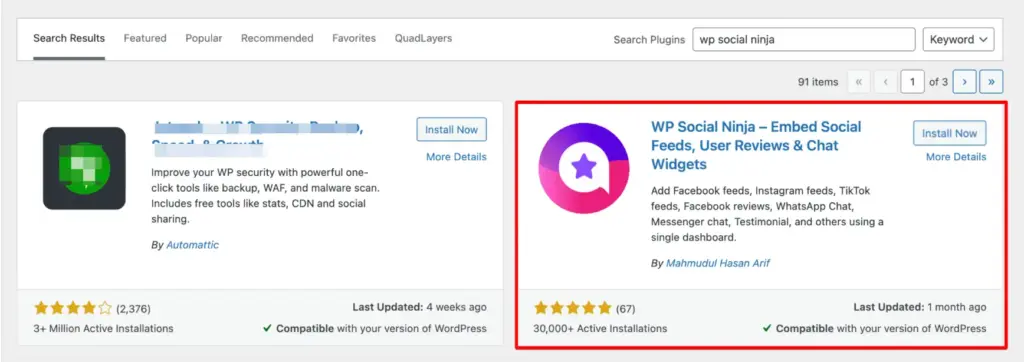
- Click Install Now, then click Activate once the installation is complete
If you need help in installing the plugin, you can read the blog: How to Install Plugins for WordPress (3 Easy Ways)
After activation, you’ll see WP Social Ninja in your dashboard menu. This is where you’ll manage your social feeds.
Step 2: Navigate to the Instagram Connection Settings
Now it’s time to connect your Instagram account. This step allows your website to pull posts directly from Instagram so you can embed the Instagram feed on WordPress properly.
From your WordPress dashboard:
- Click WP Social Ninja from the left sidebar
- Go to the Platforms section
- Select Instagram from the available platforms
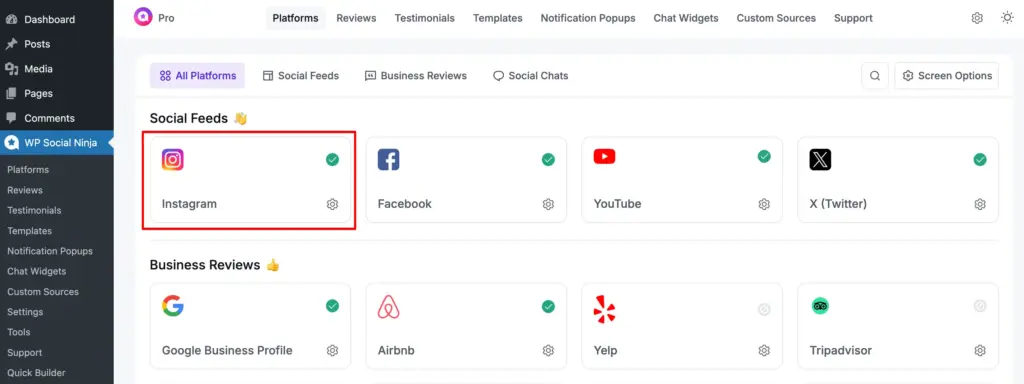
A popup screen will appear, where you will configure your Instagram account.
This is the connection area. Here, you’ll see different options depending on whether you’re using a personal or business Instagram account.
Step 3: Choose Your Account Type and Connect
WP Social Ninja offers multiple connection methods based on your Instagram account type. Choose the option that matches your account to properly embed Instagram feed on WordPress.
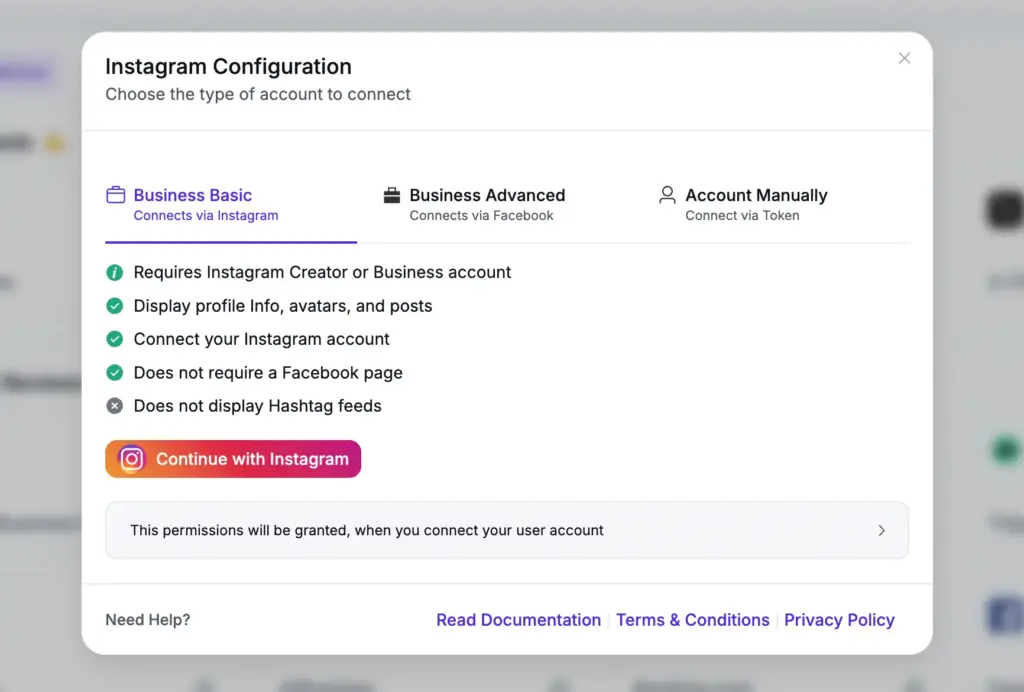
Connect Using Business Basic (Personal or Creator Account)
This method works for most users and is simple to set up.
- Click Business Basic from the connection options
- Then click Continue with Instagram
- A login popup will appear. Sign in to your Instagram account if you’re not already logged in
- Instagram will ask for permission to access your account. Click Allow to approve
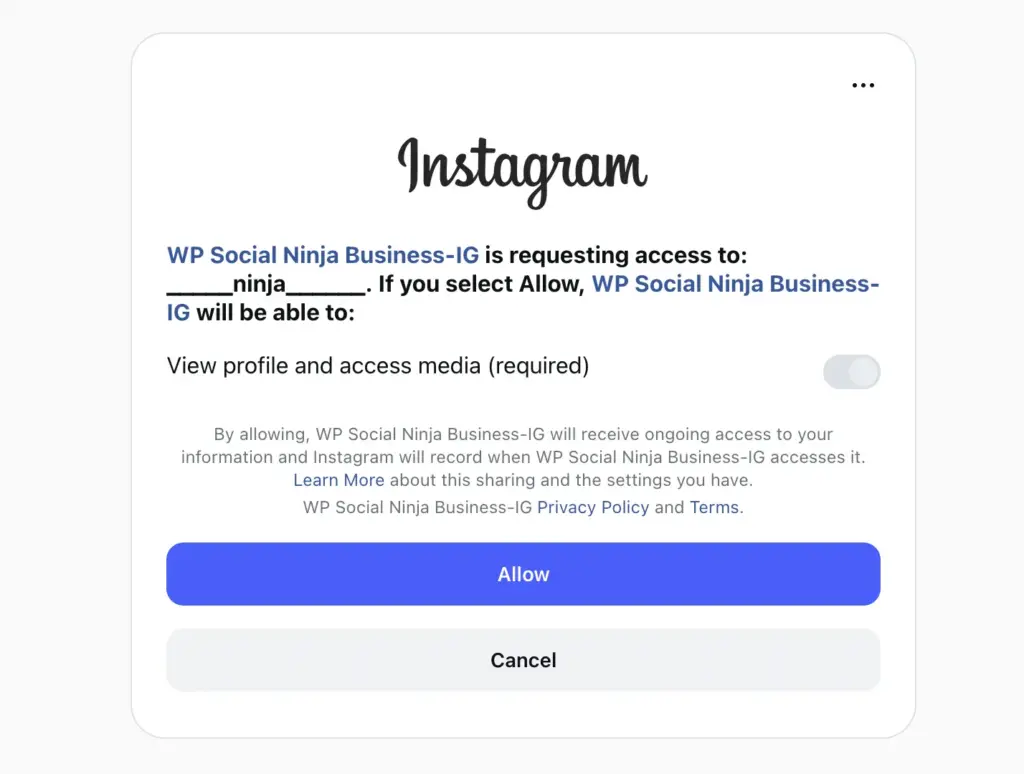
Once approved, your Instagram account will be connected automatically. You don’t need to generate tokens or configure APIs manually. The plugin handles everything securely in the background.
Connect a Business Account (Via Facebook)
If your Instagram account is linked to a Facebook page, use this method.
- Click Connect Your Business Account
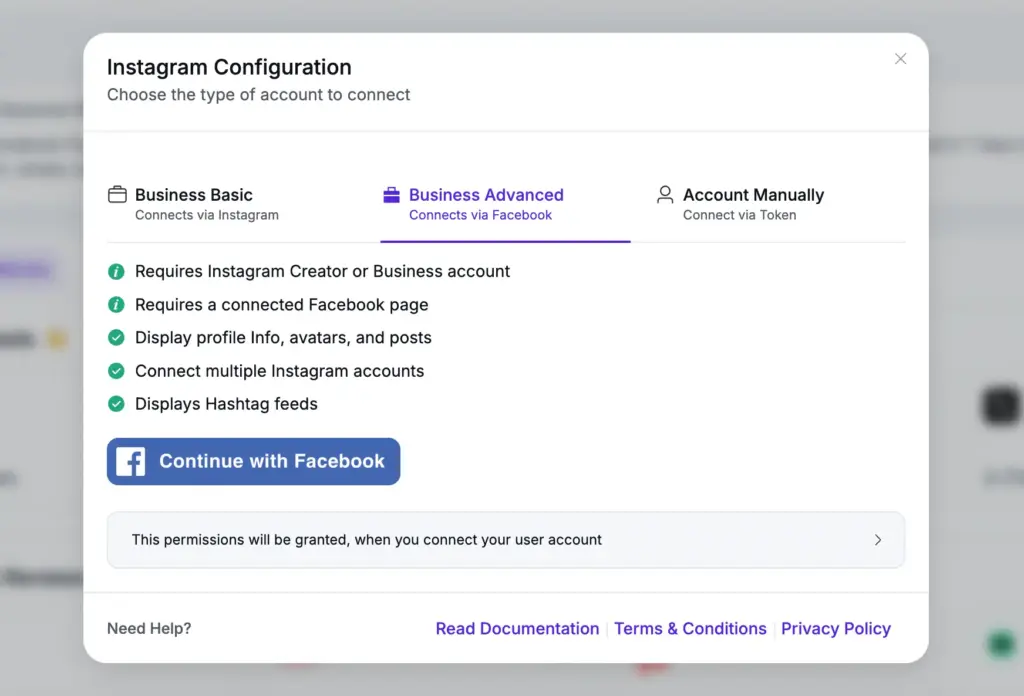
- You’ll be redirected to log in with Facebook
- Select the Facebook page connected to your Instagram account
- Review and approve the required permissions
After authorization, your business Instagram account will be connected and ready to display posts on your WordPress website.
Manual Connection (Advanced Option)
This option is only needed in special cases where automatic login does not work. For this, follow the steps:
- Click Account Manually
- Use the provided link to generate an access token
- Copy the generated token
- Paste it into the required field inside WP Social Ninja
- Click Connect this Account to complete the setup
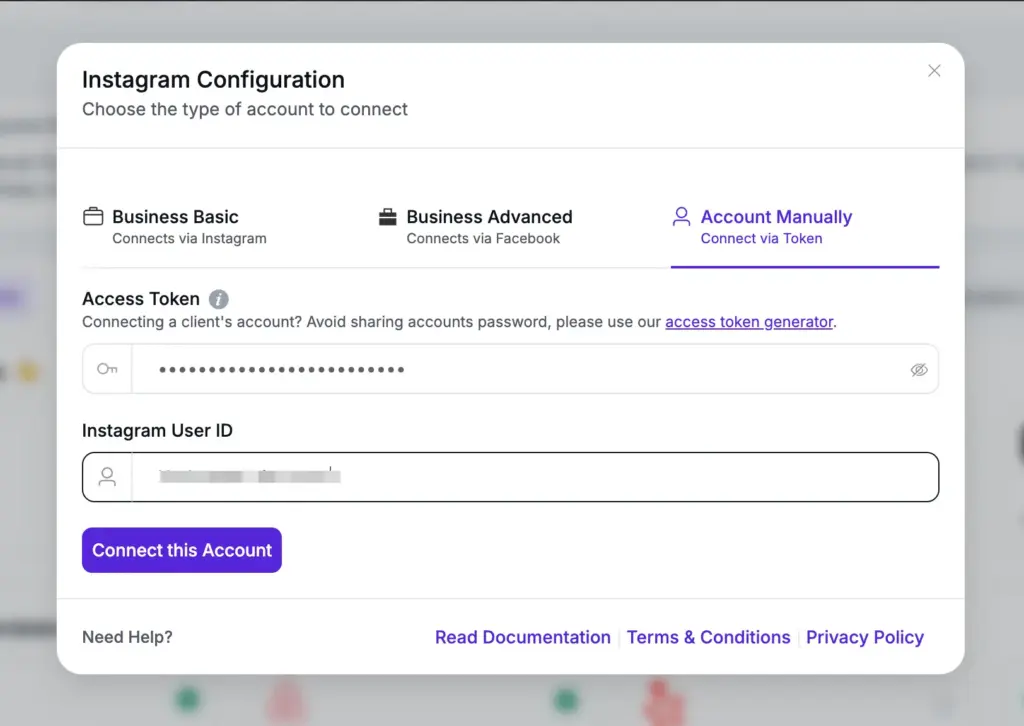
Manual connection is mainly for advanced users, but it ensures you can still connect your account if needed. For more details, you can read this blog: The Easiest Way to Manually Connect Instagram on Website.
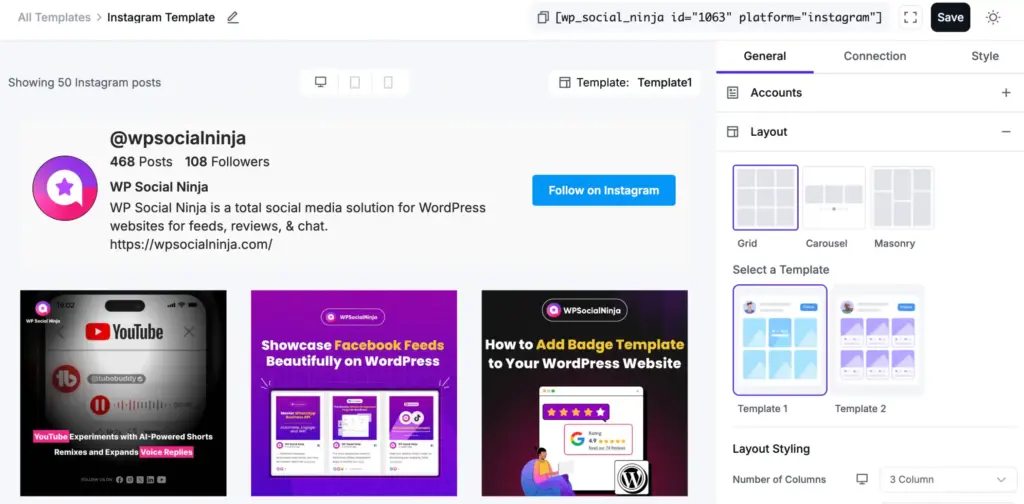
Step 4: Create Your Instagram Feed Template
Now it’s time to design how your Instagram feed will look on your website.
- Click on Create a Template
- Choose a layout style (grid, carousel, masonry, etc.)
Also, learn: How to Embed Instagram Slider Widget on WordPress Websites
- Select the number of posts you want to display
- Customize spacing, colors, and display settings as needed
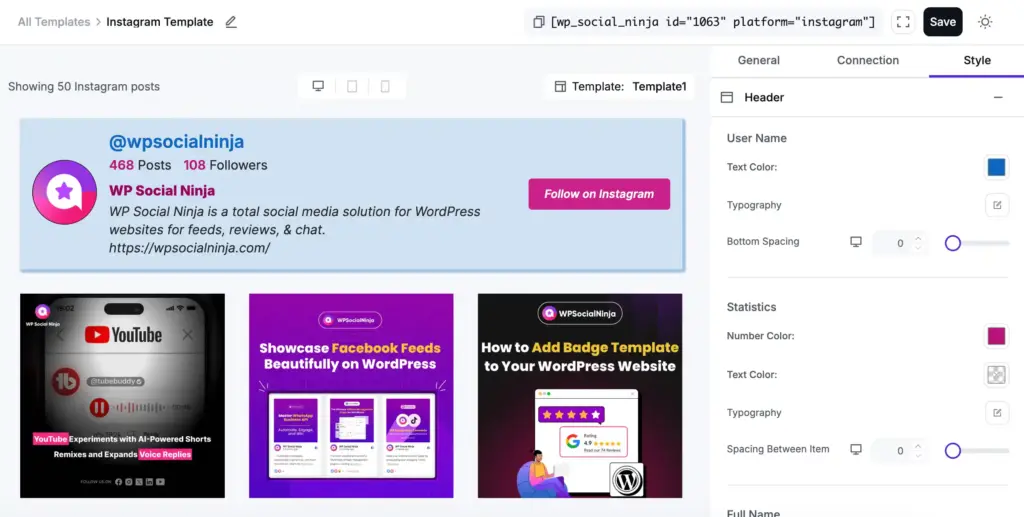
You can see a live preview while editing. This helps you adjust everything exactly the way you want.
When you’re satisfied with the design, click Save.
If you want to know more about making your Instagram feed look more organized with carousel previews, read our blog on how to embed Instagram slider widget on WordPress website.
Step 5: Embed Instagram Feed on WordPress Page or Post
Now comes the final part, embedding the feed on your website. WP Social Ninja gives you a shortcode after you create the template.
To embed the Instagram feed:
- Copy the provided shortcode
- Go to the page or post where you want to display the feed
- Paste the shortcode inside a Shortcode block (or any page builder element)
- Click Publish or Update
That’s it. Your Instagram feed is now live on your WordPress website.
Want more control over how your Instagram feed appears? Part 2 covers advanced Instagram layouts and customization options.
What did you learn?
To run a brand, you’ve to be regular on social media. However, at times, it’s quite challenging. But if you associate yourself with an expert tool, it can sort out all of the complicated procedures for you! And that’s where WP Social Ninja is the smartest among all.
Win your customers’ hearts with exceptional features
Discover how WP Social Ninja can assist you in designing outstanding customer experiences.
Moreover, you don’t need separate tools for social media marketing. Simply aggregate your reviews, feeds, and chat all under the same room with this one magic tool!
We hope you’ve learned about the different ways you can integrate Instagram feeds into your WordPress website. If you’re interested in more articles on Instagram configuration? You may want to have a look at this post on:
- Instagram for B2B Marketing (Top10 Strategies)
- The Best Time to Post on Instagram
- How to Add Elementor Instagram Feed to WordPress
- 7 Best Instagram Marketplace Strategies for Small Businesses
FAQ
Can I connect multiple Instagram accounts?
Yes. WP Social Ninja lets you connect as many Instagram accounts as you want. This is useful if you manage multiple brands or client accounts. Just repeat the connection process for each account, then choose which account to display when creating a feed.
Will adding an Instagram feed slow down my website?
Not if you use a quality plugin like WP Social Ninja. The feed loads after your main page content, so visitors see your site quickly. Images are optimized and lazy-loaded, meaning they only load when someone scrolls to them. Your site speed stays fast.
Can visitors click photos to see full posts?
Yes. When someone clicks a photo in your feed, it opens in a lightbox showing the full image, caption, and likes. They can click through to Instagram if they want to comment or follow you.
Can I choose which posts appear?
Yes. You can filter your Instagram posts by hashtags or specific keywords, so only posts with those individual hashtags or keywords show/hide in your feed.
Do I need to update the feed manually?
No. Once connected, your Instagram feed on WordPress updates automatically. You never need to manually add new posts. Just keep posting on Instagram normally, and your website feed stays up-to-date.

Subscribe To Get
Weekly Email Newsletter
Connect, Customize, and Display Social Feeds, Reviews, and Chat widgets


Trending Posts
-
 Mashfik Upal Aumy
 -

-


Leave a Reply