
How to Embed Facebook Events on Your Website (Step-by-Step Guide)


You created an event on Facebook. People are responding. But your website still shows nothing about it.
Your visitors come across your site, look around, and have no idea what’s coming up. They don’t see the event. They don’t know about the date. And they leave, without registering, without saving the date, without doing anything.
A Facebook Events feed lets you display your upcoming events from Facebook directly on your WordPress website. It updates automatically whenever you create or edit an event.
Right now, many websites miss this. Events exist on Facebook, but not on the site. Visitors never see them, so they leave without registering or saving the date.
This guide shows exactly how to embed your Facebook Events feed and keep your website up to date without manual work.
Let’s get started!
Key Takeaways
- A Facebook Events feed is a dynamic feed that shows your upcoming Facebook events directly on your WordPress website
- The native Facebook Page Plugin is unreliable and often breaks due to API changes, making it a poor long-term solution.
- The most stable method is using a plugin like WP Social Ninja, which handles API connections and keeps your events synced without manual updates
- Setup requires generating a Facebook Event Access Token, connecting your Page, creating a feed template, and embedding it using a shortcode
- Only events created directly by your Facebook Page will appear; co-hosted events are not supported due to Facebook API limitations
- You can customize layout, filter upcoming events, and place the feed anywhere on your site (homepage, events page, landing pages)
- Common issues like feeds not loading or updating are usually caused by expired tokens or cache, and can be fixed quickly by reconnecting or clearing cache
- Embedding events improves visibility, keeps your site updated, and increases the chances of users discovering and attending your events
What does ‘Embed Facebook Events’ mean?
Embedding Facebook Events means showing a live event feed from your Facebook Page directly on your website. It pulls real-time data, so any new or updated event appears automatically without manual updates.
It’s not a static image or a hand-written list. It’s a live feed connected to Facebook, which keeps your site always up-to-date and relevant.
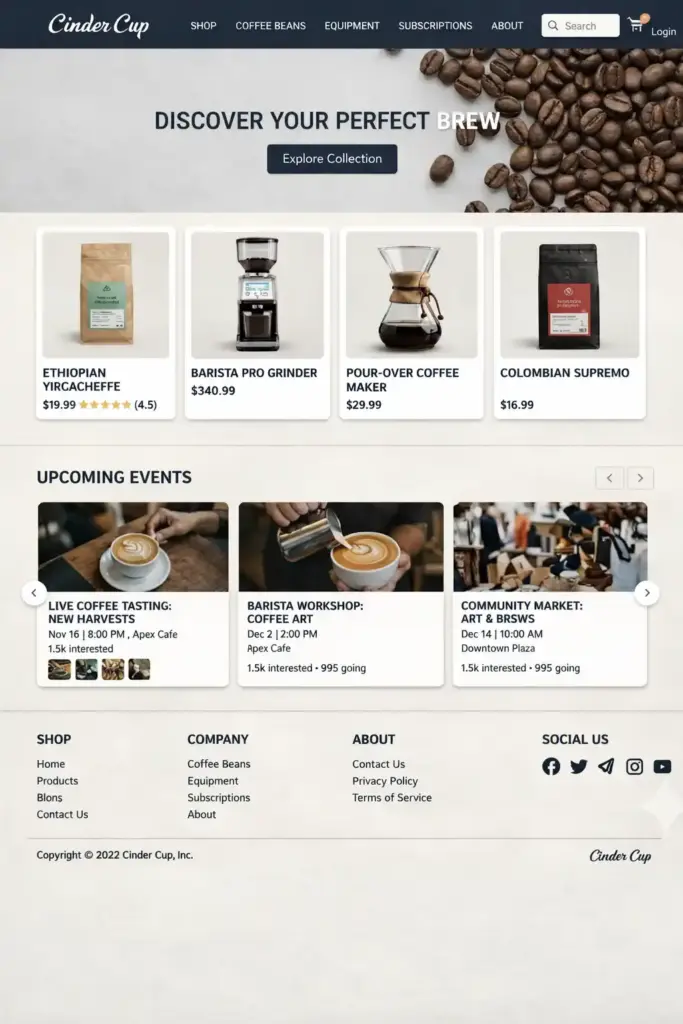
Adding a Facebook Events feed works almost the same way as embedding your Facebook feed. Once you connect your Page, you can display upcoming events on your website just as easily as your daily posts.
Why showing Facebook Events on your website improves visibility and conversions
A website that doesn’t show upcoming events looks inactive. Visitors who might want to attend something don’t know it exists. And you end up promoting the same event on five different channels, except your own website.
When you embed your Facebook Events feed:
- Your site stays updated without manual work: New events on Facebook appear on your site automatically.
- Visitors can see and plan ahead: They’re more likely to register, bookmark, or share when the event is right in front of them.
- You look more credible: An active events section signals that your business is running, growing, and worth paying attention to.
- You stop sending people away: Instead of telling people to “check your Facebook page” to see the events, they see everything on your website.
If you’ve been wondering why social feeds matter for a WordPress site, events are one of the clearest examples. They’re time-sensitive, and the more places they appear, the more people show up.
Why the default Facebook embed often doesn’t work
Before getting into the solution, it’s worth addressing something a lot of people run into.
Facebook provides an official embed code that lets you show parts of your Page on your site. This can include posts, a timeline preview, and sometimes events.
It sounds simple, but it often doesn’t work the way people expect.
Here are the common issues:
- API changes: Facebook updates its API regularly, and older embed codes often stop working after these updates.
- Page restrictions: If your Page doesn’t have events set up correctly, the plugin won’t display them regardless of your embed code.
- Limited display options: The native plugin gives you very little control over how events look on your site.
- No error handling: When it breaks, it just goes blank. There’s no error message, no helpful indication of what went wrong.
This is why most businesses and developers move to a dedicated Facebook feed plugin for WordPress instead.
The best way to embed Facebook Events on WordPress
The most reliable way to display Facebook Events on a WordPress site is by using a Facebook feed plugin like WP Social Ninja.
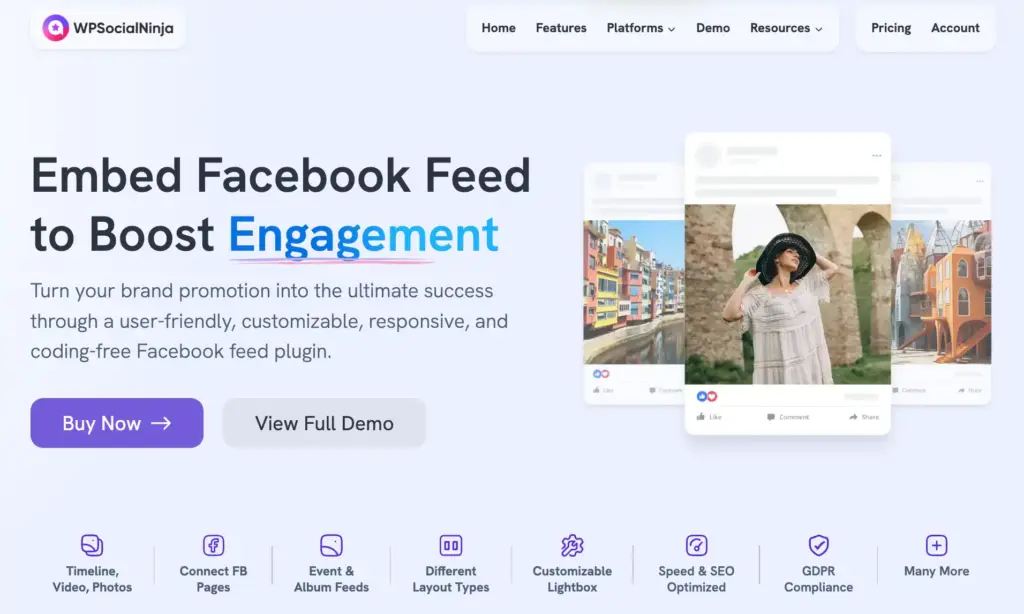
It connects your Facebook Page, pulls real-time data, and keeps your event feed updated automatically without manual work.
You can choose to display only events, customize how they appear, and control the layout using options like timeline, grid, masonry, or carousel.
It also lets you filter content, show or hide specific details, and present events in a clean, structured way, so your website always stays updated and easy to explore.
Before starting the setup, make sure you have:
- WP Social Ninja installed and activated on your WordPress site
- Admin access to your Facebook Page
- A Facebook Developer account (you’ll need this to generate your Event Access Token, we’ve explained it below)
Step-by-step: How to embed Facebook Events feed
The setup for Facebook Events is slightly different from a regular Facebook feed because it requires a specific Event Access Token.
Here’s the full process:
Step 1: Install WP Social Ninja
If you haven’t already, install WP Social Ninja from the WordPress plugin directory (search “WP Social Ninja”), install it, and activate it from your WordPress dashboard.
The free version covers basic feeds. For Facebook Events, you’ll need the Pro version.
Step 2: Go to Platforms and select Facebook
From your WordPress dashboard, go to WP Social Ninja → Platforms. Find Facebook and click the Settings icon next to it.
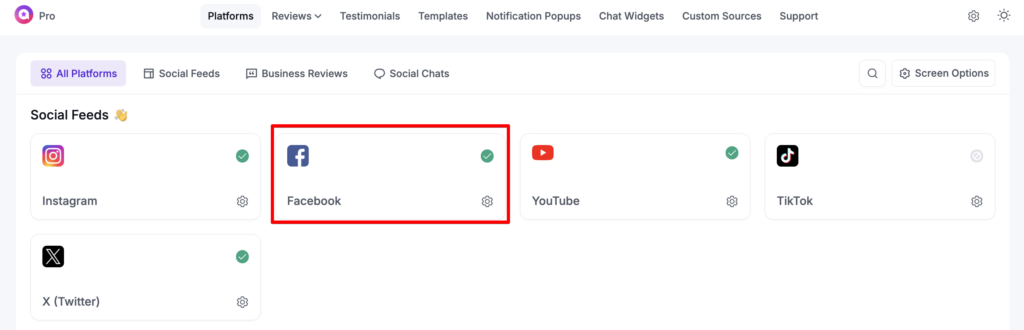
A pop-up will appear for Facebook Configuration.
Step 3: Select “Connect Event Access Token”
This is the step that’s different from a regular Facebook feed setup.
In the configuration pop-up, you’ll find three options to configure the account. Select Connect Event Access Token. You’ll see two fields: Facebook Page ID and Event Access Token. Both are required.
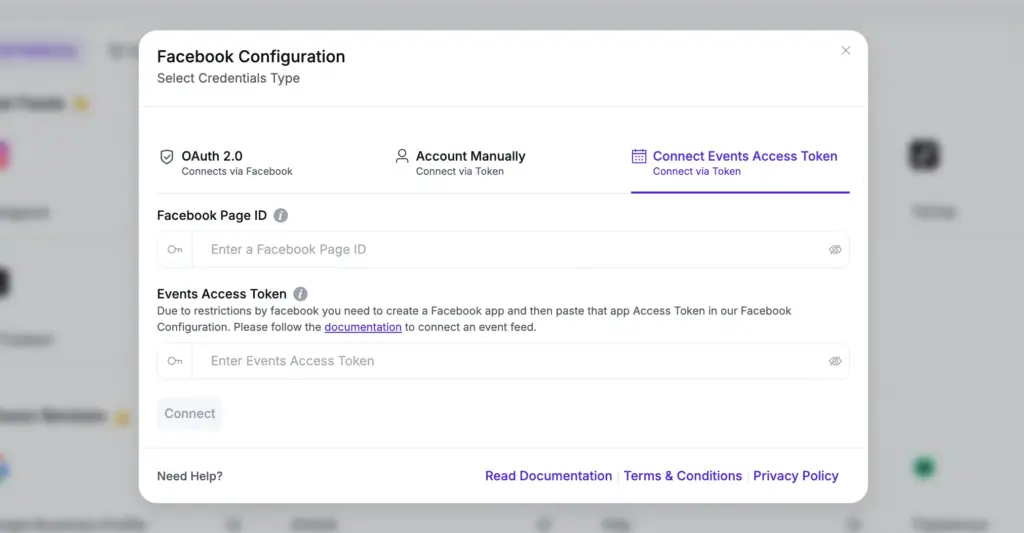
Don’t have these yet? The next two steps cover how to get them.
Step 4: Generate Your Facebook App and Access Token
To display events, Facebook requires you to use a long-lived access token from a Facebook App. Here’s how to get it:
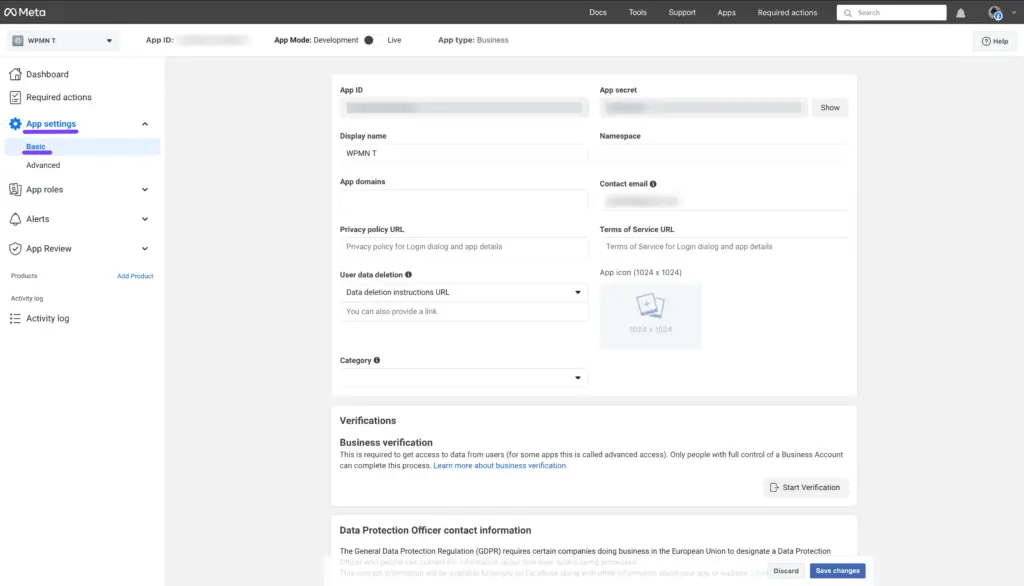
Create a Facebook App:
- Go to Facebook Developer site and log in with your Facebook account
- From the top menu, click My Apps → Create App
- Select the app type (usually “Business” for social feed access) and click Next
- Fill in the required details like App Name, Contact Email, and click Create App
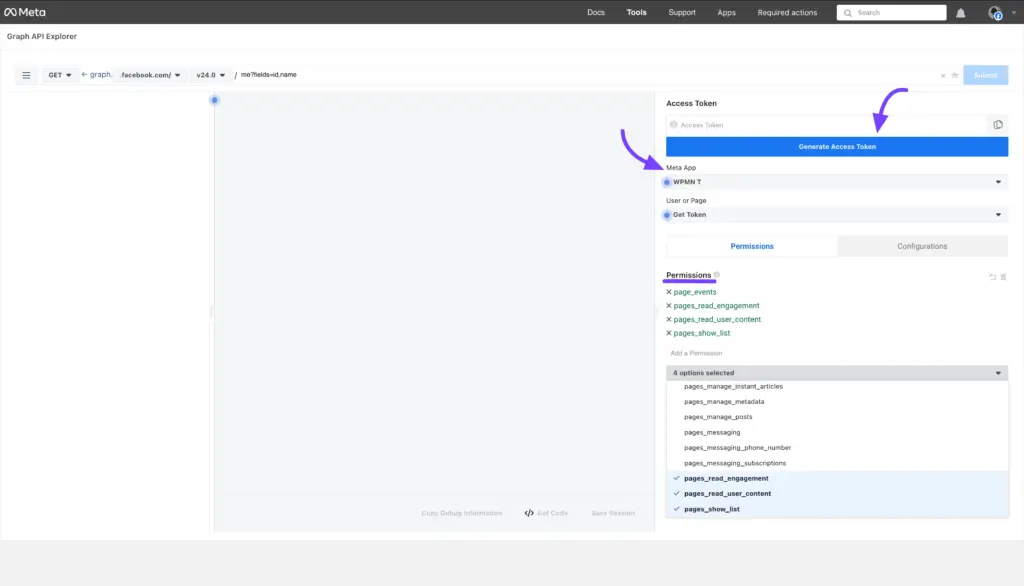
Get your User Access Token:
- Go to the Facebook Graph API Explorer
- Select your app from the dropdown
- Generate a User Access Token with pages_read_engagement and pages_read_user_content permissions
Convert to a long-lived Token:
Standard tokens expire quickly. So, you need a long-lived token for a stable connection.
- Go to the Facebook Access Token Debugger
- Paste your User Access Token and click Debug
- Scroll to the bottom and click Extend Access Token
- Copy the new long-lived token; this is your Event Access Token

If you want a detailed walkthrough of the token process, see the guide on getting your Facebook access token.
Get your Page ID: Go to your Facebook Page, click About, and scroll down. Your Page ID is listed there. Alternatively, it’s visible in the URL of your Page’s about section.
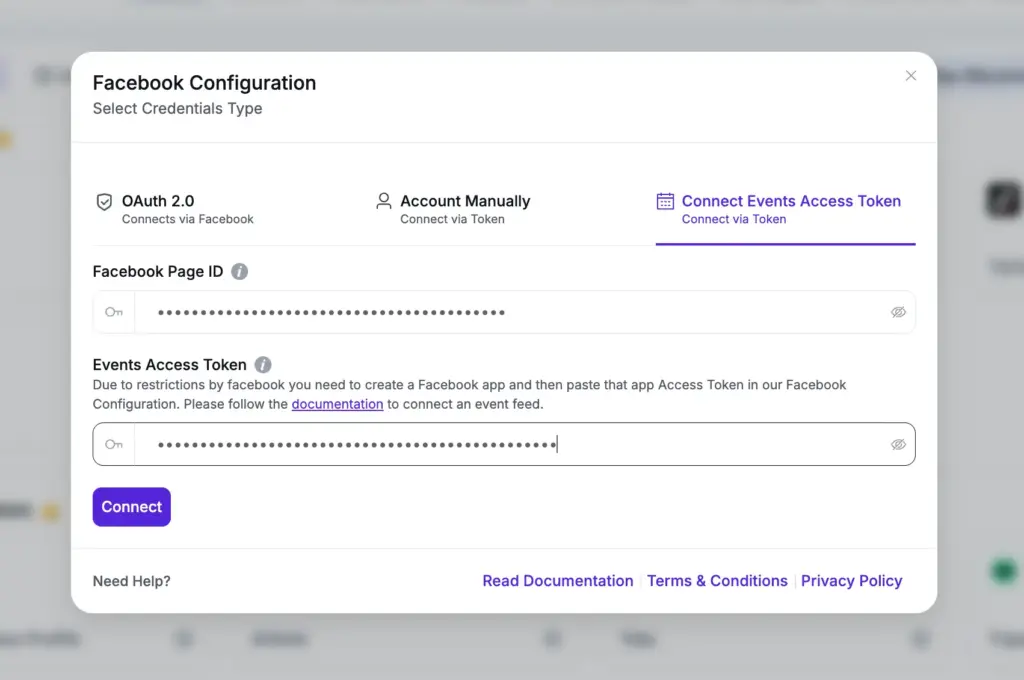
Step 5: Connect your Facebook page Events
Go back to WP Social Ninja, open the Facebook Event Access Configuration, paste in your Page ID and Long-Lived Access Token, and click Connect.
Step 6: Add a New Template
Click Add New Template. A pop-up will appear.
From the Feed Type dropdown, select Events. Then choose which Page’s events you want to display (the page you connected in the previous step).
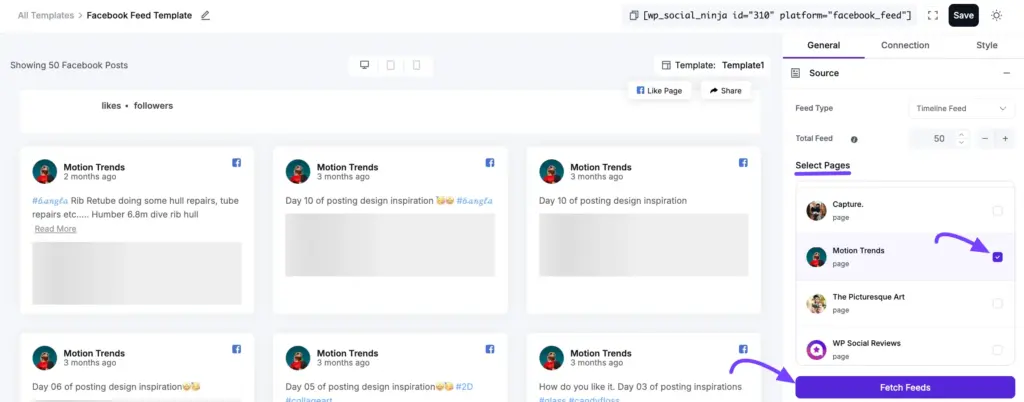
Click Fetch Feeds. Your events will load.
Important: Events must be created directly by your Facebook Page to appear in the feed. Events where your Page is only listed as a co-host will not show up; this is a Facebook API limitation, not a plugin issue.
Step 7: Customize and Style your feed
Now you can adjust how your events look:
- Choose a layout (Grid, List, or Carousel)
- Set how many events to display
- Show or hide event details like date, time, and description
- Adjust colors, fonts, and spacing to match your site
- Set a date range to show only upcoming events
Step 8: Save and embed
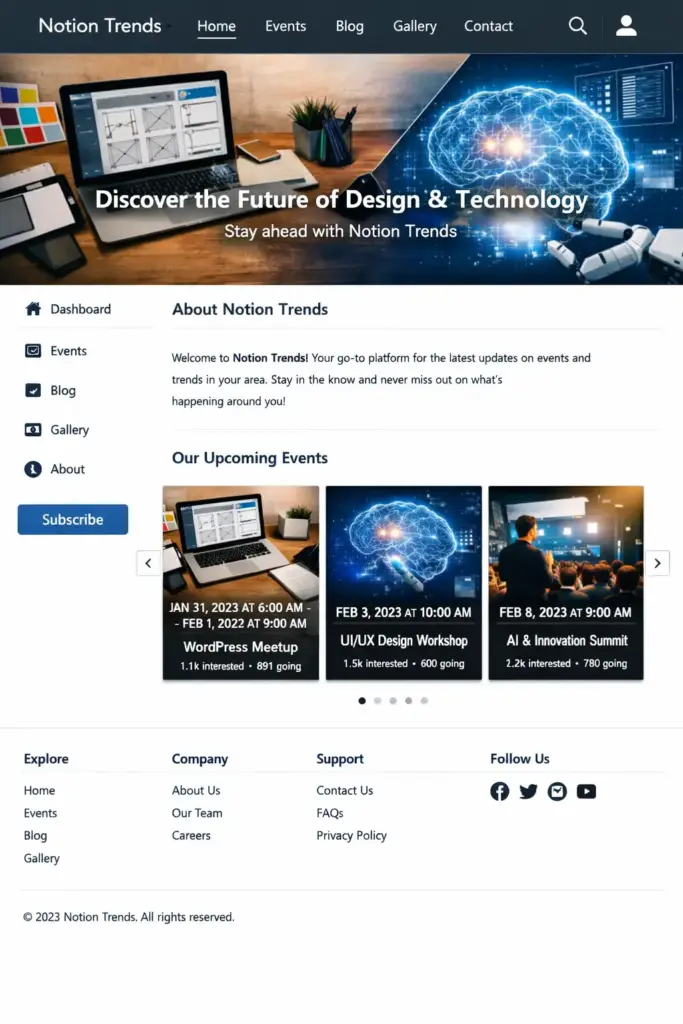
Click Save Template. You’ll get a shortcode that looks like this: [wpsn_social_feed id=”123″]
Copy that shortcode and paste it onto any page, post, sidebar, or footer in WordPress. Your Facebook Events feed is now live on your website.
Common Facebook Event feed problems
When your Facebook event feed doesn’t show up or stops updating, it’s usually something simple. Most issues come from expired tokens, cache delays, or Facebook API limits.
Start with these quick checks before reconnecting everything; they solve most problems without extra setup:
The feed isn’t showing any events
This usually happens when the access token has expired or is no longer valid. The easiest fix is to reconnect your Facebook account in WP Social Ninja to refresh the connection and restore the event feed.
Events aren’t updating
Go to WP Social Ninja → Settings → Feed Platforms → Facebook Settings and click Clear Cache. This forces the plugin to fetch fresh data from Facebook.
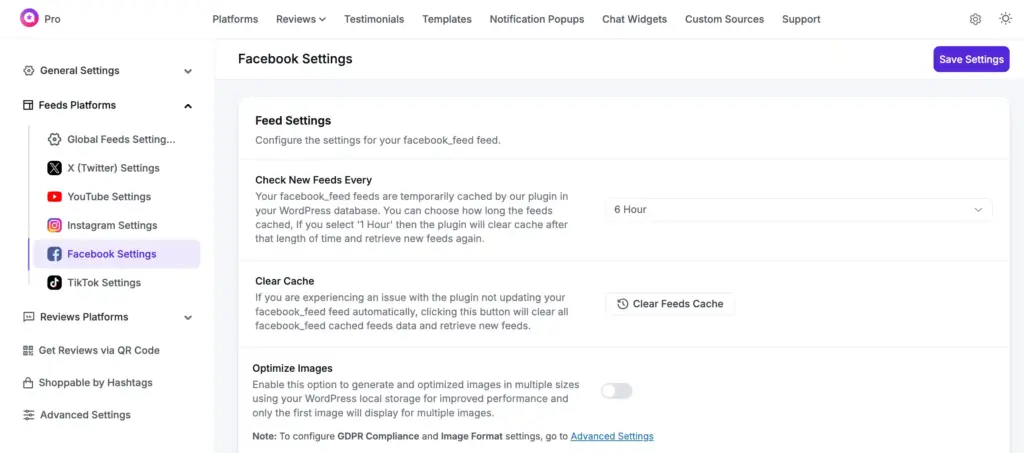
You can also set the sync interval here; choose how often WP Social Ninja checks for new events.
The embed worked before, but stopped loading
This is almost always caused by a Facebook API change or an expired token. The fix is to remove the old WP Social Ninja app from your Facebook Business Integrations settings, then re-authorize the connection from scratch.
If the error message points to an API failure specifically, this guide on how to fix Facebook API errors walks through the most common causes and their exact fixes, useful if reconnecting alone doesn’t resolve it.
Note: When you delete a registered app from Facebook, the access token is disconnected from every site using it. You’ll need to reconnect on each site. This is a Facebook/Meta policy.
If you’re in the process of cleaning up your Facebook presence more broadly, for example, switching to a new Page or removing an old one, here’s a guide on how to delete a Facebook Business Page so you can do it without accidentally breaking other connected tools.
Co-hosted events aren’t appearing
Events where your Page is only a co-host won’t show up in the feed. Facebook’s API doesn’t share data for co-hosted events. To get an event into your feed, it must be created directly by the main Page.
The Facebook native embed isn’t working (native embed)
In most cases, this happens due to Facebook API changes that the native embed can’t handle properly. Using a Facebook feed plugin is the most stable and suitable solution.
What else can you do with Facebook feeds on your site?
Once your Events feed is live, your Facebook Page is already connected through WP Social Ninja. So you don’t need any extra setup to show more content. You can quickly display posts, albums or reviews from the same dashboard and keep your site updated with fresh Facebook activity.
You can also display:
- Facebook post feed: Your regular Page updates, photos, and videos
- Facebook album feed: Display all your Facebook photo albums or showcase a specific album on your site
- Reviews from your Facebook Page: Customer ratings displayed on product or service pages
If you want to bring in feeds from other platforms too, the same plugin handles Instagram, YouTube, TikTok, and more from one dashboard. Here’s a broader guide on how to embed social media feeds if you want to go further.
How to get more out of your Facebook Events
Embedding the feed is the first step. Here’s how to make it work harder:
Place your events feed where it’s most visible: A dedicated Events page is good, but also consider your homepage, your sidebar, or a landing page for a specific event. The more visible it is, the more people will see it.
Combine events with other social proof: Showing reviews alongside your events builds trust. Visitors who see that other people attended and enjoyed past events are more likely to sign up for the next one.
Promote your events page: Once you have a clean events feed on your site, share that page in your email newsletter, in your social bios, and across your other channels. Your website becomes the central hub.
Growing your Facebook audience also means more people see your events in the first place. If your Page follower count is still low, this guide on how to get followers on Facebook has practical tactics that work alongside your events strategy..
If you’re also trying to get more leads on Facebook from your events, combining your Facebook promotion with a clear events section on your website creates a much stronger conversion path.
Keep your Facebook Events visible and updated
Embedding Facebook Events on your website doesn’t have to be complicated; it just needs the right setup.
The native Facebook plugin is unreliable. The manual approach doesn’t scale. But with a dedicated plugin and a proper access token, you get a feed that stays updated, looks clean, and requires nothing from you after the initial setup.
If you’re ready to set it up, create a Facebook event first if you haven’t already, then follow the steps above to get it showing on your site. And if you want to take your whole social presence further, social media integration is a natural next step once your events feed is live.
FAQ
How can I embed Facebook Events on my website?
The most reliable way is using a WordPress plugin like WP Social Ninja. Install the plugin, generate a Facebook Event Access Token, connect your Page, select Events as the feed type, and paste the shortcode onto any page. The feed updates automatically as you add or update events on Facebook.
Is there a free way to embed Facebook Events?
WP Social Ninja has a free version, but Facebook Events embedding requires the Pro version because it needs a dedicated API connection and Event Access Token setup. You can try the free version to test the plugin, then upgrade for the Events feature.
How do I fix a Facebook Events embed that isn’t loading?
Start by clearing the plugin cache (WP Social Ninja → Settings → Facebook Settings → Clear Cache). If that doesn’t help, check whether your access token has expired and reconnect the app. If you previously used the native Facebook Page Plugin, removing and re-adding it often resolves loading issues caused by outdated embed codes.
Does this work with Gutenberg and Elementor?
Yes. You can embed the events feed using a shortcode, which works in Gutenberg, Elementor, Oxygen, and Beaver theme builder.

Subscribe To Get
Weekly Email Newsletter
Connect, Customize, and Display Social Feeds, Reviews, and Chat widgets


Trending Posts
-
-
 Mashfik Upal Aumy
 -


Leave a Reply