
With WP Social Ninja, adding your Facebook Page events to your WordPress site is quick and simple. In this guide, we’ll walk you through how to connect your Facebook Page with WP Social Ninja and display your events directly on your website.
Facebook Event Access Settings #
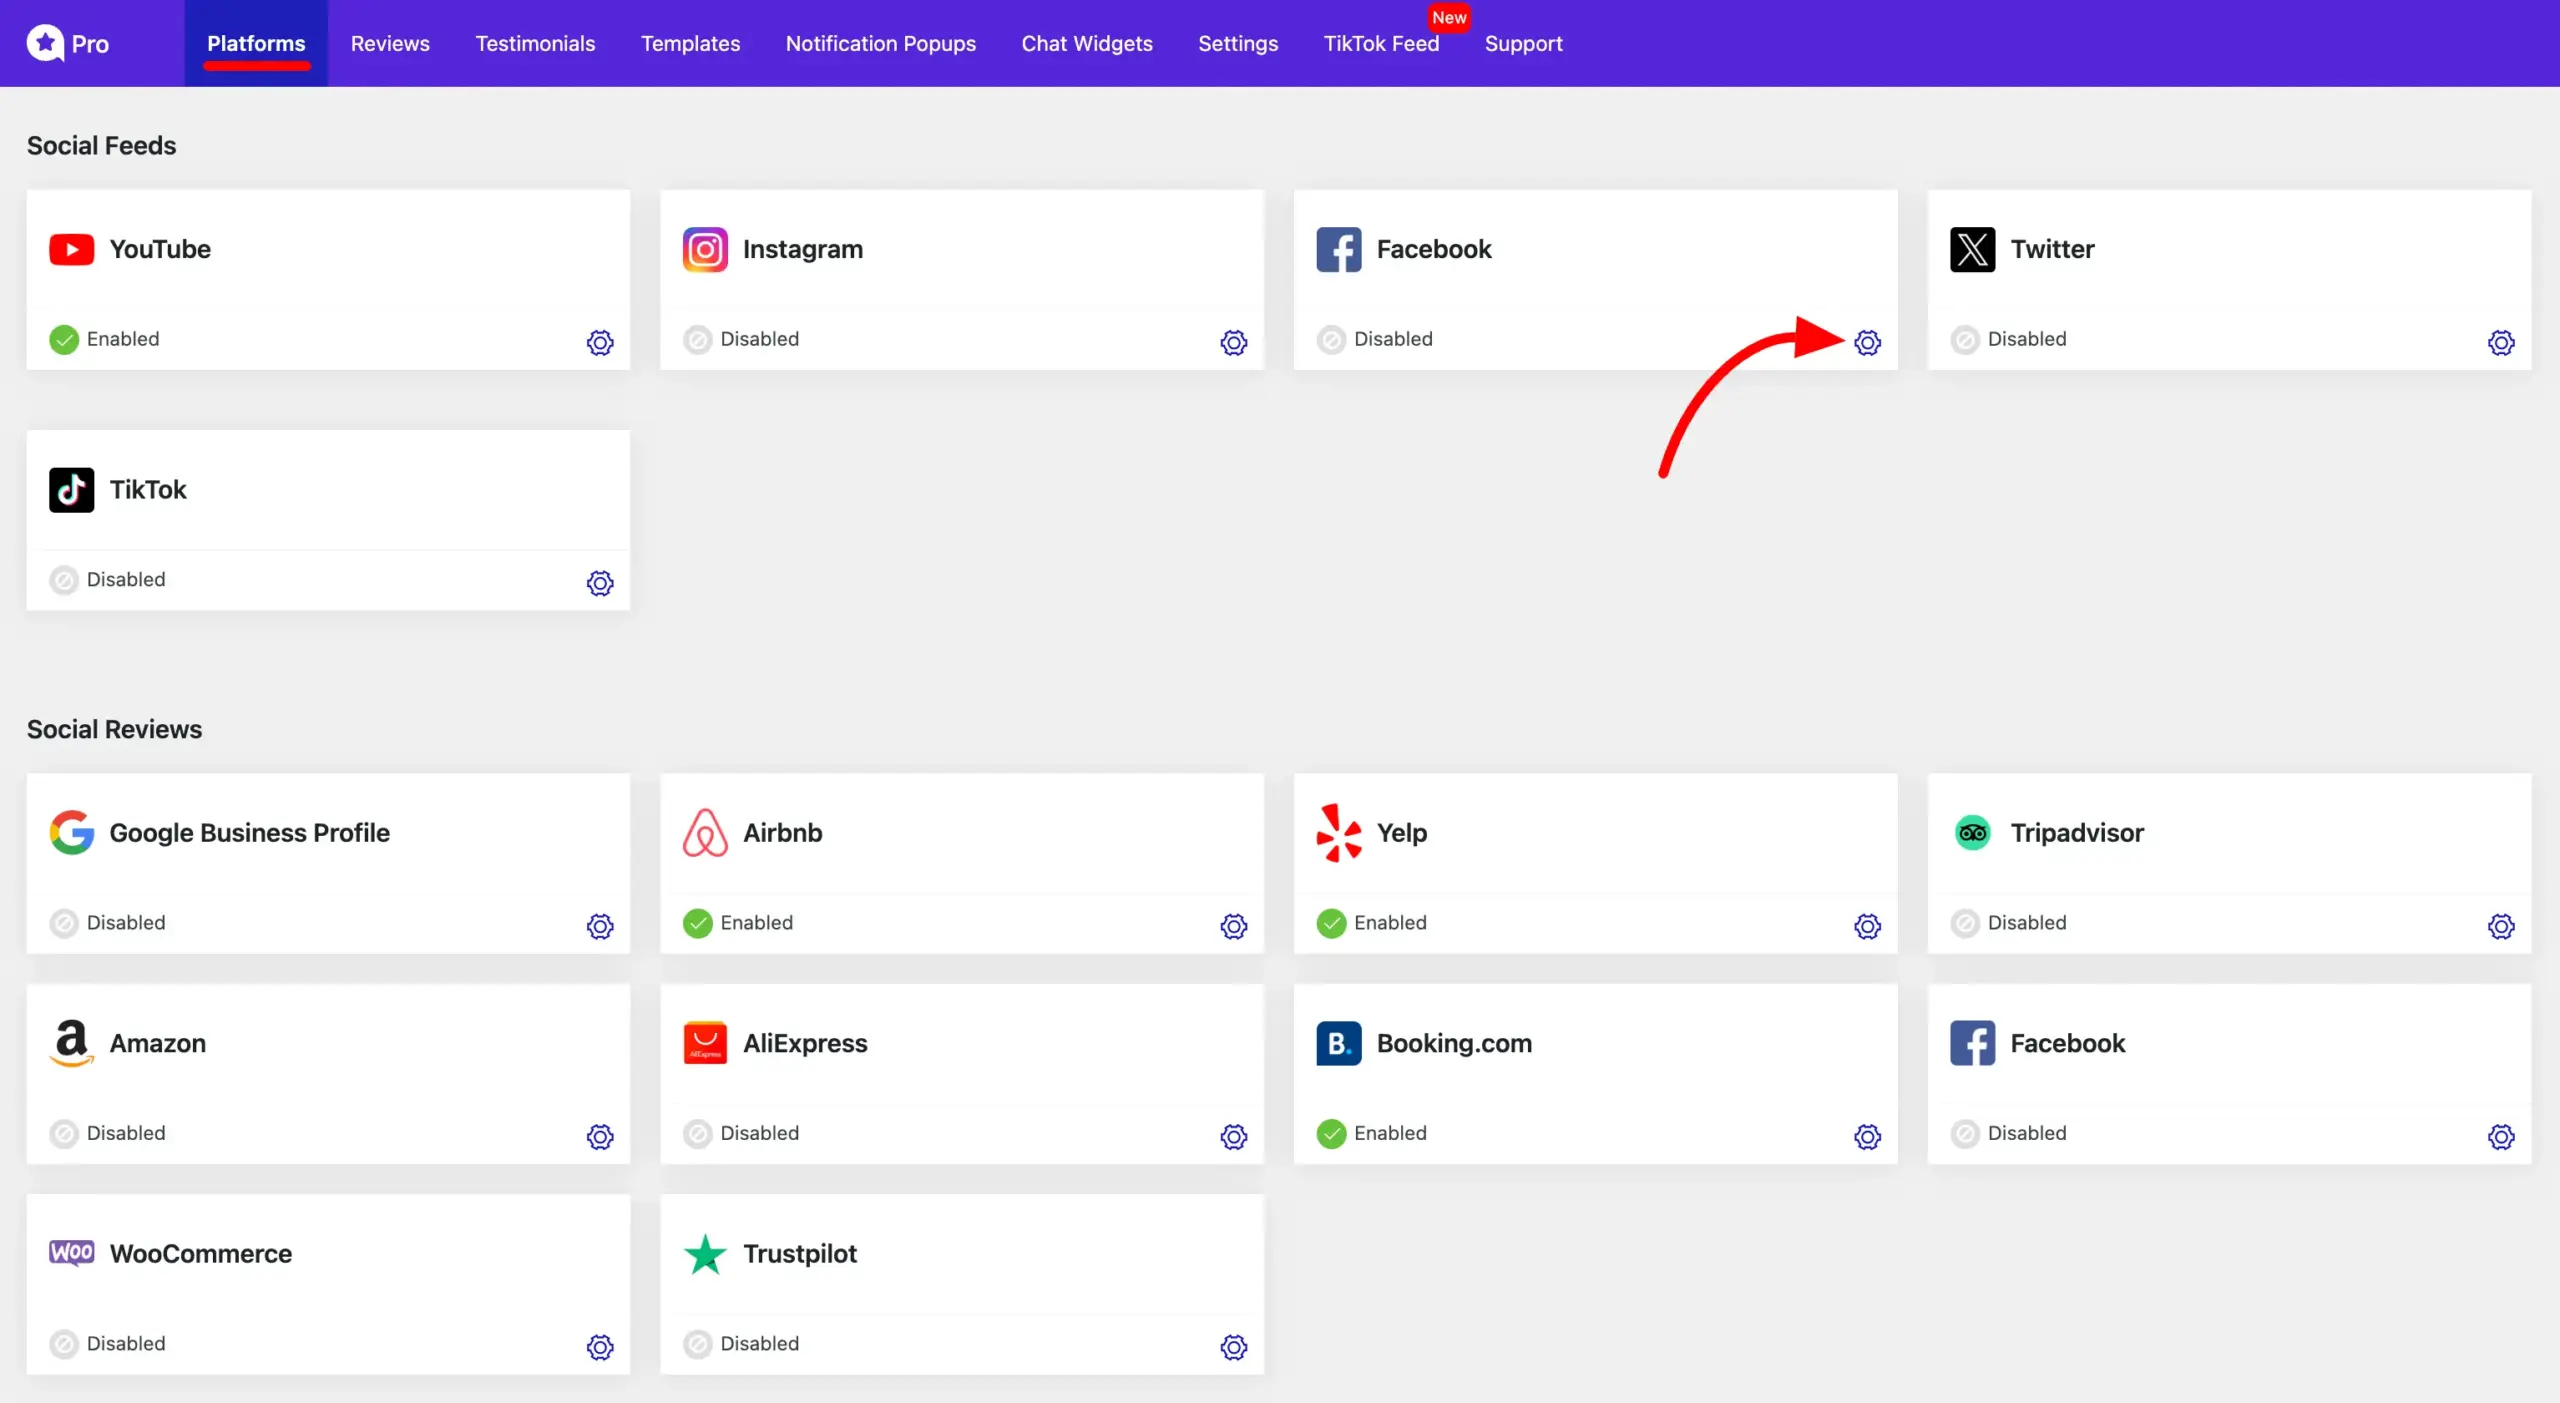
To access the Facebook Event Access settings in WP Social Ninja, navigate to the Platform tab from the top menu, then click the Settings icon.
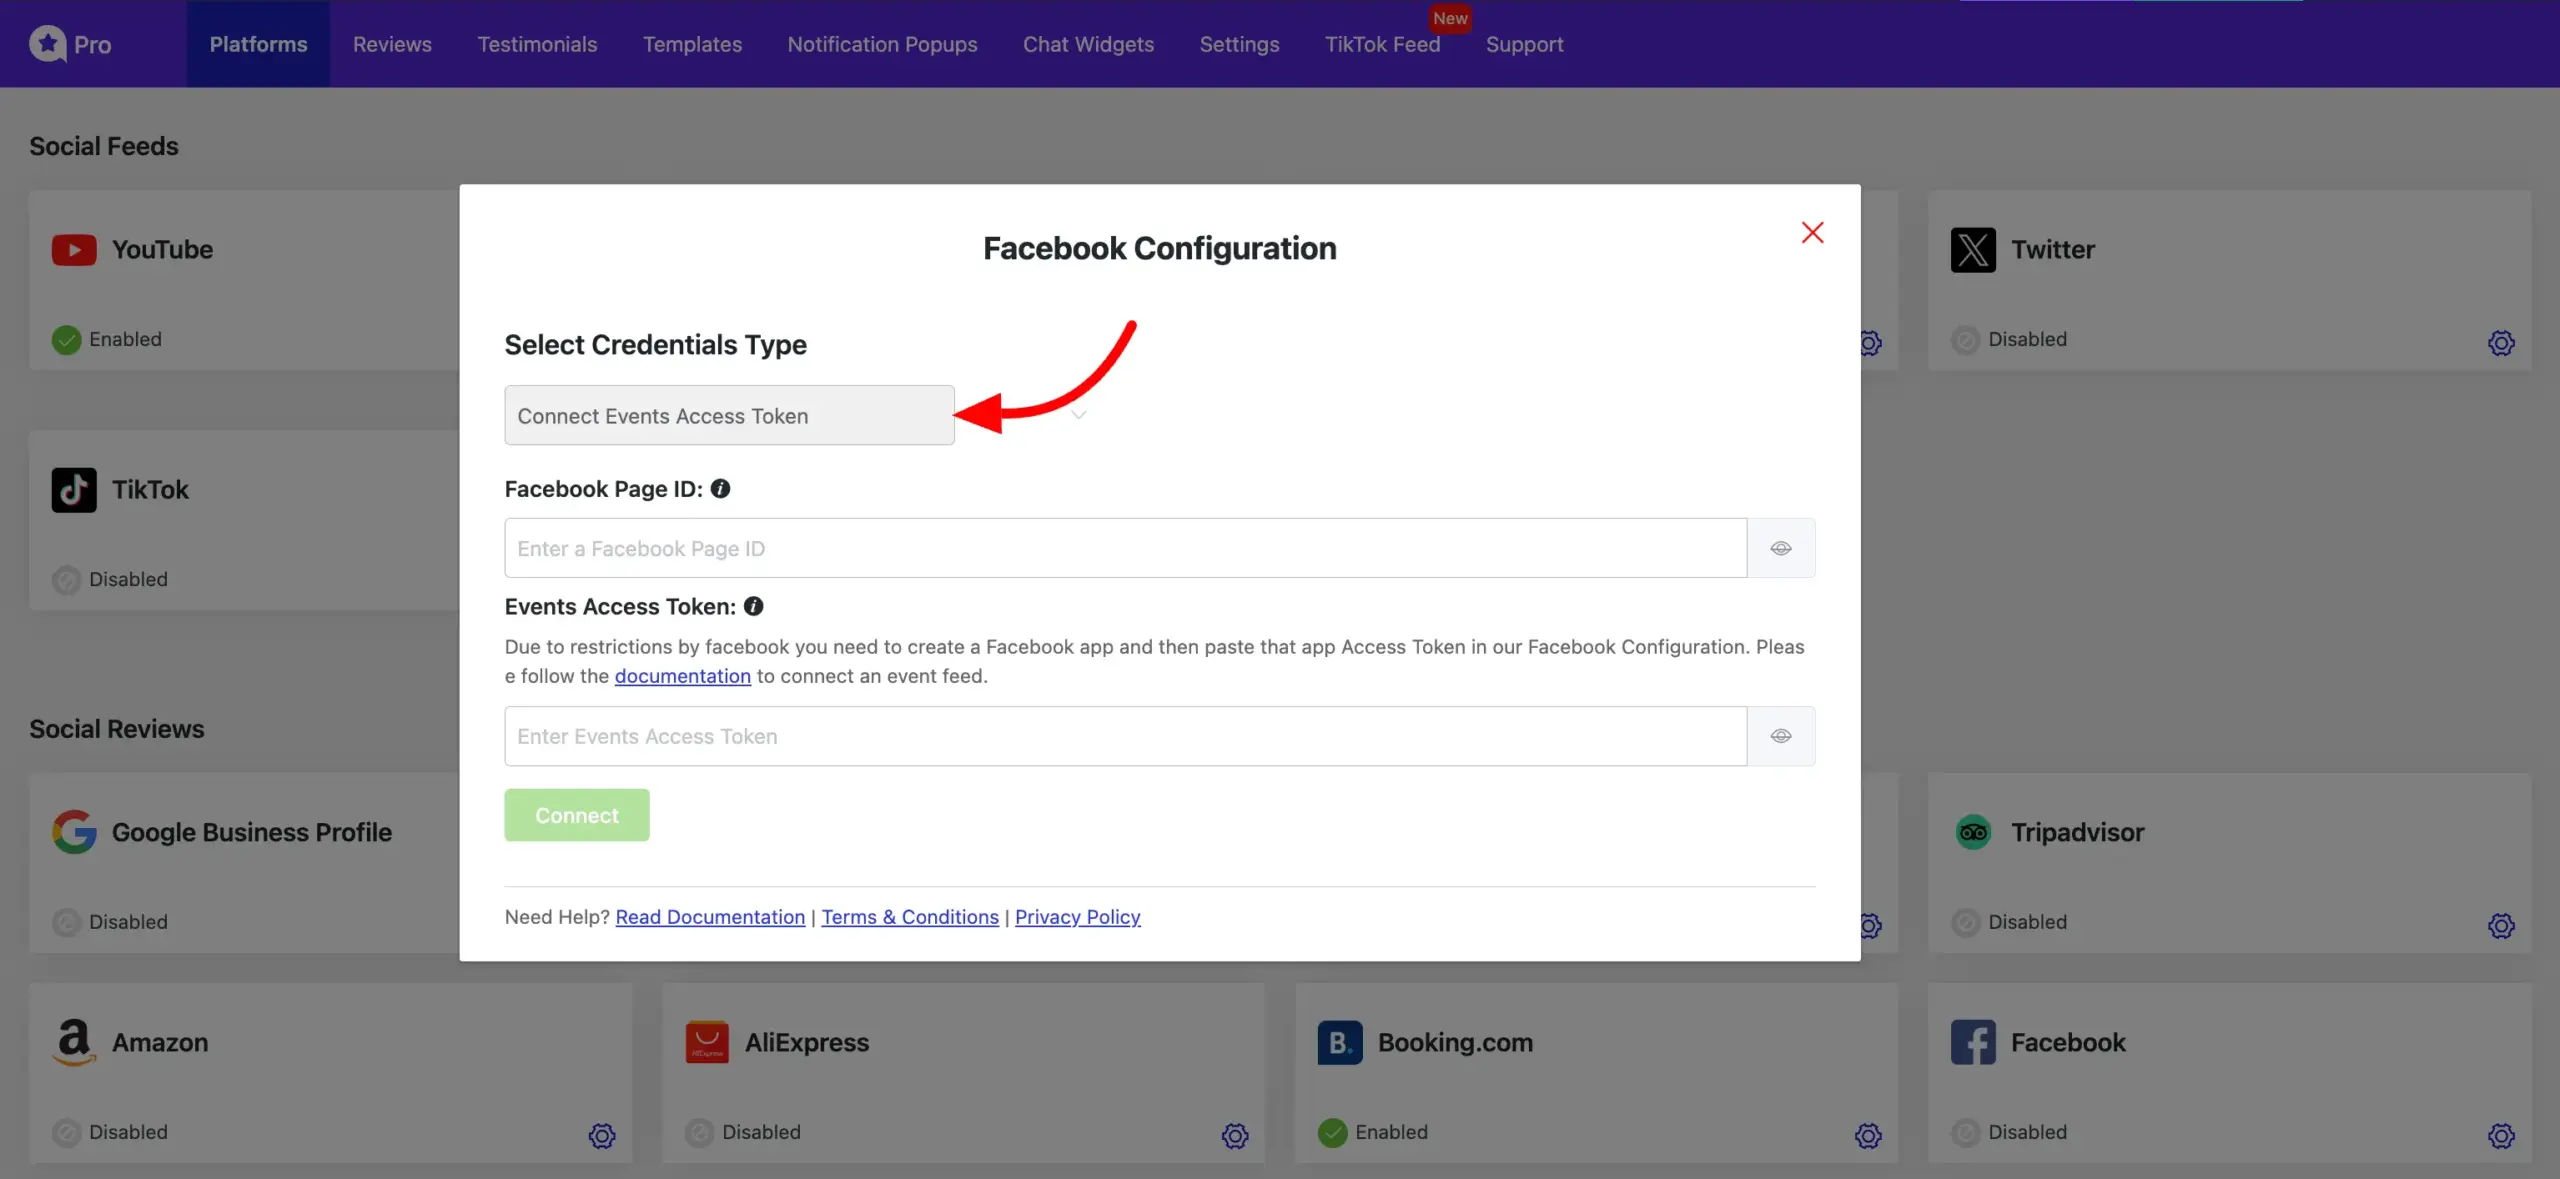
A pop-up for Facebook Configuration will now appear. From the dropdown, select Connect Event Access Token. You’ll see that both your Facebook Page ID and Event Access Token are required to connect your Facebook Events.
Now, we’ll walk you through how to connect your Facebook Page Events with WP Social Ninja. To get started, you’ll first need to create a Facebook App to collect the required credentials.
Facebook App #
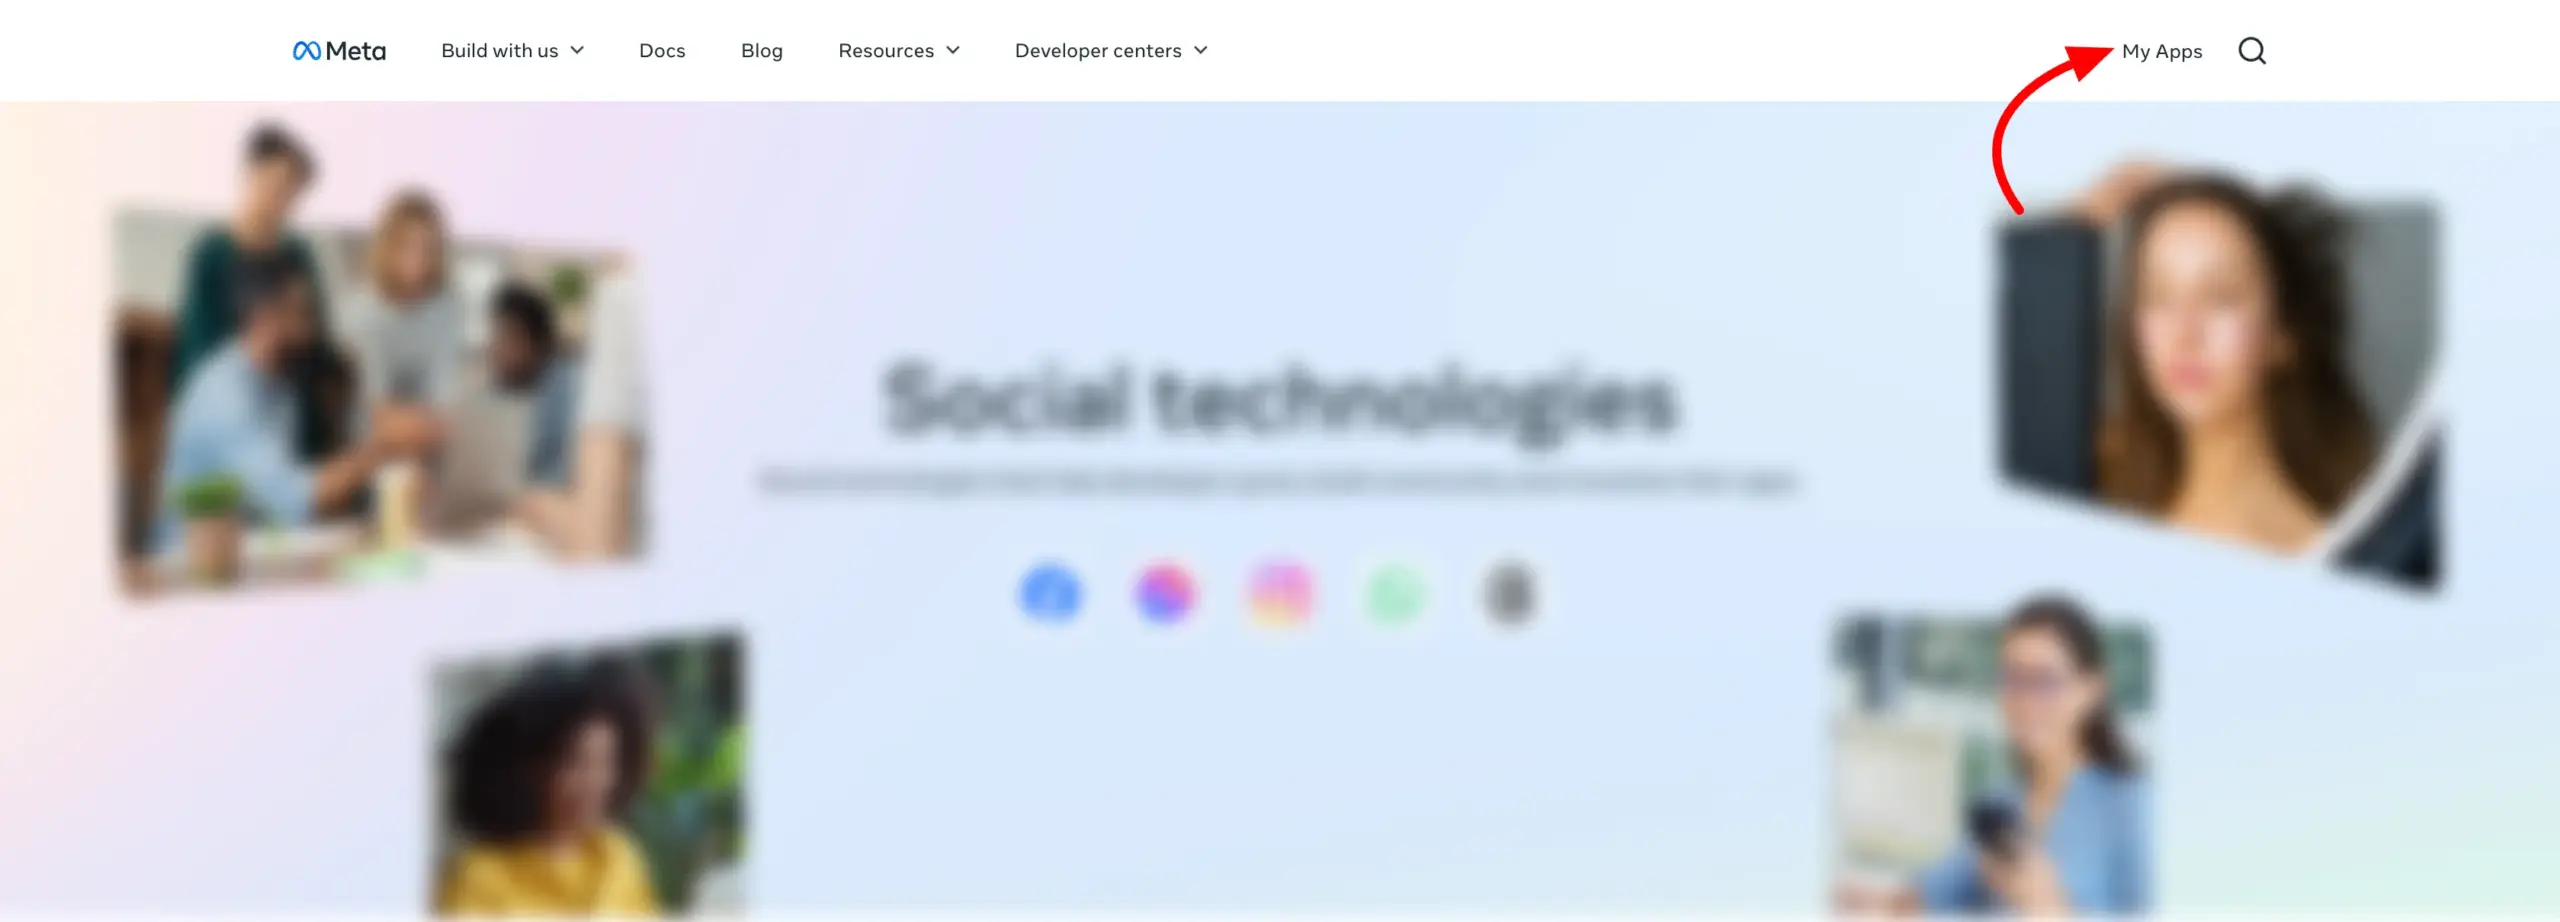
To create a Facebook App, visit the Facebook Developer site. Log in to your account and click on the My Apps button from the top menu.
Note that, You must log in with your personal Facebook profile’s username and password. Businesses cannot register as developers on Facebook; only individuals may do so.
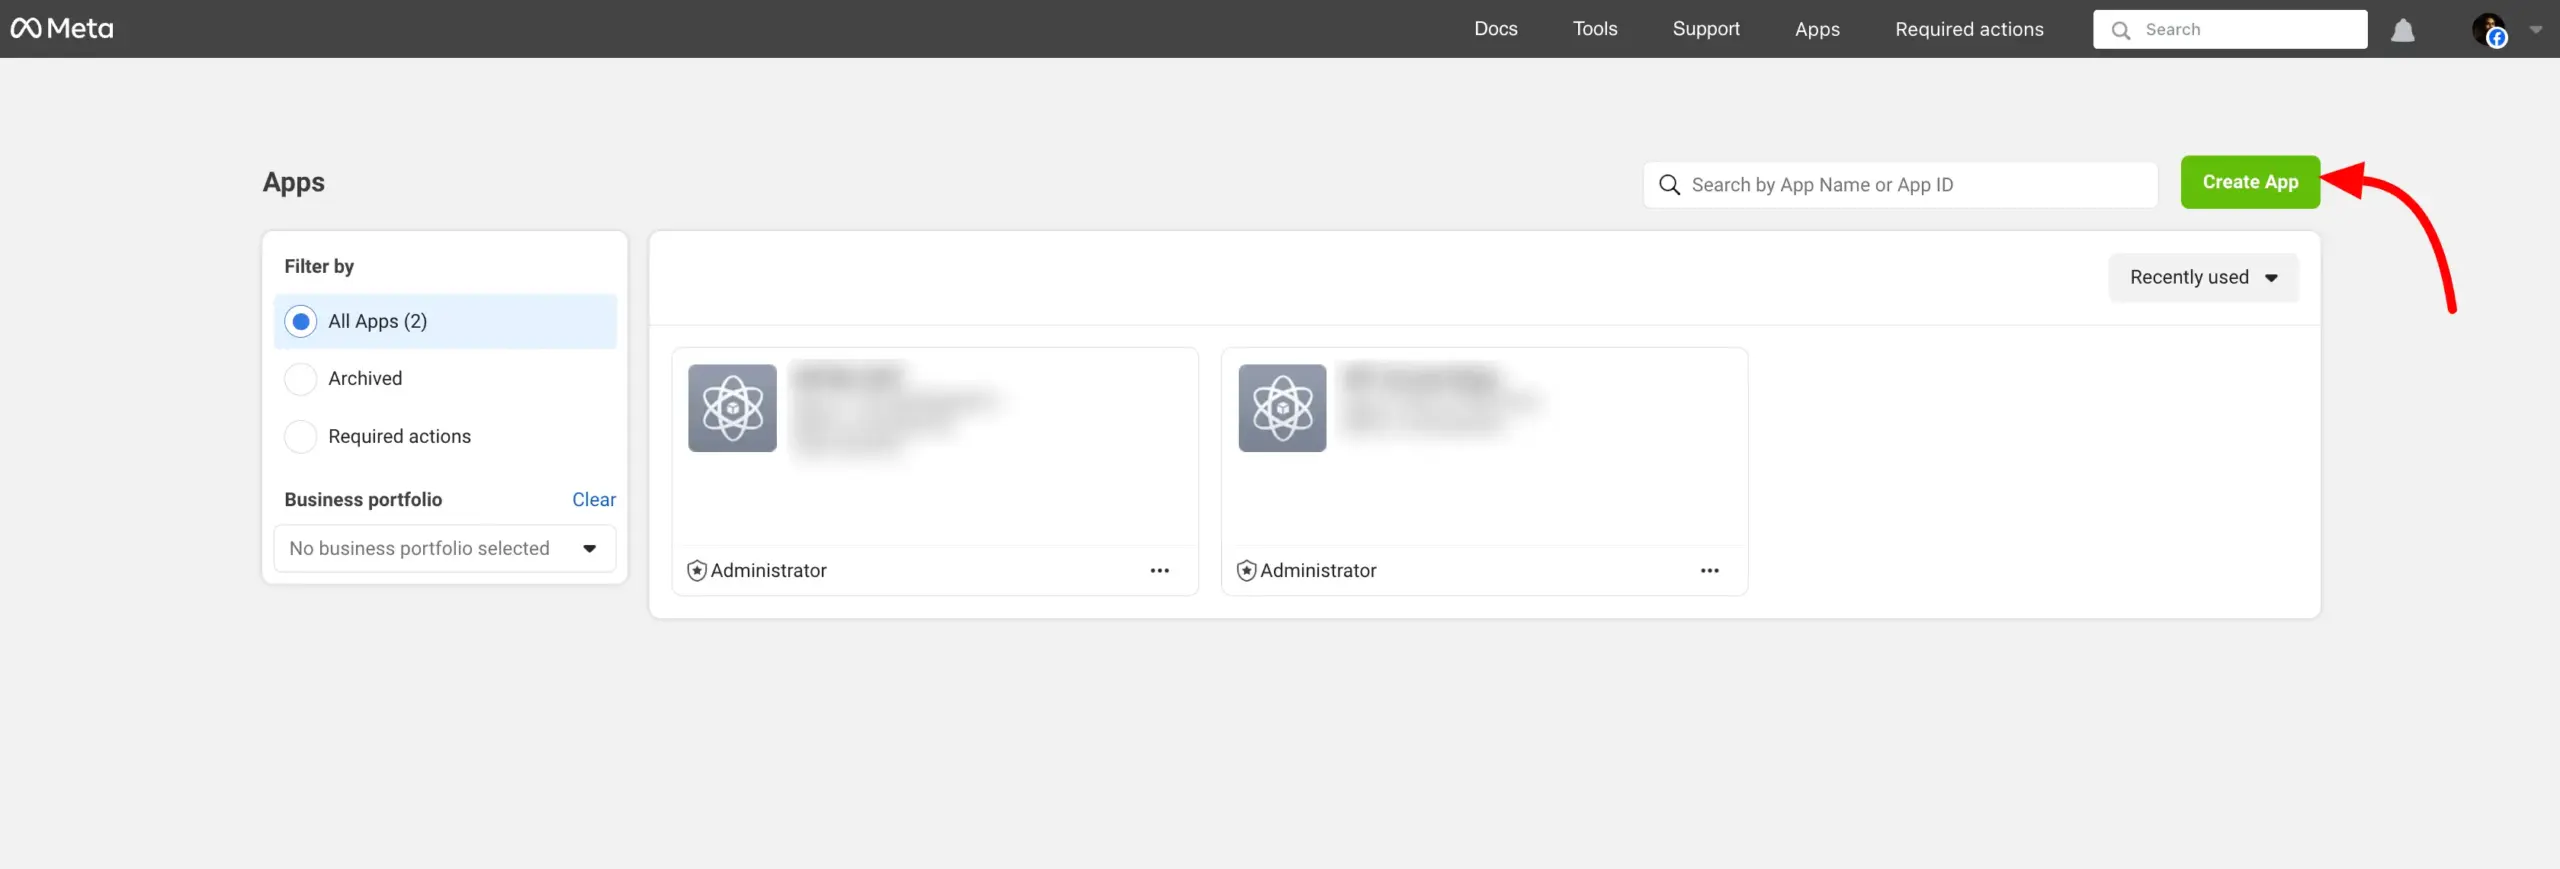
Now you’ll see the app creation page. Just click on the Create App button to get started.
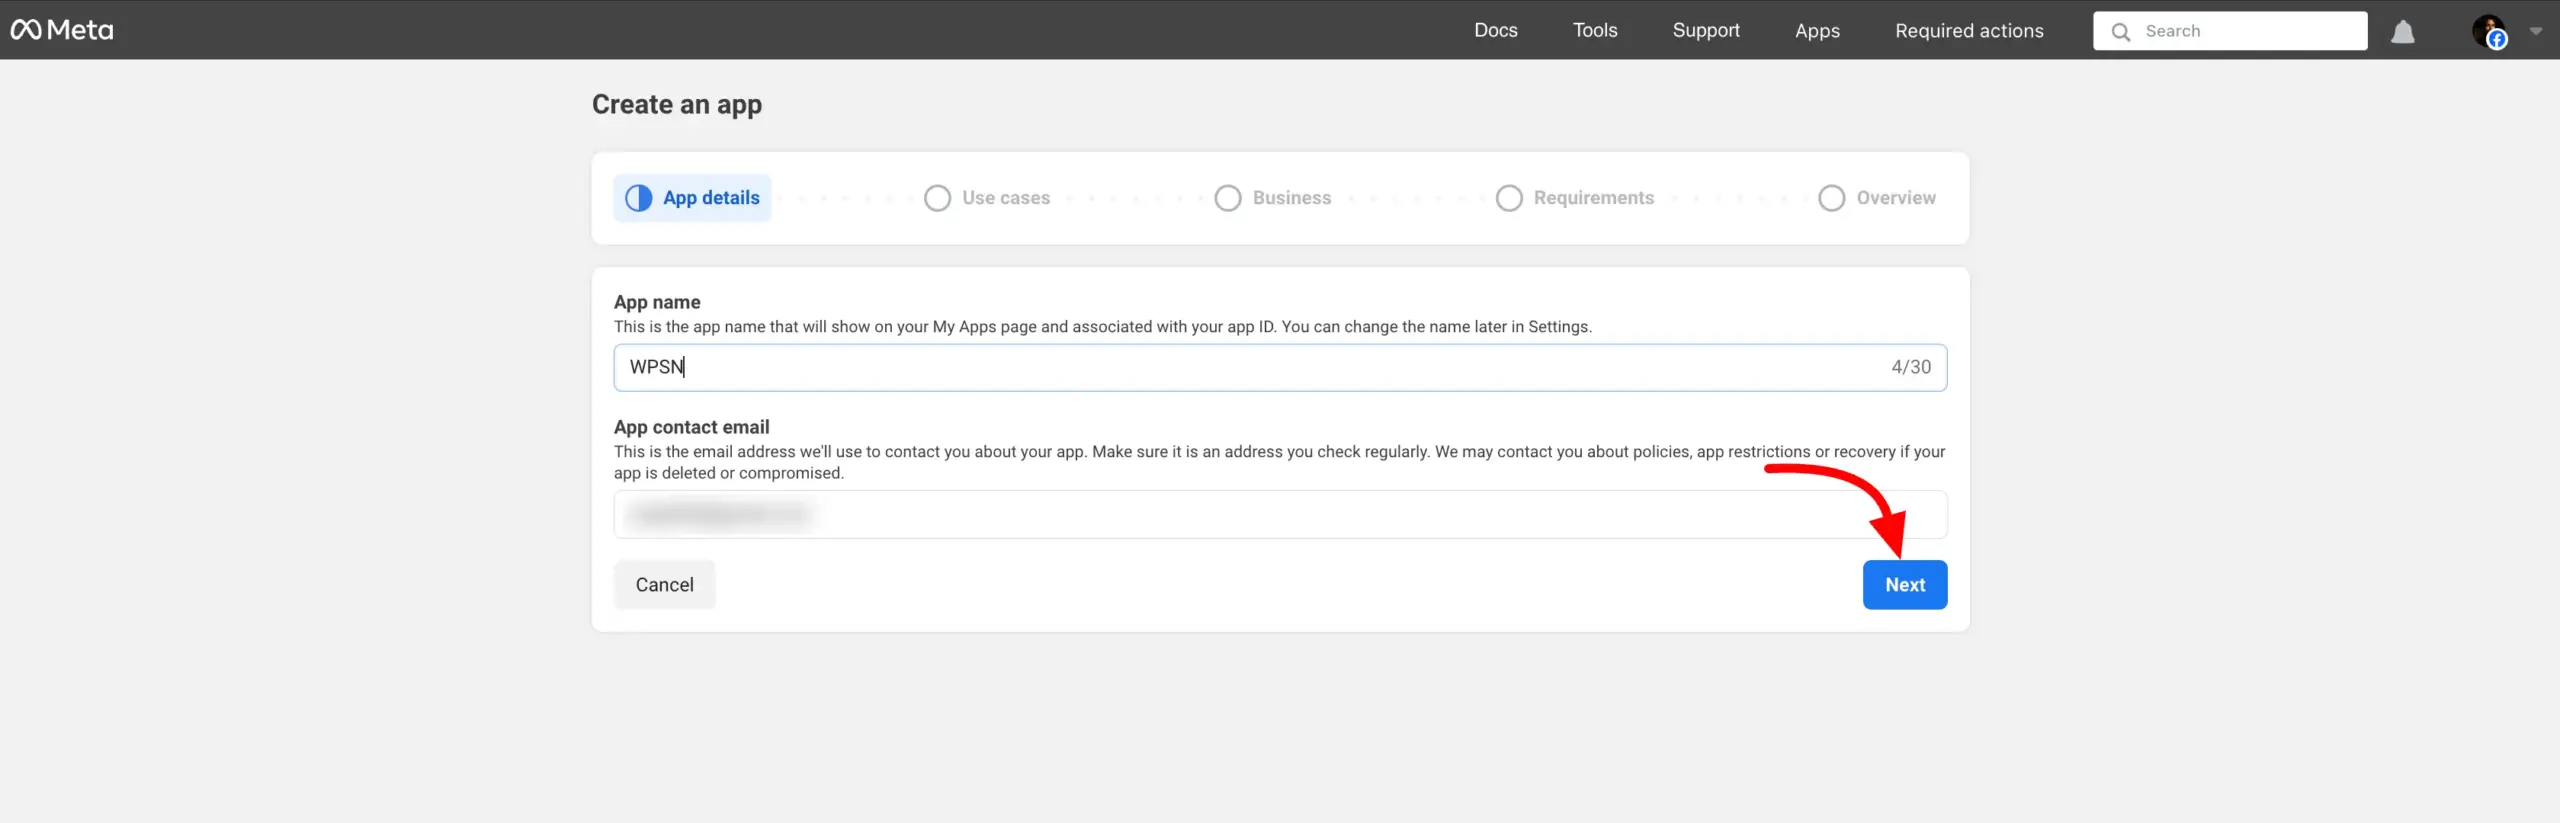
Give your app a name and enter a contact email. Once you’ve filled those in, click the Next button.
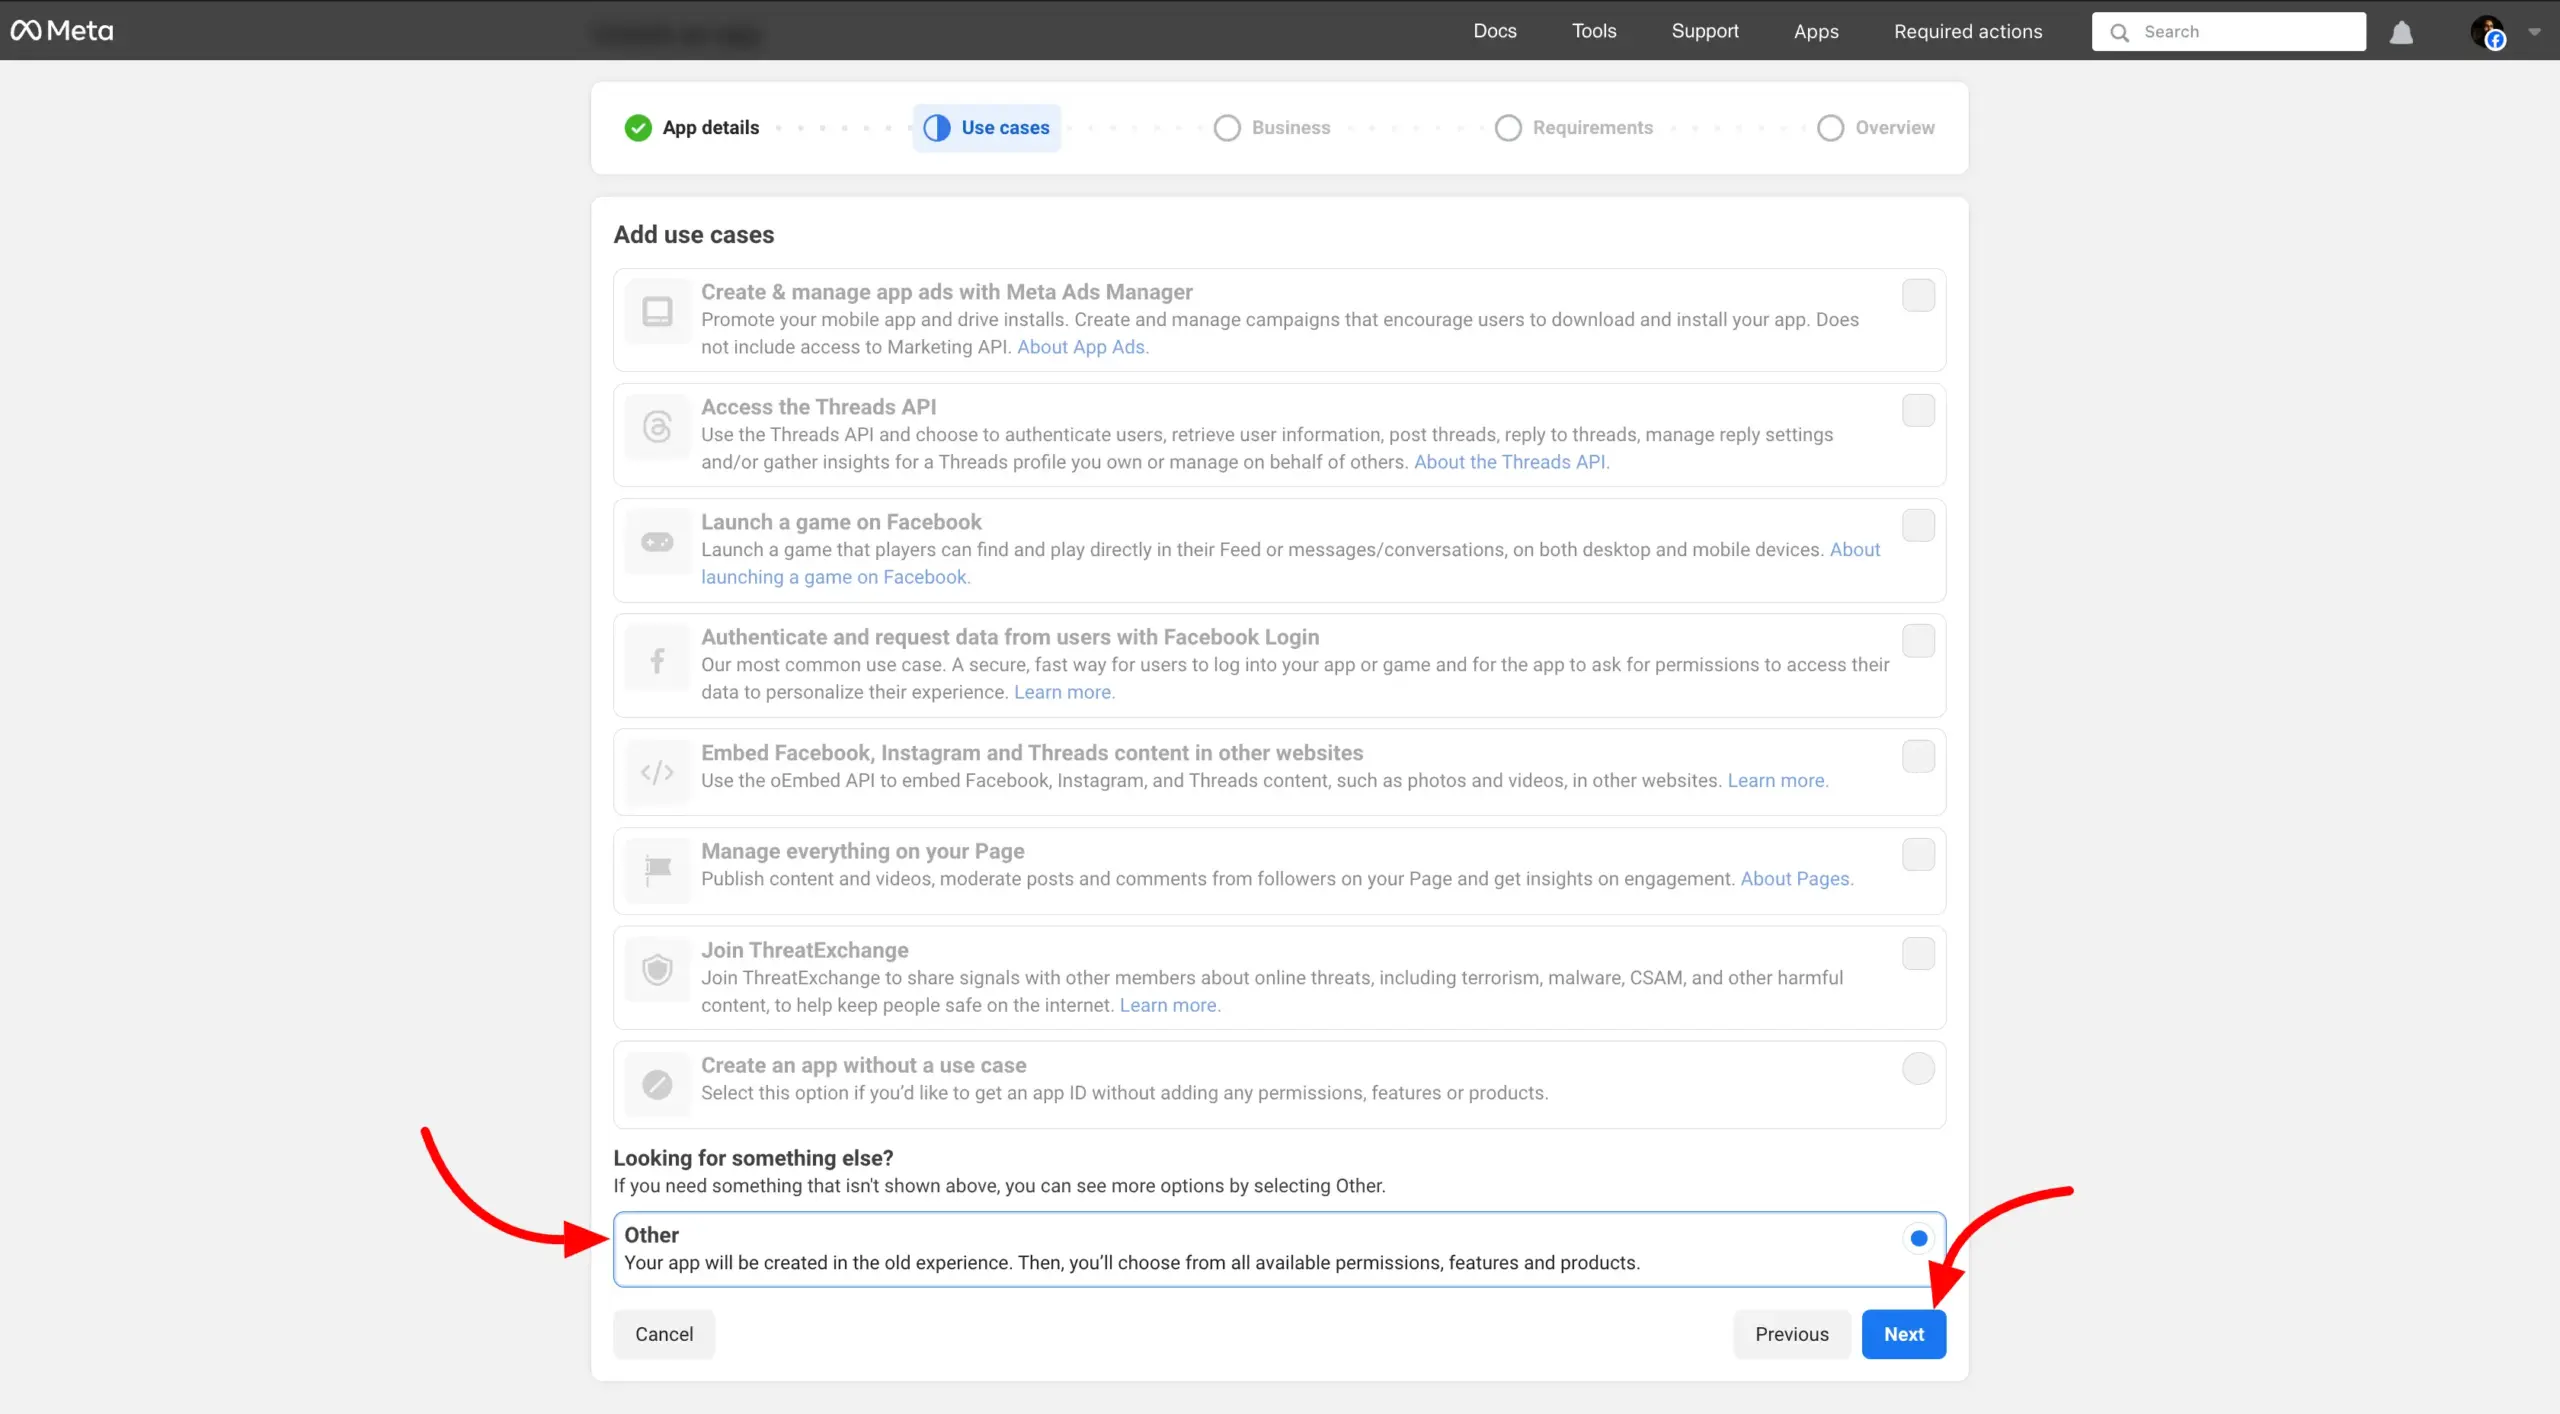
In the Use Cases section, select Others, then proceed to the next step.
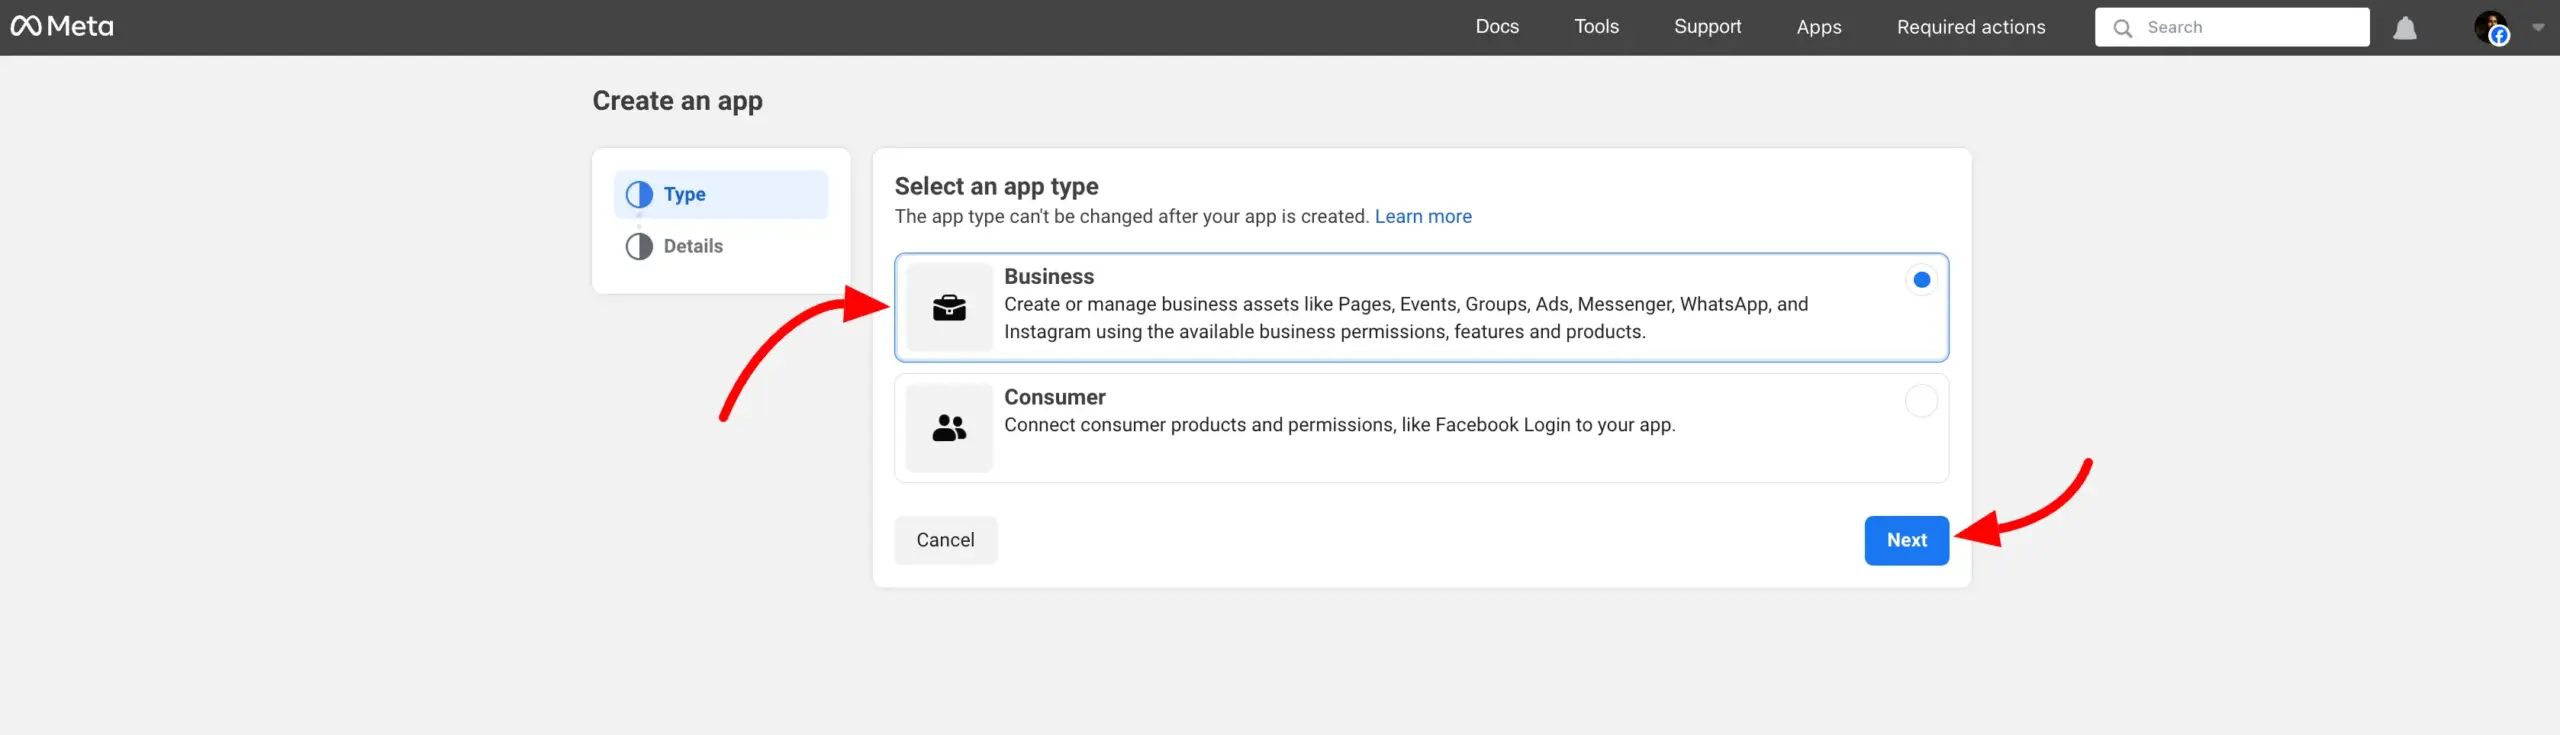
Next, select Business as your App Type and click on the Next button to proceed to the next page.
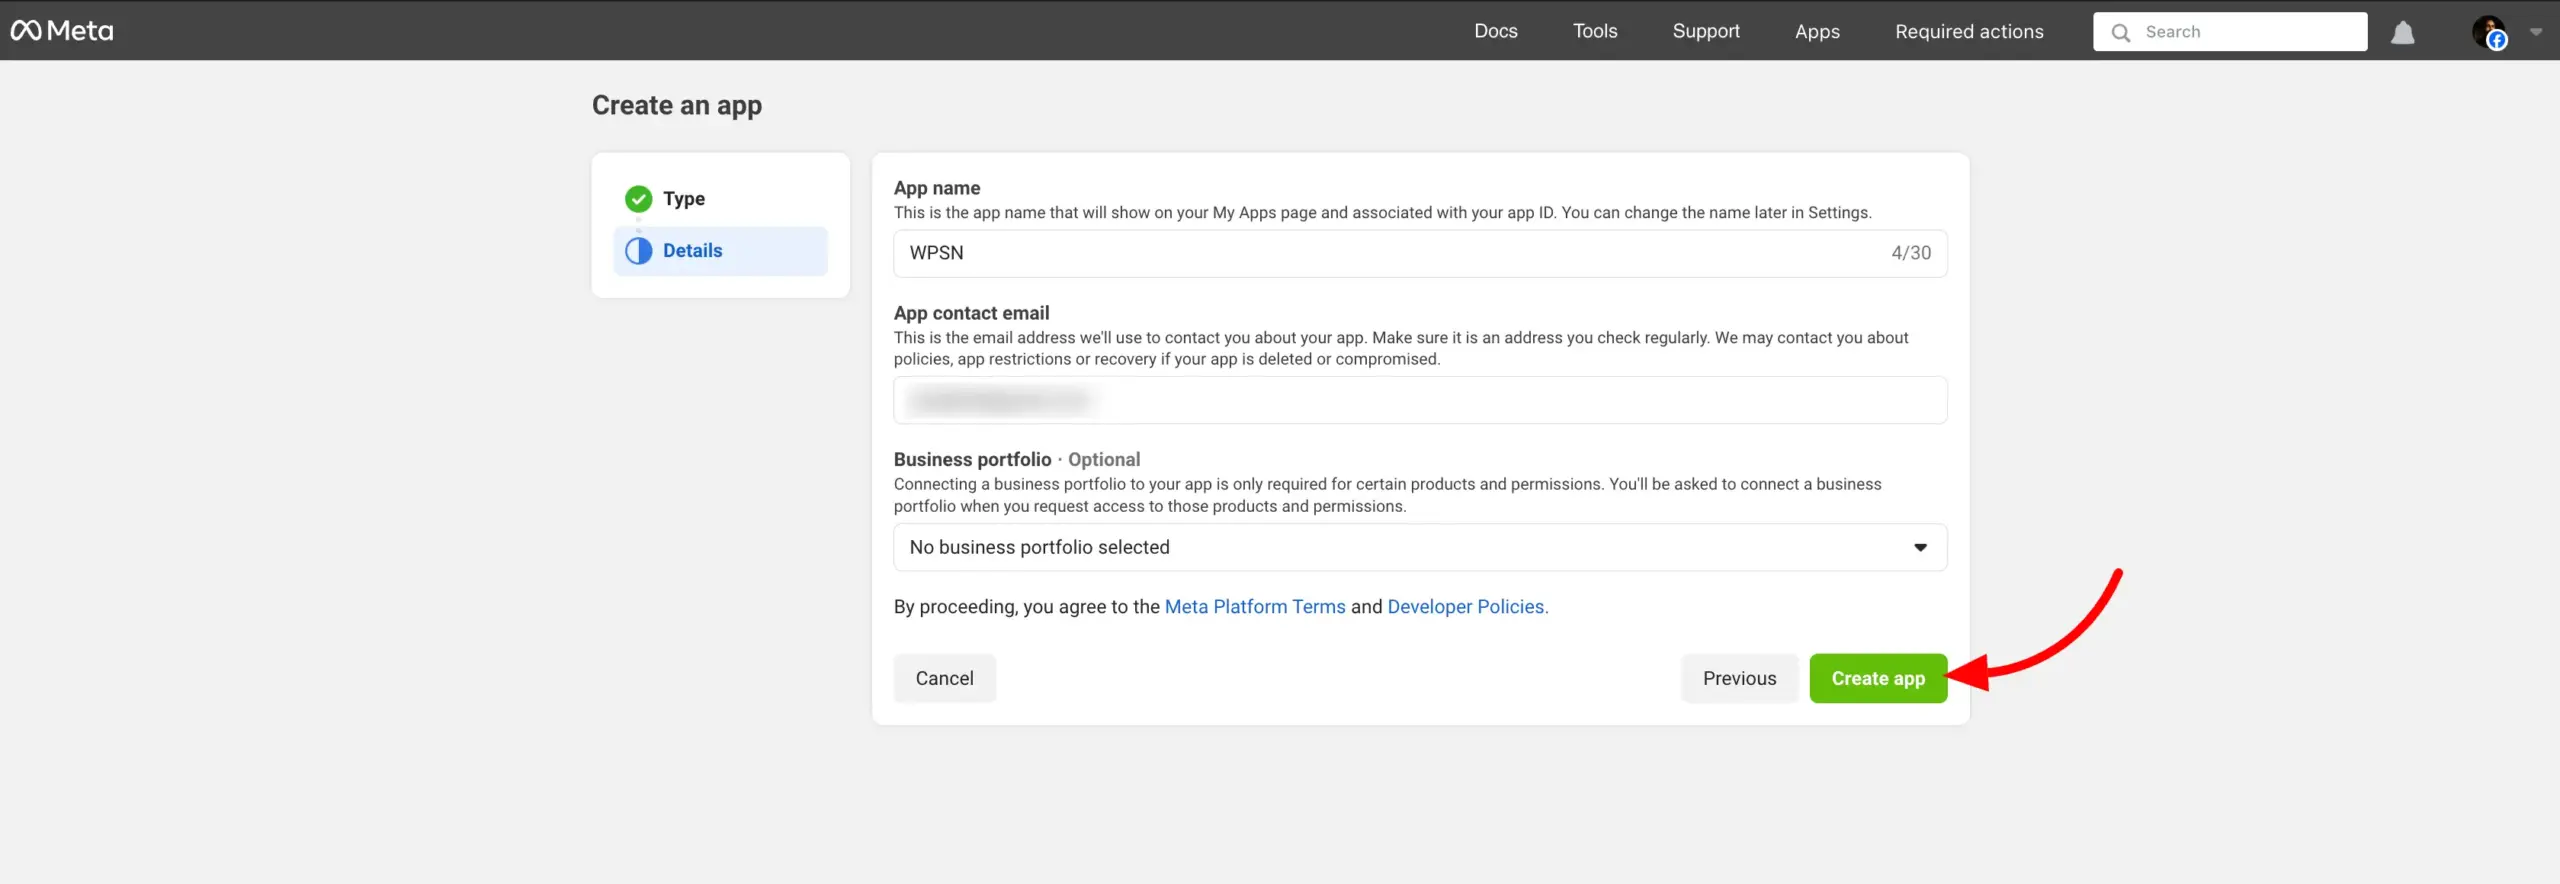
You’ll now see the App details page. Here, you can make any changes if needed, or simply leave the information as it is. Once you’re ready, click the Create App button to finalize.
A popup will appear asking you to re-enter your Facebook password for security. Type in your password and click the Submit button.
Get the Credentials #
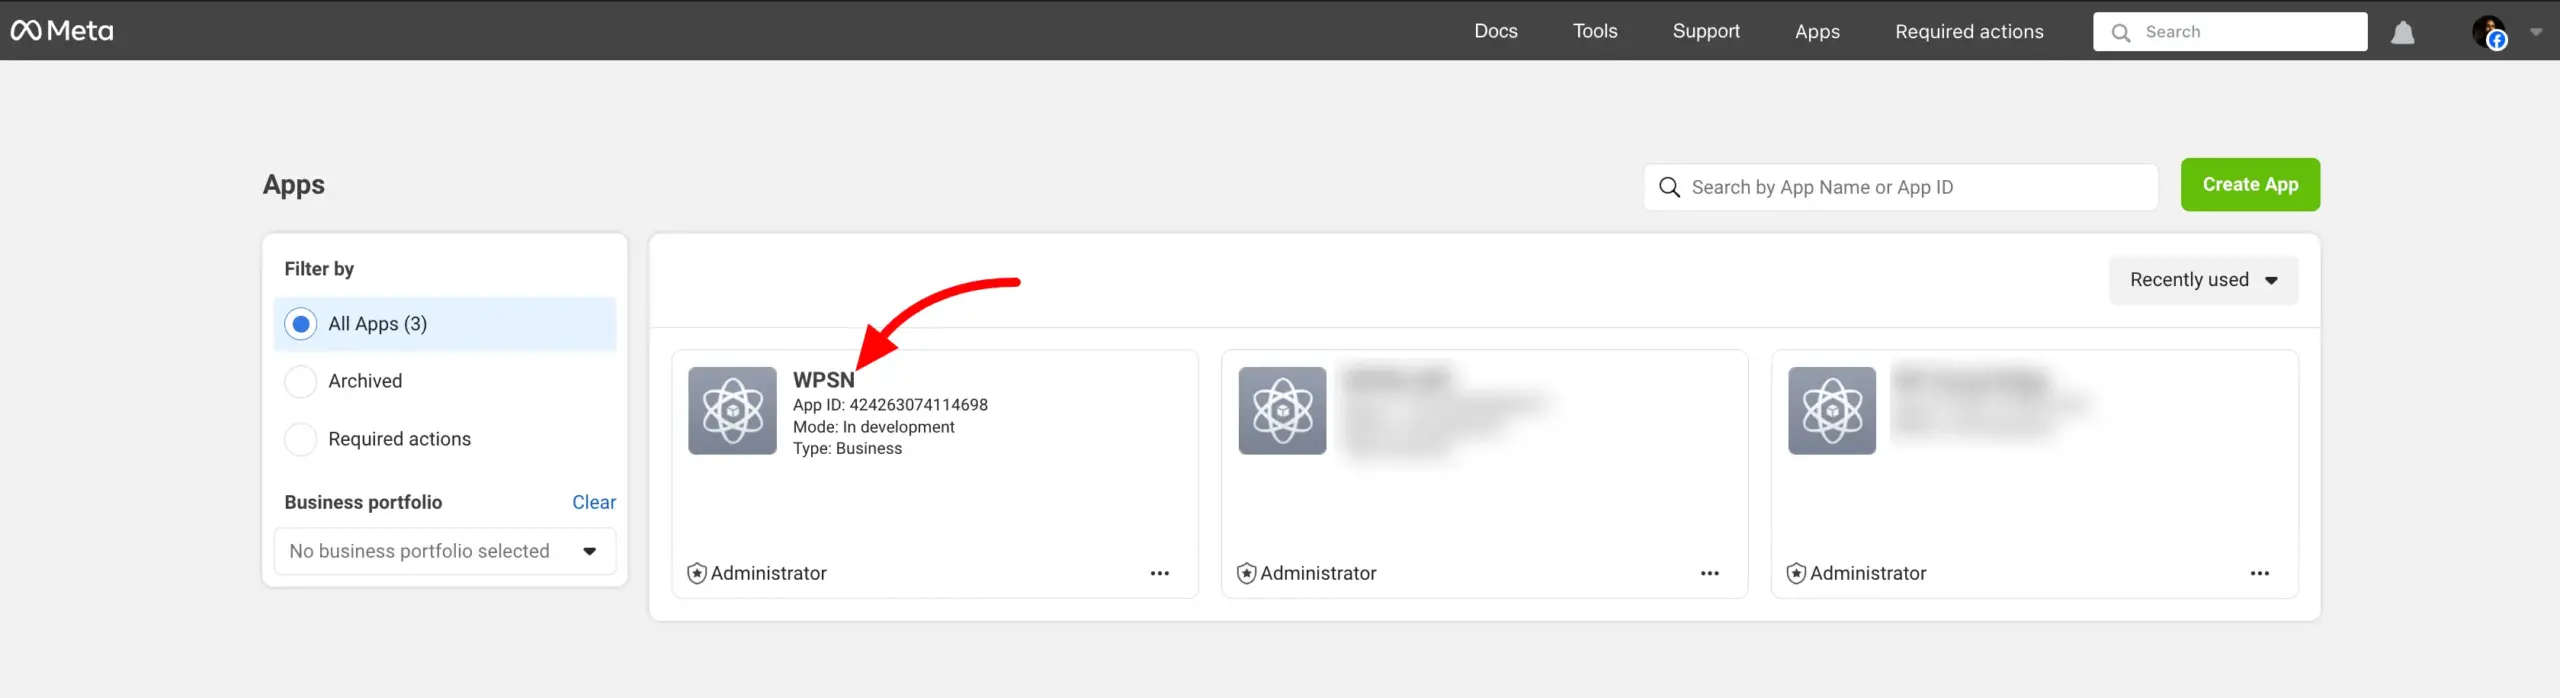
Go to your Meta App Developer Account and click on the App that you have created now.
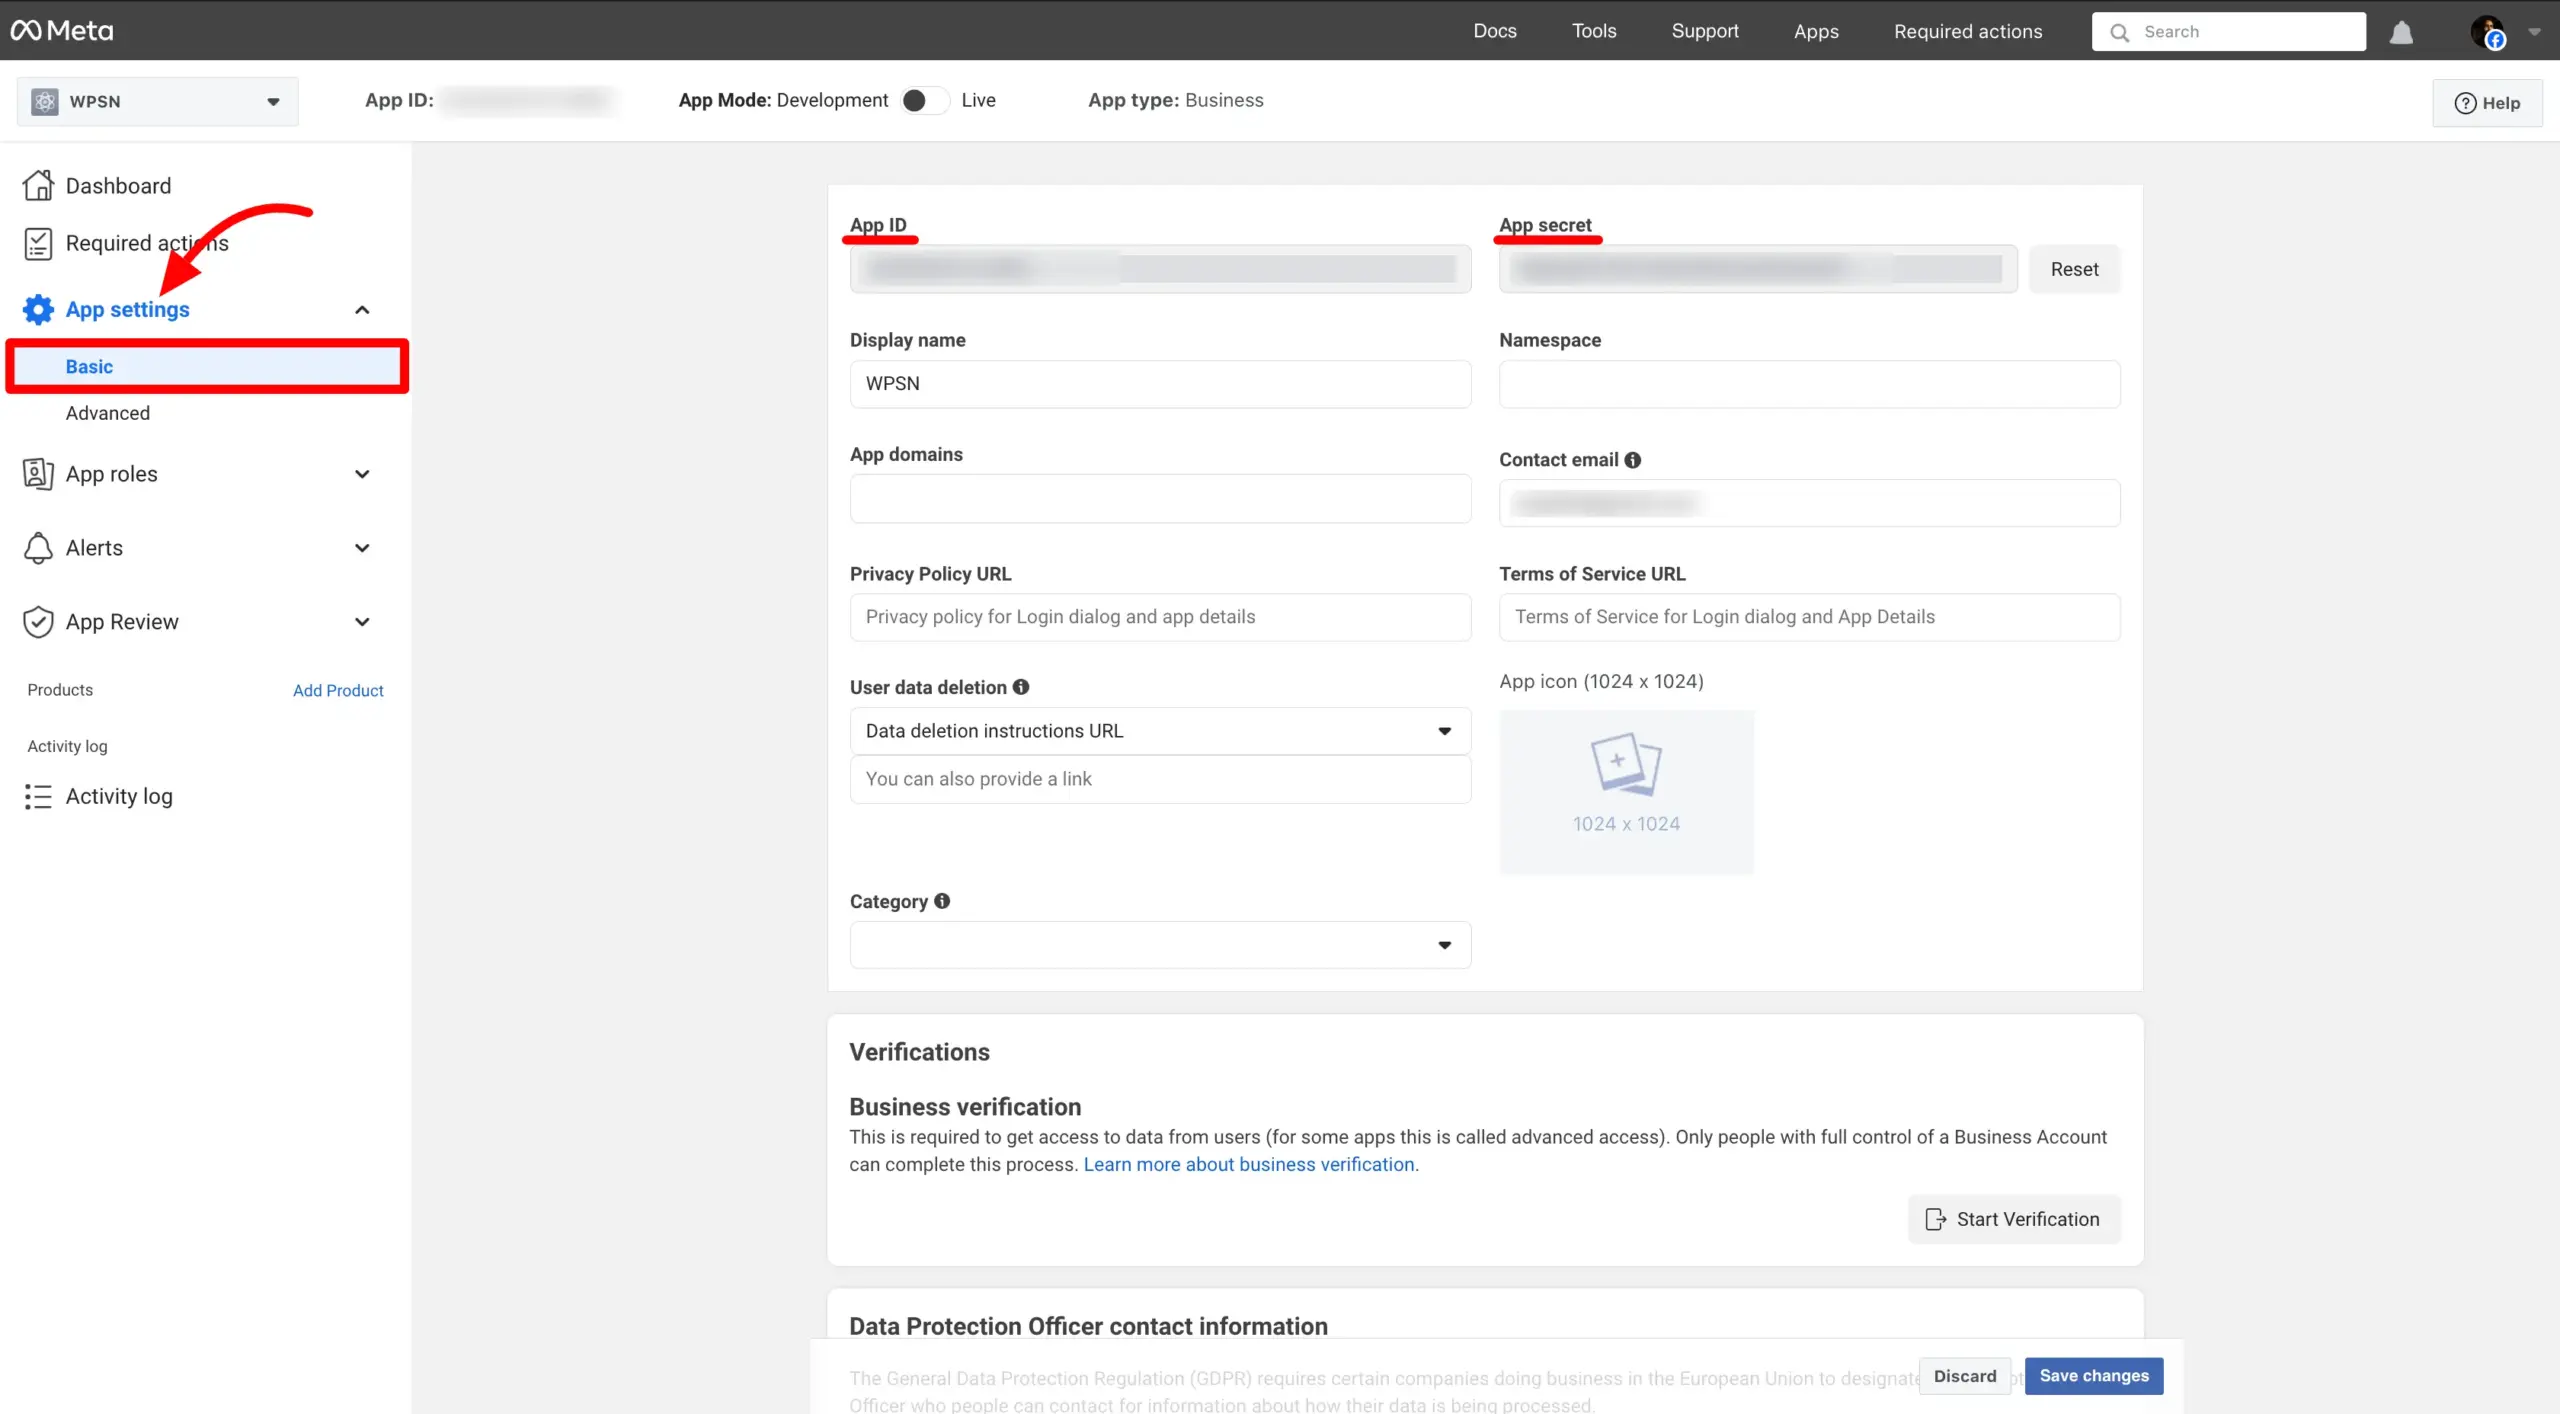
Now the App development page will appear. From the left sidebar, go to App Settings and select Basic. You’ll see your App ID and App Secret here, copy both to use later.
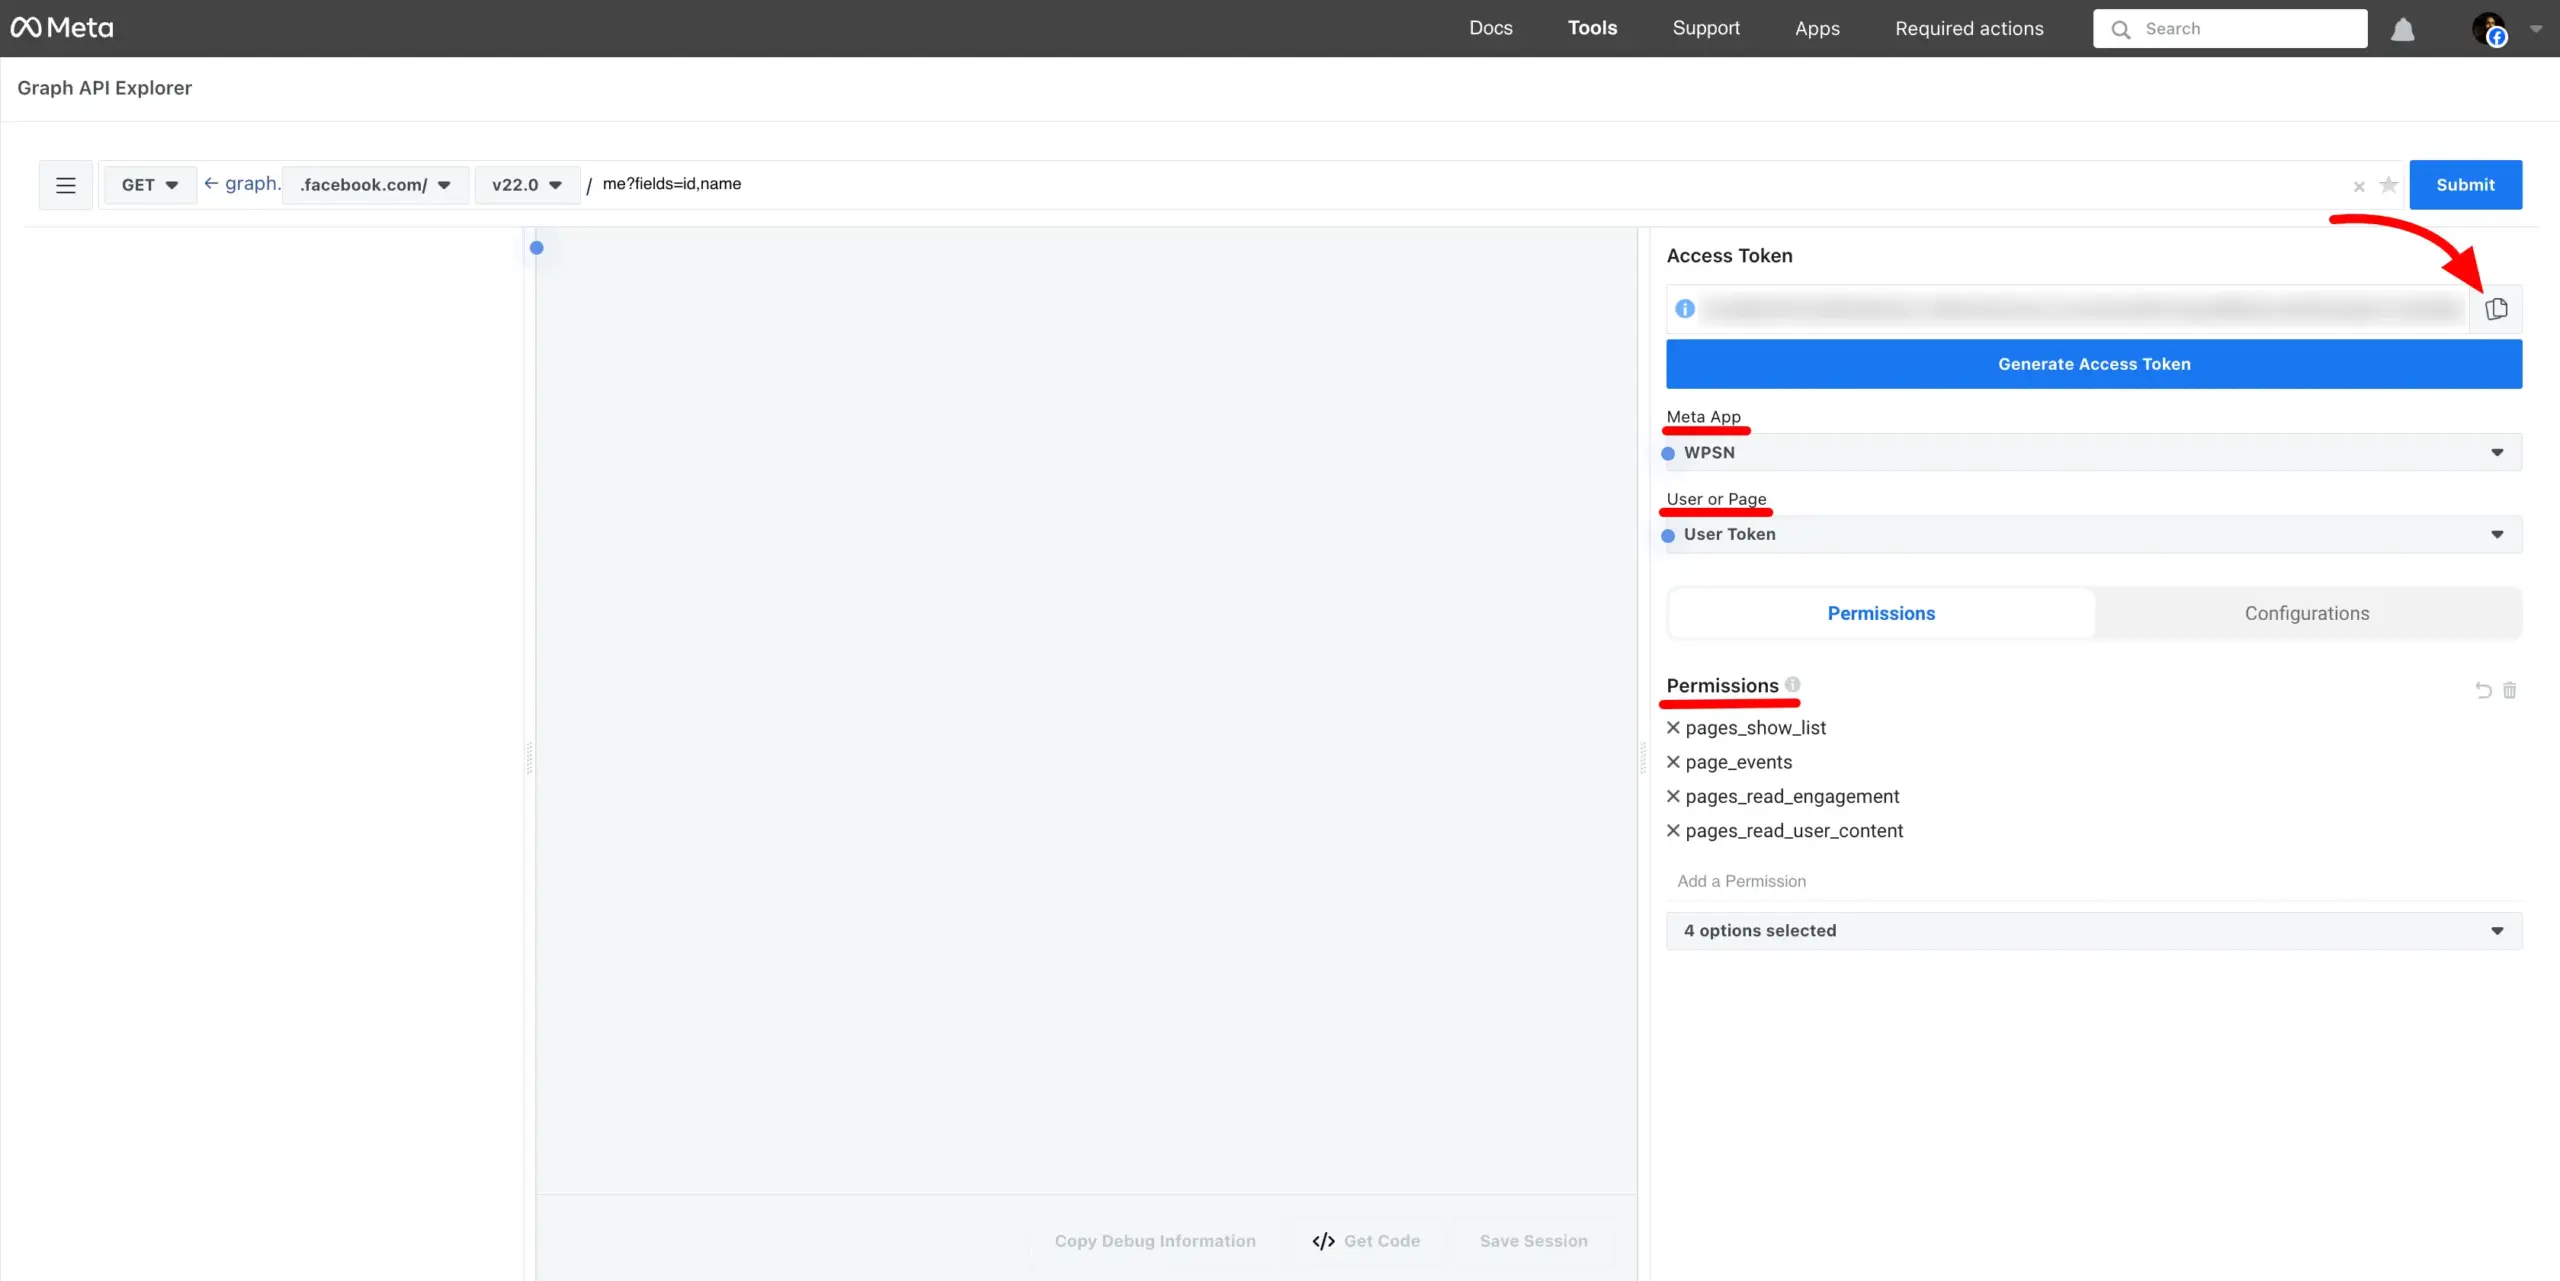
Next, go to the API Explorer page. First, choose the Meta App you created earlier. Then, in the User or Page dropdown, select User Token and enable the following permissions:
- pages_events
- pages_read_engagement
- pages_read_user_content
- pages_show_list
After setting the permissions, click on the Generate Access Token button. Once the token is created, copy it and save it for later use.
Long Lived Access Token #
- A temporary (1 hour) Access Token will be provided once you have responded to the questions. In order to prevent this temporary Access Token from expiring, copy and paste it into the form in the following step.
- Go to your Facebook App page & copy the App ID, App Secret & Access Token you created before. Paste them below boxes.
- At last, click on the Extend my token button and copy the Access Token for later use. Do refresh the page every time before creating the Access Token.
Oops!
×
- This is your Event Access Token, paste it to the required field of the WP Social Ninja dashboard. And to get the Page ID, you need to go to the link.
- Now, go to the Facebook Feed → click on the Continue with Facebook button & then a popup will appear.
- Select Continue as – (your Facebook ID)
Configure Facebook Page Event with WPsocialninja #
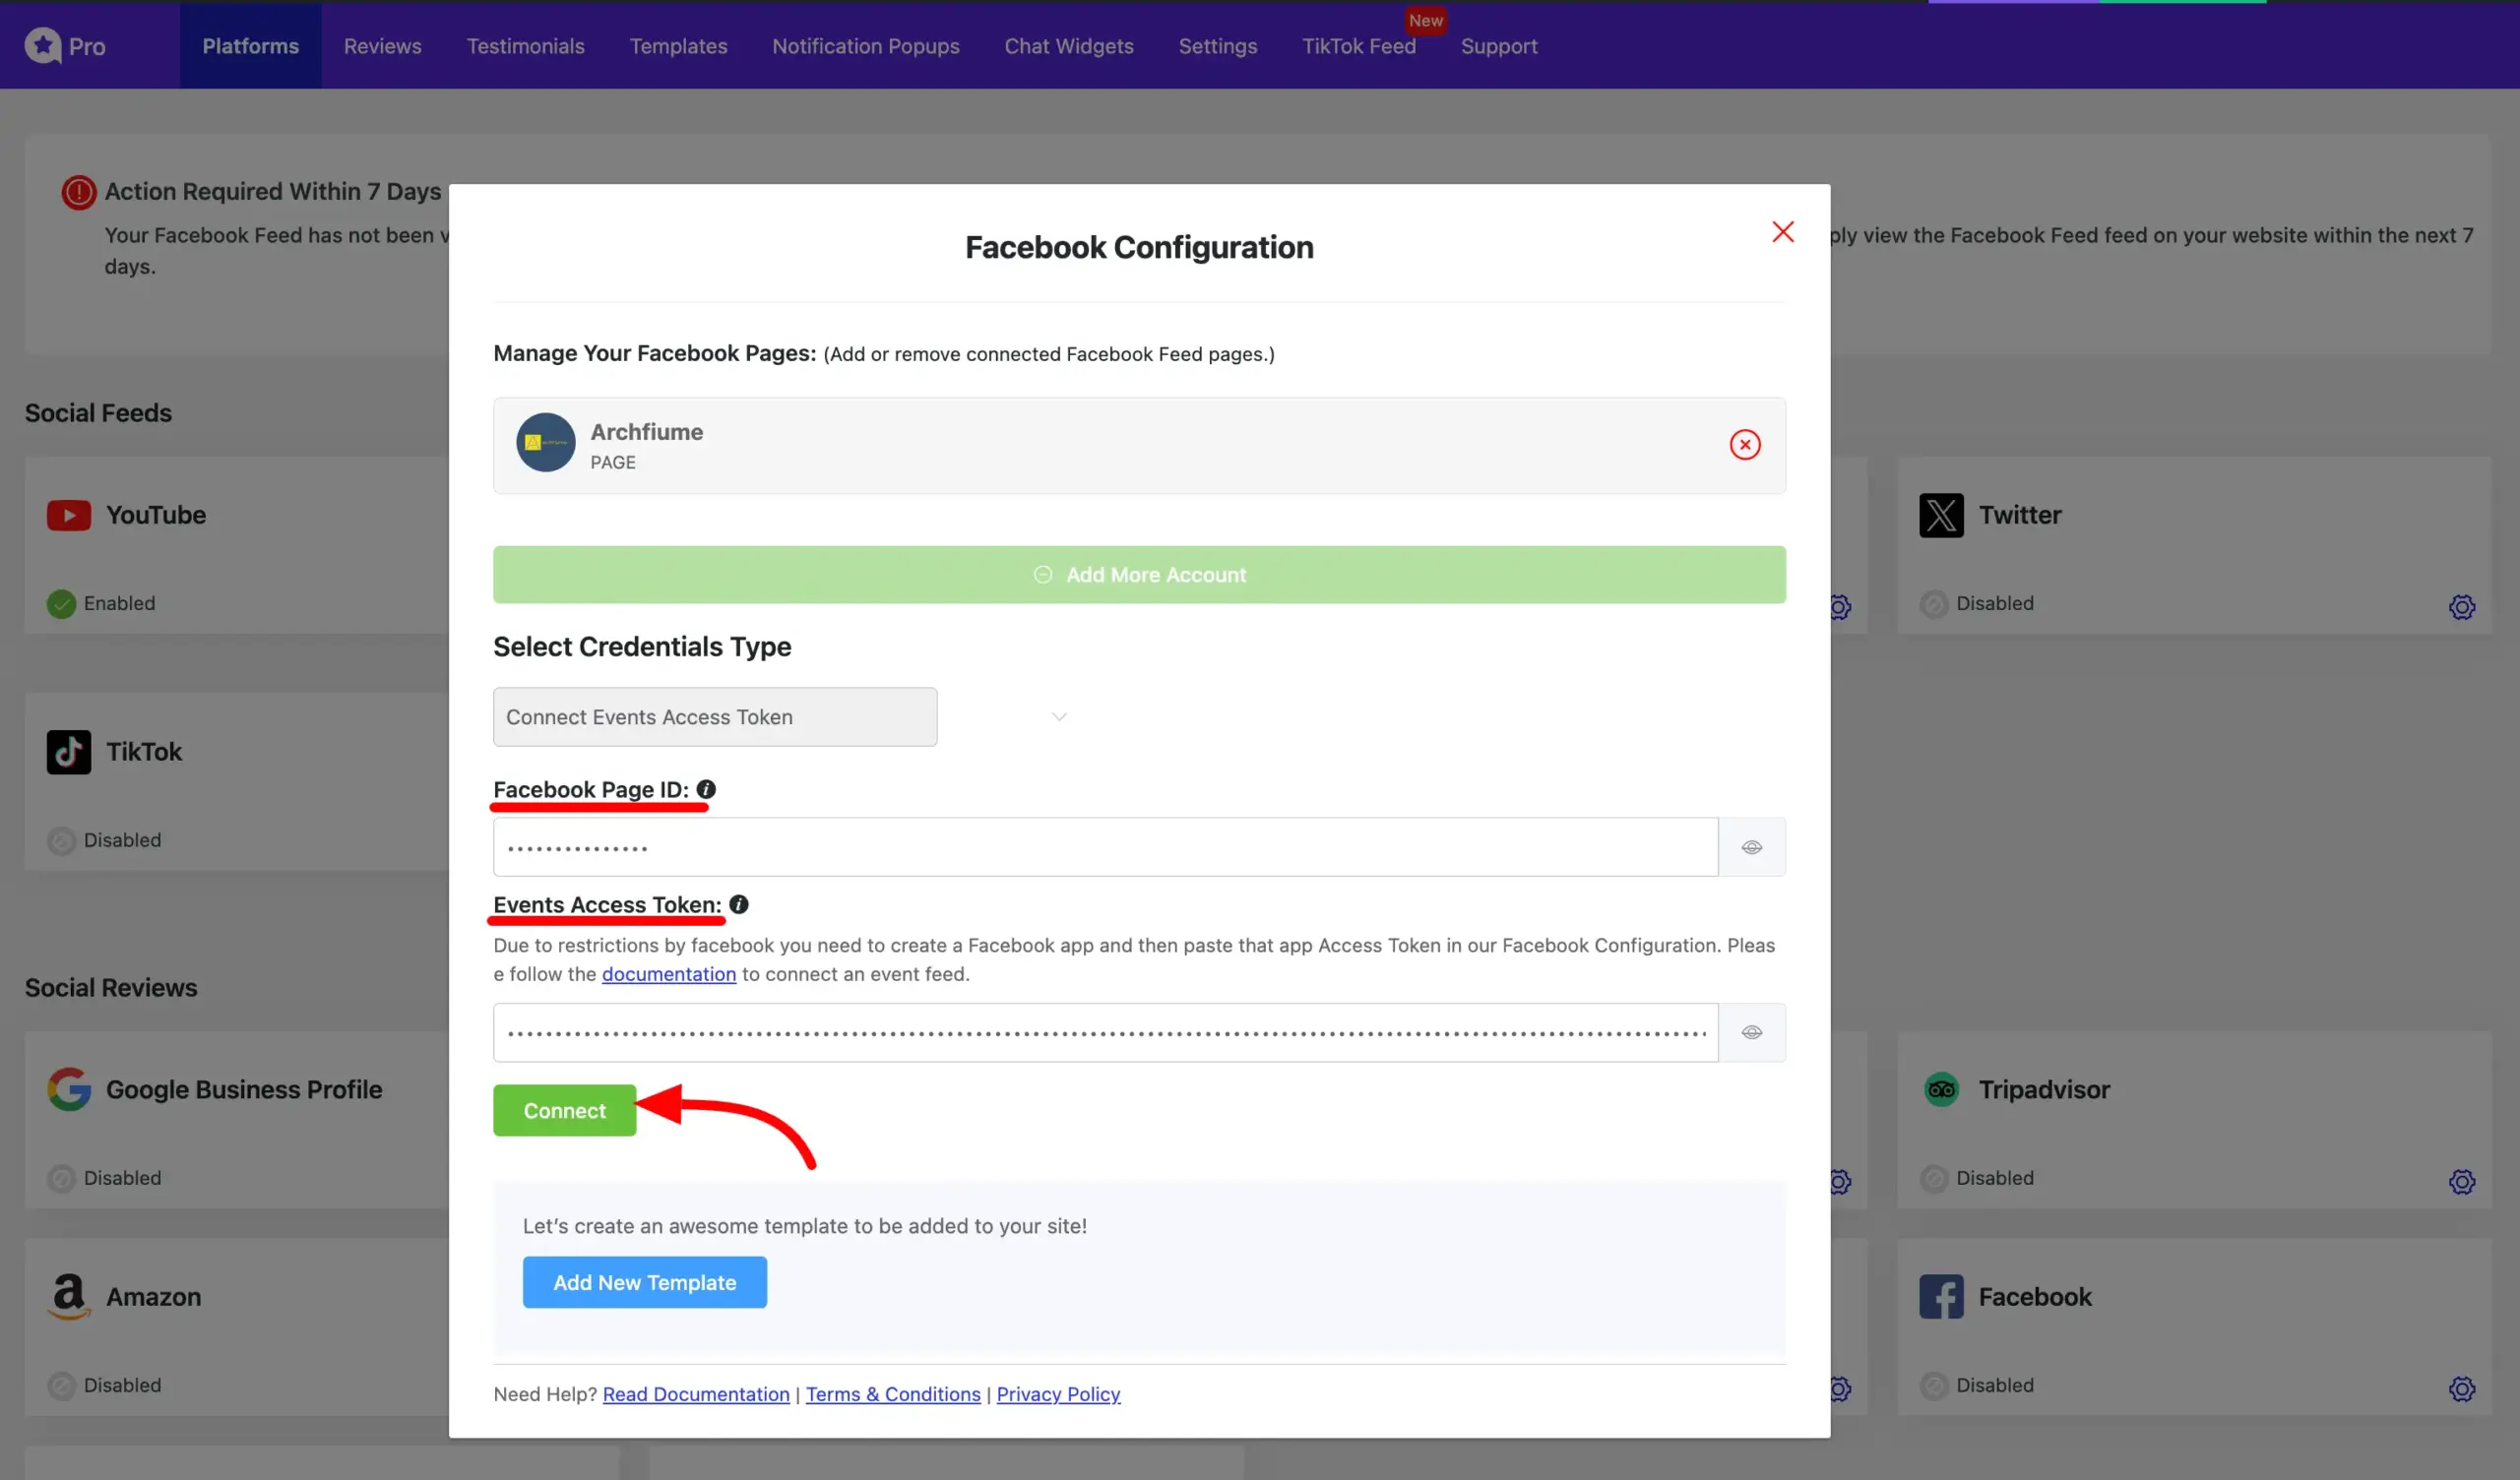
Go back to your WP Social Ninja and open the Facebook Event Access Configuration settings. Paste the Page ID and Long Lived Access Token you copied earlier into the respective fields and click on the Connect button.
Next, click on the Add New Template button to set up and customize the template as per your preferences.
This is how you can display your Facebook Page Events on your site. If you have any further questions or need assistance with this configuration, please don’t hesitate to contact us.


