
WP Social Ninja will allow you to change every single Layout Setting on your website within a few clicks.
Here, you may select a single Platform or multiple Platforms. However, the Layout Settings customize option will remain the same for all the Social Reviews Platforms.
Settings #
Let’s go through the steps of changing the Settings.
Display Rating #
Here, on the Display Rating button, you can control the rating on your website.
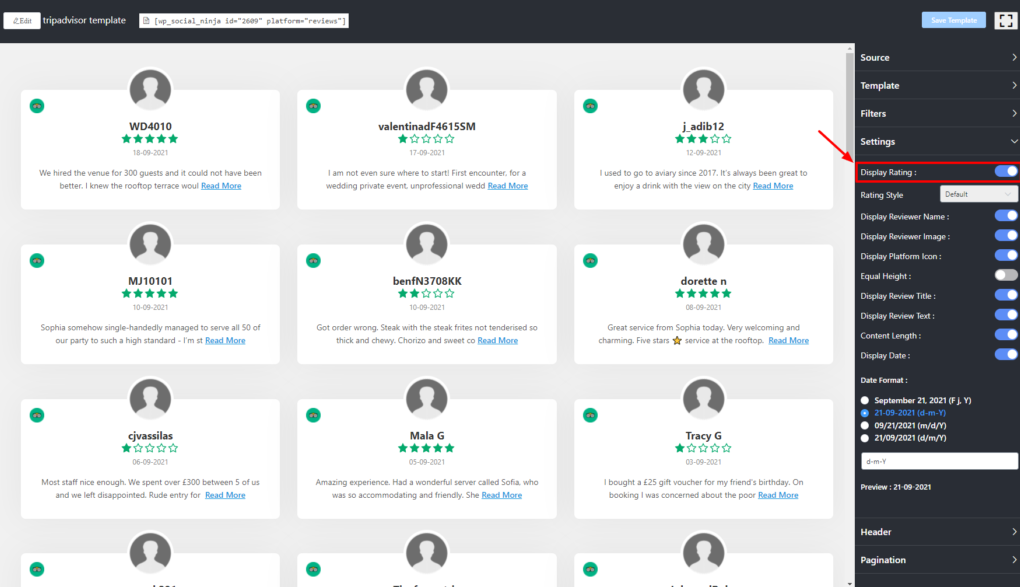
If you want to display the ratings then you can just turn it on. Similarly, just click to turn it off for hiding it.
Rating Style #
Next, you can change your Rating Style.
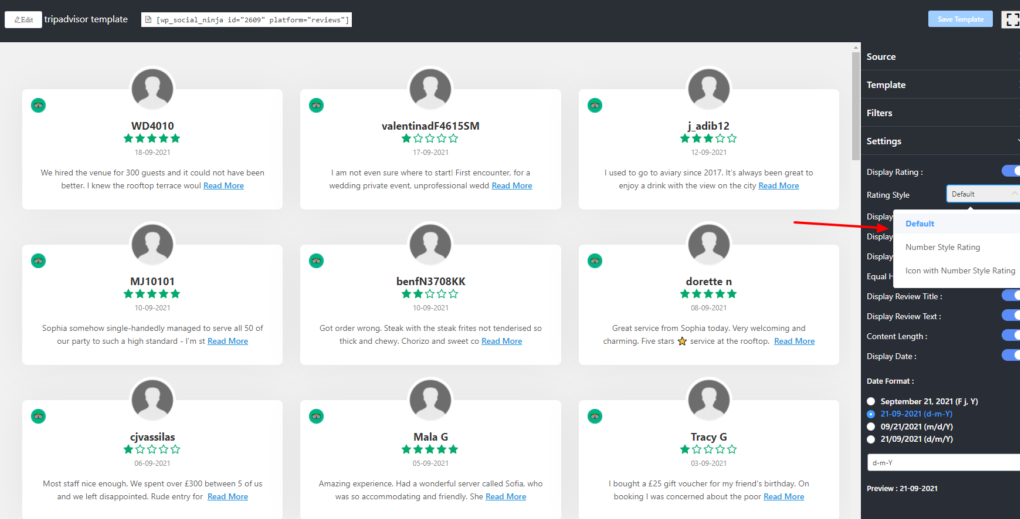
Three Layout options are available right now. Default, Number Style Rating, and Icon with Number Style Rating. Pick any from the drop-down menu and add more variations on your website.
Other Settings #
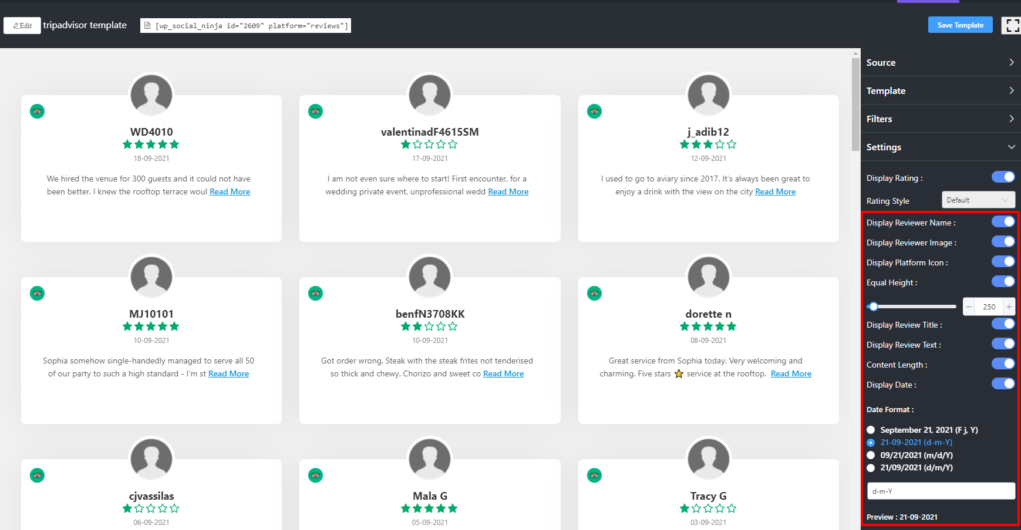
Display Reviewer Name #
Like Rating Style, you can customize your Display Reviewer Name as well. A reviewer’s privacy is always important. Here, you can turn off the button if you want to hide the Reviewer Name.
Display Reviewer Image #
Once you are done with the Display Reviewer Name, you can also turn on/off the Display Reviewer Image. If you turn on the button reviewer image will be displayed however, turning off the button will hide the image. Here, we have kept it on to display the reviewer images.
Display Platform Icon #
The next filter is Display Platform Icon. In this setting, you can turn off the filter icon if you don’t want to display the platform icon. In order to do that, you can just click the enable or disable button.
Equal Height #
The next one is Equal Height. You can adjust the height of the Reviews by clicking it on/off. If you turn it on then all the reviews will be in Equal Height. Moreover, you can adjust the height according to the text. To do that click on the Plus/Minus button.
Display Review Title #
By enabling this option, you can show the Title of the reviews. Click the Disable button if you don’t wish to show the Review Title.
Display Review Text #
After you adjust your Equal Height, you can adjust your Reviewer Text.
Content-Length #
If you disable the Display Reviewer Text button then you won’t be able to display the Content-Length. But if you enable the Content-Length button then all the text will align in the same horizontal line.
Display Date #
Using this Plugin you can also control your Display Date. Click to enable the button if you want the Date to be shown. You can see in the above screenshot the Date is displayed in the (d-m-Y) format. So, you can choose your preferred Date format from the various formats that are available.
In the Front End View, it can see that there is a Display Date visible. All the Texts have Equal Heights and Content-length is perfectly aligned.
Pagination #
At this stage, you can choose to change the Pagination by clicking on the drop-down menu.

Pagination Style has two options currently. You can pick any from None or Load More.
If you select the Load More option, you get to set the number of Reviews Per Page and change the Button Text. Simply, write down your desired text in the Load More Button Text box and then adjust your Reviews Per Page number.
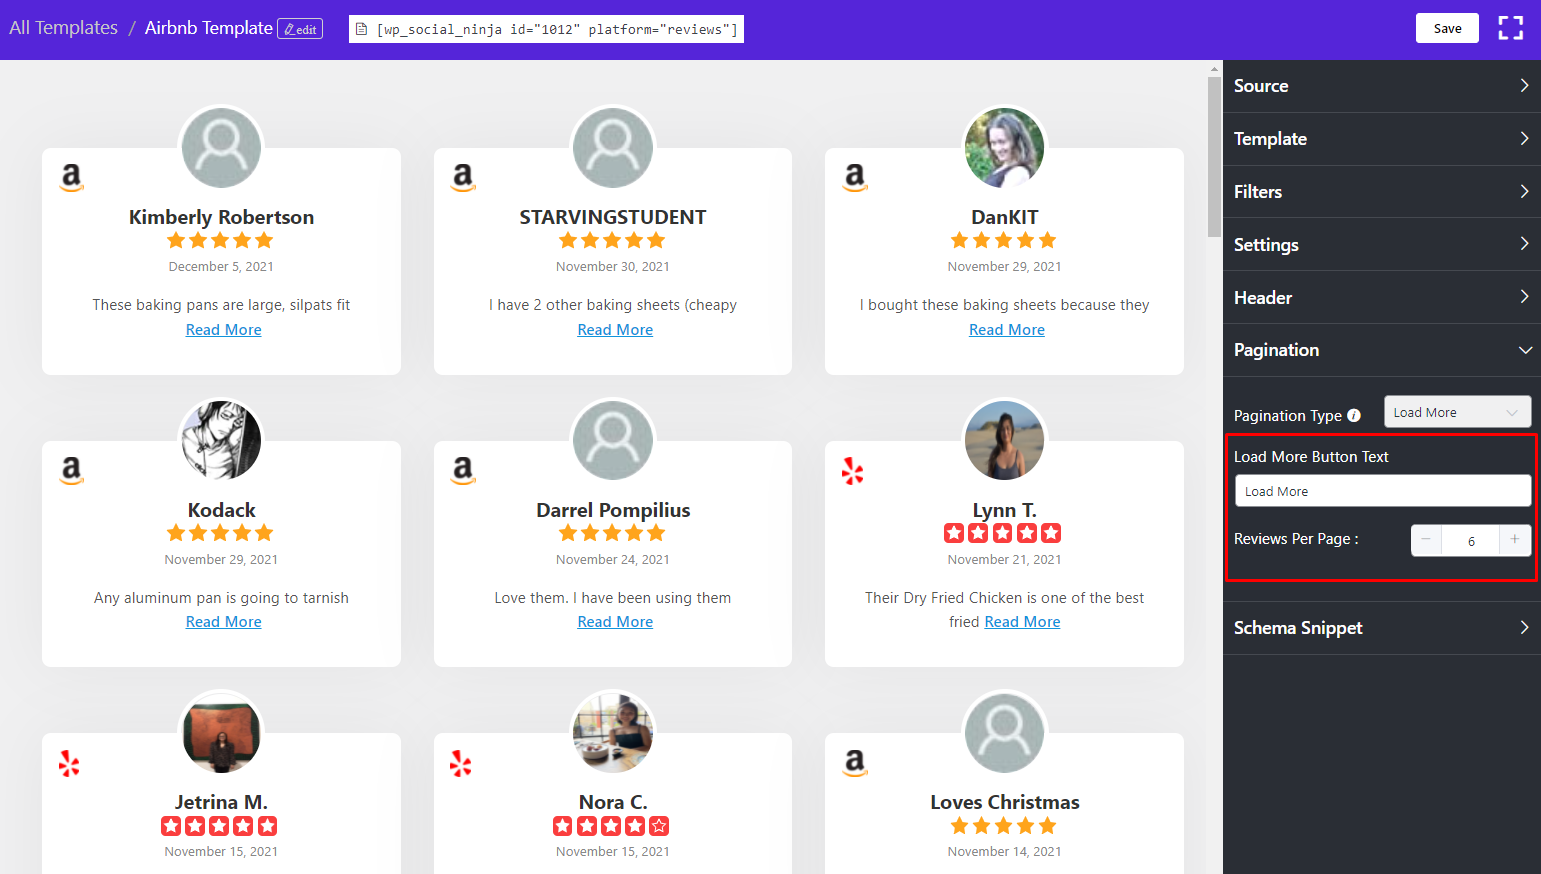
Here, in this Review Per Page, you can adjust the review number for every page from the scroll bar.
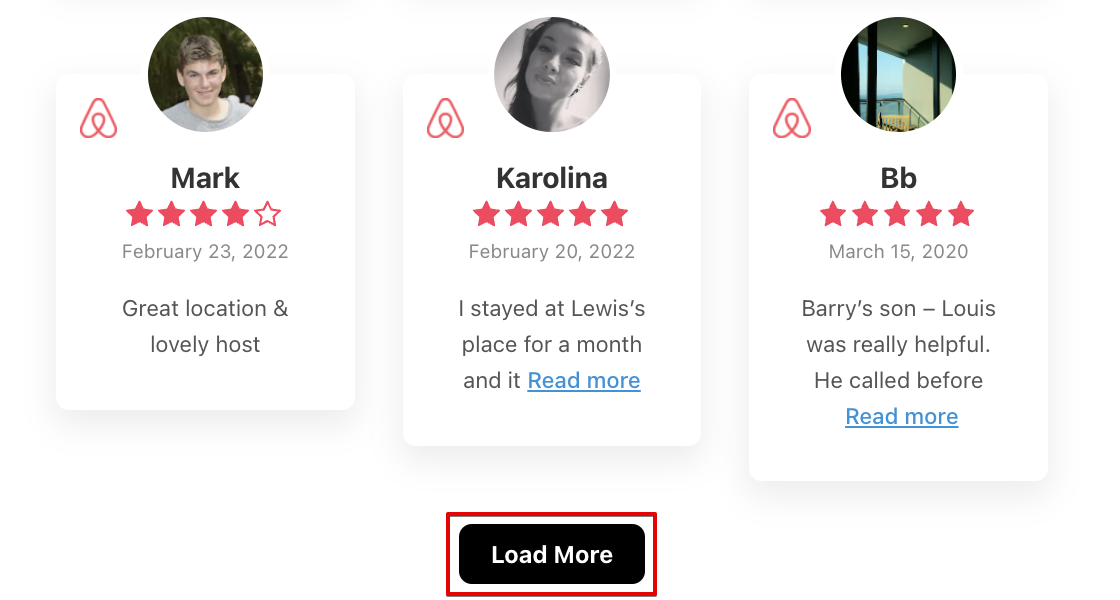
The Front End View of Pagination Settings is like this. Click on the More Reviews button to get more reviews.
Header Settings #
Next, we have Header Settings. In this part, seven Layout options are available right now; Display Title, Display Rating, Display Number of Reviews, Display Write a Review Button, Custom Title text, Custom Number of Reviews Text, and Custom Write a Review Text.
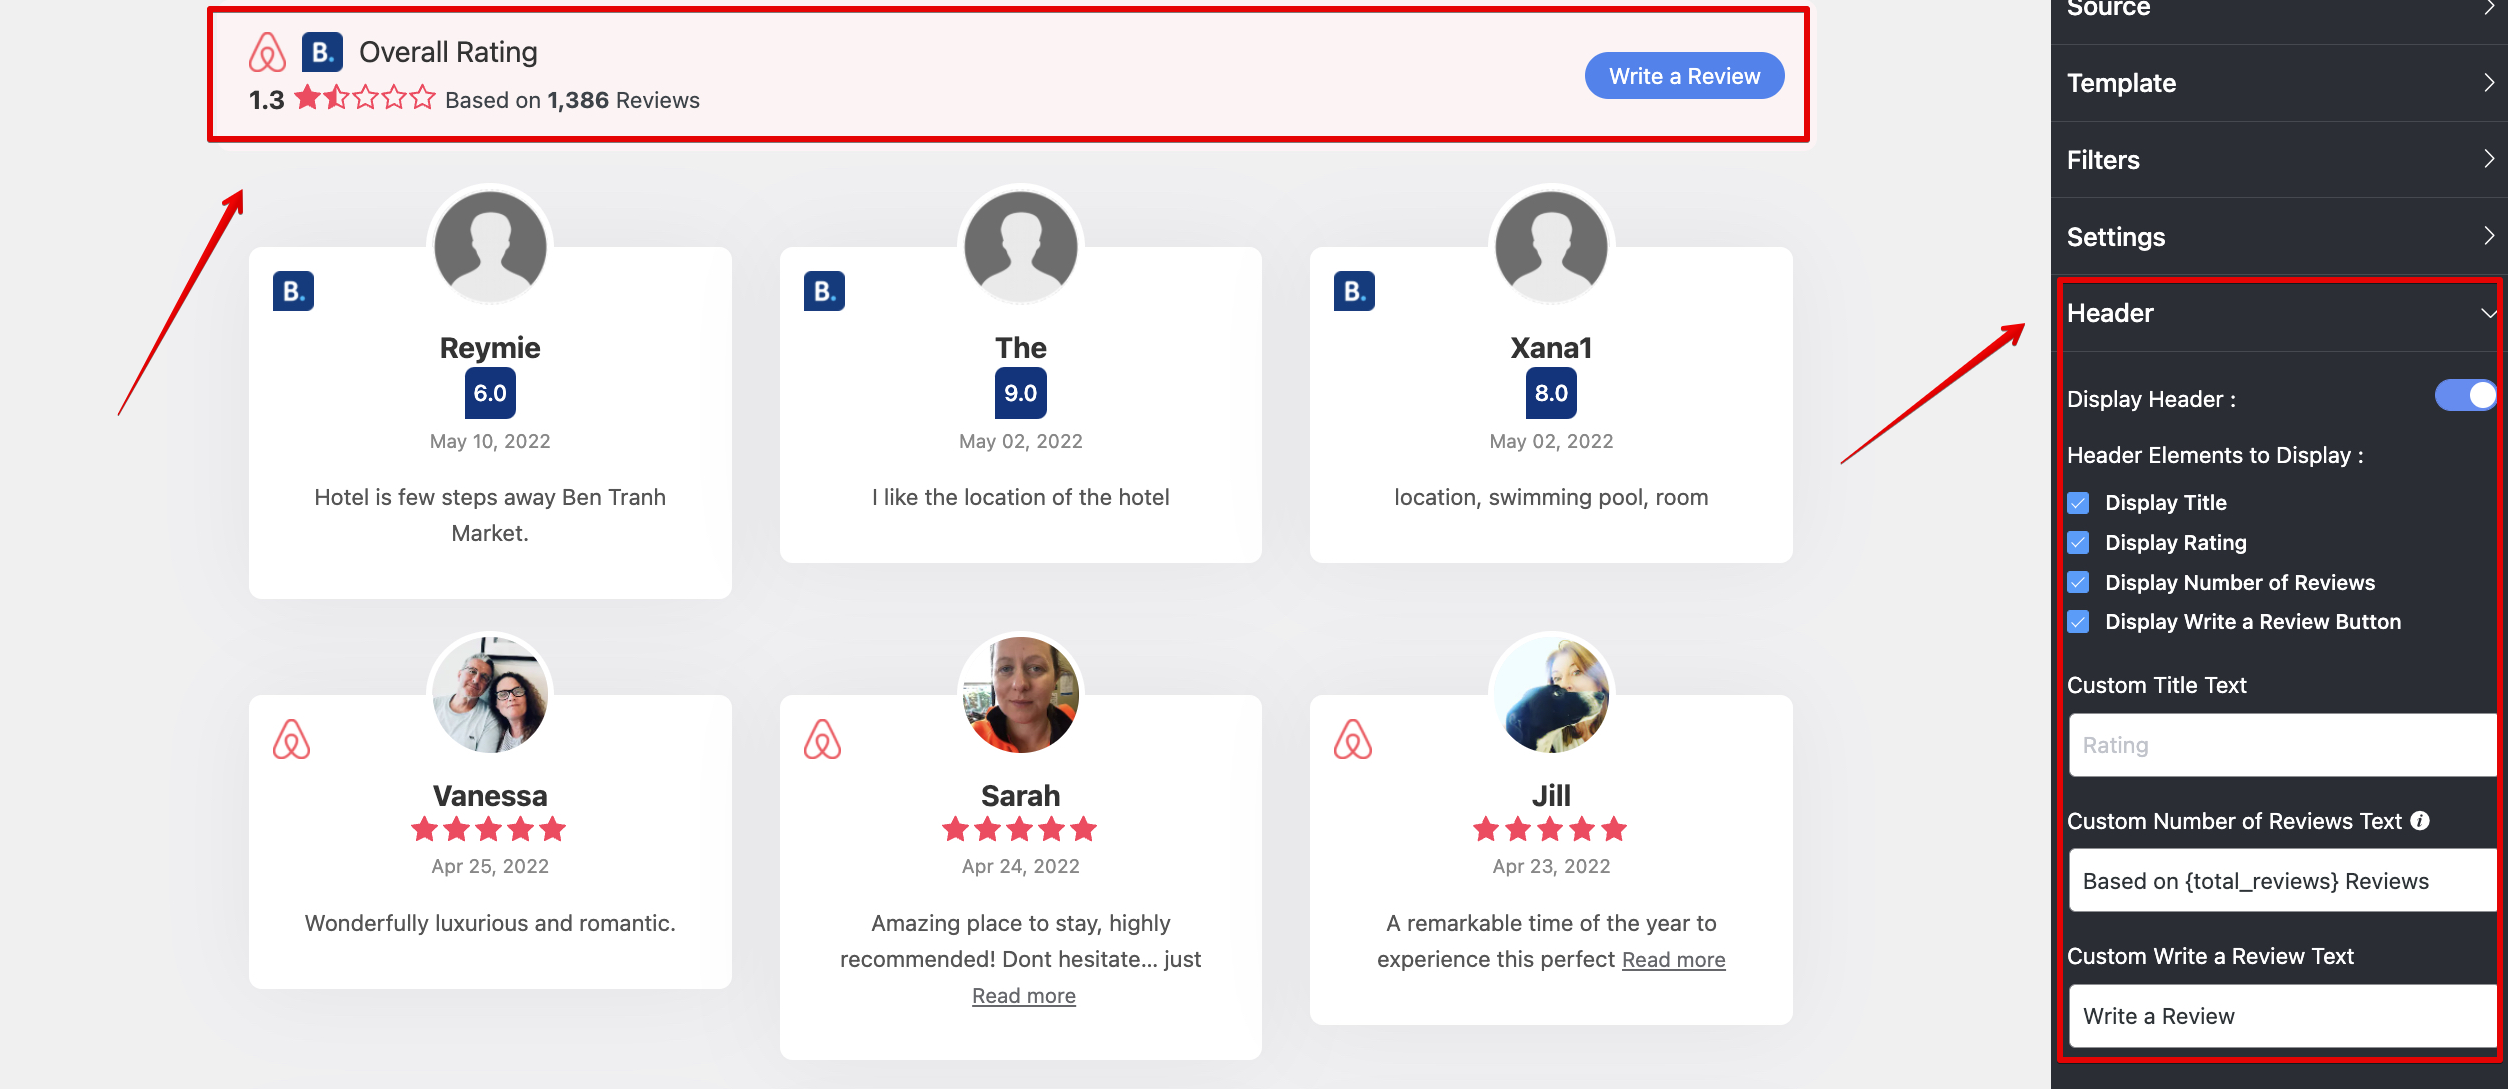
By clicking on the Display Title you are allowing the Business title to show on the Front End.
Next is Display Rating. You can tick mark the box to display the rating however, you may untick the box too.
If you select multiple platforms, for instance, Airbnb and Booking.com then the average display rating will appear on your site.
Moreover, add the Display Number of Reviews and Display Write a Review Button by ticking the boxes.
Again, the Custom Title Text lets you write down your desired text in the box and that text will appear in the header.
You can also change the number of reviews displayed on the header by simply typing the number in the Custom Number of Reviews Text box.
If you want to change the text of “Write a Review” then you can do that by writing those in the Custom Write a Review Text box.
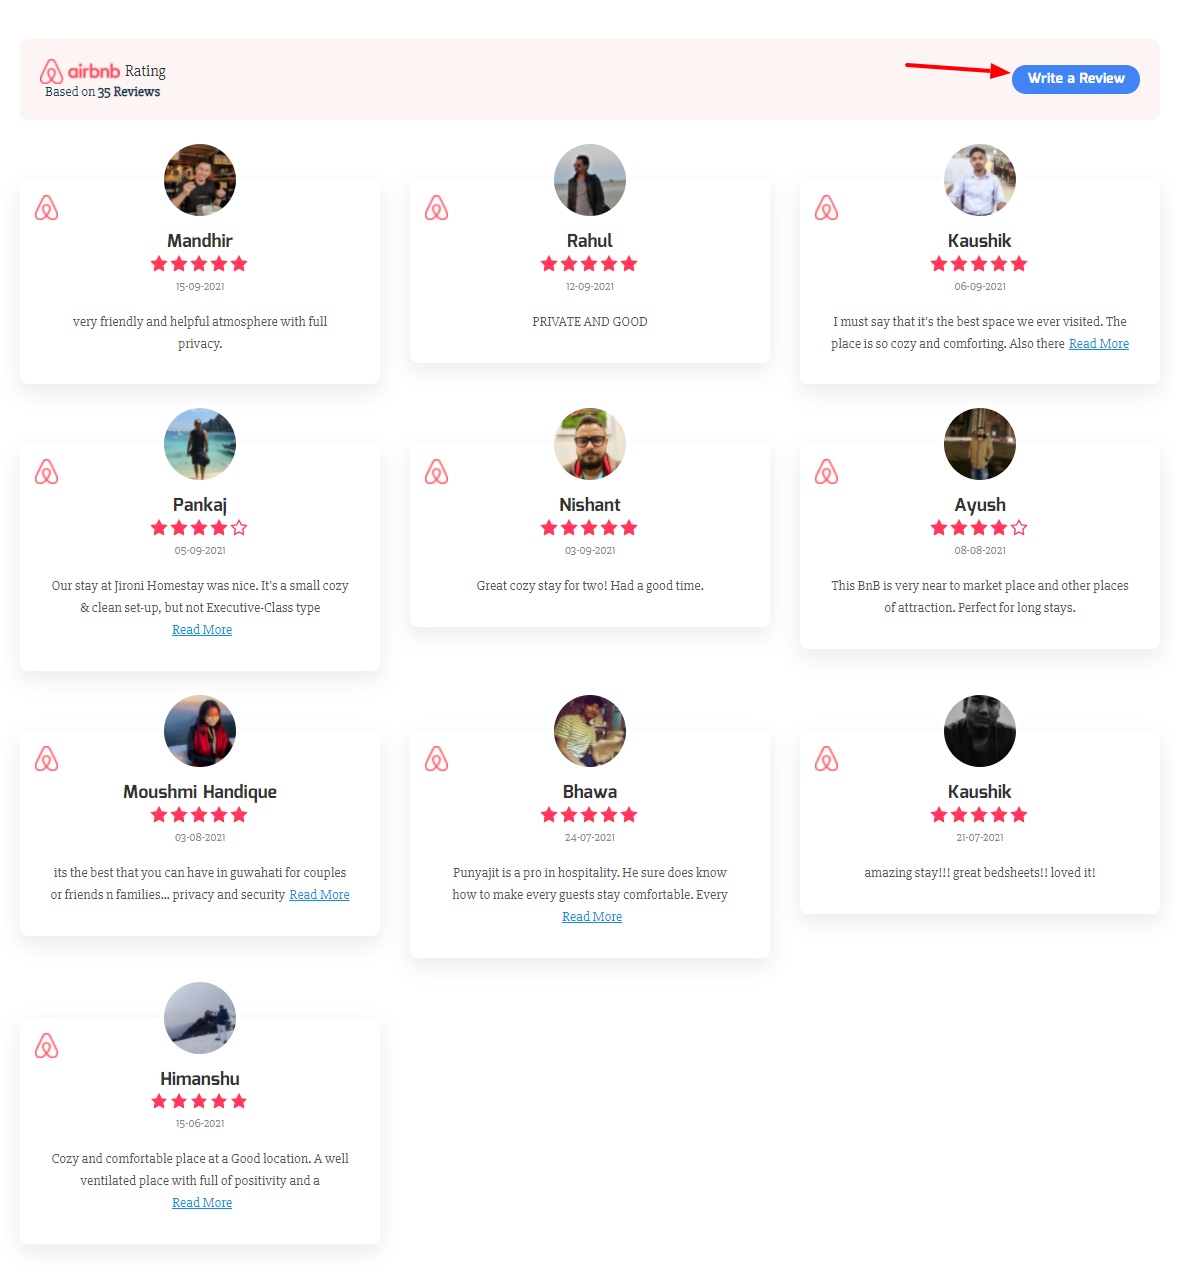
Here, from the Front End, you can Write a Review and in the case of multiple platforms, this Call to Action button will take you to the individual sites.
Also, check out – Template Layout


