
To collect reviews using Fluent Forms on your website, you need to know how to integrate Fluent Forms with WP Social Ninja. WP Social Ninja has an amazing feature to fetch Fluent Forms Reviews without any hassle.
Let’s check how WP Social Ninja will uplift your business by collecting Fluent Forms Reviews on your website.
Fluent Forms Integration #
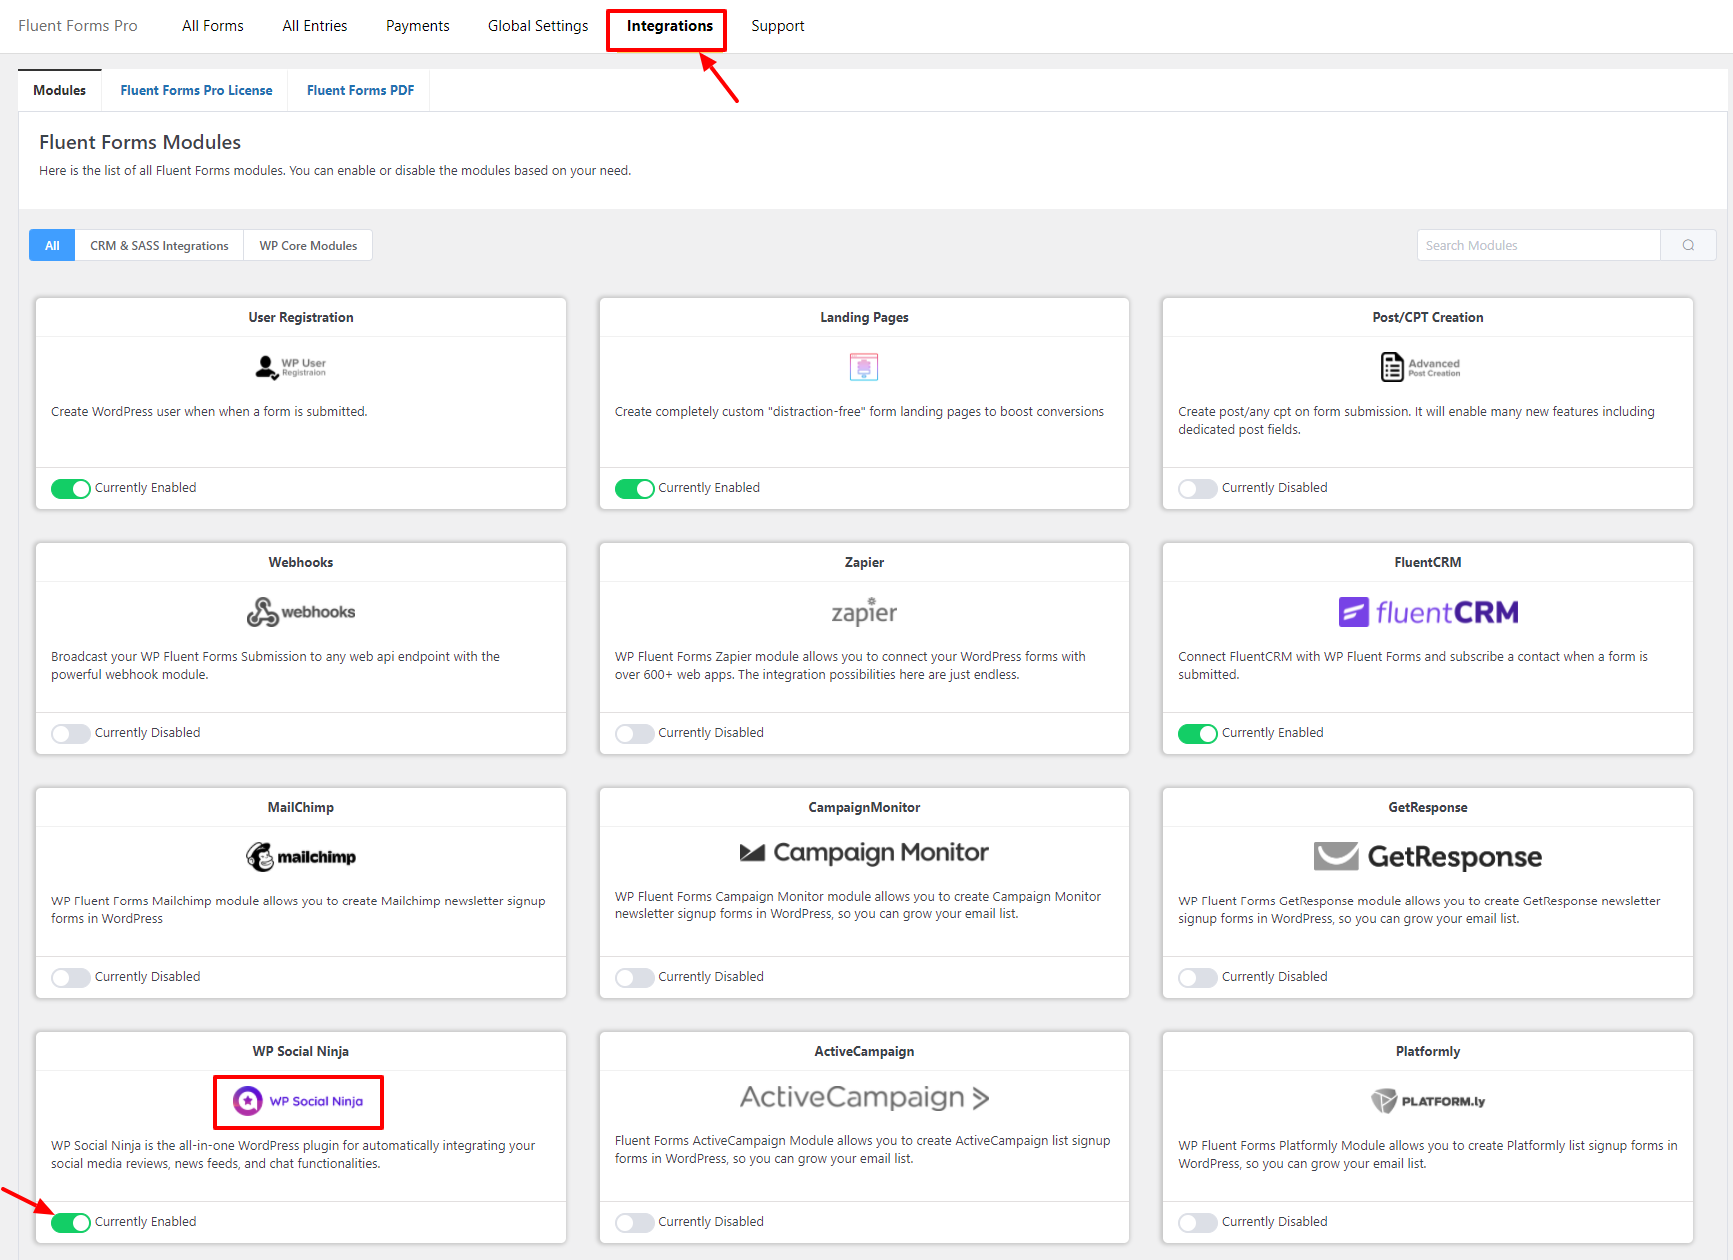
The first thing you need to do is to go to the Integrations tab of Fluent Forms. Scroll down to the WP Social Ninja module and turn on the Enable button.
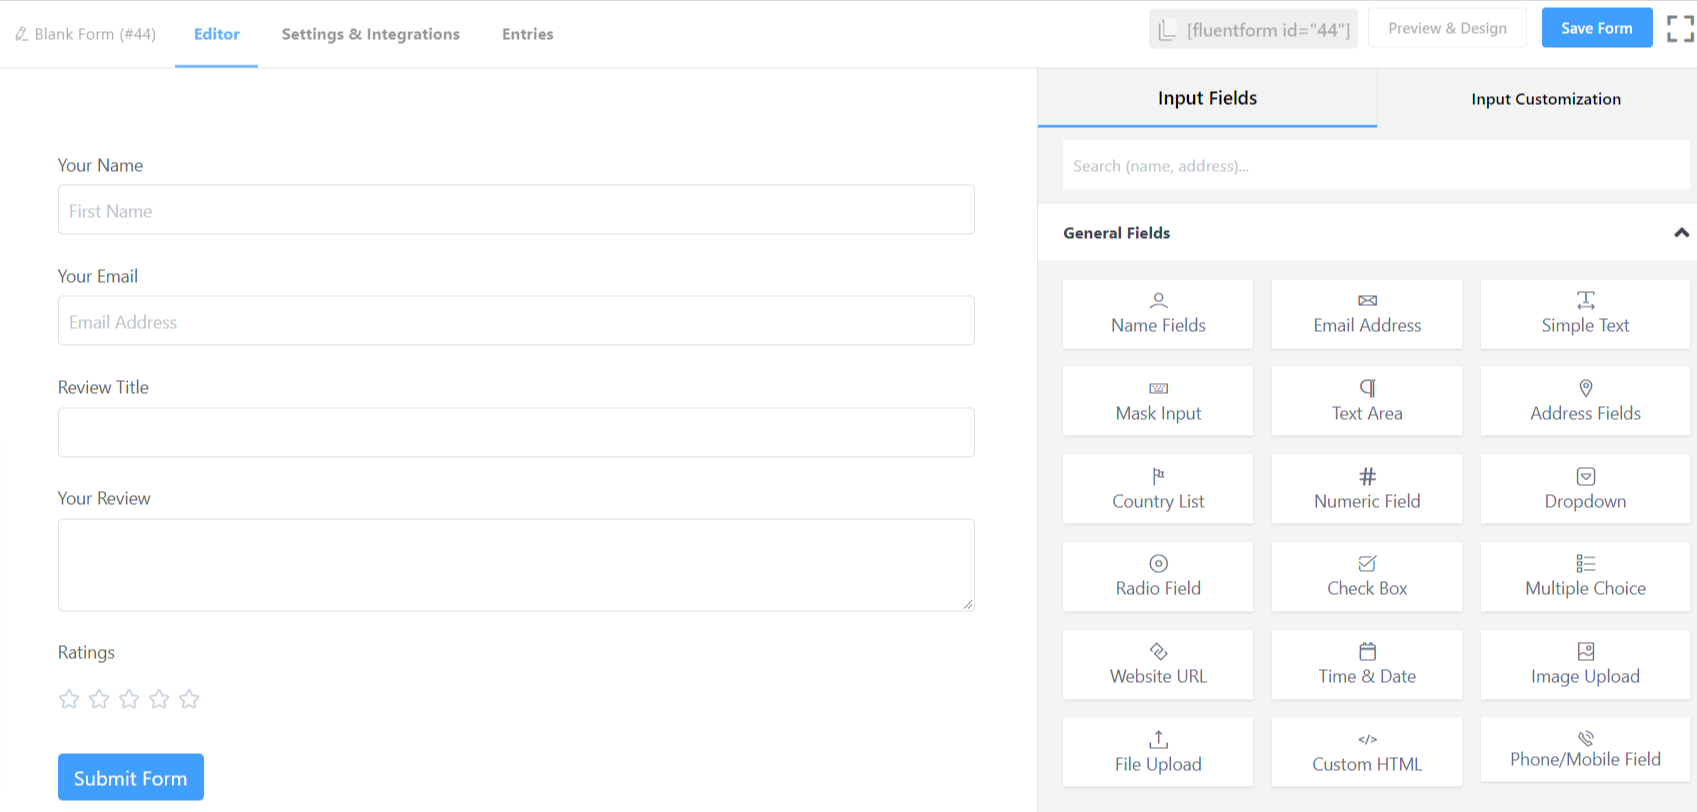
After that, go to your Fluent Forms dashboard & click on Add a New Form to create a new form. Or you can edit an existing form.
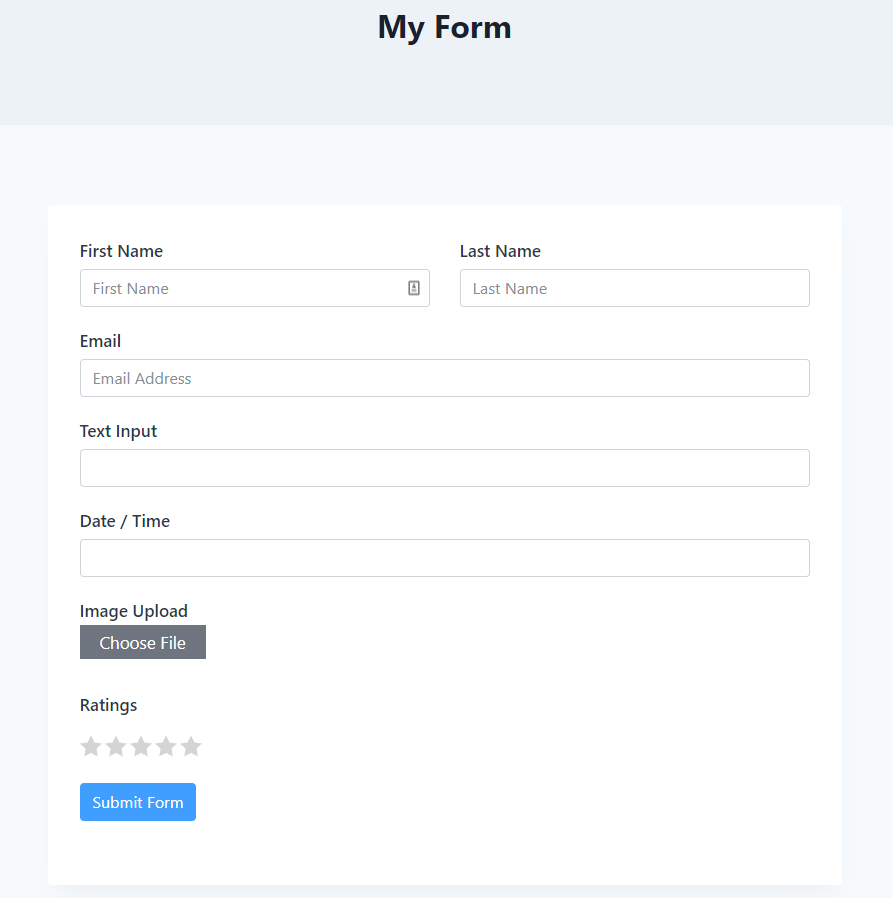
In this example, a Review form has been created. That includes Name, Email Address, Review Title, Review Text, and Ratings field. Keep in mind, that the Ratings field is only available in the Fluent Forms Pro version.
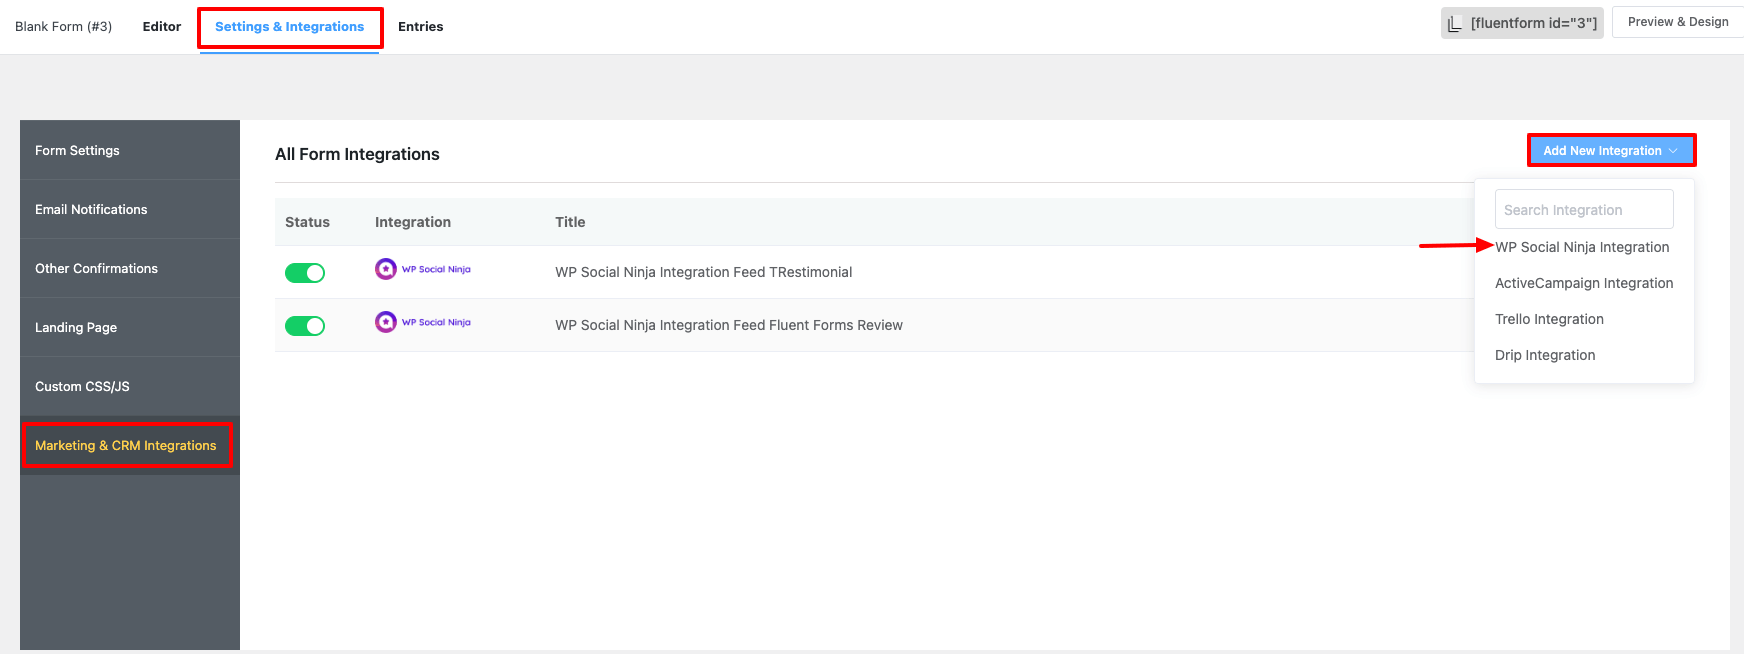
Go to the Settings & Integrations tab and & click on the Marketing & CRM Integrations option. Here, you need to click the Add New Integration button & select WP Social Ninja Integration.
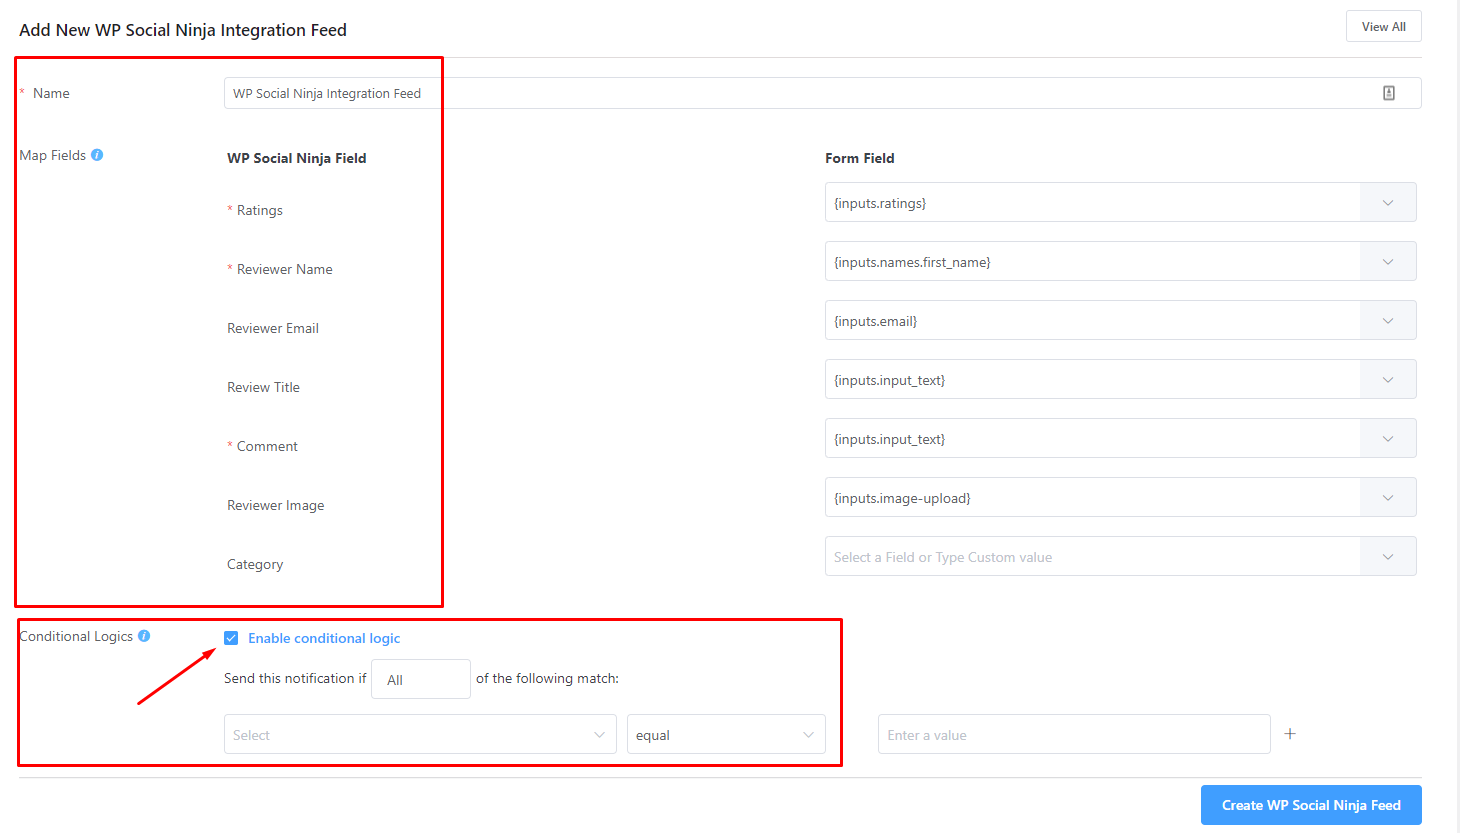
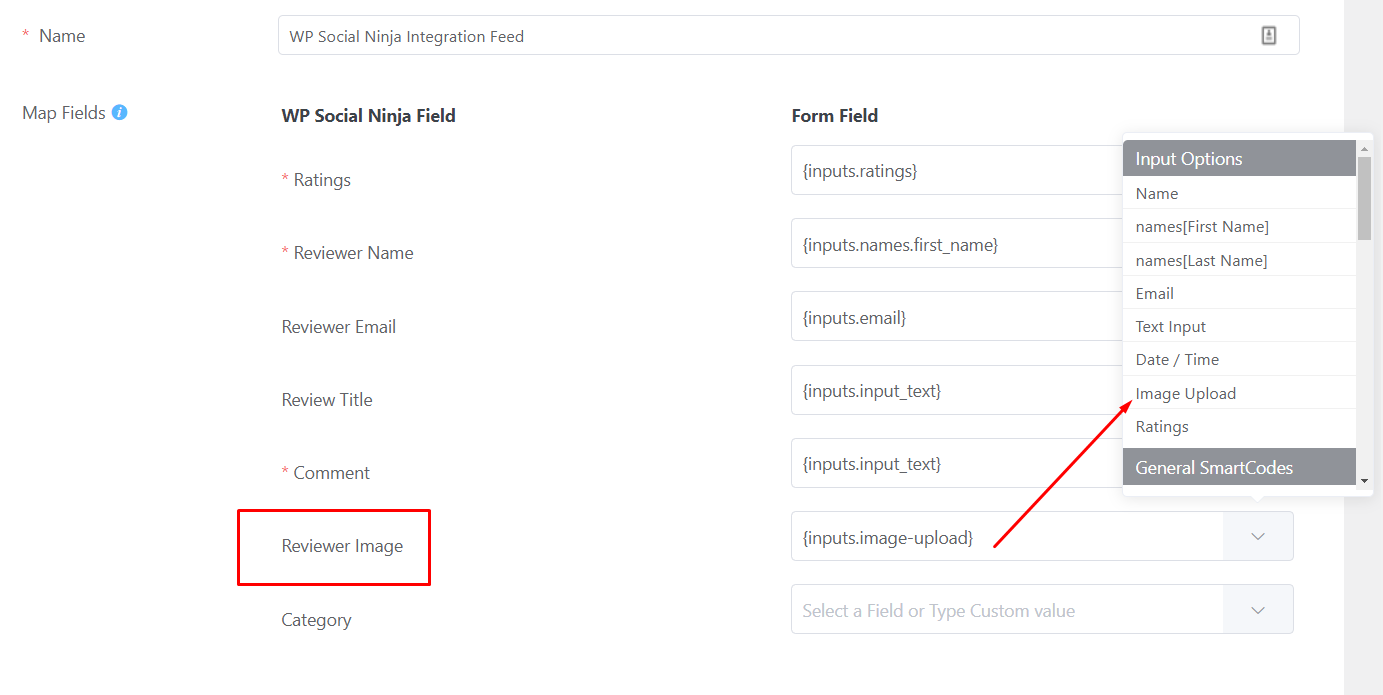
Then, you have to add a new WP Social Ninja Feed. Give an appropriate name to your feed.
And using the Map Fields option, select which Fluent Form fields pair with their respective WP Social Ninja fields.
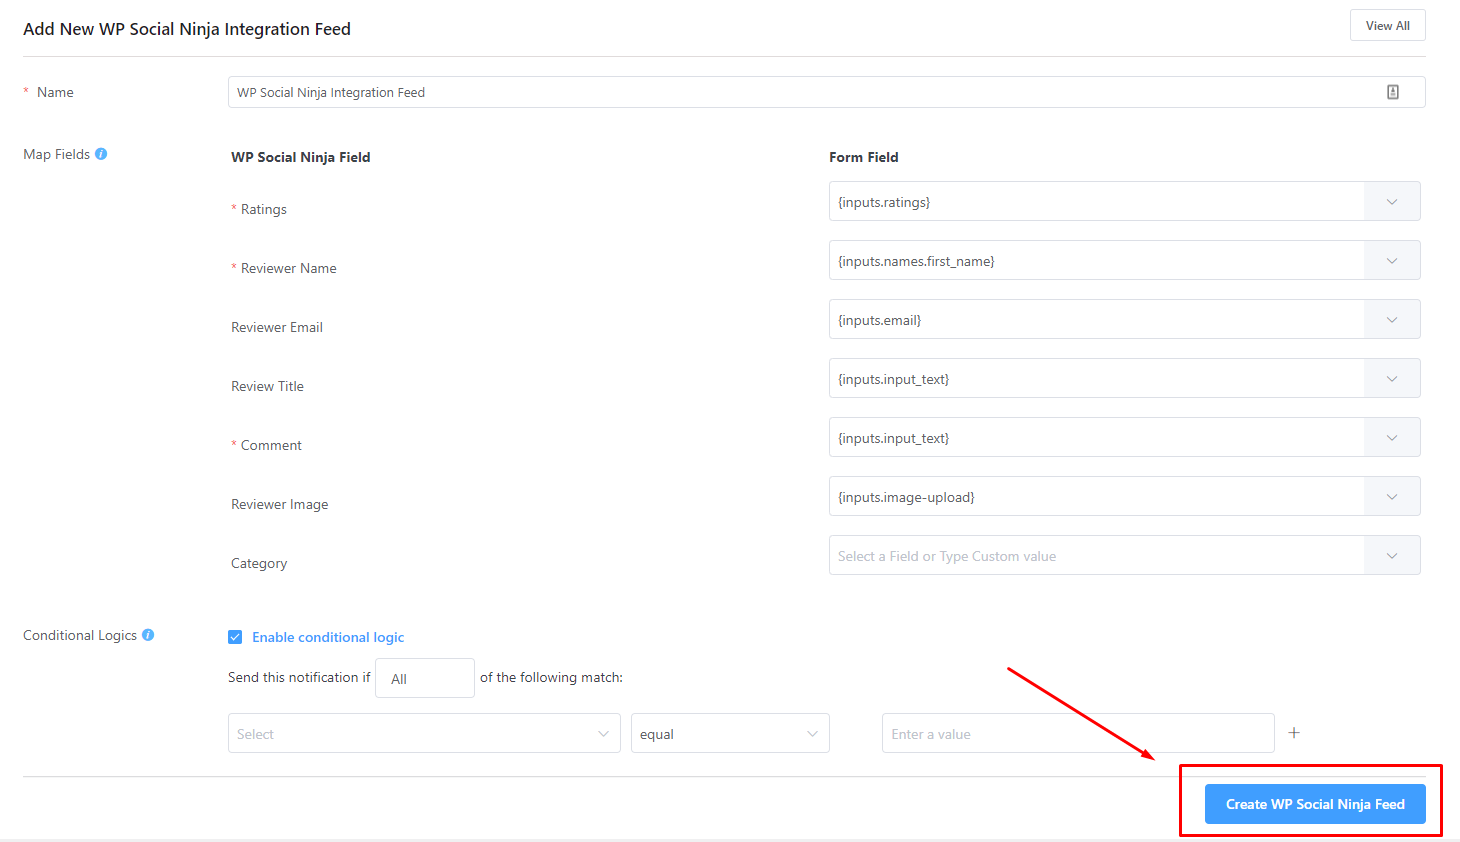
You can also enable Conditional Logic if you want to. Lastly, when the configuration is done, click on the Create WP Social Ninja Feed button to save the settings. Look at the Feed settings given below to get a better idea.
Moreover, add your Reviewer Image from the Form Field to display the image on your site.
Once you are done, Make sure to click the Create WP Social Ninja Feed button.
Then you can copy the Form’s shortcode and paste it to any page/post.
Make sure to click the Save Form button.
Fluent Forms Review template #
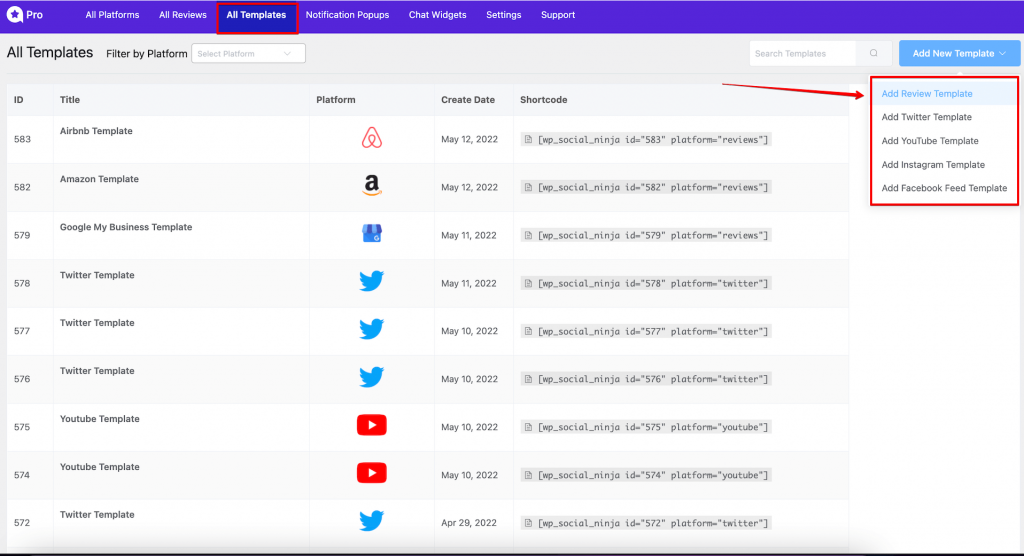
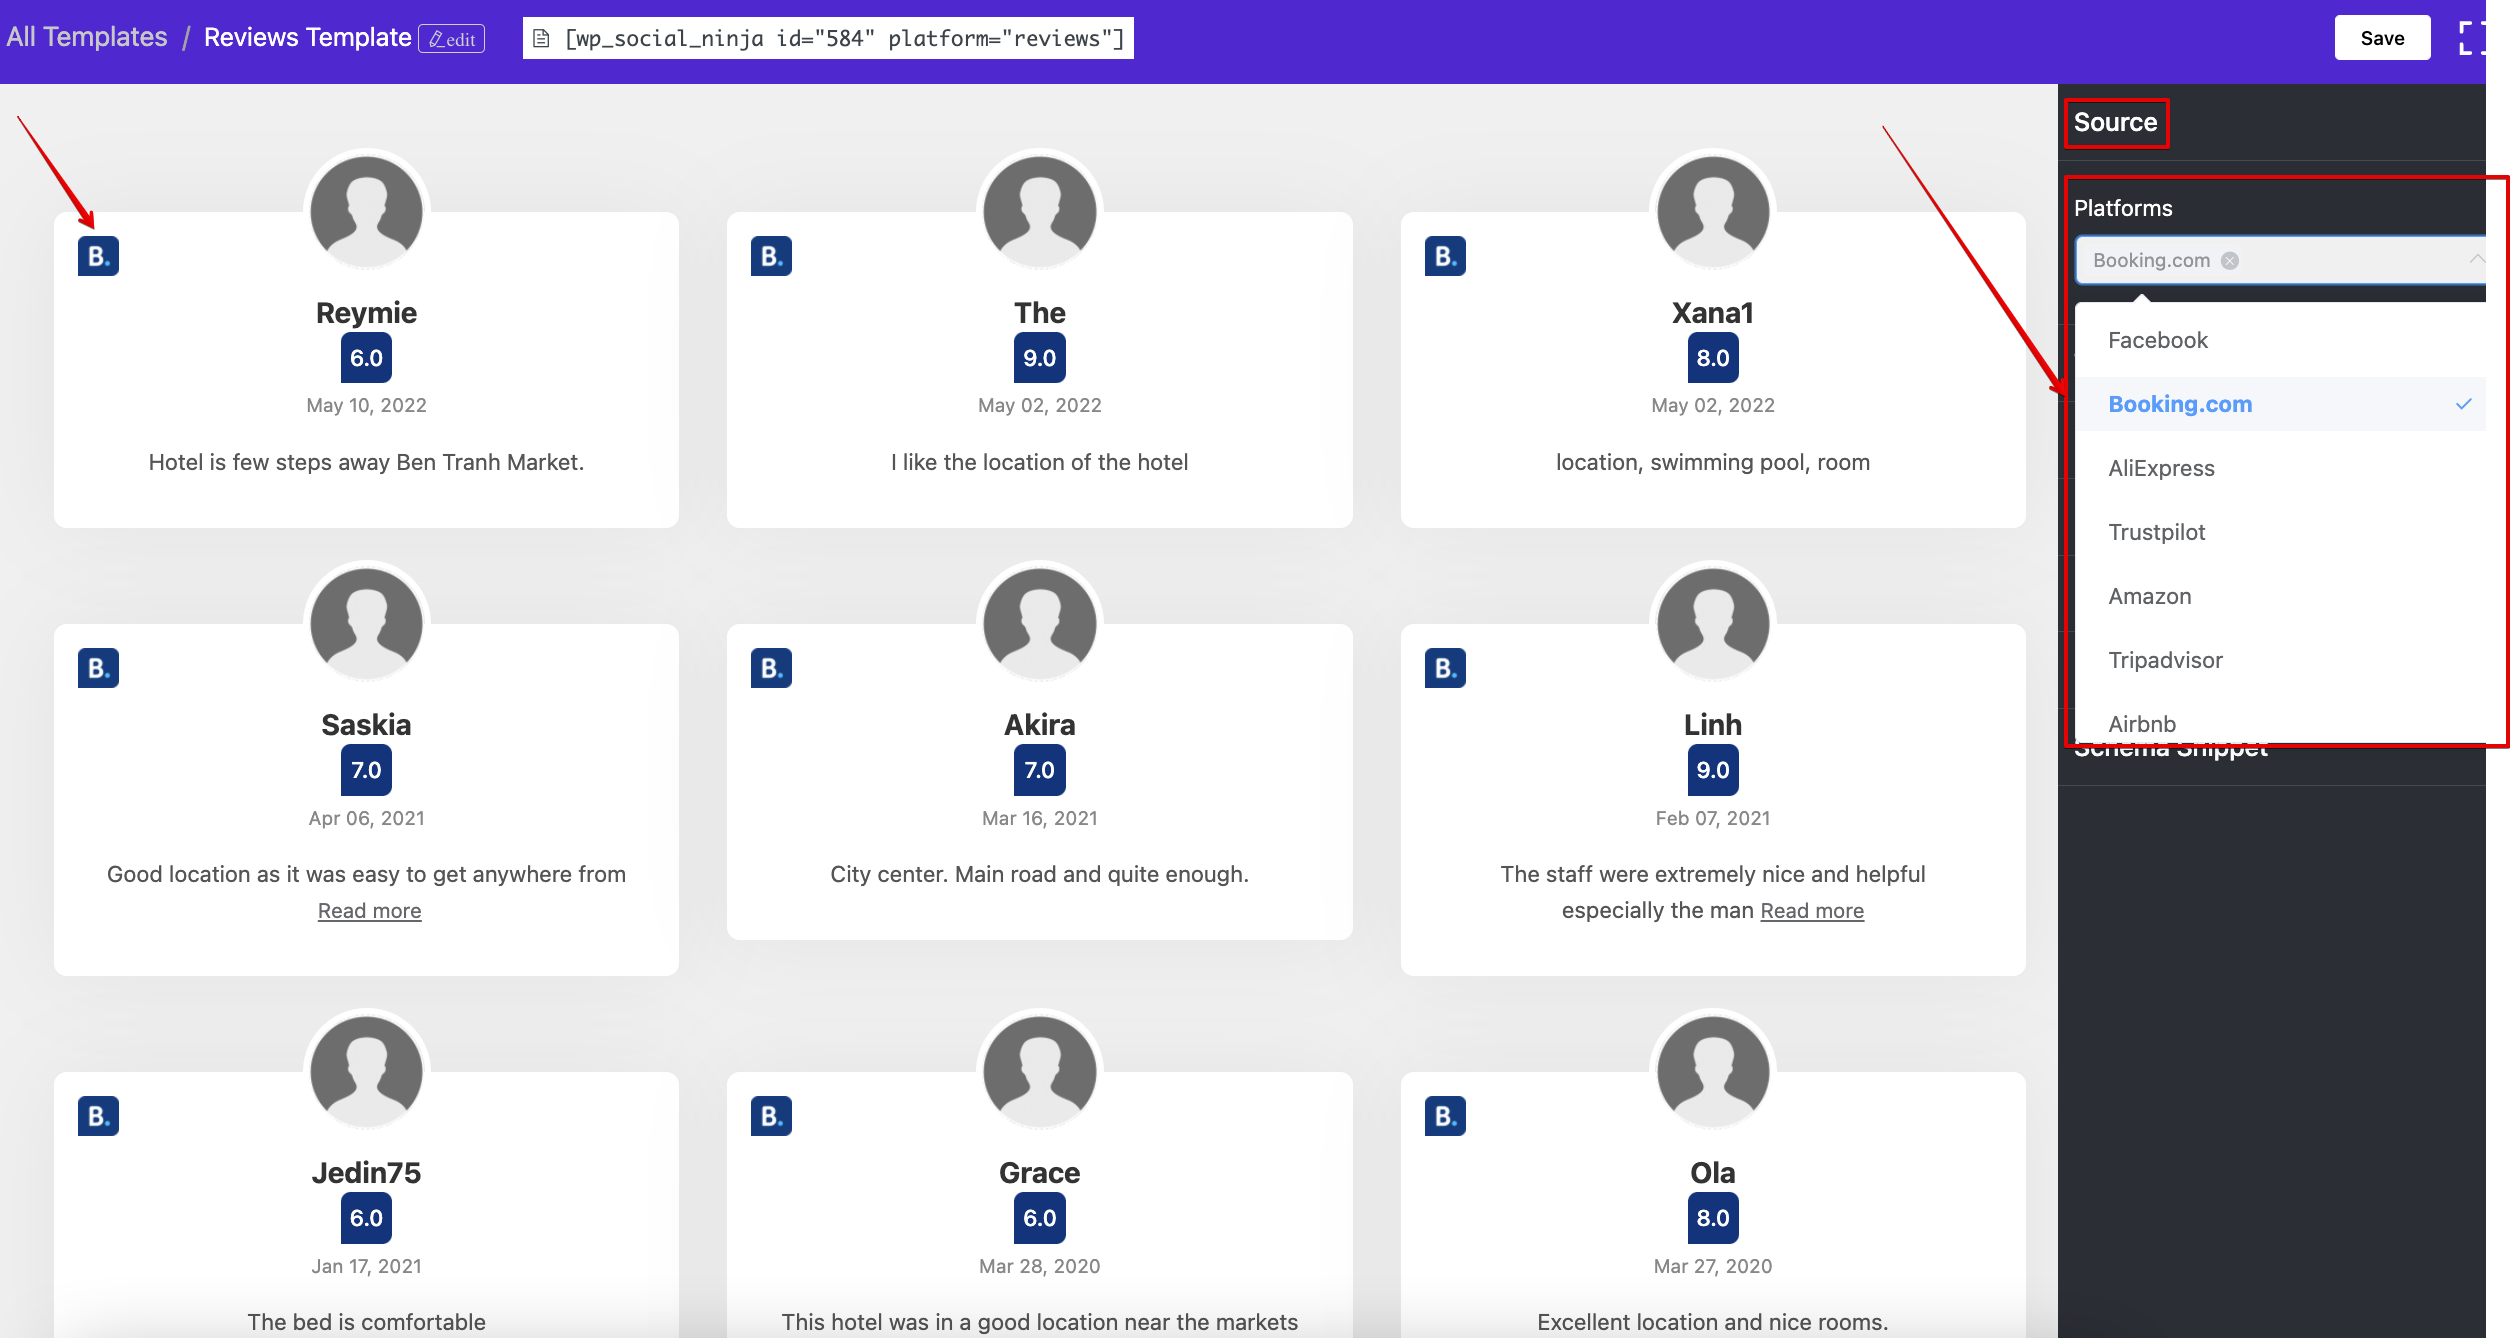
Now it’s time to set up the Fluent Forms review template in WP Social Ninja. Go to your WP Social Ninja dashboard & click on All Templates. To add a new template, click the Add New Template button & select Add Review Template.
Then go to the Source option and select Fluent Forms from the dropdown. And click on the Save Template button. Now, you will notice that the reviews that were submitted by the form have automatically appeared on your website!
Now, if you want to manually approve every review collected using Fluent Forms, you can do that as well.
Go to the Settings section of WP Social Ninja.

Find and click on Fluent Forms Settings. Now enable the button Review must be manually approved. Then, click on Save Settings.

Next, you need to go to All Reviews to check all the submitted reviews.
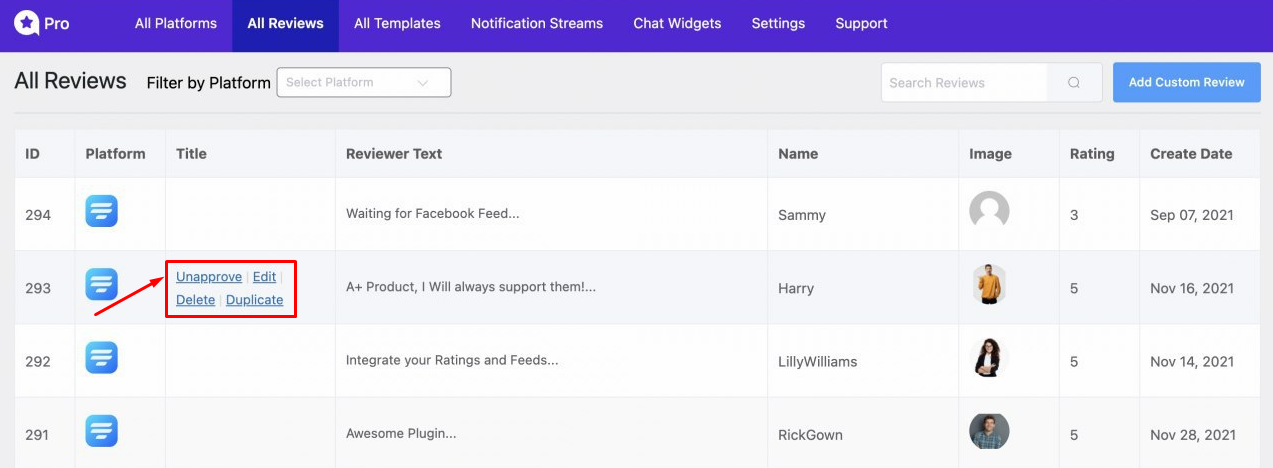
From here, you can Approve or Unappove the specific reviews. Let’s Approve the five-star reviews and Disapprove the rest. Now let’s have a look at how it looks on the frontend.

As you can see, you’ve successfully controlled the reviews from your dashboard.
Also, check out – How to add Custom Reviews


