
- Messenger Configuration
- WhatsApp Configuration
- Telegram Configuration
- Instagram Configuration.
- Twitter Configuration
- Slack Configuration
- Skype Configuration
- Phone Configuration
- Added SMS chat widget. (Pro)
- Email Configuration
- WeChat Configuration
- Added Instagram DM chat widget. (Pro)
- Microsoft Teams
- Line Configuration
- Snapchat Configuration
- Linkedin Configuration
- Viber Configuration
- Chat Widget Drag and Drop
- Fluent Forms Chat Widget
Have you thought about adding Messenger Chat or any other Social Chat platform to your WordPress site? The All-in-One Chat feature will definitely speed up the connection with the customers in the fastest way possible.
WP Social Ninja has an amazing feature to connect multiple Social Chats so you can communicate with the world in a minute. This process is extremely safe and doesn’t hamper your privacy. Let’s look at how you can attach the following platforms to your Page.
Messenger Configuration #
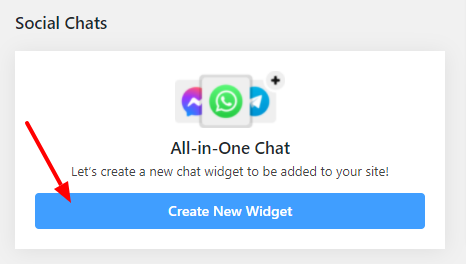
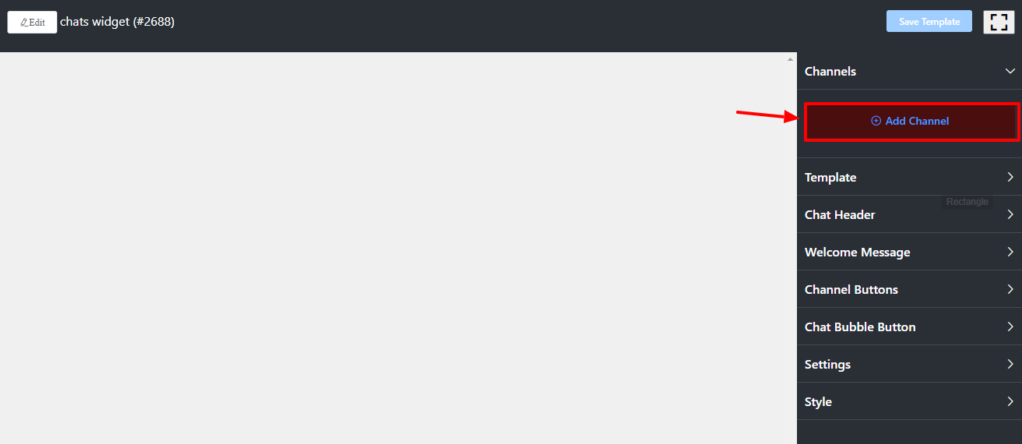
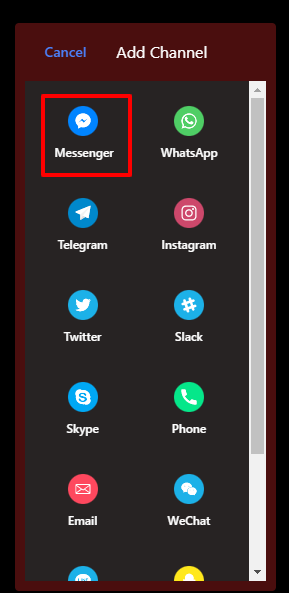
To begin, click the Create New Widget button to add a new chat widget. Then click the Add Channel button to connect to the chat widget & select the Messenger icon.
Next, you need a Facebook ID/username or Link to insert in the box. Let’s check how you can obtain that.
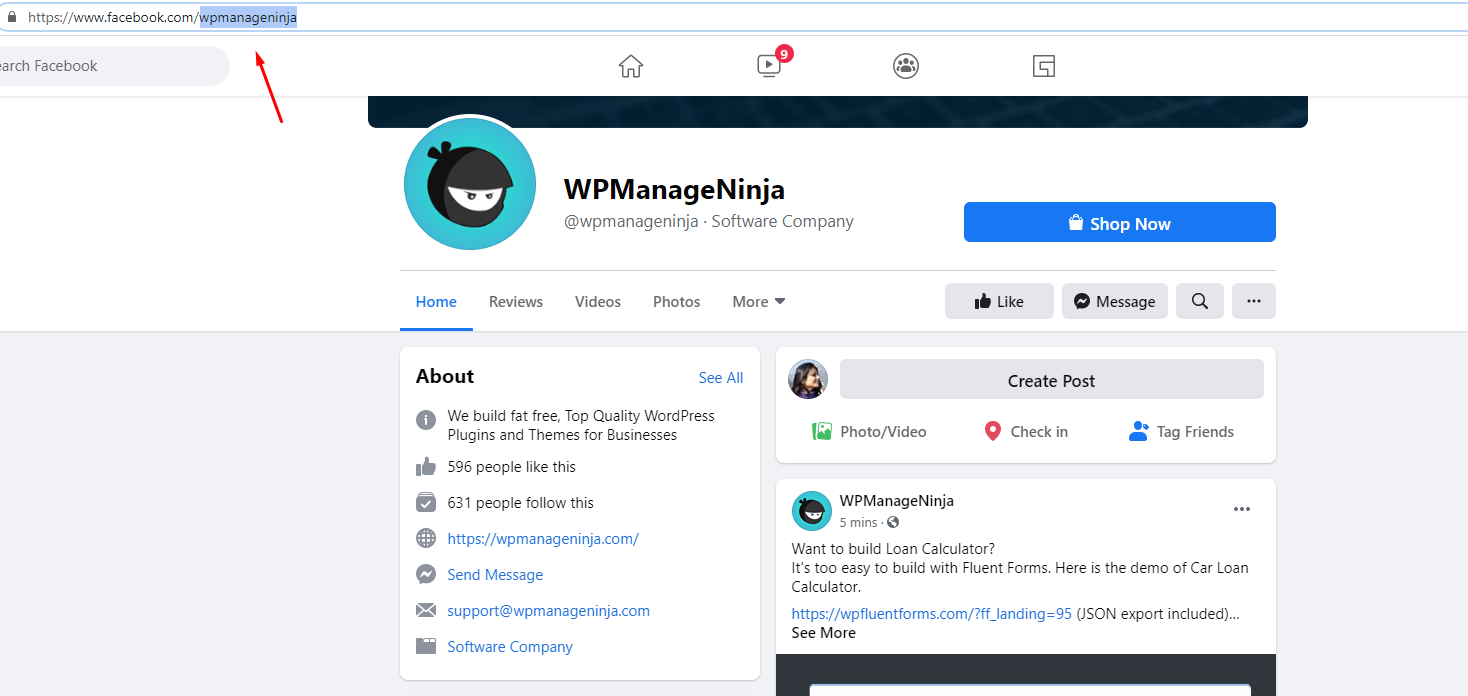
Login to your Facebook account. Suppose you need a User ID. The first thing you need to do is click on the profile & Go straight to the URL.
User ID #
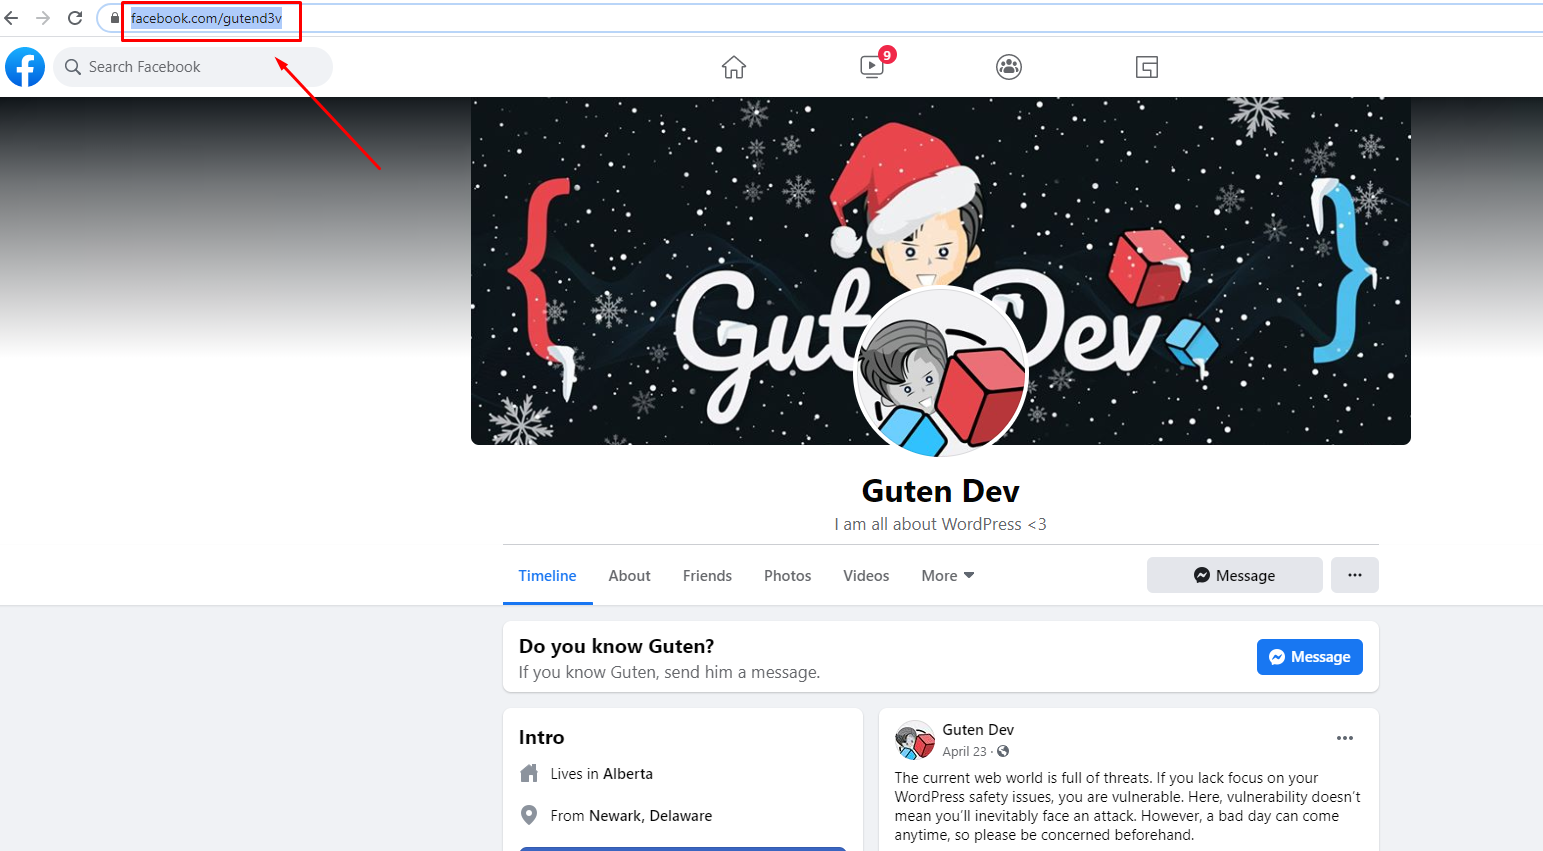
Here, you can see the URL, facebook.com/gutend3v. In order to get the user’s id, copy after the slash and paste it on the Messenger Configuration. For instance, gutend3v.
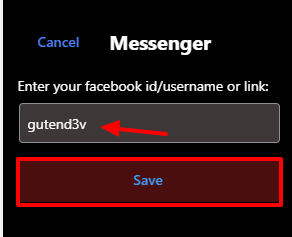
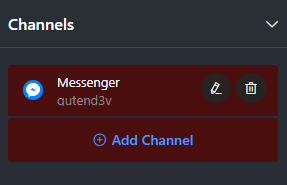
Now, click on the Save button, and you will get a Success notification. You can click on the Edit icon to edit the link or the Delete icon to delete it.
Page ID #
Similarly, you need a Page ID or Group ID to configure. However, some IDs may vary, but the process is just the same. Let’s dive in.
Similar to User ID, you can click on the URL and copy the ID after the last slash. You can paste it into the Messenger Configuration and click on the Save button.
WhatsApp Configuration #
Ever considered adding WhatsApp Chat to your WordPress site? This will increase your business and open a network to connect with customers easily. Let’s look at how you can attach WhatsApp to your Page.
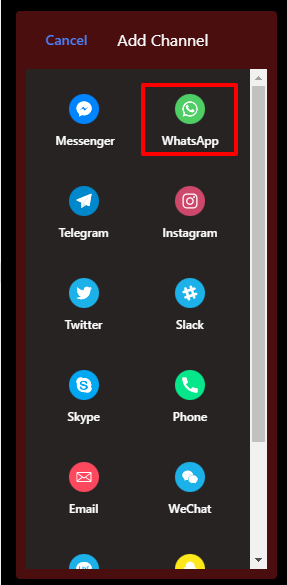
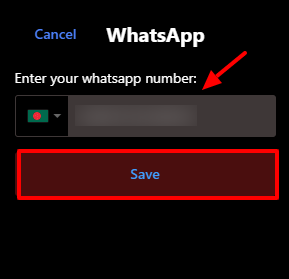
First, click on the Add Channel button & tap the Whatsapp icon.
Here, you need to provide your country & phone number, then Click Save. Now, the Whatsapp chat widget will be connected.
Click on the Whatsapp icon to take you to the Whatsapp chat page.
Telegram Configuration #
How about you add your Telegram account to your website to communicate with the customers? You can now connect your Telegram account and get in touch with the world in a few clicks. Let’s take a look at the screenshots below to know how you can attach Telegram to your website.
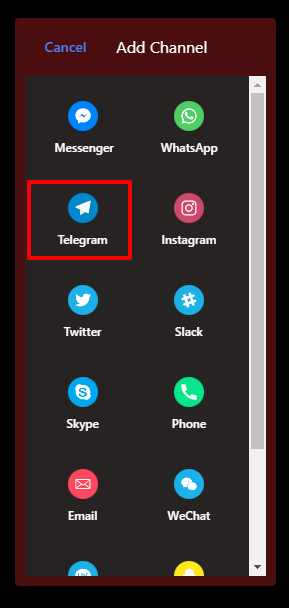
Firstly, click on the Add Channel button & tap the Telegram icon.
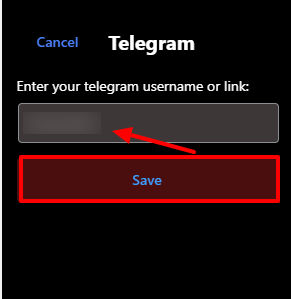
Here, you need to provide your User ID/link and Click on the Save button.
Once you have successfully saved the Telegram User ID, click on the Whatsapp icon to take you to the Telegram Chat App.
Instagram Configuration. #
Lack of proper communication can cause a loss of potential customers to your business. How about you add your Instagram account to your website to communicate with the customers? Let’s take a look at how you can attach Instagram to your website.
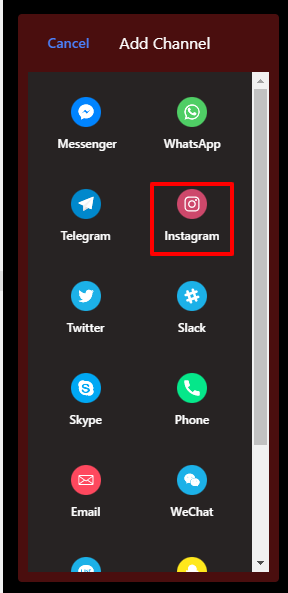
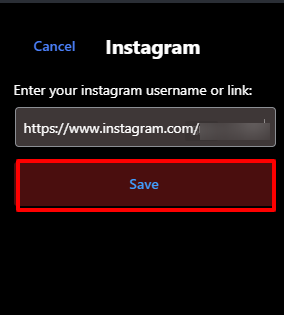
First, click on the Add Channel button & tap the Instagram icon.
Then you need to provide your Instagram username/link and Click on the Save button.
Now, the Instagram chat widget will be connected. Click on the Instagram icon to take you to the Instagram chat page.
Twitter Configuration #
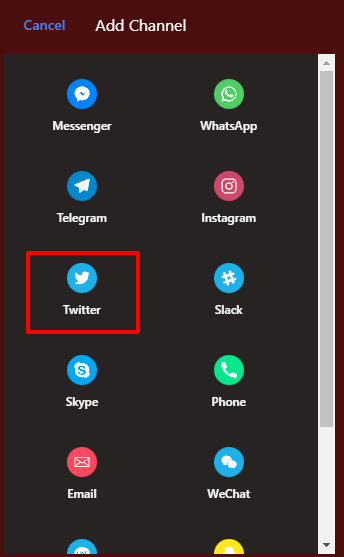
First, click the Add Channel button to connect to the chat widget & select the Twitter icon.
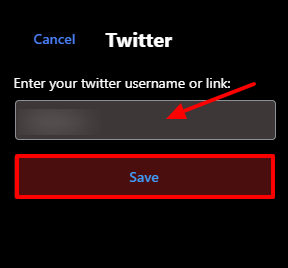
Here, you need to provide your Twitter username/link and Click on the Save button.
Now, click on the Twitter icon on the chat bubble to take you to the Twitter App page.
Slack Configuration #
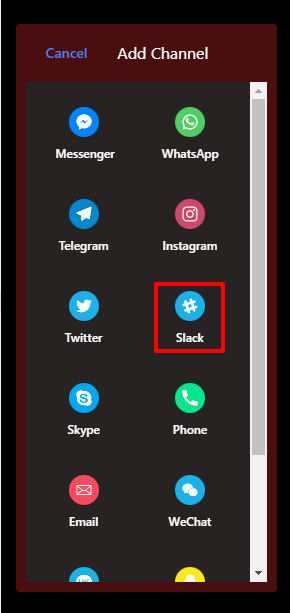
First, click the Add Channel button to connect to the chat widget & select the Slack icon.
Here, you need to provide your Slack username/link and Click on the Save button.
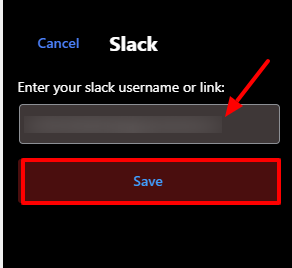
Now, click the Slack icon on the chat bubble to take you to the Slack App page.
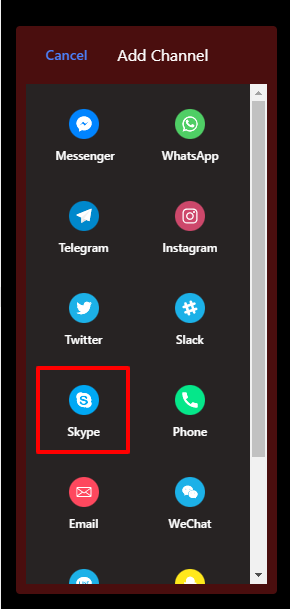
Skype Configuration #
First, click the Add Channel button to connect to the chat widget & select the Skype icon.
Here, you need to provide your Skype username and Click on the Save button.
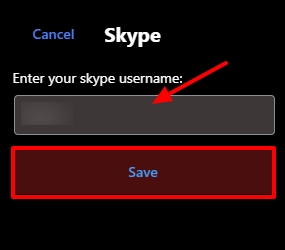
Now, click the Skype icon on the chat bubble to take you to the Skype App page.
Phone Configuration #
First, click the Add Channel button to connect to the chat widget & select the Phone icon.
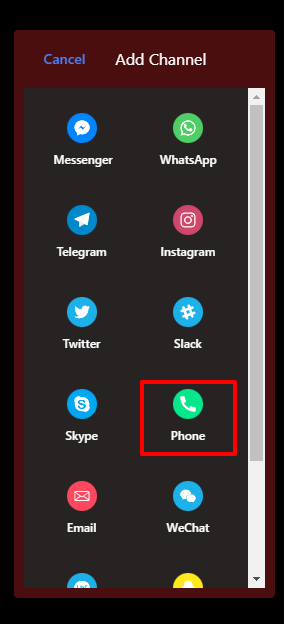
Here, you need to provide your Phone number and Click on the Save button.
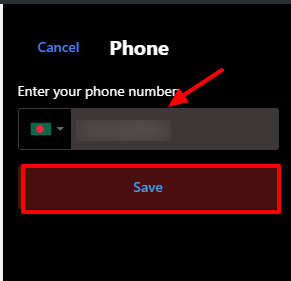
Now, click on the Start Chat with, the button on the chat bubble to take you to the Phone page.
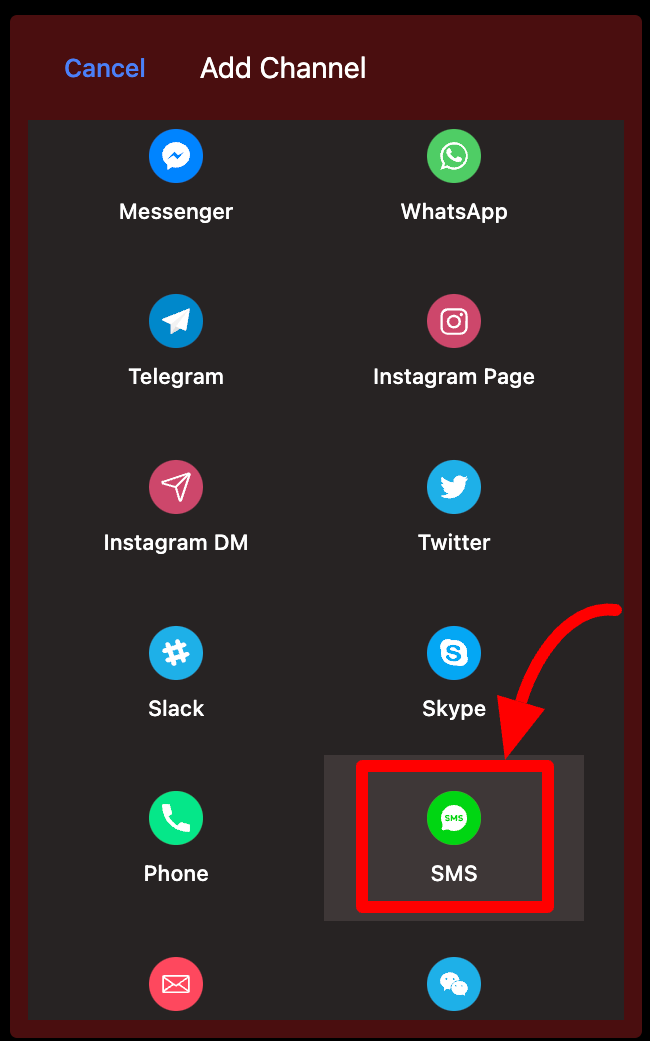
Added SMS chat widget. (Pro) #
To add the SMS Chat Widget to your site, click the Add Channel button.

Now you’ll see all the available channels for the chat widget. From the list, select the SMS channel.
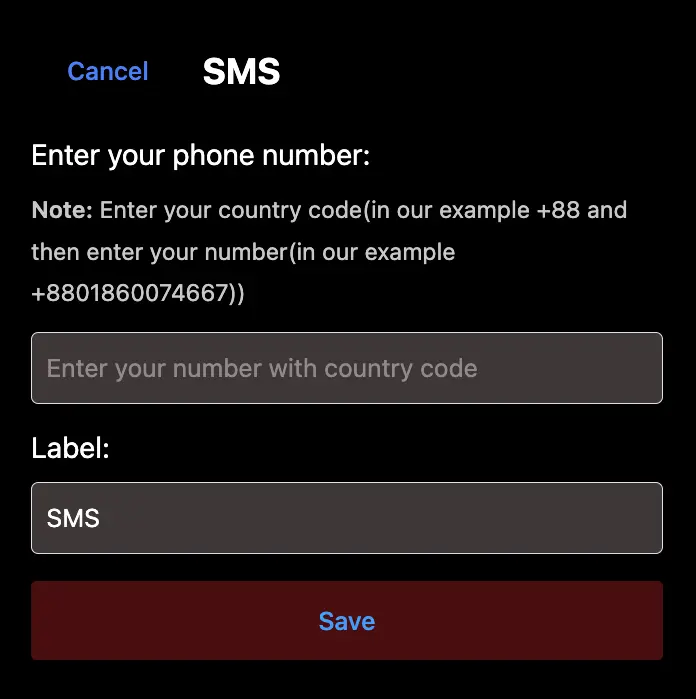
Next, enter the phone number where you want to receive SMS messages. Make sure to include the country code for example, +880 followed by your number.
If you’d like to customize the channel label, type your preferred label in the Label field.
Finally, click the Save button to apply your changes.
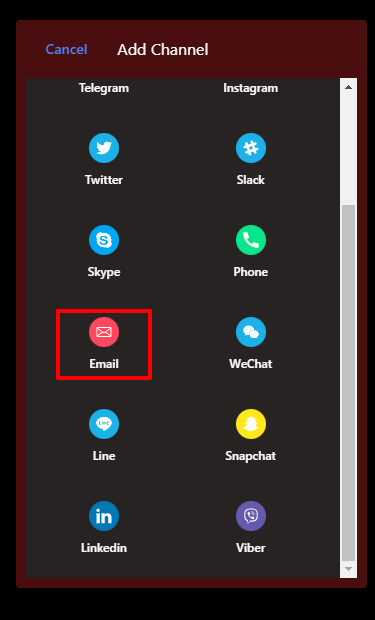
Email Configuration #
To configure Email, click the Add Channel button to connect to the chat widget & select the Email icon.
Here, you need to provide your Email Address and Click on the Save button.
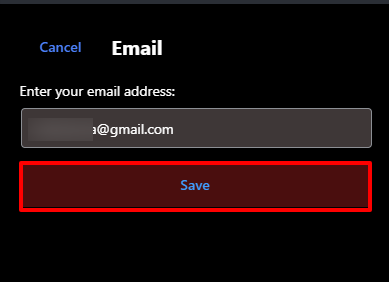
Now, click on the Email icon on the chat bubble to take you to the Email page.
WeChat Configuration #
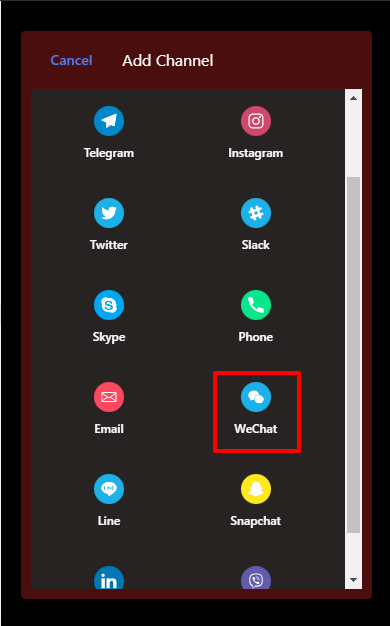
To configure WeChat, click the Add Channel button to connect the chat widget & select the WeChat icon.
Here, you need to provide your WeChat User ID and Click on the Save button.
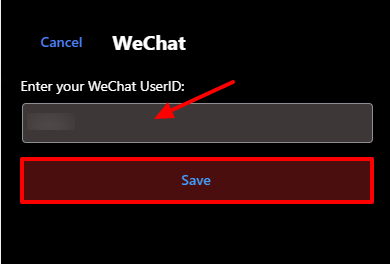
Now, click on the WeChat icon on the chat bubble to take you to the WeChat page.
Added Instagram DM chat widget. (Pro) #
To add the Instagram Direct Message widget, click on the Add Channel button.

Now, choose the Instagram DM channel from the list to add it as a widget.

Now, enter your Instagram Username or Profile link in the provided field.
If you’d like to update the label for your Instagram DM channel, you can do that in the Label field. Finally, click the Save button to apply your changes.

Microsoft Teams #
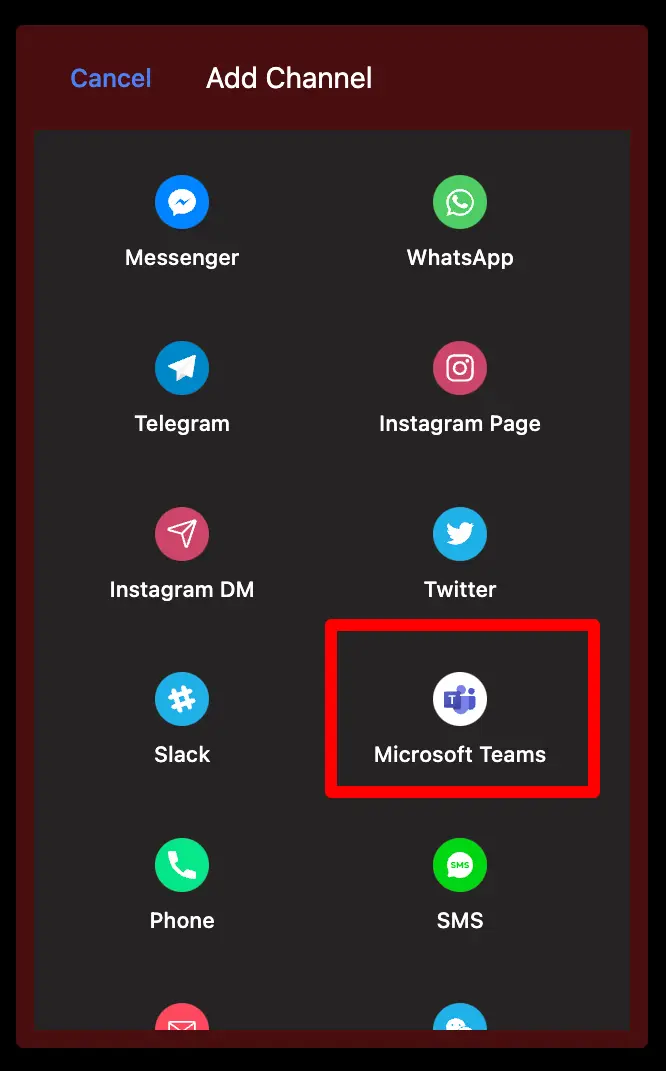
To add the Microsoft Teams widget, click on the Add Channel button.
Now, choose the Microsoft Teams channel from the list to add it as a widget.
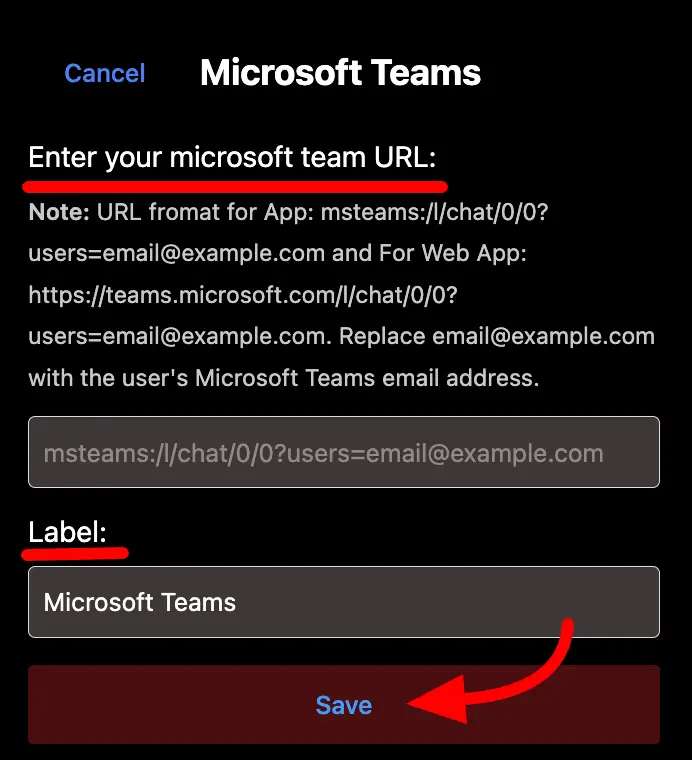
Now, enter your Microsoft Teams URL as instructed
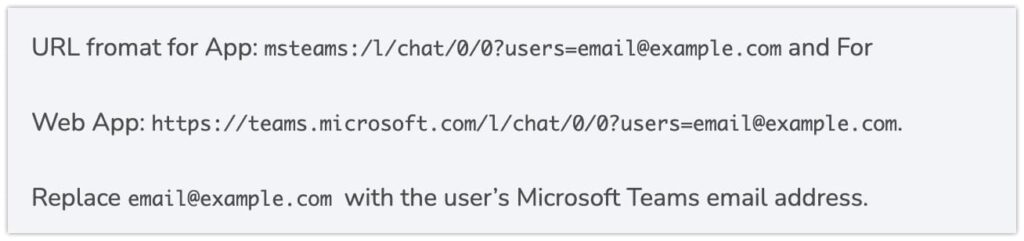
Hope you get the idea about the URL format now enter your Microsoft team URL:
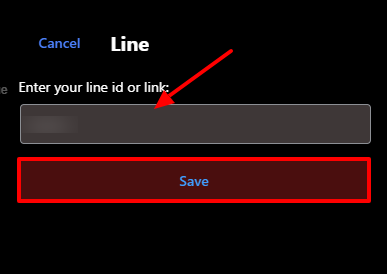
Line Configuration #
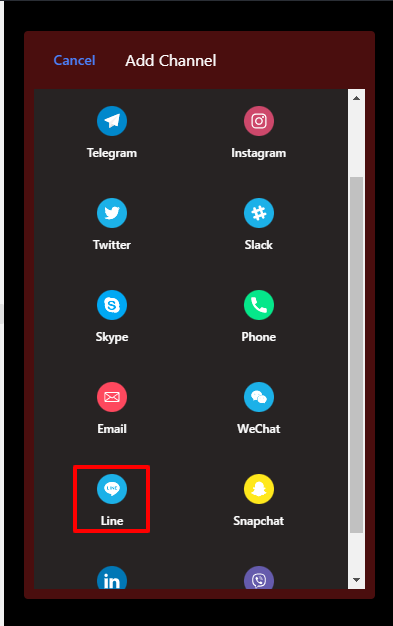
First, click the Add Channel button to connect the chat widget & select the Line icon.
Here, you need to provide your Line ID/link and Click on the Save button.
Then click on the Line icon on the chat bubble to take you to the Line chat page.
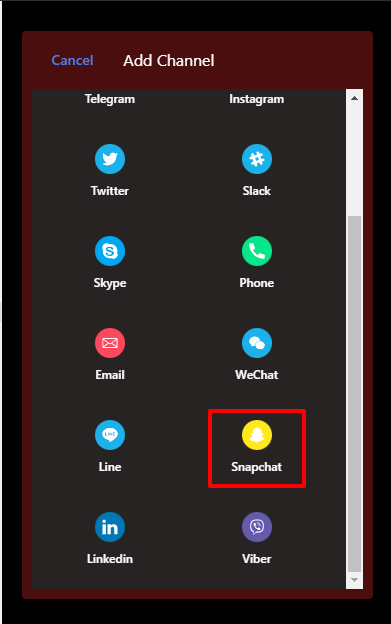
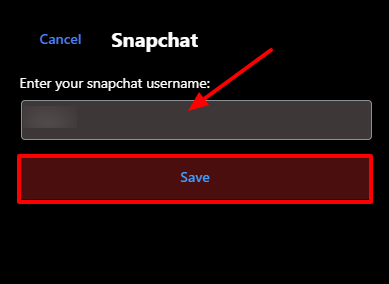
Snapchat Configuration #
First, click the Add Channel button to connect to the chat widget & select the Snapchat icon.
Here, you need to provide your Snapchat username and Click on the Save button.
Then click on the Snapchat icon on the chat bubble to take you to the Snapchat page.
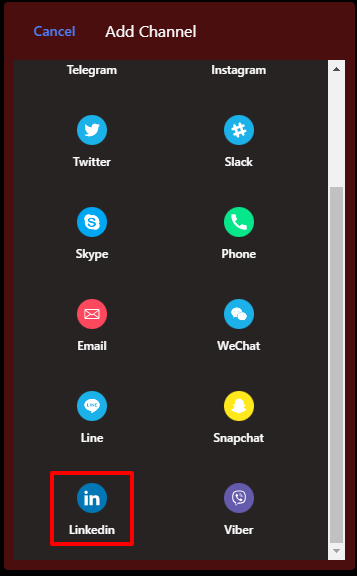
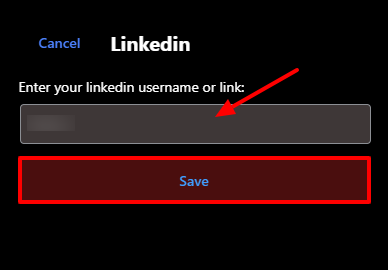
Linkedin Configuration #
To configure Linkedin, click the Add Channel button to connect the chat widget & select the Linkedin icon.
Here, you need to provide your Linkedin username/link and Click on the Save button.
Then click on the Snapchat icon on the chat bubble that will take you to the Linkedin page.
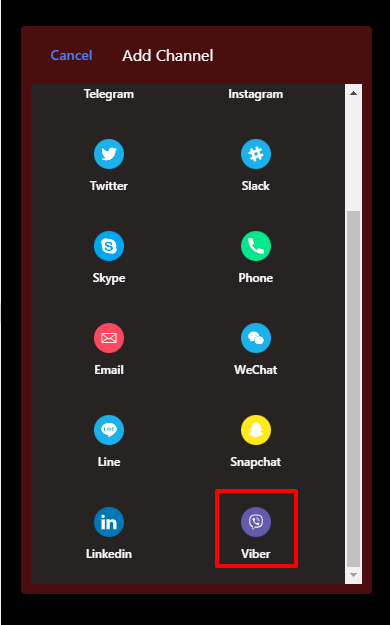
Viber Configuration #
To configure Viber, click the Add Channel button to connect the chat widget & select the Viber icon.
Here, you need to provide your Viber mobile number and click on the Save button.

Then click on the Viber icon on the chat bubble that will take you to the Viber chat page.
Chat Widget Drag and Drop #
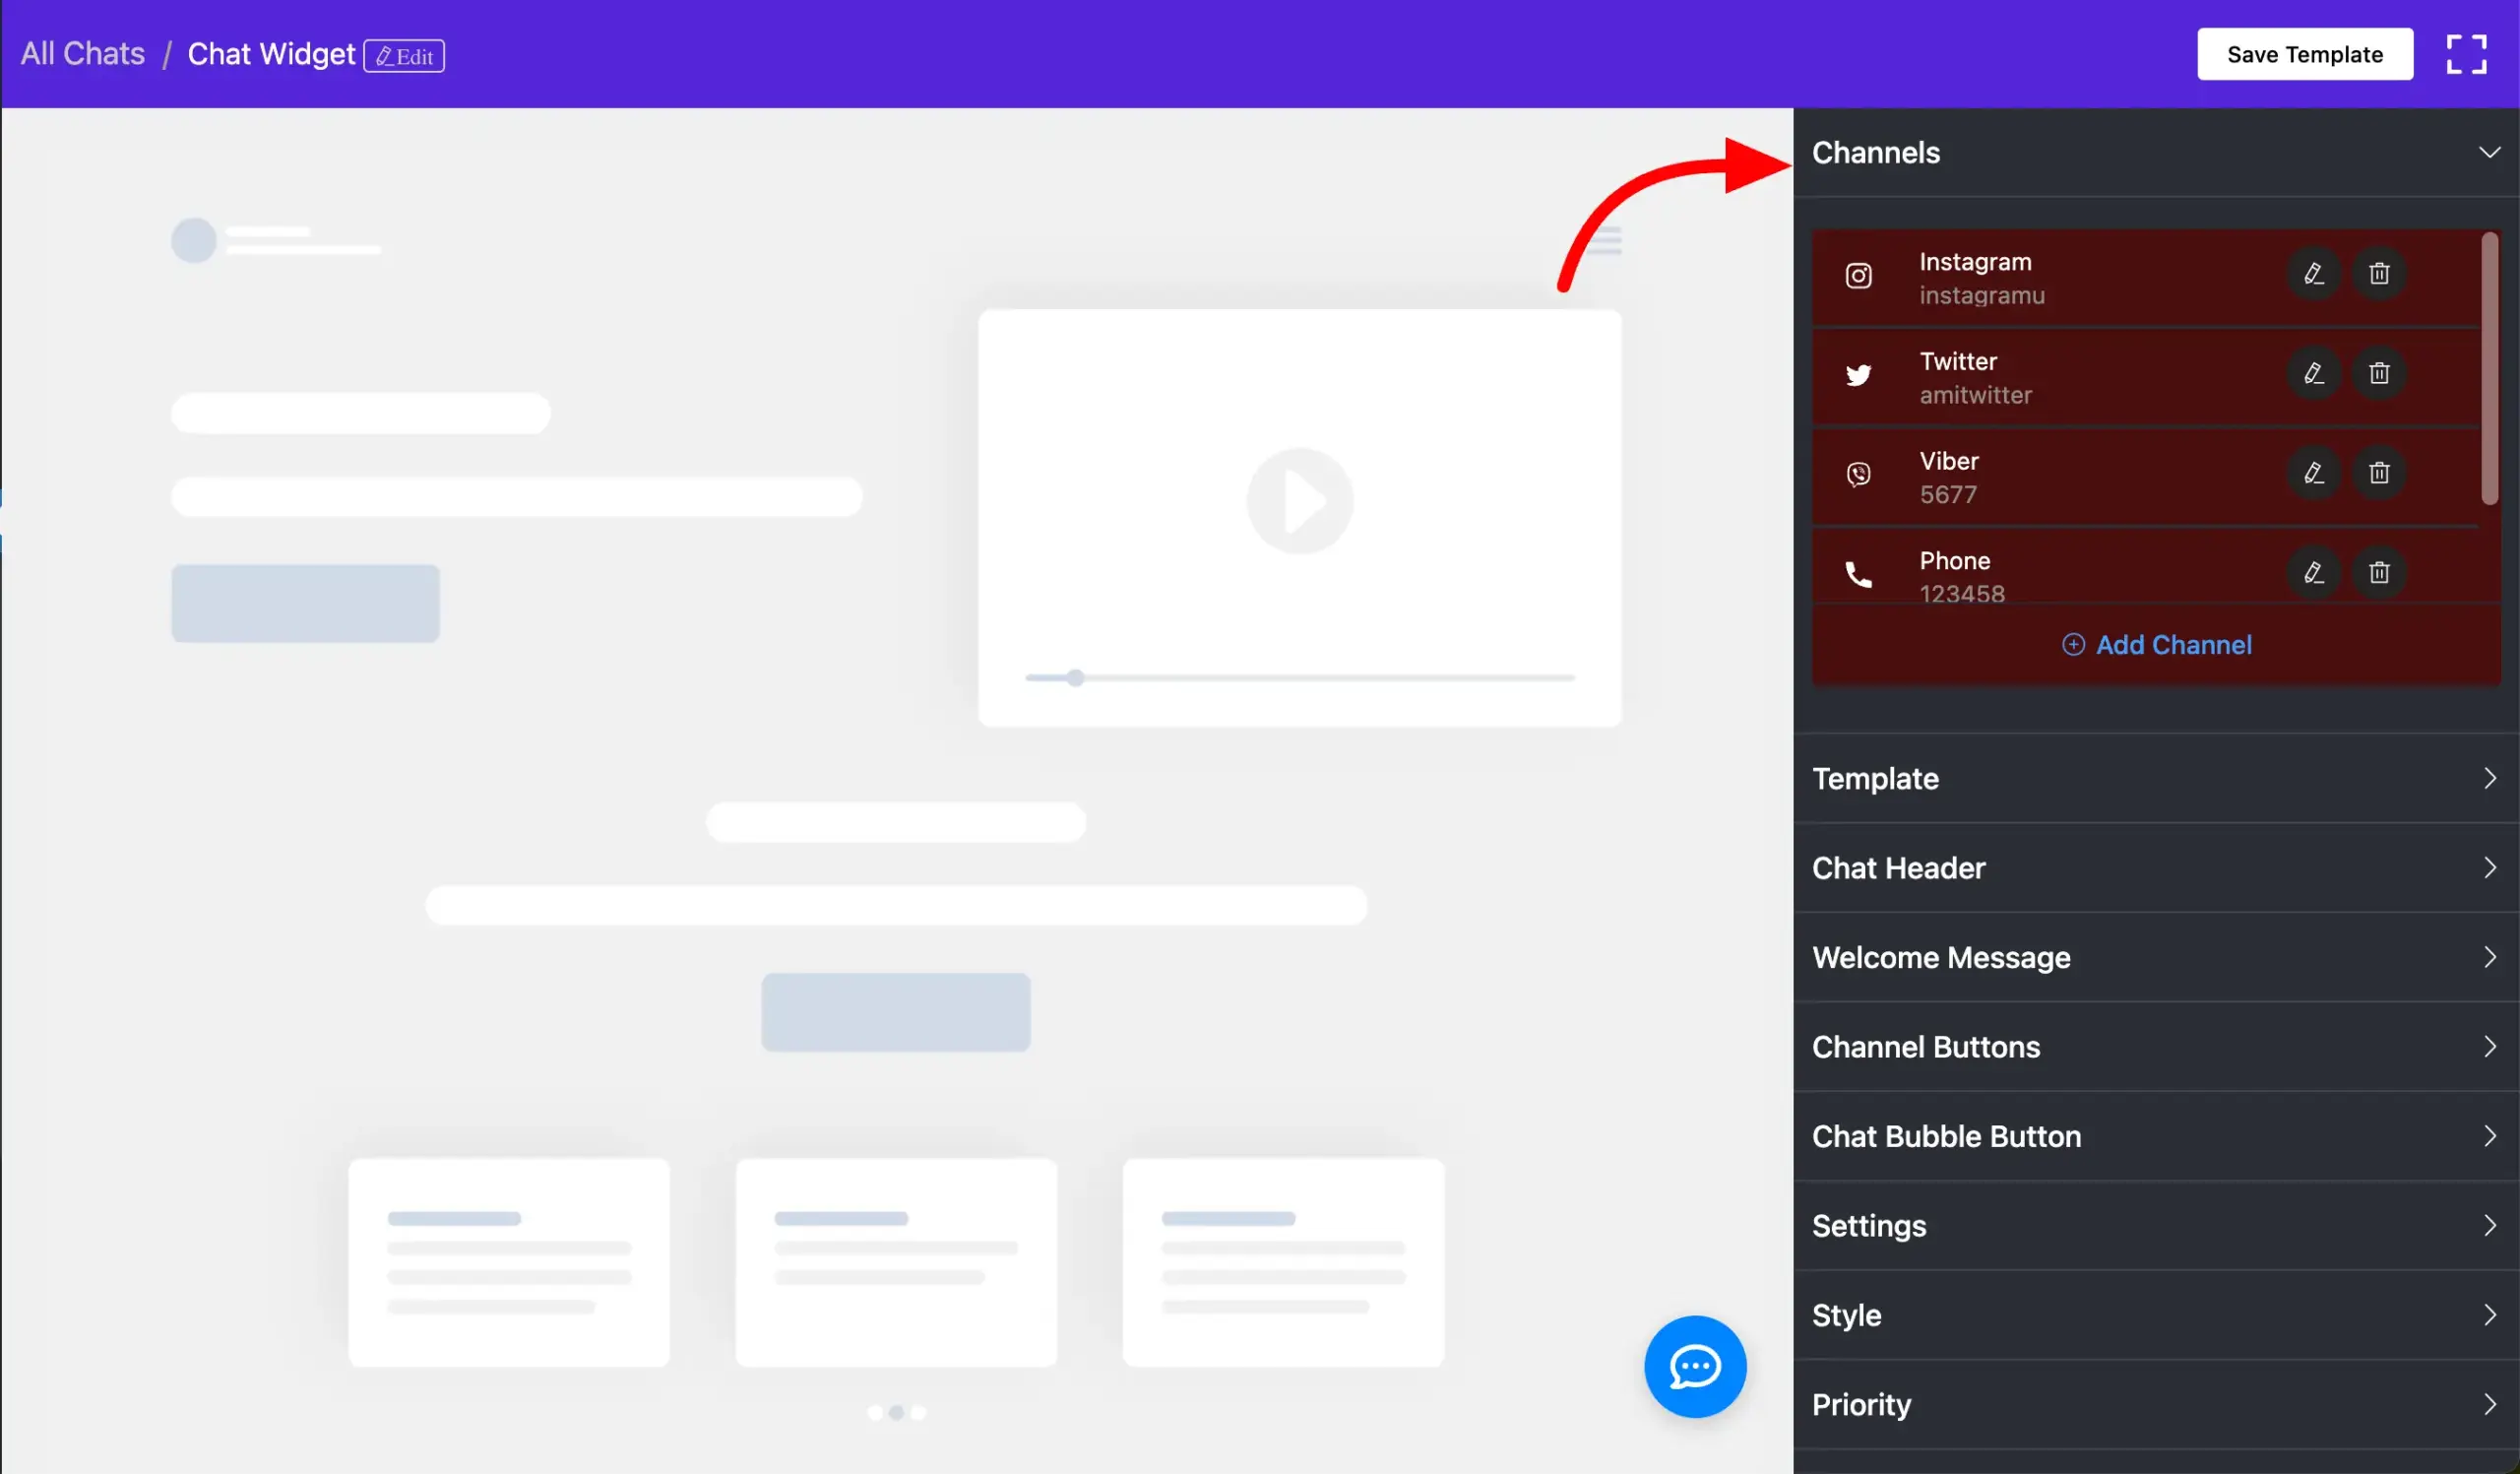
WP Social Ninja now lets you reorder chat widgets effortlessly using the drag-and-drop feature. This makes organizing your chat widgets more convenient.
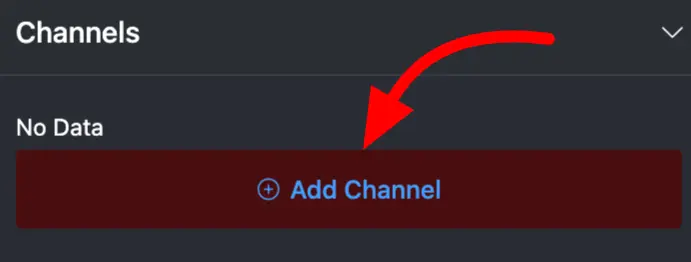
To use this feature, go to the Chat Widget Template from the Template Settings in WP Social Ninja. Select the Channels section, where you’ll see all the chat channels you’ve connected.
Simply drag and drop the widgets to arrange them in your preferred order. Once you’re done, click the Save Template button to apply your changes.
With this feature, managing your chat widgets is quicker and more efficient!
Fluent Forms Chat Widget #
WP Social Ninja always comes up with awesome features.
You already got to know how to connect Fluent Forms with WP Social Ninja to collect and embed reviews on your website. But, did you know, you can also integrate Fluent Forms with the social chat widget?
The best part is collecting your visitors’ information without disturbing their scrolling.
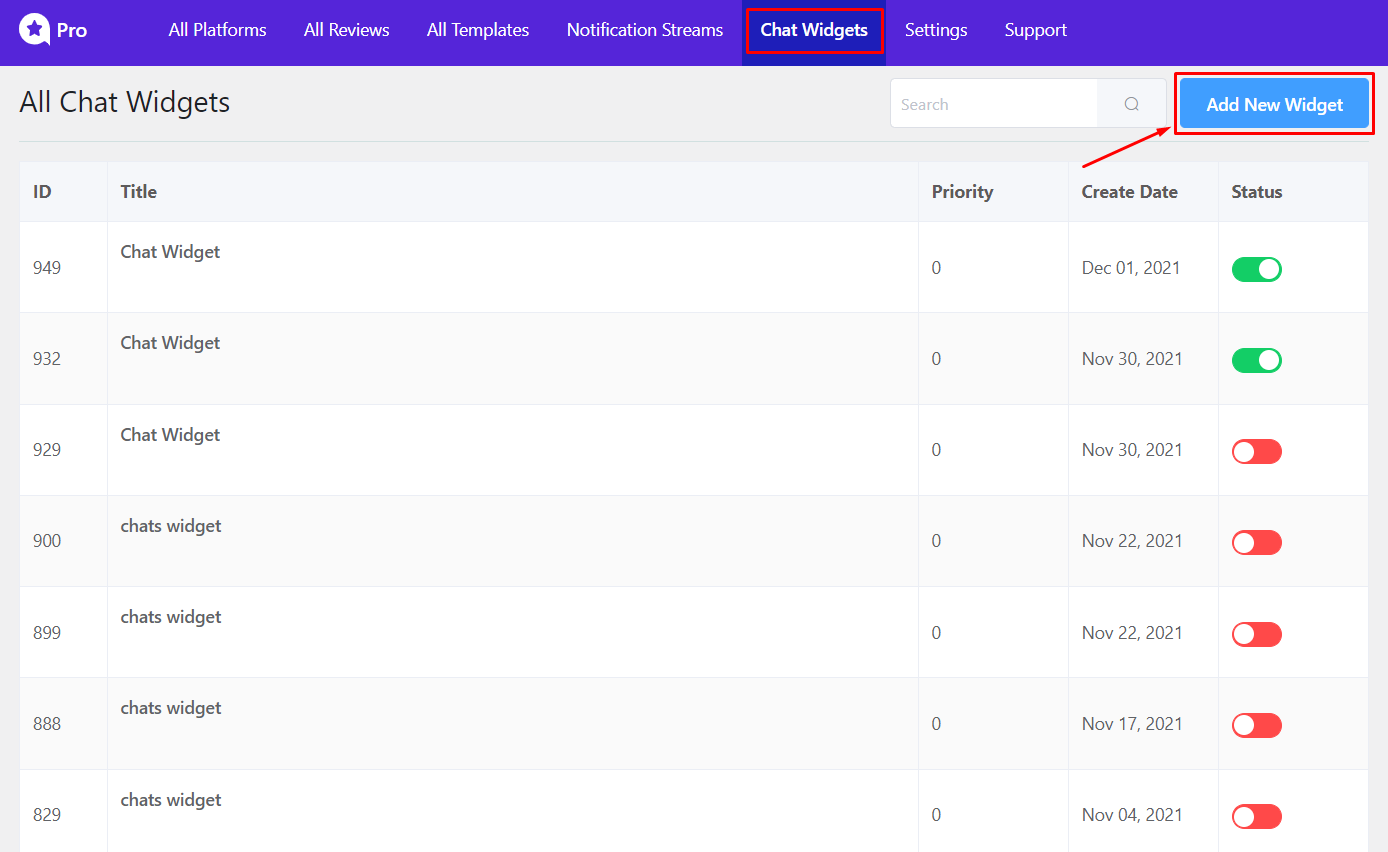
To do so, go to Chat Widget and click on Add New Widget.
Once you are in, go to the Channels and click on Add Channel. A new box will pop out. Scroll down a little bit and choose Fluent Forms.

To connect Fluent Forms with the social chat widget, you need to paste the form’s Shortcode in the box. So, paste the copied Shortcode in the Paste your Fluent Form shortcode box.

Make sure to press the Save button.
Now, go to Template settings, and choose your favorite Layout Type. You can also select a Template Style from 4 different styles.
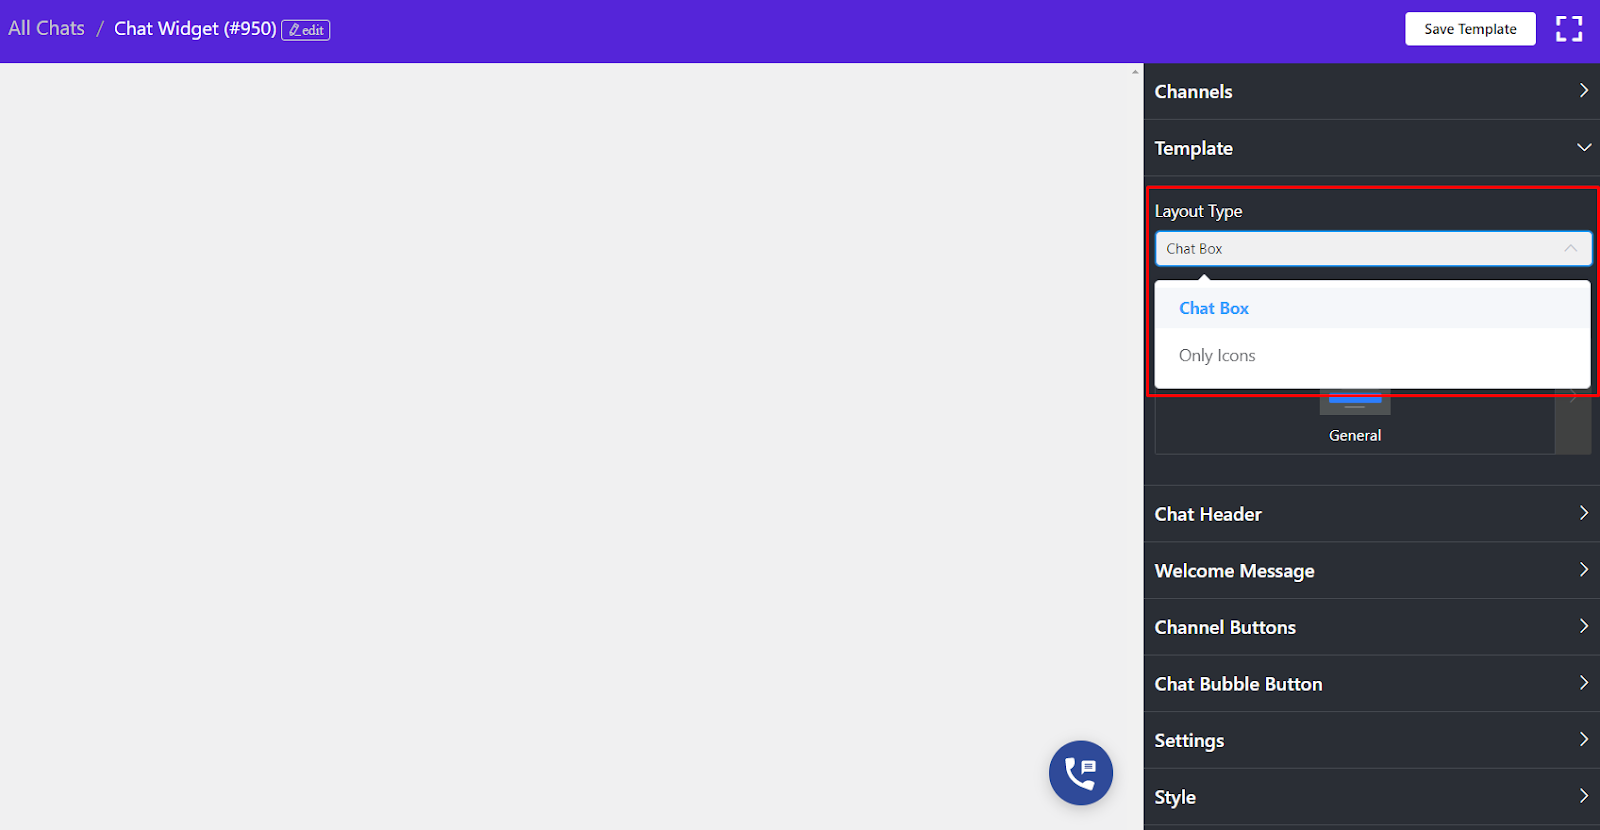
Similarly, you can customize your Chat Widget according to your taste from the different options available in the settings bar.
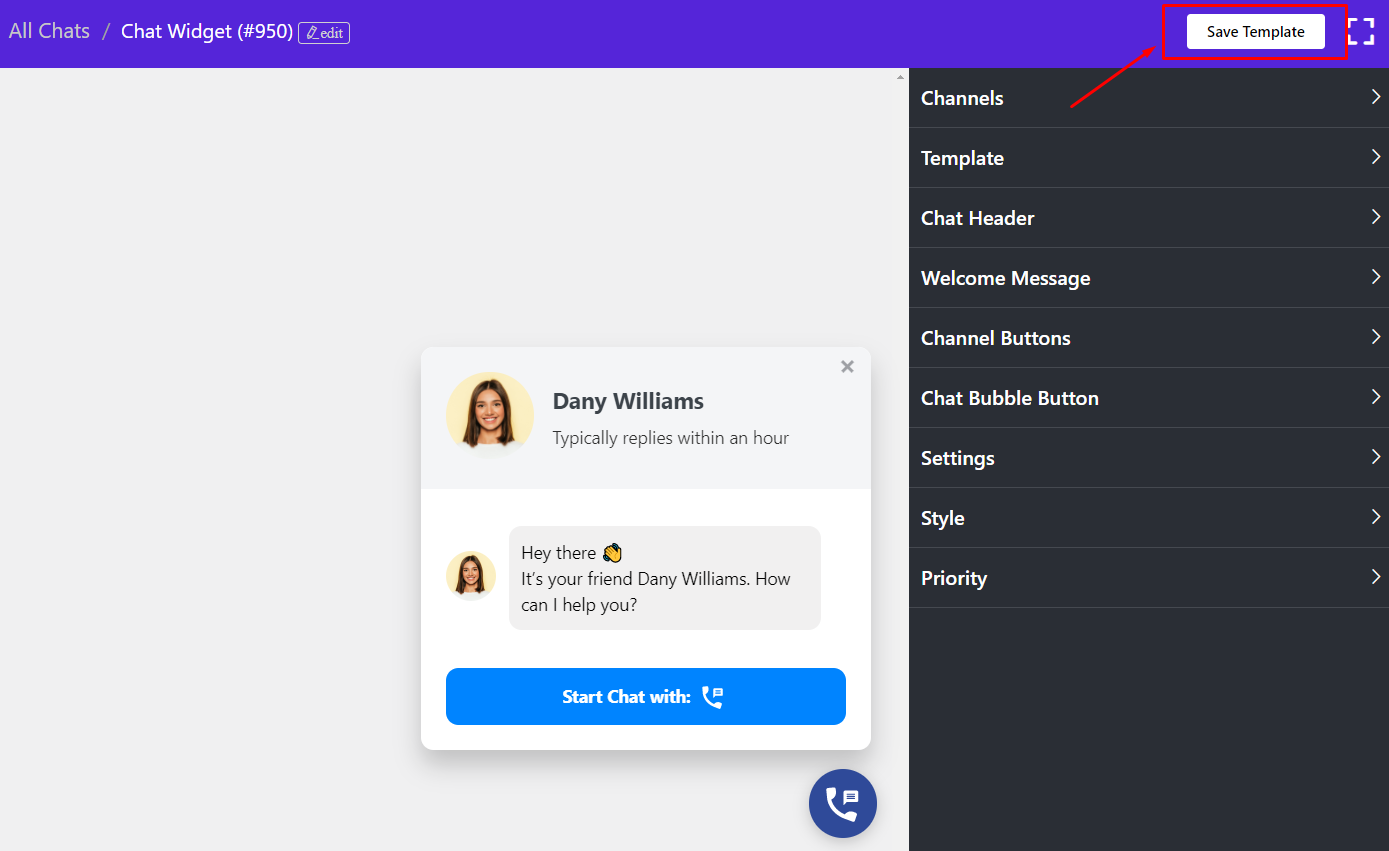
After you are done styling your Chat Widget, make sure to click on Save Template Button to save the chat widget template.
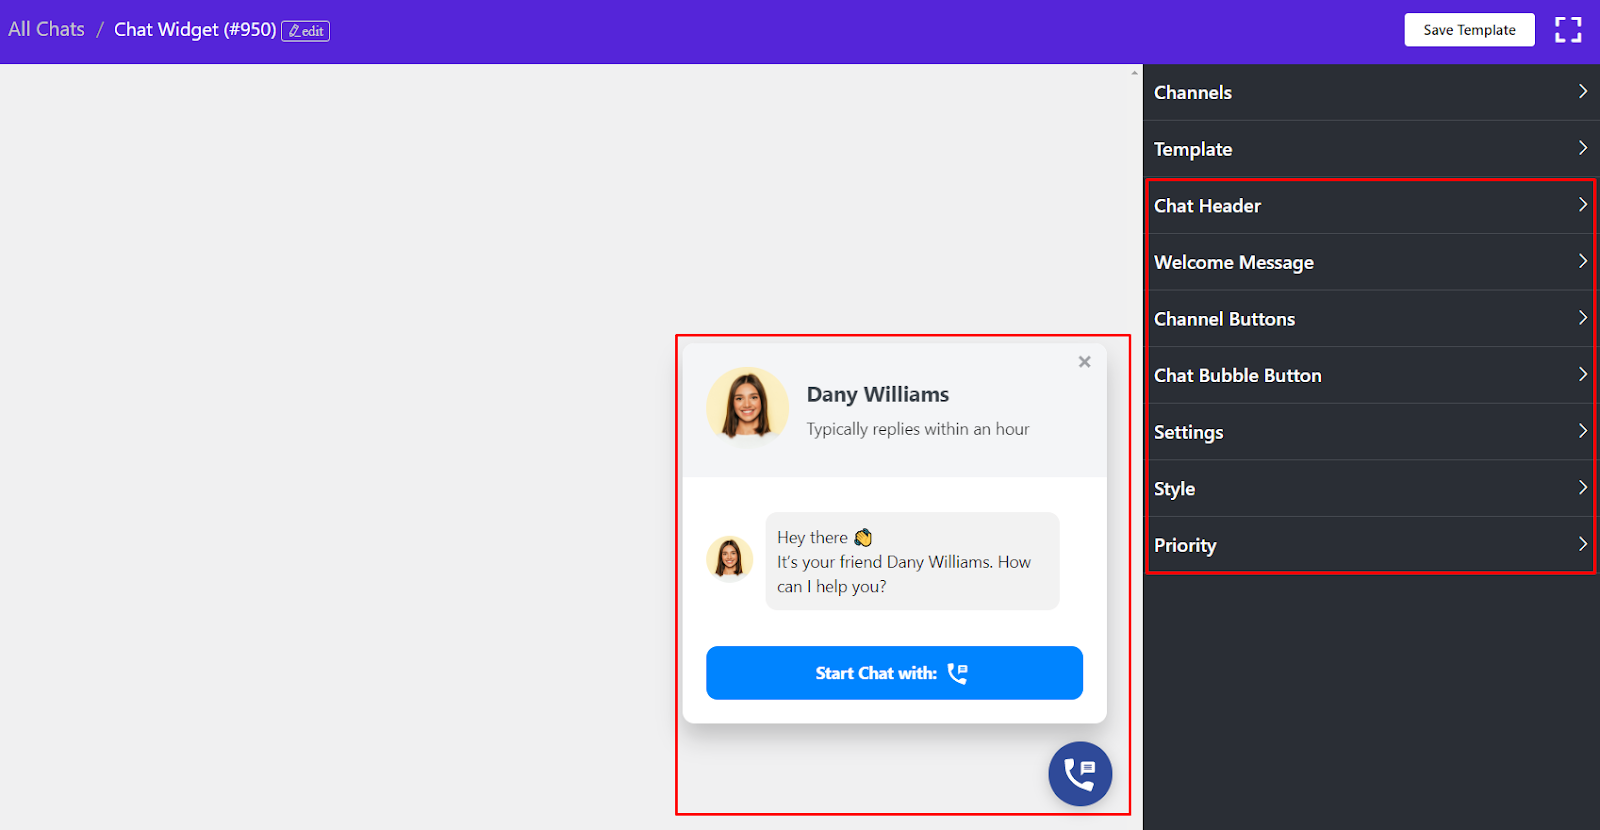
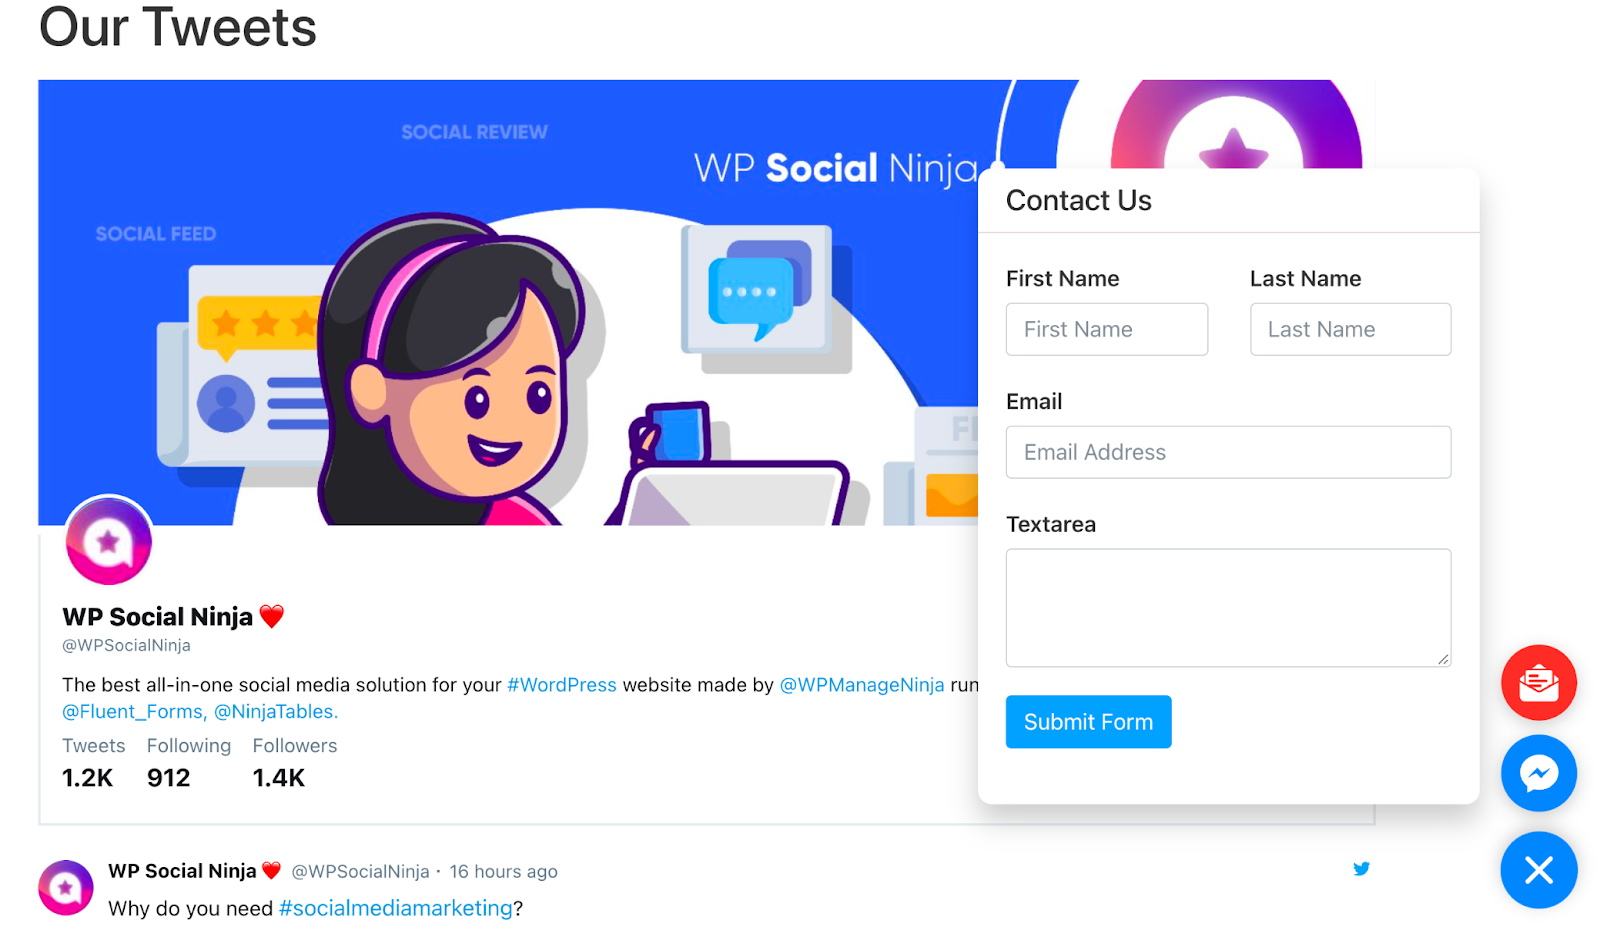
Now let’s look at how it looks on the front end if you pick Chatbox Layout Type. When you click on Chat Icon, a Chat Box will pop up. After that, when you click on the Fluent Forms icon, you will see a pop-up box named Contact Us.

Now, if you choose Only Icon Layout Type, you can only see the Chat Icon on the frontend. But once you click the Fluent Forms Icon, a Contact Us box will pop up.
This is how easy it is to configure all the Social Chat platforms with just a few clicks!


