
WP Social Ninja easily connects with your Facebook account, letting you display your Facebook Page activity on your website. This article will guide you on how to connect your Facebook Page events to your site.
Enable Facebook Feed #
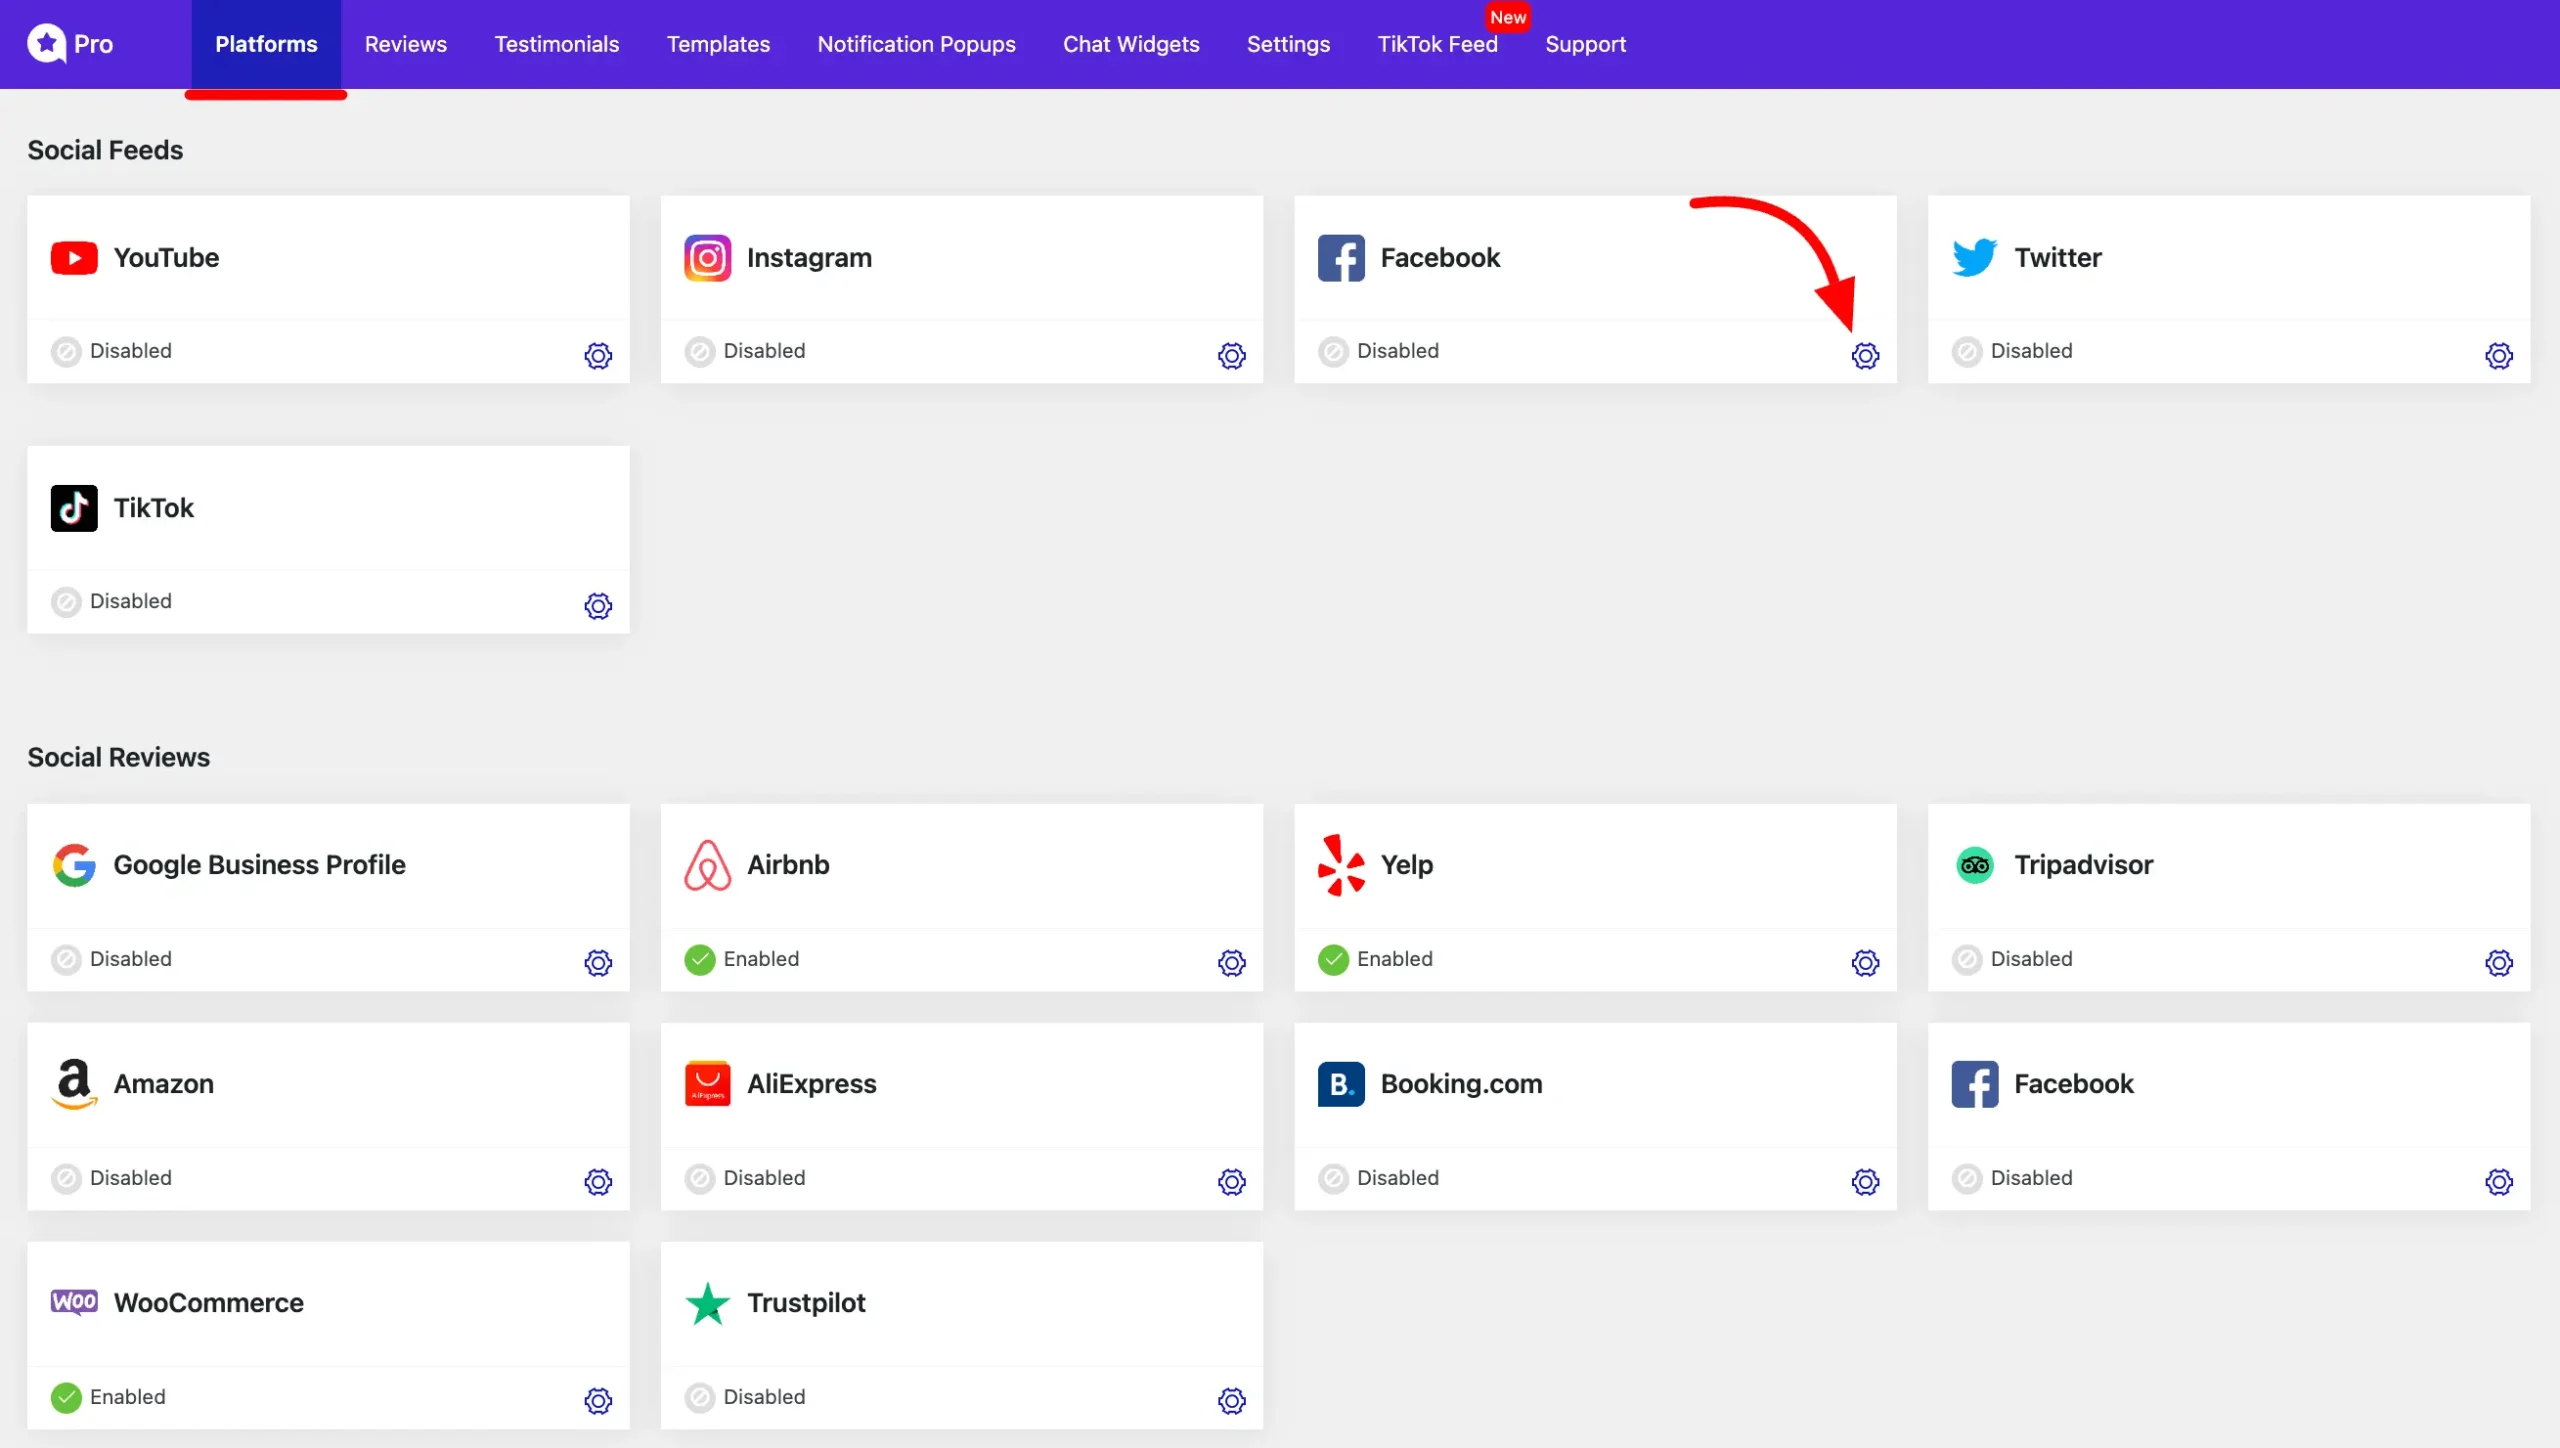
First, go to WP Social Ninja and select the Platform from the navbar. Locate Facebook and enable it by connecting your Facebook account with the WP Social Ninja Plugin.
Click on the Settings icon next to the Facebook in your Platform section.
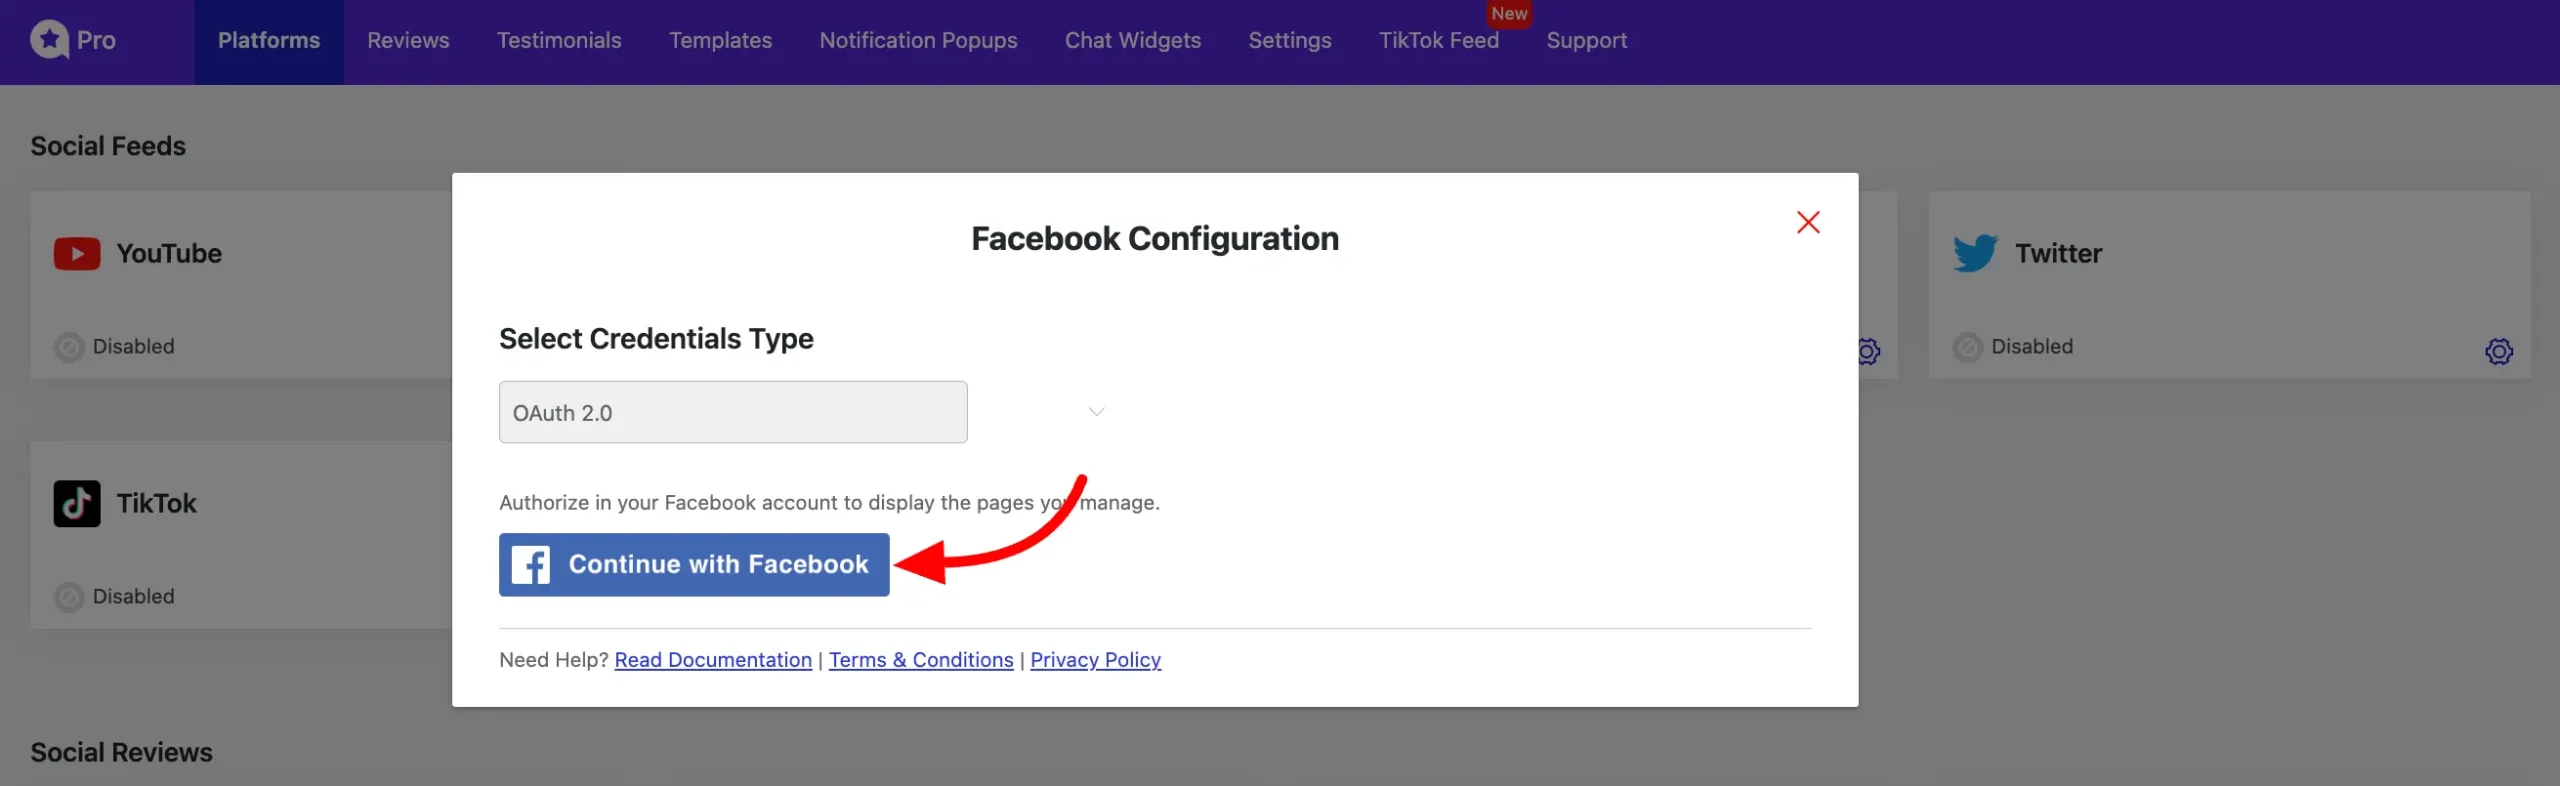
A pop-up will appear to configure your Facebook account. Click Continue with Facebook. Log in to your Facebook account and give permission to WP Social Ninja to connect with your Facebook account.
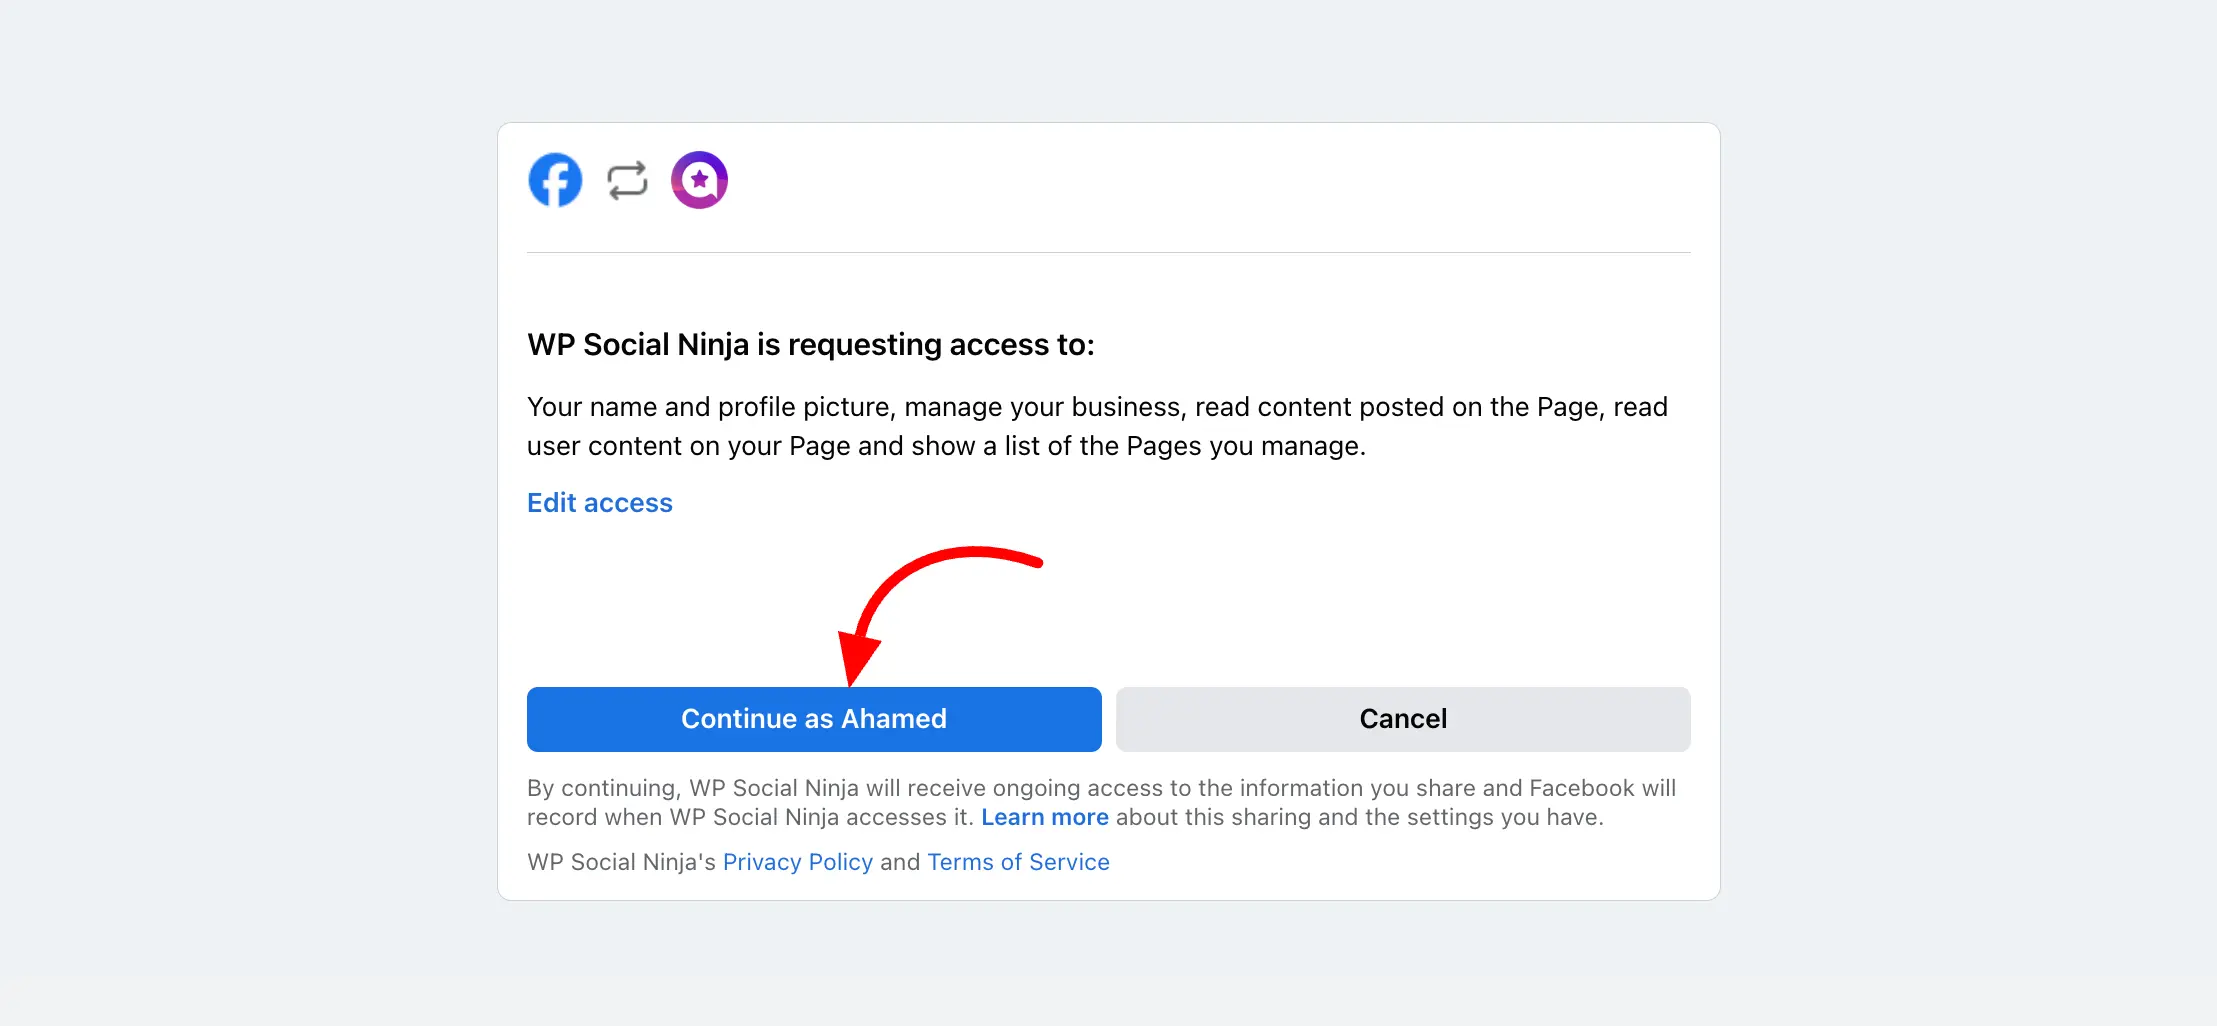
Click on the Continue button here to give access to your WP Social Ninja.
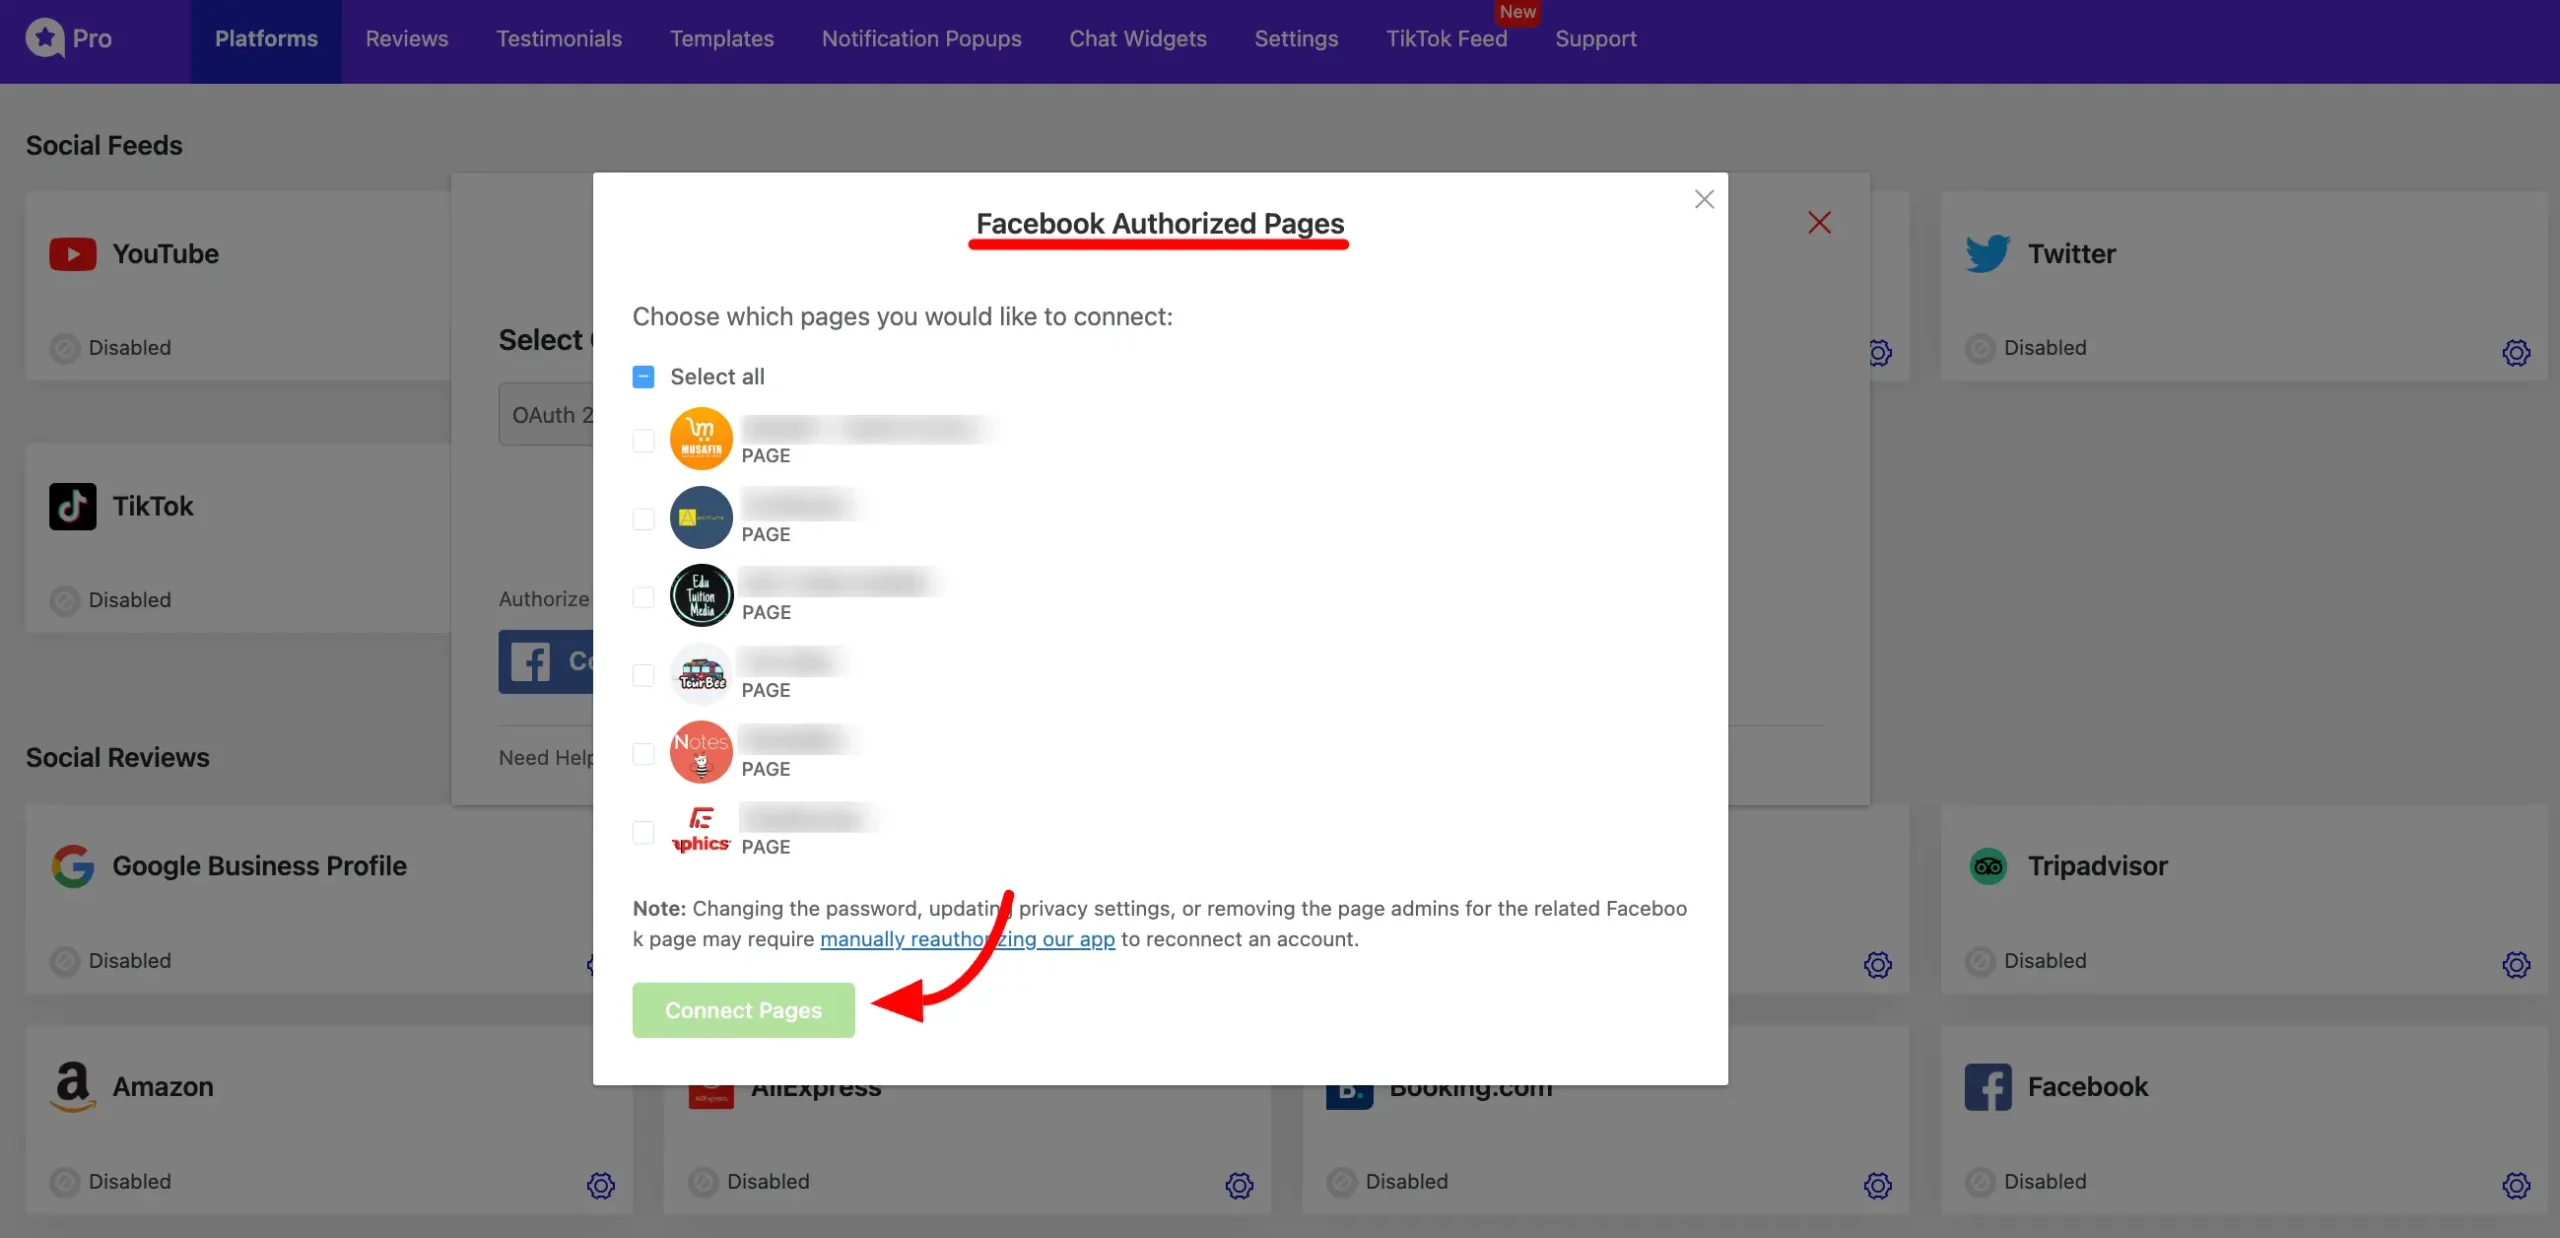
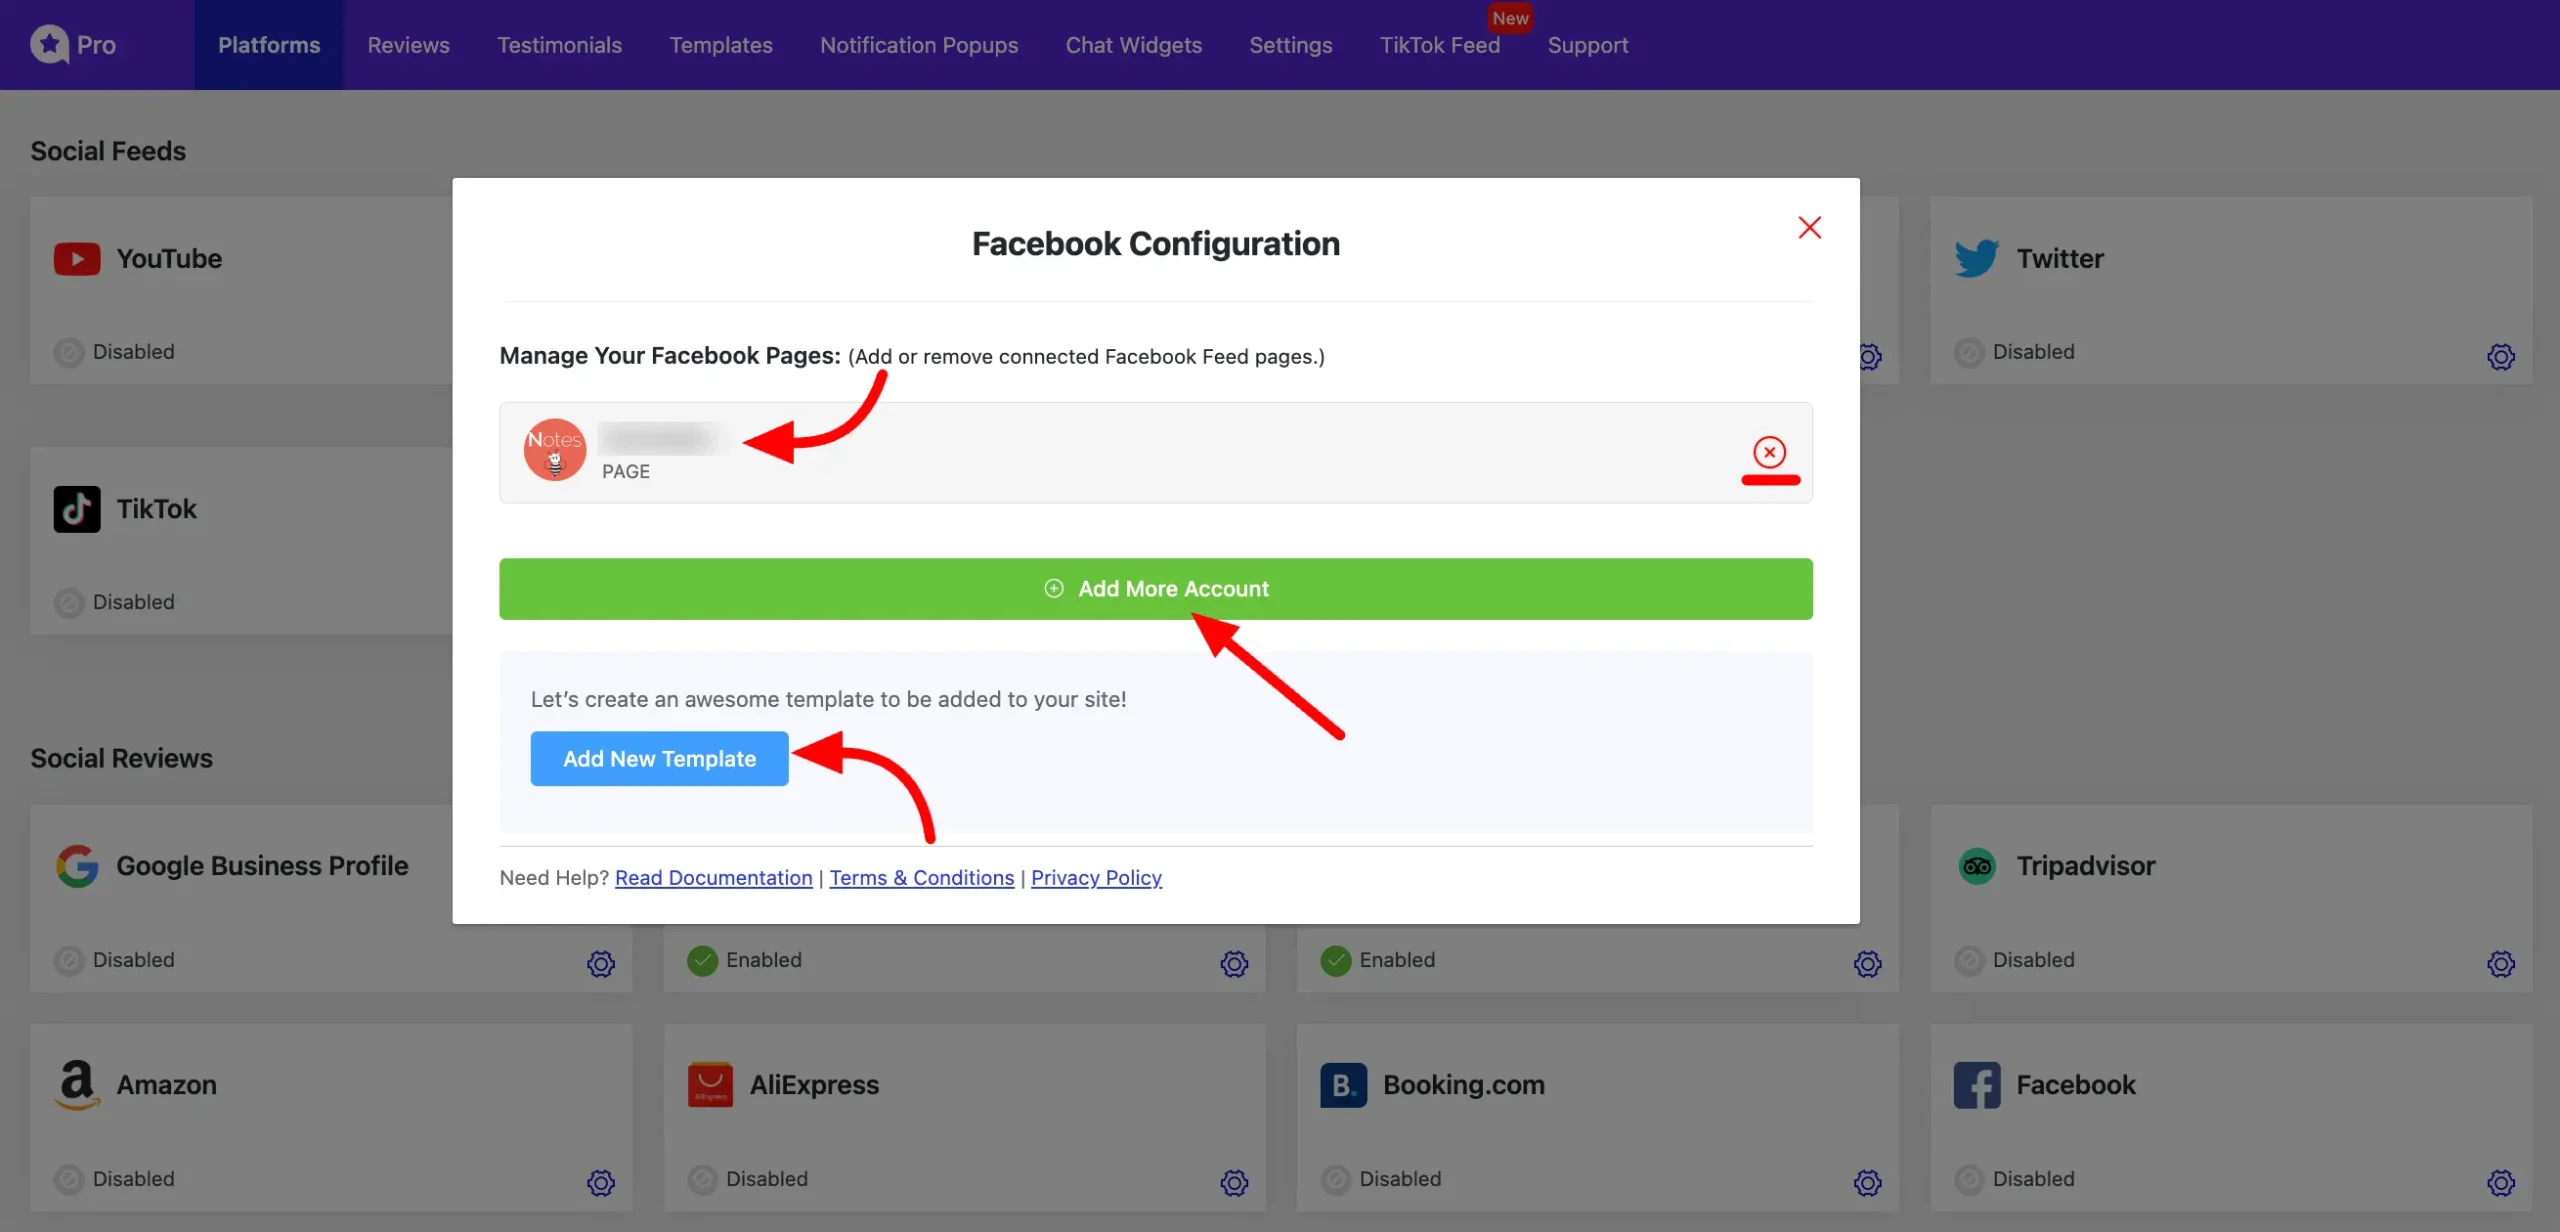
You will be redirected to the WP Social Ninja Platform Page, where a pop-up will prompt you to select one or more Facebook Pages to display events on your website.
After selecting the pages, click the Connect Pages button.
In the next pop-up, you’ll see your Facebook Page has been added. To remove it, simply click the Remove icon button next to your Page Name. To connect another account, click the Add More Account button.
To display your Facebook events on your website you can choose some awesome templates from WP Social Ninja, to do so click the Add New Template button and choose a template.
Facebook Feed Settings #
WP Social Ninja offers various settings to keep your Facebook Feed updated. To access the Facebook Feed Settings, navigate to WP Social Ninja. Click on Settings from the top navigation bar. In the left sidebar, select Feed Platforms, then choose Facebook Settings.
Here’s a breakdown of the available Facebook Feed settings:
Check New Feeds Every: Specify the interval (in hours) at which WP Social Ninja will request and retrieve new updates from your Facebook account.
Clear Cache: If your latest content isn’t appearing in your Facebook Feed, use this option to clear the cache. This action will refresh the feed and display the most recent data.
Optimize Image: This feature allows you to optimize Facebook images for your Social Ninja Feed, ensuring faster load times on your website. You can Reset your image optimization anytime by clicking on the Reset button.
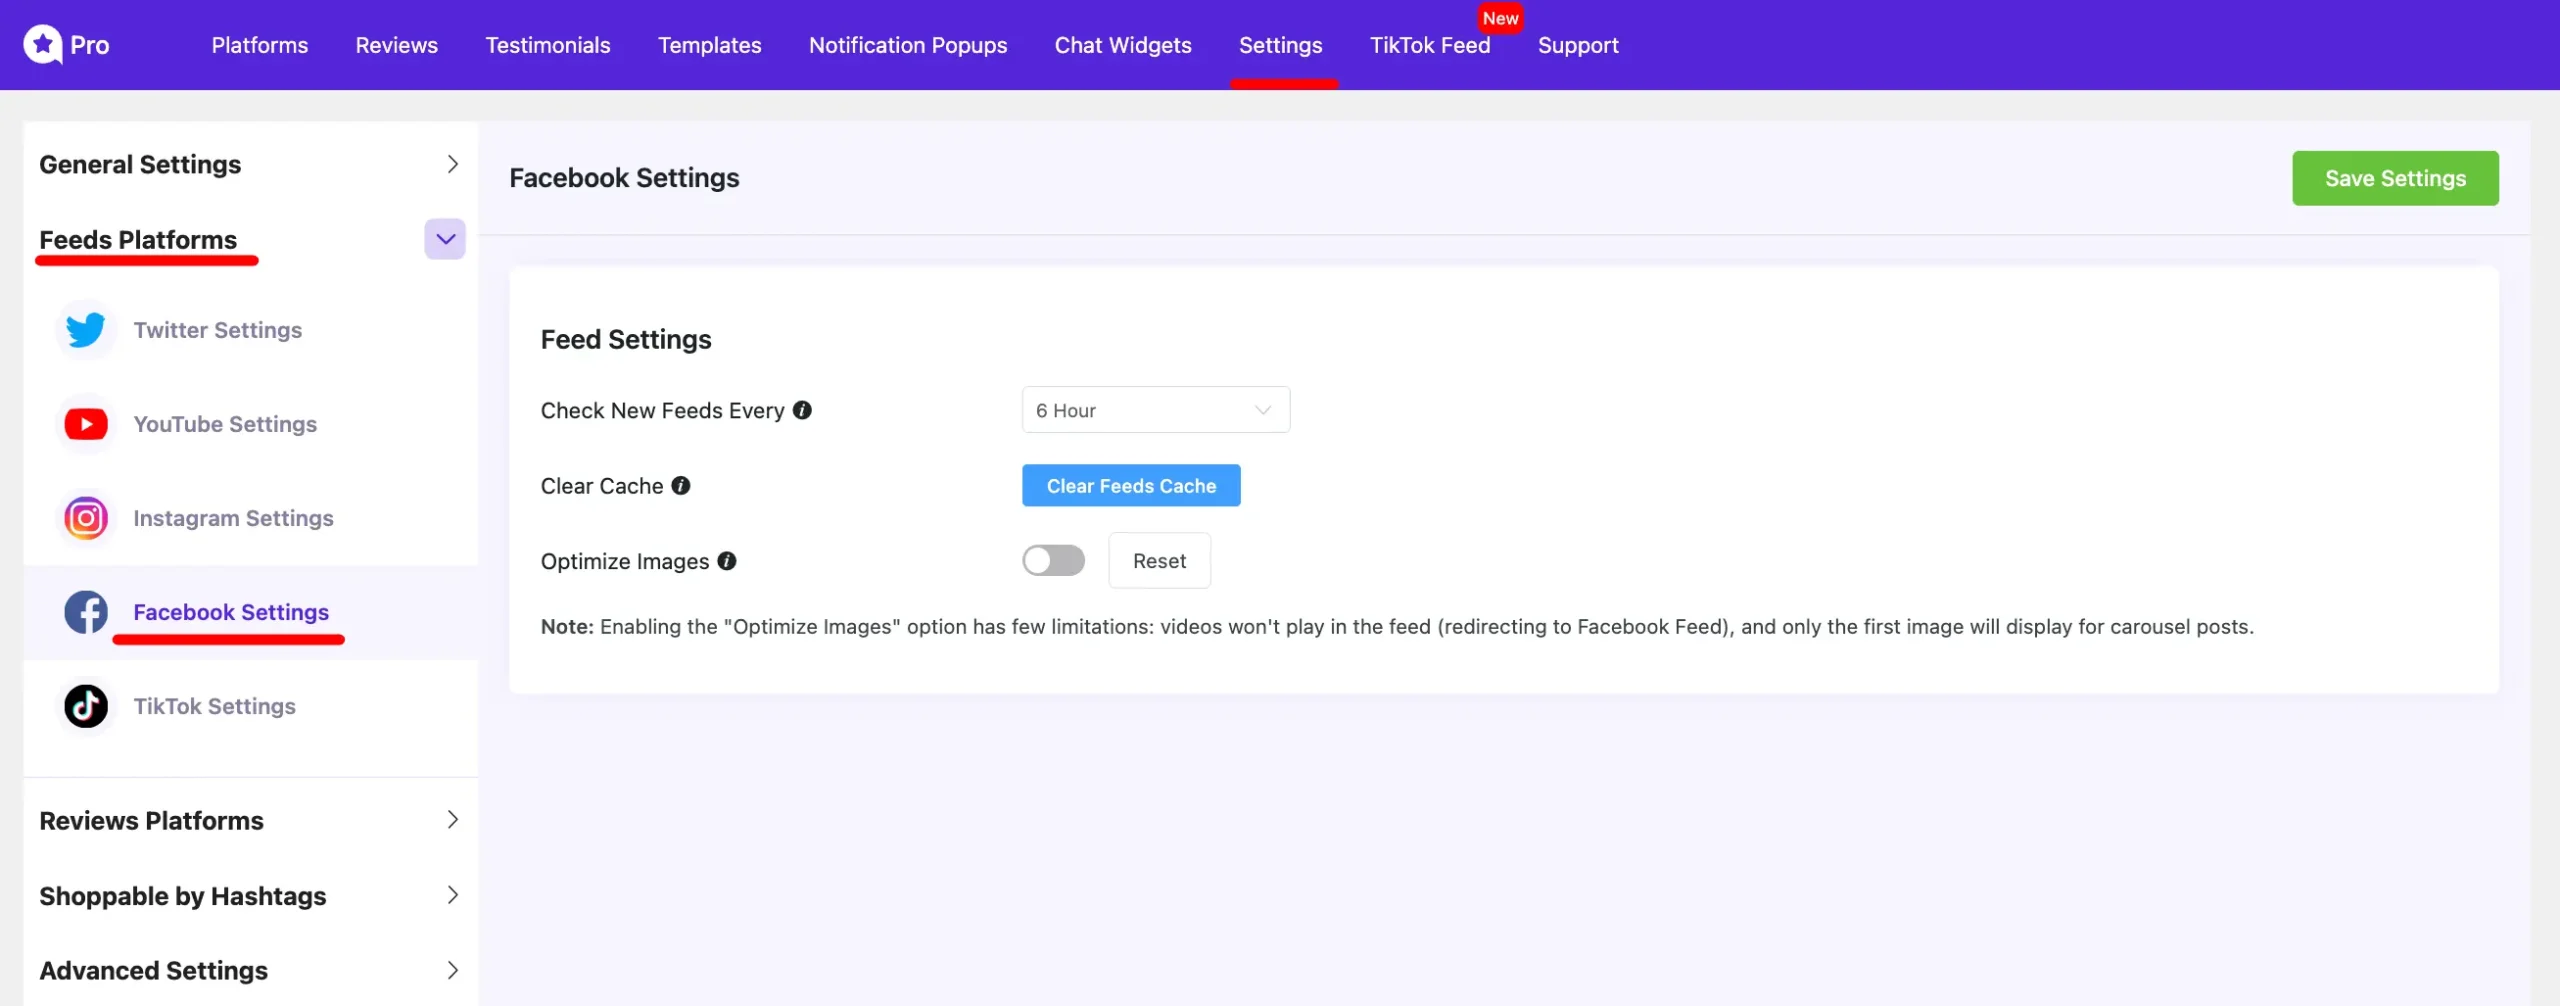
Enabling the Optimize Images option has some limitations. Videos will not play directly in the feed and will redirect to the Facebook page. Additionally, for carousel posts, only the first image will be displayed.
That’s how you connect your Facebook account with WP Social Ninja. If you have any questions about this process, please feel free to contact us.


When using facebook widget the images from facebook posts are not loaded. I have tried it with no cache too and no success.
You won’t get the images on the free version of WP Social Ninja. You have to purchase the pro version to avail of this feature. Please open a support ticket if you are using pro already and still facing the issue. Our support agent will assist you. Thank you!
I successfully connected facebook account, but I’m getting an error “Please select a page to get feeds” when creating a template but I don’t see any Page for a feed.
The issue you are facing is due to the last Meta update. Our support team will help you out in this, please contact here: https://wpmanageninja.com/support-tickets/
Unable to purchase or contact support. What happened?
Hi there, We apologize for the inconvenience. There may have been a temporary glitch. Could you please try purchasing again?