Notification Pop-up Highlight Your Best
Reviews
Hook your audience and turn clicks into customers with the best WordPress Notification Popup plugin.
Easy & Quick Setup
Connect Multiple Platforms
Advance Customization
Multiple Template
Notification Filtering
Deep Header Settings
GDPR Compliant
Other Features
Engage your visitors and drive sales with WP Social Ninja
Create a compelling online presence that captures attention and encourages visitors to make faster buying decisions all with Notification Popups.


Want to highlight your reviews from multiple platforms? Bring them all!
Display lovely reviews from different networks with popups that captivate attention and leave a lasting impact.
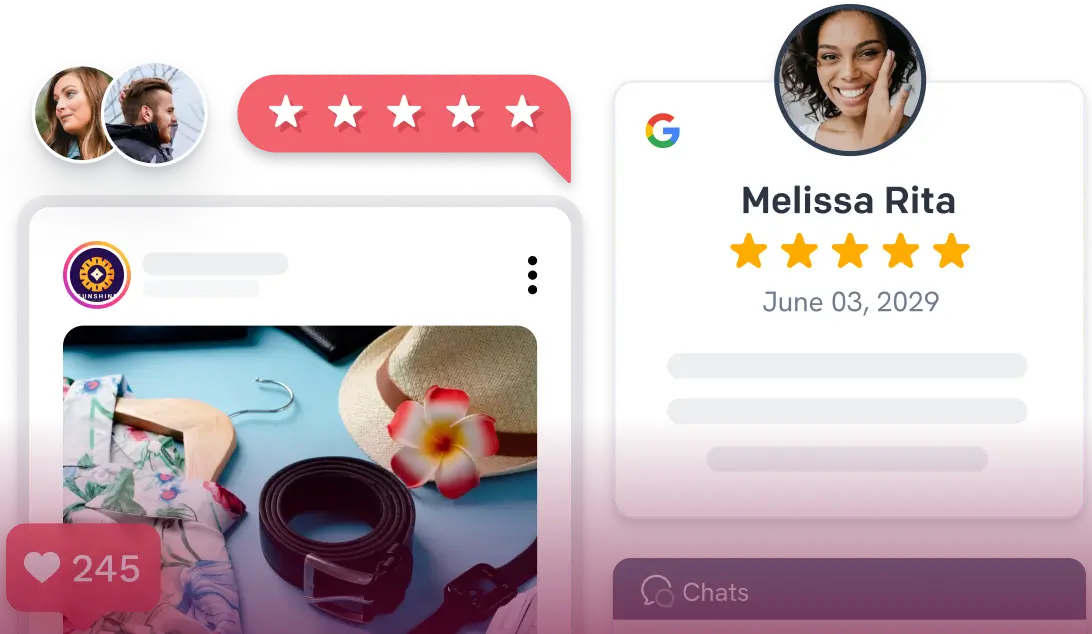
Google Business Profile Reviews
Display Google reviews through popups on your website to gain customer trust and spark more engagement with authentic feedback.

Facebook Reviews
Facebook reviews boost brand reputation and improve in your search engine rankings to grab your niche in no time.

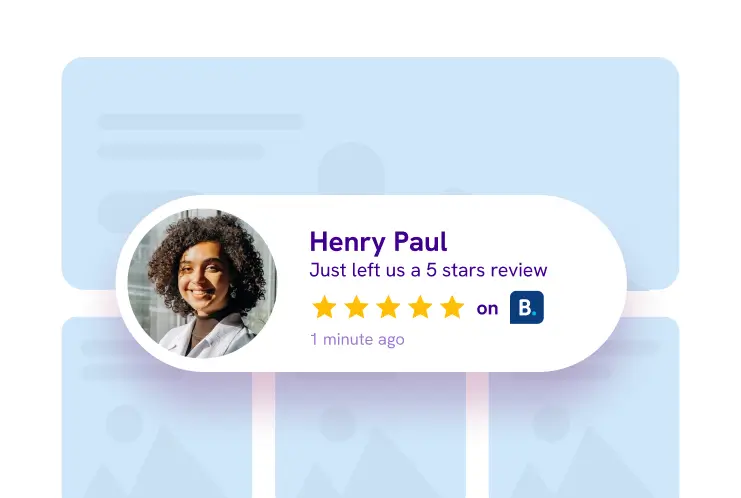
Booking.com Reviews
Use Booking.com reviews to boost buyer confidence and engage audiences.
WooCommerce reviews
Gather and display WooCommerce reviews on your WordPress website and improve your user experience overnight.

Custom Reviews
Collect custom reviews from site visitors to define your brand’s trustworthiness.

Fluent Forms Reviews
Create a feedback form quickly, welcome users, and collect testimonials.

Frame your brand’s story and grow your audience
Share your content with social feeds, build trust with reviews, and engage with chats.
Customize your review popup with ease
Doesn’t matter if you are a tech-savvy person or not; make the most out of your Notification Popup features with basic and advanced features.
Customize your review popup
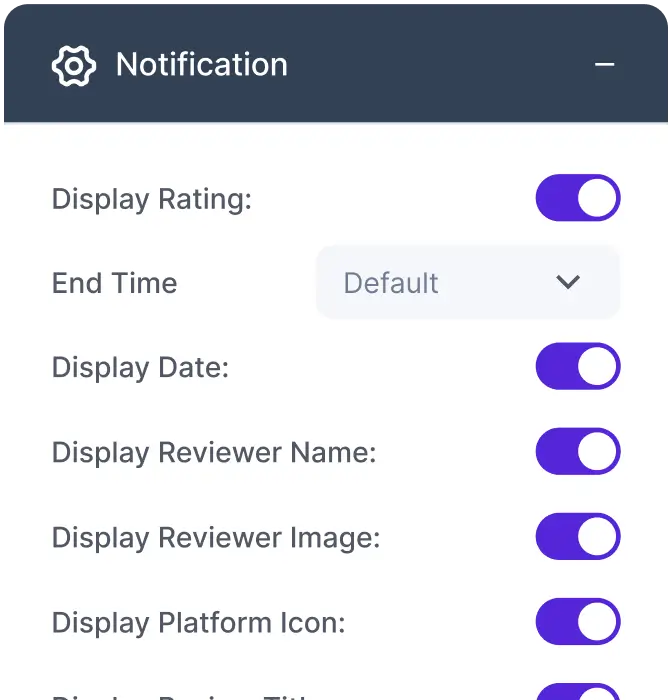
Take full control – customize the title, position, style, and visibility, so your reviews stand out and engage customers precisely how you want.
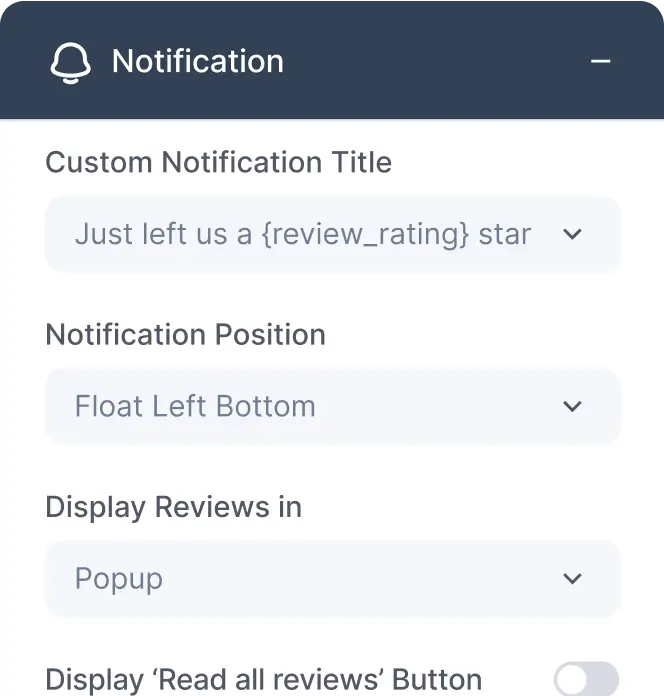
Personalize Title & Position
Make your popups truly yours! Set a custom title and decide whether it pops up on the left or right side of the screen for the perfect impression.
Pick perfect spot for your reviews
Place your reviews where they’ll shine! Whether it’s the homepage, product pages, or checkout, display them exactly for better attention.
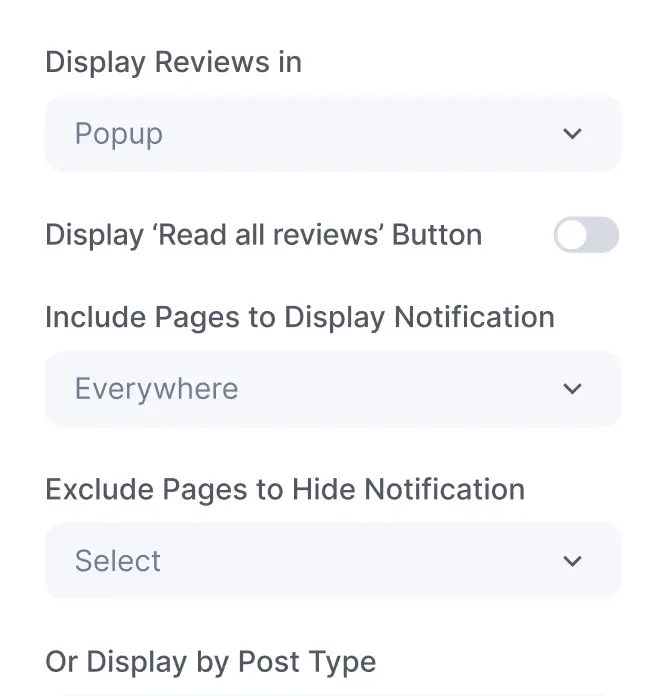
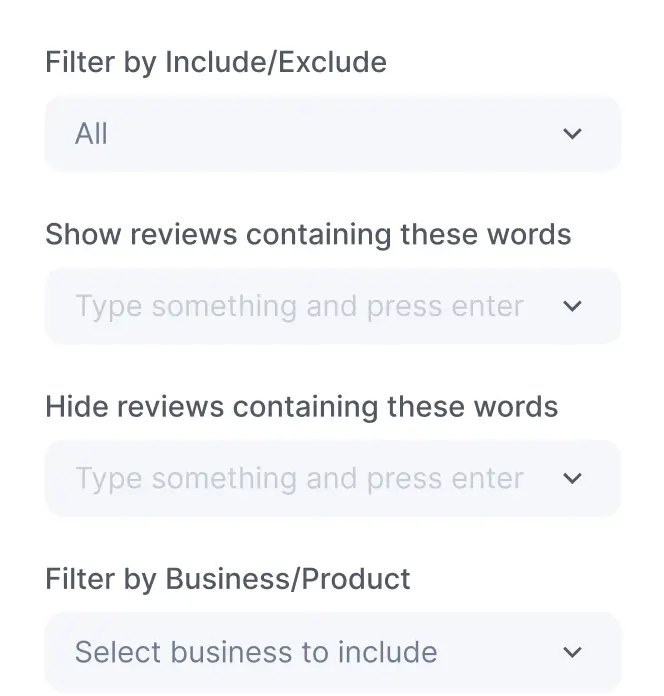
Fine-tune with Exclude/Include
Get precise control to show up. Select specific pages or devices (desktop or mobile) to ensure the right people see your feedback.
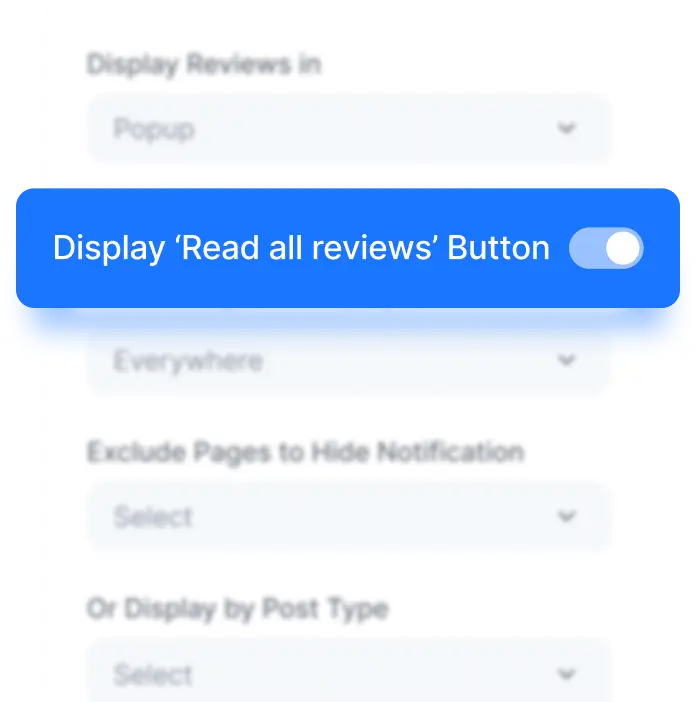
Motivate visitors to explore all reviews
Encourage your audience to dive deeper into your reviews by adding a “Read All Reviews” button. Make it easy for visitors to access!
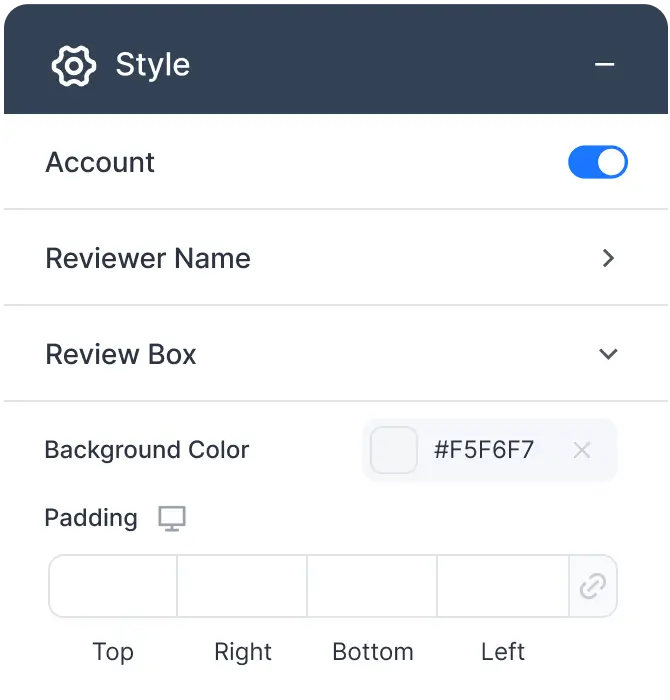
Make Popup pop with custom styles
Give your popups a unique flair by styling them to match your brand’s personality. Adjust colors, fonts, and layout to stand out!
Trusted by thousands, loved by many
Discover what our users appreciate about us
I am very happy about the solution. I integrated reviews from multiple platforms, and that is exactly what I was looking for. Instagram Integration I’ve to try next, just great so far!

Tobias
@tdprojects
I could not be more impressed! this works just great and has saved me now on a situation that was easily avoidable through the chat function. Appreciate all the hard work.

Michael Schwitzer
@1stchoicewi
This is the pure gold. It is all in one plugin you must have on your web. Especially if you want to show your best testimonials from customers, or just looking for the best social feed plugin.Now I dont need live chat free plugin and smash baloon insagram plugin.

flu5ky
@flu5ky
I’ve been involved in website development since 1995, you do the math. I’m a fan of the WordPress Community and I’ve seen a lot of plugins come and go. I’m telling you now that this something special, and will solve a lot of headaches, and for a very reasonable cost.

seachat
@seachat
Extremely happy to be a client for this great product, it has solved my entire need of connecting social feeds and reviews to my and my client’s sites. And support is always great.

clariable
@clearcutmario
This plugin makes it quick and easy to add a review template to your website. It is easy to understand and operate. I had a problem with accessing my Facebook page reviews and submitted the problem to support. The support team was quick to respond.

bellyhorse
@bellyhorse
This is a premium plugin which has a free version. You can have a good taste of how this plugin works with the free version but I can tell you that you should consider investing on the Premium version as soon as possible.

dariomartinezb
@dariomartinezb
Flexible pricing plans built for all kinds of businesses
Unlock endless possibilities with our pricing plans at every stage of your marketing growth
Single Site License
$89/YR
Save 50%
$44/YR
Agency License
$299/YR
Save 50%
$149/YR
Unlimited Site License
$499/YR
Save 50%
$249/YR
*Grab the summer discount and unlock flat 50% discount on the first-year license!

Features to display social feeds
Features to show customer reviews
Features to connect chat widgets
-

How to Add Notification Popup to Your WordPress Websites
If you are running an online business, Notification Popup is no stranger today. It is one of the effective marketing…
Frequently Asked Questions
Top questions you need to ask before buying WP Social Ninja.