

How to Add Tripadvisor Reviews to WordPress (Simple Way)


Do you want to embed Tripadvisor reviews on your WordPress website?
Reviews are the most formidable form of social proof and can heavily influence the purchase decisions of potential customers.
That’s why social review sites and platforms have become so important to assess the quality of a business.
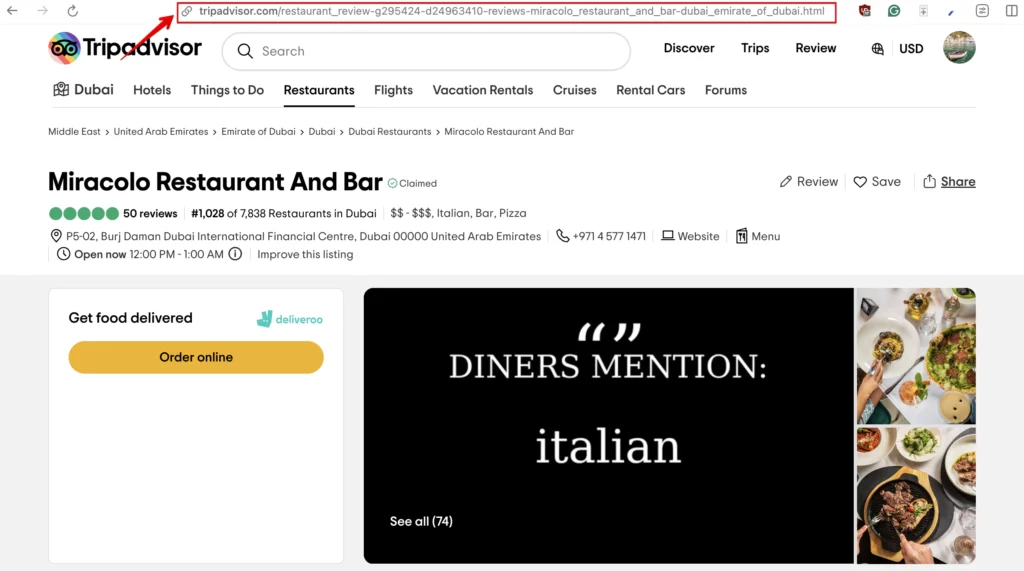
Regarding social review platforms, Tripadvisor is a US-based online travel company that uses user-generated content and is trusted by millions of travel enthusiasts.
So, if you run a travel agency, hotels, restaurants, or any other tourism-related business, you must consider embedding Tripadvisor reviews on your E-commerce website to build trust and improve customer retention.
If you are looking for the easiest way to embed Tripadvisor reviews on your WordPress website, look no further!
In the next part of the article, we’ll guide you on how to embed Tripadvisor reviews easily with the best social media plugin.
Let’s start!
Why should you embed Tripadvisor reviews?
It can be quite difficult for travelers to get their hands on genuine information before planning their tour. This is where Tripadvisor comes in as the beacon of hope!
This platform enlists more than 11 million businesses and has 30 million user reviews. Tripadvisor is a trusted place for millions of explorers to plan their must-see destinations and discover new places.
So, if you are in the hospitality business, it would simply not be fair to keep your Tripadvisor reviews only on the platform itself, would it?!
No business can succeed without truly addressing the pain points of its customers! Saying that you can solve two major pain points of your target audience by embedding Tripadvisor reviews:
- Overcoming Trust Issues: Your Tripadvisor reviews contain the experiences of your previous customers, which clearly depict the quality of your business and improve its transparency. This makes it easier for potential customers to trust you more and encourage them to do business with you.
- Improvised User Experience: Improving user experience is the greatest form of branding! Your embedded Tripadvisor reviews save your visitors from the hassle of searching for your business on the platform. They can easily take a look at them on your site, and it becomes easier for them to make their decision.
Tripadvisor reviews are purely user-generated content. They are more than social proof; they are wisdom for people struggling to make the best travel arrangements.
Whenever you showcase your Tripadvisor reviews with them through your site, you are making things easier for them and adding value to their lives. This will eventually lead to a higher conversion rate and establish your reputation as a brand.
Bonus tips: Here are tips on how to ask for reviews professionally! If your business is not getting enough reviews, take a look at them.

Get exclusive social media marketing tips and tutorials in your inbox!
How to add Tripadvisor reviews to your WordPress website
Whenever it comes to making any situation easier within WordPress, plugins come to mind first.
One of the most beautiful things about WordPress is the vast collection of plugins that serve almost every functionality you can think of! There are plenty of Tripadvisor review plugins in the WordPress directory as well to embed and customize your Tripadvisor reviews!
However, each of them has its own way of functioning, and to be honest, not all of them are easy to operate, or sometimes their prices can be overkill.
But don’t worry! We will introduce you to the most efficient, budget-friendly, and multi-functional plugin for your Tripadvisor reviews and show you the step-by-step configuration process to embed your Tripadvisor reviews, which will take only two minutes!
Step 1: Install WP Social Ninja to embed Tripadvisor reviews
Yes, WP Social Ninja is our recommended plugin to embed your Tripadvisor reviews. With its simple integration process, this multidimensional social media plugin is packed with features like Social Feeds, Social Reviews, Chat Widgets, Notification Popups, and Custom Testimonials.

The Social Reviews feature of WP Social Ninja will allow you to add Tripadvisor reviews along with 10+ platforms that include Google Business Profile, WooCommerce, Airbnb, Booking.com, and more.
If you are familiar with installing WordPress plugins, WP Social Ninja is no different. It will take only a few steps.
You can do that in two ways:
- From your Dashboard
- From WordPress Repository
Here’s how to install it from your Dashboard:
- Navigate to the WordPress Admin panel. From the WordPress Dashboard, go to Plugins > Add New
- Next, on the search input field, type WP Social Ninja and wait for a moment for it to come up
- Now click on the Install Now button
- Then Activate
If you decide to install from WordPress Repository:
- Search WP Social Ninja in the WordPress Repository, and it will appear on the top. Once you click it, hit the Download button
- Now go to the Dashboard and go to Plugins > Add New > Upload Plugin > Choose the zip file
- After that, click the Install Now button and then Activate
Win your customers’ hearts with exceptional features
Discover how WP Social Ninja can assist you design outstanding customer experiences.

Step 2: Configure your Tripadvisor account
To add Tripadvisor reviews, first of all, you need to integrate with the Tripadvisor server.

Next, you have to visit the Tripadvisor site to get the URL.
Now, copy the URL, go back to the dashboard of WP Social Ninja, and paste it for Tripadvisor Configuration.
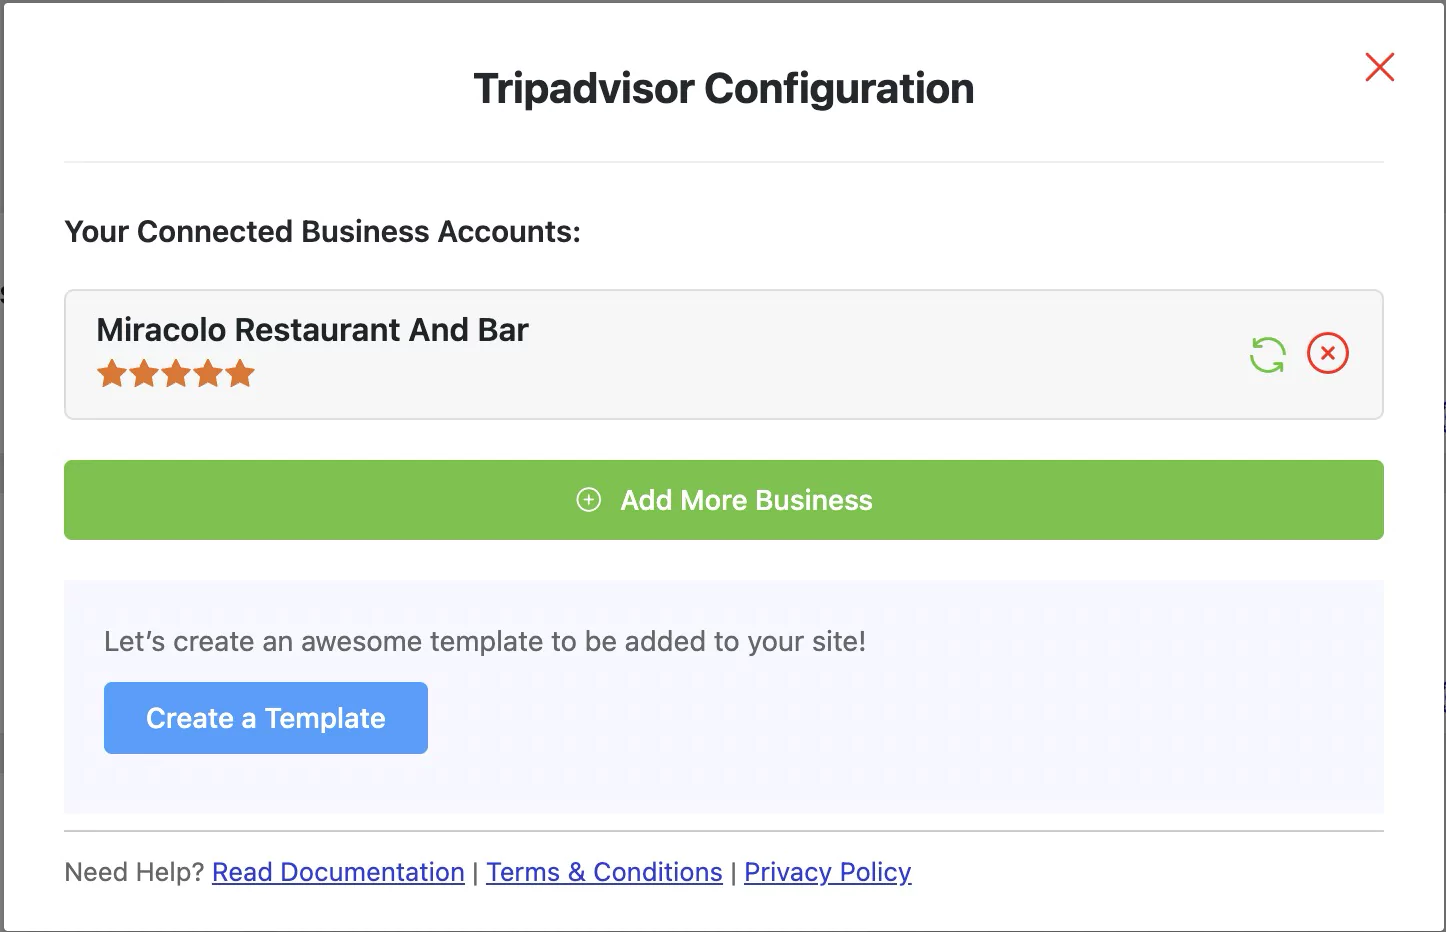
Next, you have your Tripadvisor reviews, and you will get a notification with a Success signal.
One thing to keep in mind is that loading reviews could take some time. However, this won’t take long. Contact our Support team for further queries.
Step 3: Customize your Tripadvisor review template
WP Social Ninja is a social plugin full of features. It can collect your Tripadvisor reviews and personalize the reviews to make your website look more engaging.
To start customizing your Tripadvisor reviews, click on the Create a Template button. There, you will see multiple customization options. Let’s talk about them in detail now!
Template
Next, click on the Template button, and a drop-down menu will appear. From here, you can adjust the Layout Type, Template Type, and Number of Columns.
Layout Type
WP Social Ninja has four types of layouts right now: Grid, Slider, Masonry, and Badge. Pick any layout types to give your website a new look!

We’ve selected Grid Layout Type here; you can select any to display Tripadvisor reviews.
Template Types
In this section, we can set up the Template Types. We’ve nine Template Types at the moment.
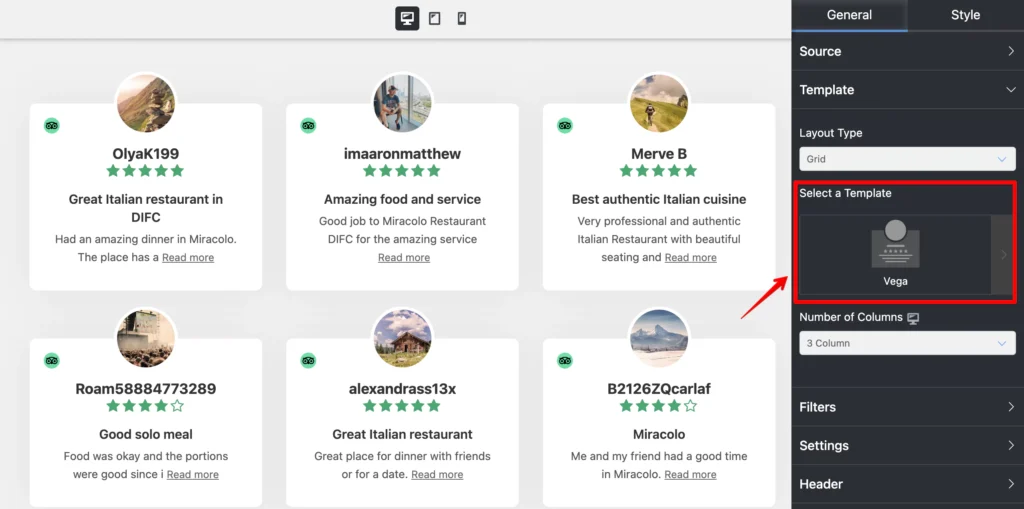
Vega, Spica, Sirius, Rigel, Procyon, Pollux, Mimosa, Hadar, and Deneb. We’ve selected Vega; you can select any that can suit your website.
Number of Columns
Next, we have the Number of Columns. To select this, click on the arrow sign, and a drop-down menu will appear.
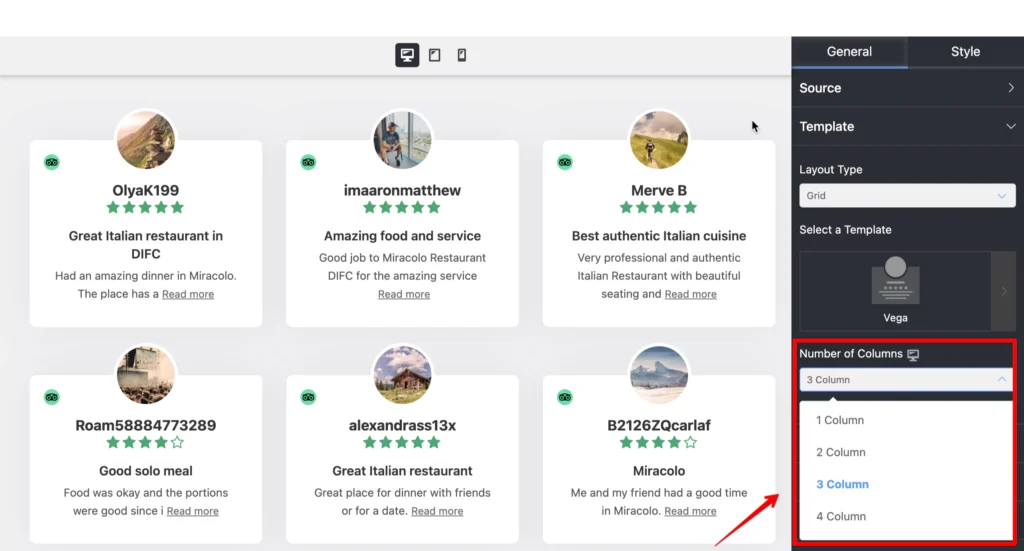
We’ve 1 Column to 4 Columns right now. For demonstration purposes, 3 Columns are selected to display the Tripadvisor reviews. You can choose any that looks good on your brand.
Filters
WP Social Ninja has a detailed Filters option, so you can customize your settings to match your brand. Let’s see the options.
Number of Reviews
Click on the arrow sign from your WP Social Ninja dashboard to select your Number of Reviews.
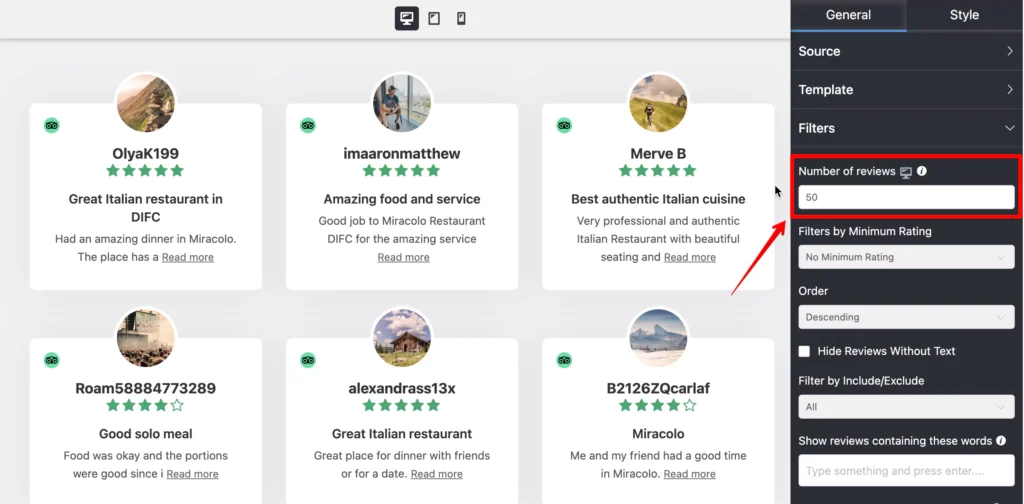
Select the number of Tripadvisor reviews that you want to display for your website.
Filters by Minimum Rating
Your business doesn’t need to show off every single rating on your website. Here, filter your ratings and display the best ones that you’ve got!
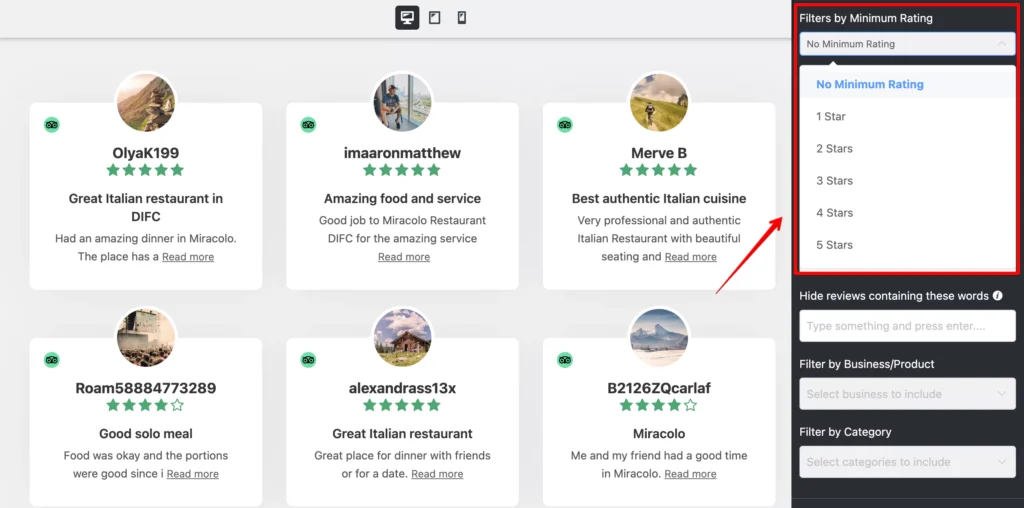
You’ll have six options to choose from: No Minimum Rating to Five Stars to display your reviews. Here, we have selected No Minimum Rating; you can pick any.
Order
In the next part, you can arrange your online reviews in a particular Order.
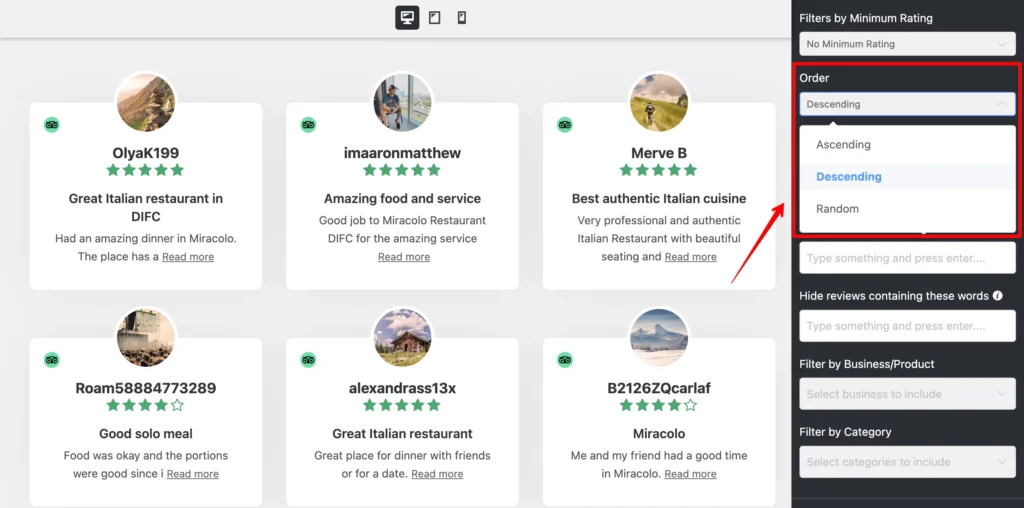
You can select the Ascending, Descending, or Random option to display your reviews on your website.
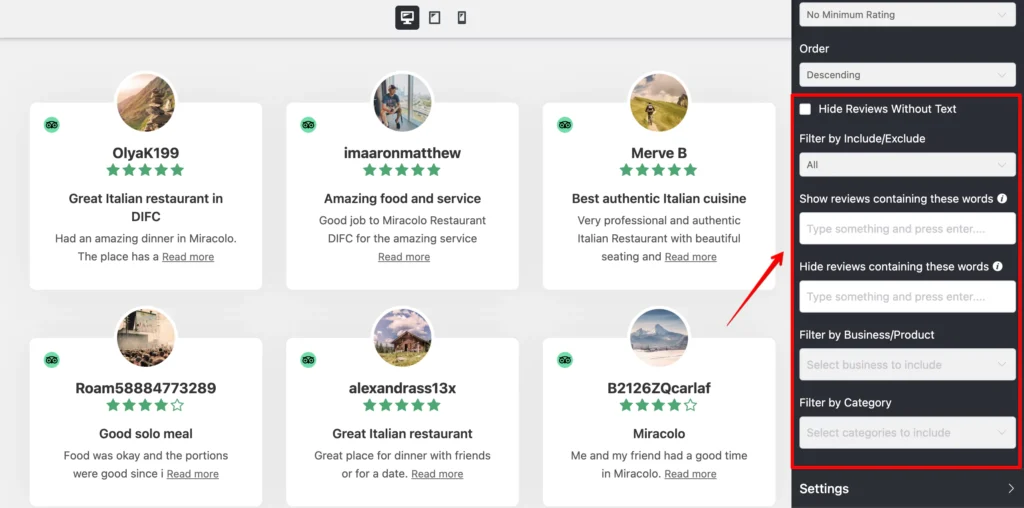
Other filter features
WP Social Ninja has more filtering options to offer for your Tripadvisor reviews. You can include/exclude reviews based on the reviewer’s name, show/hide reviews based on specific words, and filter reviews based on product and category!
Tripadvisor reviews Settings
WP Social Ninja is a jam-packed feature tool. Moreover, you can customize every single setting to decorate your website that suits your brand perfectly.
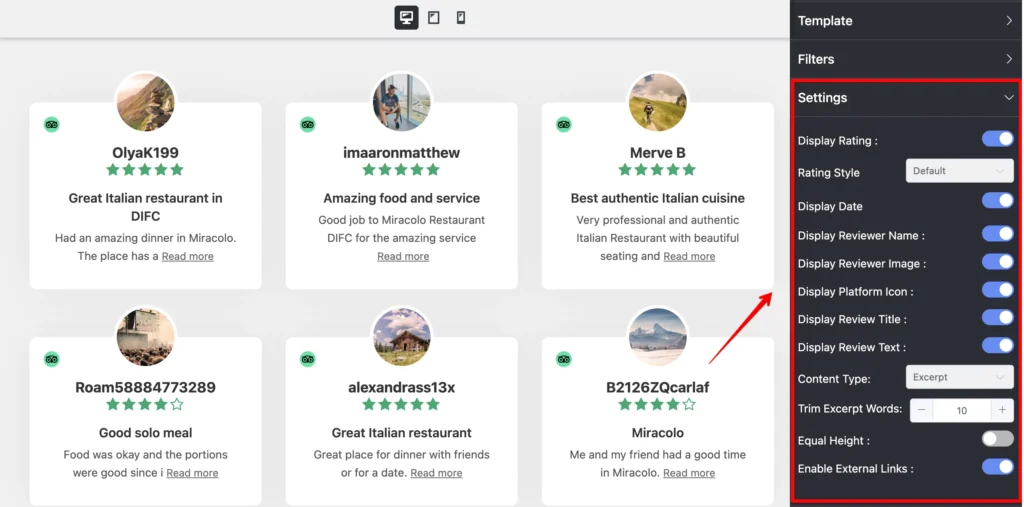
If you want to customize your rating, click on the Display ratings and take control of it. Next is Rating Style. WP Social Ninja allows you to change your rating style from the three options given. WP Social Ninja lets you do an in-depth integration to secure users’ privacy. Like Rating Style, you can take control of your Display Reviewer Name and Image as well.
The next feature is the Display Platform Icon. Turn off the filter icon if you want to adjust the platform icon. You can even choose if you want to display the title and text of your Tripadvisor reviews.
Another interesting filter is Equal Height. Adjust your text height by turning on/off the button. You can decide to display the Tripadvisor review date or not.
Header
Previously we’ve already seen WP Social Ninja allows the users to play with the settings panel. In the next part, we’ll discuss Tripadvisor reviews Header Settings.
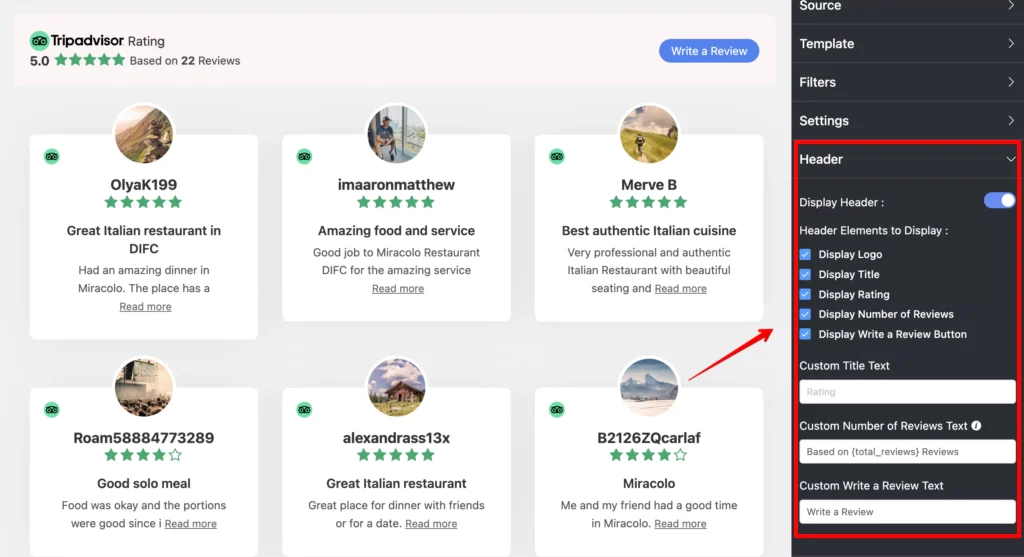
In this part, four Layout options are available in the WP Social Ninja dashboard: Display Title, Display Logo, Display Rating, Display Number of Reviews, and Display Write a Review Button.
A Call To Action button will appear on your website if you enable the Write a Review option. Your users can give their reviews from the CTA button. Moreover, for multiple platforms, this CTA will take to the individual sites.
Pagination
A long list of reviews is monotonous and lengthy sometimes. Well, we can fix this in the Pagination Settings part. Let’s follow the instructions below.

The Pagination Type has two options currently. You can pick any from None or Load More. If you select the Load More option, it’ll ask you to adjust your Reviews Per Page number.
Here, in this Review Per Page, you can adjust the review number for every page on your website from the scroll bar.
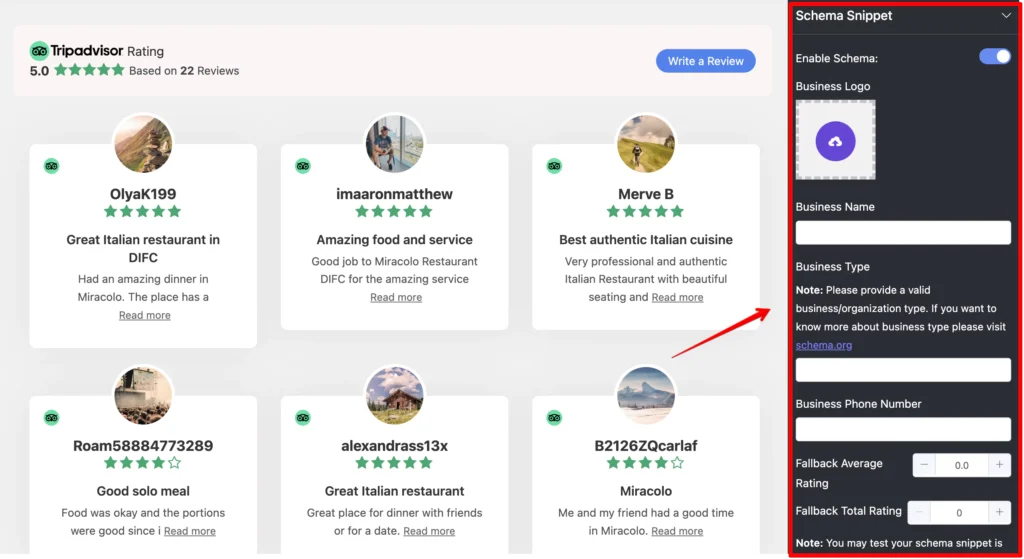
Schema Snippets
Add schema for Tripadvisor reviews with WP Social Ninja to get better search engine results. First, click on the Schema Snippet option and enable it. Then, fill out all the relevant information accurately.
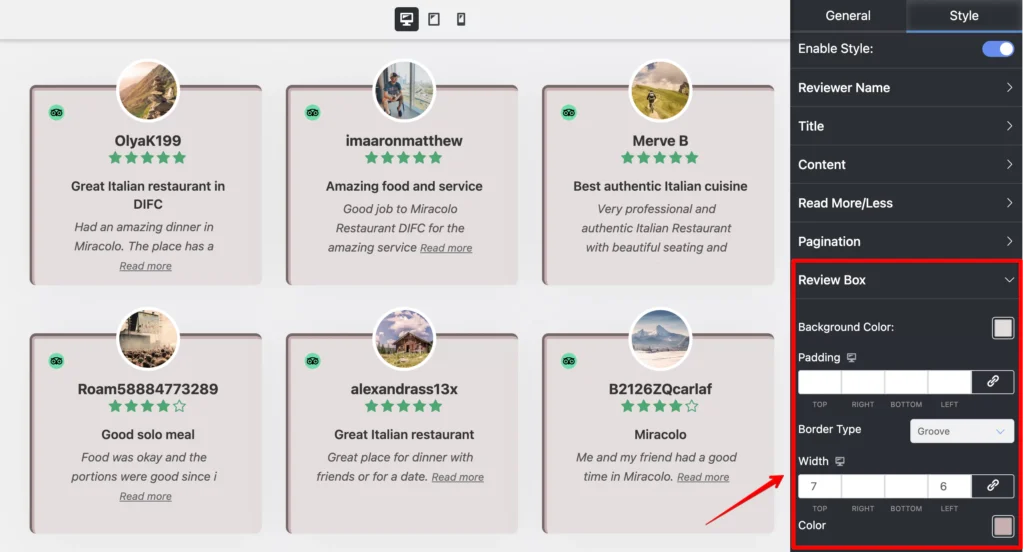
Style options
By now, you have seen many cool and handy customization options for your Tripadvisor reviews, but that’s not all. With the advanced styling options of WP Social Ninja, you can perform more in-depth customization of your Tripadvisor reviews.
You can change the color of the font, background, review box, typography, and font style and do much more with WP Social Ninja.
For example, we have done some customization for the review box, but you can customize your entire template down to each element.
After you’ve completed the Tripadvisor reviews customization, make sure you click on the Save Template button to preserve all your changes.
After saving the template, copy the shortcode and paste it to any page you like! This should look like this on your website.

Ending notes
Adding social media reviews to your website not only creates word-of-mouth marketing; it also provides excellent user engagement. Here enters WP Social Ninja, the all-in-one social networking tool for your WordPress website.
We hope the article was sufficient enough for you to have a better understanding.
Check out our other blogs to learn about the wide range of WP Social Ninja-

Subscribe To Get
Weekly Email Newsletter
Connect, Customize, and Display Social Feeds, Reviews, and Chat widgets


Trending Posts
-
 Mashfik Upal Aumy
 -

-


Leave a Reply