

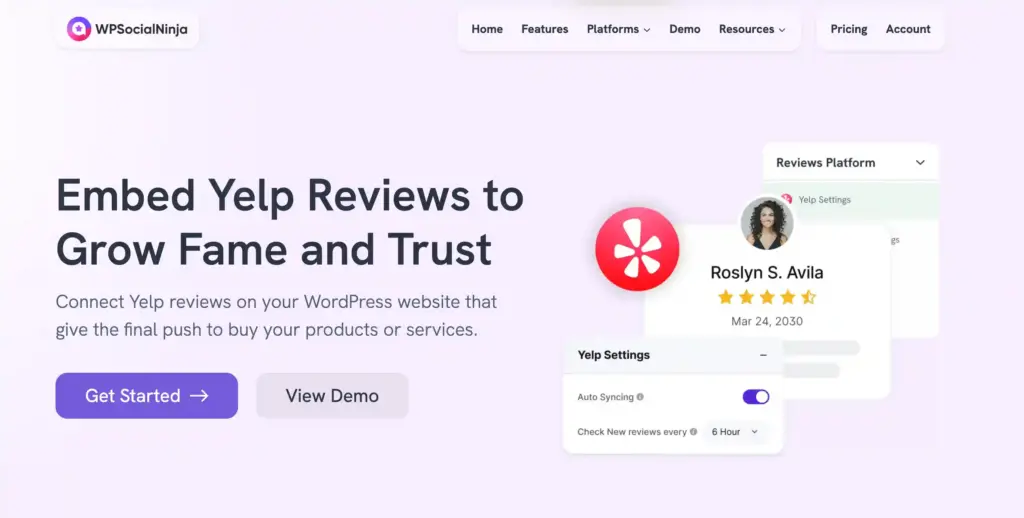
How to Embed Yelp Reviews to WordPress Without Coding (2026)


Yelp has over 330 million reviews. For restaurants, salons, clinics, and local service businesses, it’s often the first place a new customer checks before walking through the door.
But those reviews stay on Yelp. Your website visitors have to leave your site, search for your business, and find it on their own. Most won’t bother.
In my decade of experience working with WordPress businesses, I’ve seen this pattern repeat constantly. Business owners collect great Yelp reviews, then do nothing with them. The reviews exist, but the trust signal never reaches your website or visitors.
However, you can fix this in a few minutes without any coding or developer help.
This guide will show you the easiest way to embed Yelp reviews on your WordPress website and keep them updated automatically.
Key takeaways
- Yelp reviews stay on Yelp by default. Embedding them on your WordPress site brings that trust signal directly to your visitors.
- The easiest way to do this is with a dedicated plugin like WP Social Ninja, which handles the API connection and keeps reviews in sync automatically.
- The setup involves four simple steps: install WP Social Ninja, get your API key, find your Place ID, and connect everything from your WordPress dashboard.
- Once connected, you can customize your reviews template, filter by star rating, add schema markup, and display reviews anywhere on your site using a shortcode.
What is the easiest way to embed Yelp reviews on WordPress?
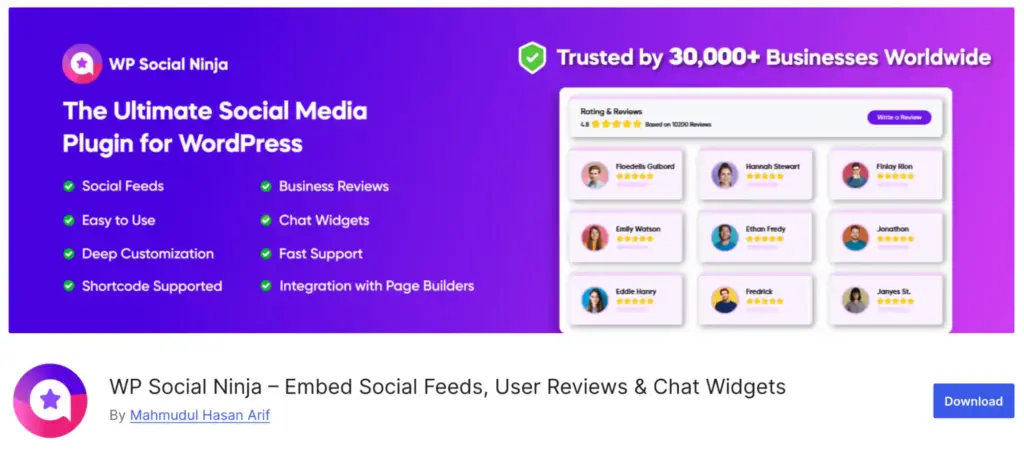
The easiest way to embed Yelp reviews on WordPress is by using a dedicated Yelp reviews plugin that handles the API connection for you. There are plenty of options you will find on the WordPress repository. But I would like to recommend WP Social Ninja for its ease of use and advanced features.
WP Social Ninja pulls your Yelp reviews automatically, keeps them in sync, and displays them in a styled widget without touching any code. Once set up, new reviews appear on your site automatically without any manual work.
Key features of WP Social Ninja’s Yelp reviews integration that you will like:
- Use ready-made templates to get started with your Yelp reviews immediately
- Connect multiple businesses and display all your feedback in one place, so visitors can instantly see your overall quality
- Filter reviews by minimum star rating or by keywords, to show the most relevant feedback first
- Add a reviewer verification badge next to names so visitors know the reviews are genuine
- Enable schema markup so your star ratings and reviews can appear directly in Google search results
- Use the AI-powered review summarizer to give visitors a quick snapshot of what customers say
- Let auto-sync handle the updates so new Yelp reviews always stay current on your site
- Set up moderation rules to automatically showcase your best reviews as new ones come in
- Turn your best Yelp reviews into notification popups to grab visitor attention on any page
- Generate QR codes and place them at your counter, reception, or with packages so customers can leave Yelp reviews on the spot
If you also collect reviews on Google or Tripadvisor, WP Social Ninja lets you pull them all into one place. It supports 10+ review platforms from a single dashboard. Every platform is included in one subscription along with all its other social proof features. No extra add-ons or per-platform charges.
Bonus Tips: If your business is on both Yelp and Google, and you want to know where to put more effort, check our Google vs. Yelp reviews comparison to see which platform suits your needs best.
Win your customers’ hearts with exceptional features
Discover how WP Social Ninja can assist you in designing outstanding customer experiences.
How to embed Yelp reviews on WordPress with WP Social Ninja
You need to install WP Social Ninja and get your API key to embed Yelp reviews on your WordPress website. It’s a fully secure connection, and your reviews load reliably and stay in sync. The setup takes just a few minutes and requires no coding.
Follow the steps below to embed Yelp reviews on your WordPress site.
Step 1: Install and activate WP Social Ninja
The first step is the installation of WP Social Ninja. The process is simple and the same as installing a WordPress plugin. You can do that in two ways:
- From your Dashboard
- From the WordPress Repository
Here’s how to install it from your Dashboard:
- Navigate to the WordPress Admin panel. From the WordPress Dashboard, go to Plugins > Add New
- Next, in the search input field, type WP Social Ninja and wait for a moment for it to come up
- Now, click on the Install Now button
- Then Activate
If you decide to install from the WordPress Repository:
- Search WP Social Ninja in the WordPress Repository, and it will appear at the top. Once you click it, hit the Download button
- Now go to the Dashboard and go to Plugins > Add New > Upload Plugin > Choose the zip file
- After that, click the Install Now button and then Activate
Step 2: Get your Yelp API key
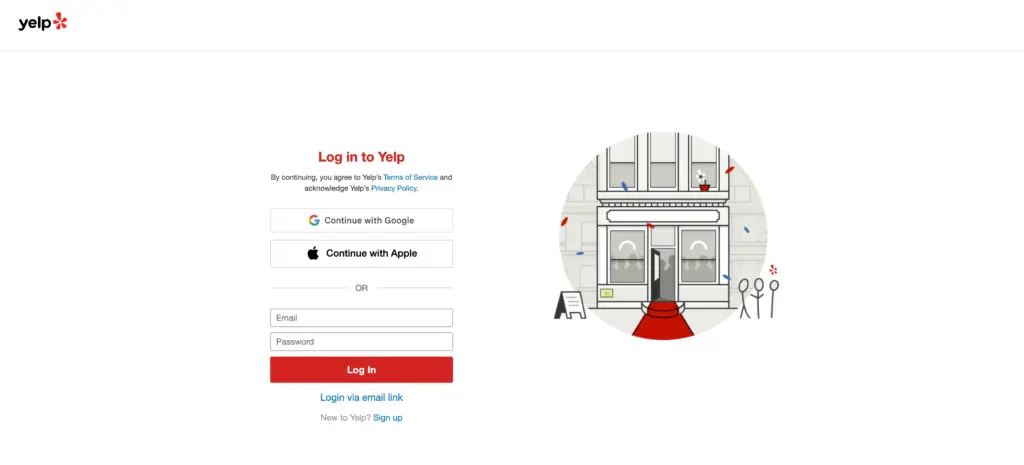
You will need to create a free app on Yelp’s developer portal to generate your API key. Here is how to do it:
- Go to the Yelp Developers website and log in with your Yelp business account
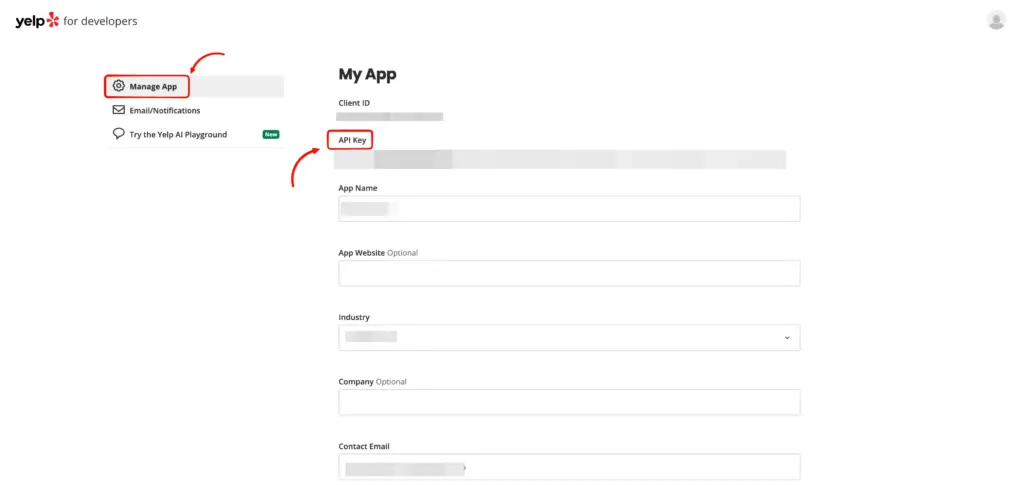
- Navigate to the Manage App section and click Create App
- Fill in the required fields: App Name, Industry, Contact Email, and a brief Description
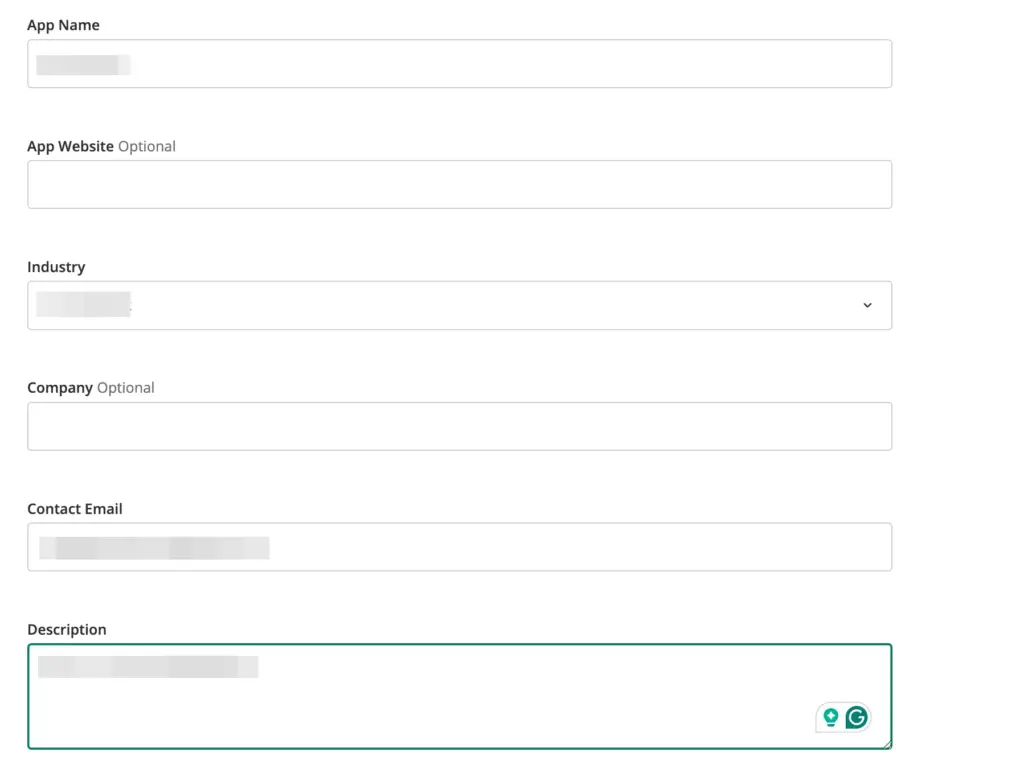
- Click the Create App button.
- Yelp will show you a “Success!” page with your new API Key. Copy it to your clipboard and save it somewhere safe.
Step 3: Find your Yelp Place ID
Your Place ID is the unique part of your business URL on Yelp. It takes just a few seconds to find.
- Open a new browser tab and go to Yelp.com
- Search for your business name and city, then click on your business from the results
- Look at the URL in your browser’s address bar. You will find your Place ID after https://www.yelp.com/biz/
- For example, if your URL is https://www.yelp.com/biz/bocconcino-san-francisco?osq=Italian&q=italian, your Place ID is bocconcino-san-francisco
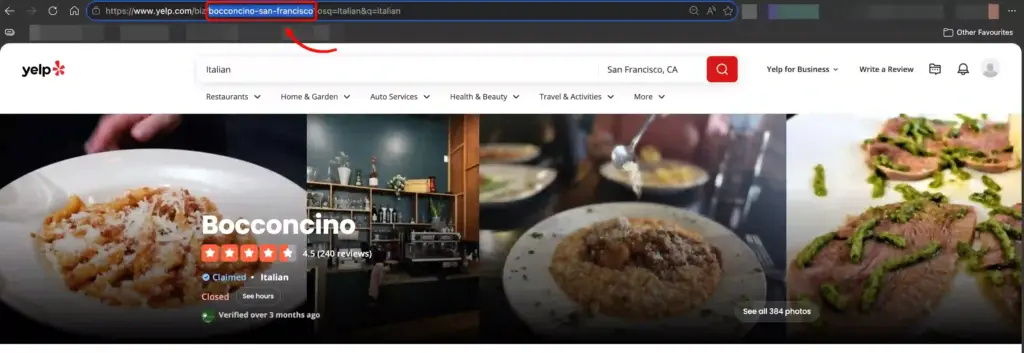
- Copy your Place ID carefully
Step 4: Connect Yelp to WP Social Ninja
Now head back to your WordPress dashboard to complete the connection.
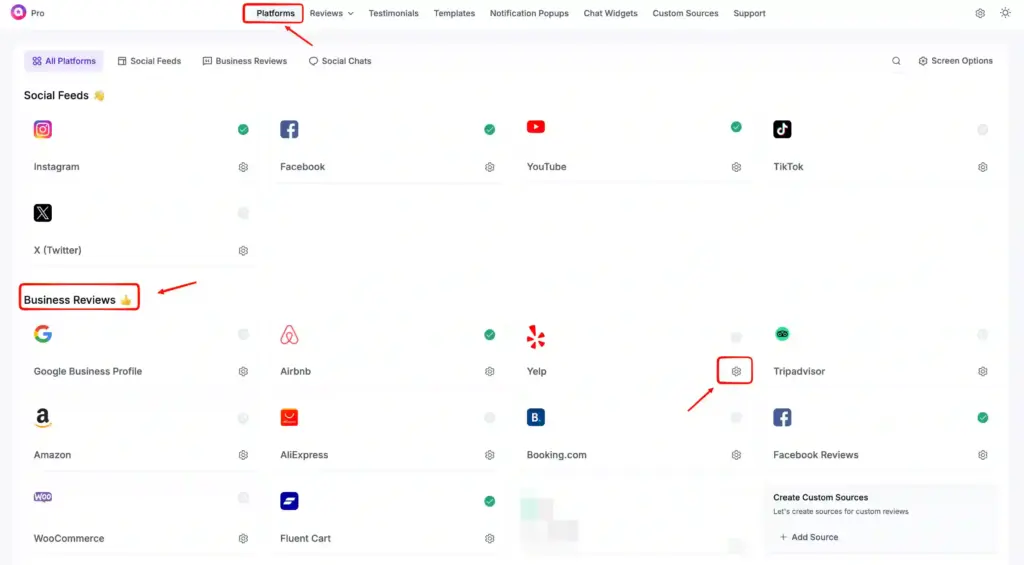
- From your WordPress dashboard, go to WP Social Ninja and click on Platforms
- Find Yelp in the Business Reviews section and click the Settings icon next to it
- A pop-up window will appear with two fields: API Key and Place ID.
- Paste your API Key into the first field and your Place ID into the second, and click Save
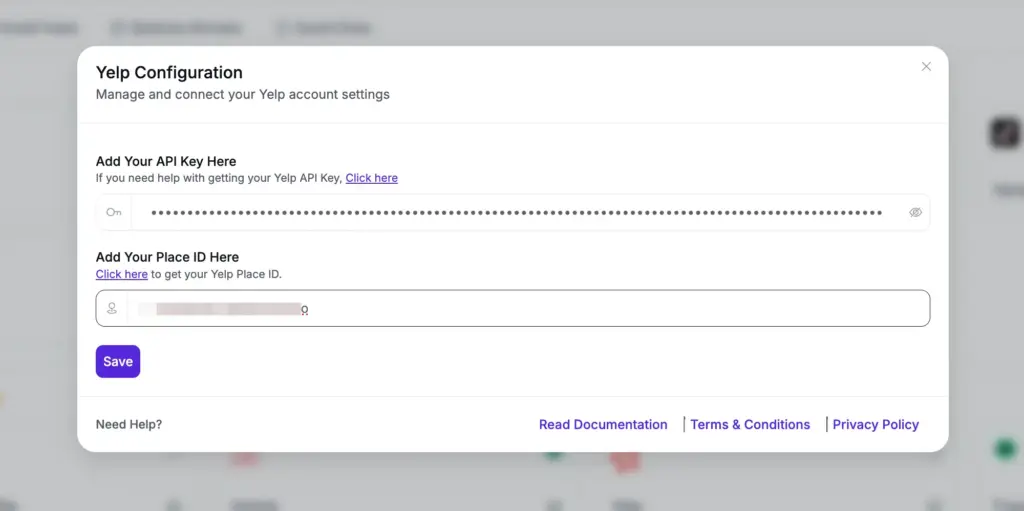
Your Yelp account is now connected. The Yelp row will show a green Connected status.
Step 5: Customize your template
Once your reviews are connected, you need to present them properly. WP Social Ninja lets you design customized templates to match your website, highlight your best reviews, and organize everything so visitors can quickly understand your value.
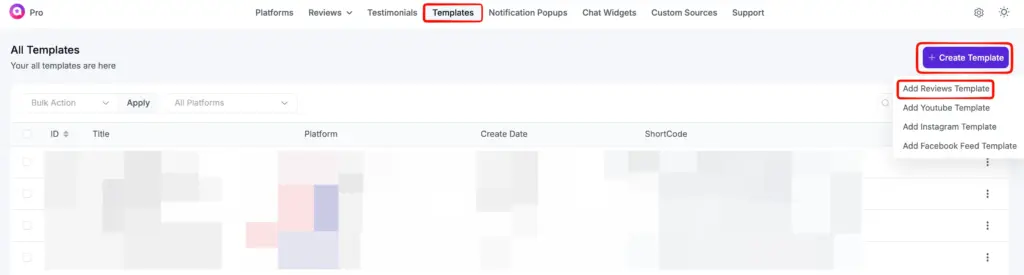
To create your Yelp reviews template, head to the WP Social Ninja dashboard, click the Templates tab, hover over Create Template, and choose Add Reviews Template.
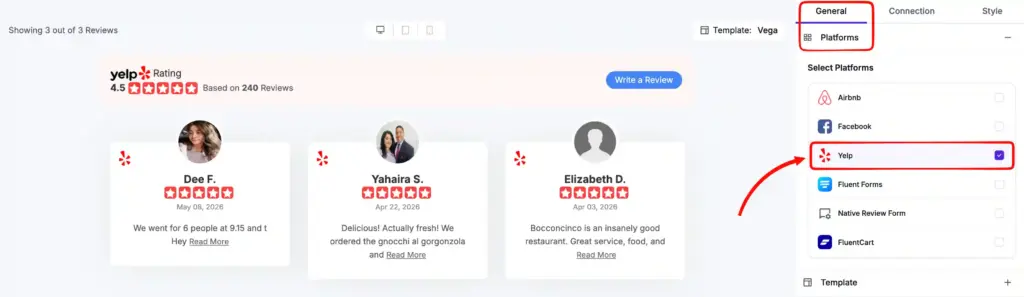
You will land on the editorial panel. Select Yelp from the Platforms under the General section, and all your connected reviews will be fetched here.
You should notice three tabs: General, Connection, and Style. Under each tab, there are multiple customization options.
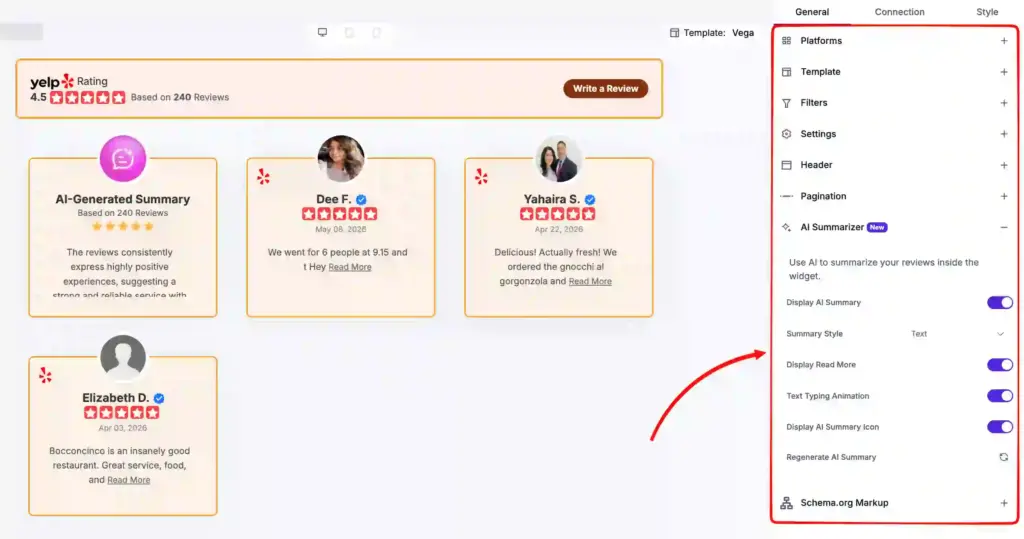
Under the General tab, you will find the following options:
- Template: Choose from 10+ pre-built stylish templates to get started fast.
- Filters: Control how many reviews to show, sort them by ratings and keywords, and more.
- Settings: Manage how your reviews appear, including ratings, reviewer names, badges, and images. You can also adjust how much content is visible and fine-tune the layout so your reviews look credible and easy to scan.
- Header: Control the top section of your reviews. You can show your rating, total reviews, title, and add a “Write a Review” button that directs visitors to your Yelp page or any custom URL.
- Pagination: Control how reviews load on the page. Choose a “Load More” button and decide how many reviews appear at a time to keep things clean.
- AI Summarizer: Show a quick summary of your reviews so visitors get the main idea fast. Supports OpenAI and OpenRouter.
- Schema Markup: Add structured data so your ratings and review counts can appear in Google search results, helping you build trust and get more visibility.
Under the Style tab, you can control how your reviews look on your website. From fonts and colors to spacing and layout, adjust everything to match your site’s design. You can style individual elements like ratings, reviewer names, badges, and review text to keep everything clean, consistent, and on-brand.
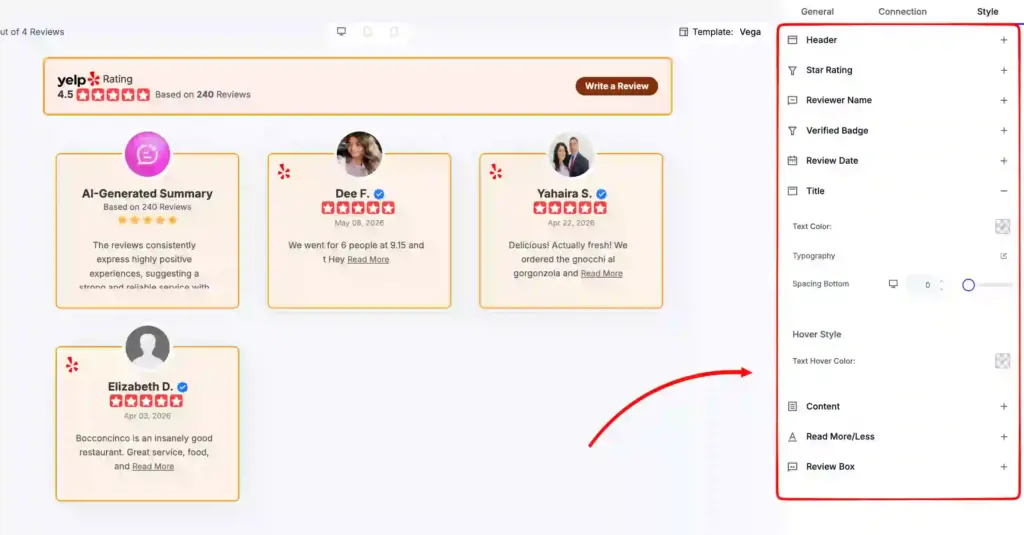
If you want to see how these customizations look in real use, check out the demo templates. It will help you understand how advanced WP Social Ninja can be when it comes to styling.
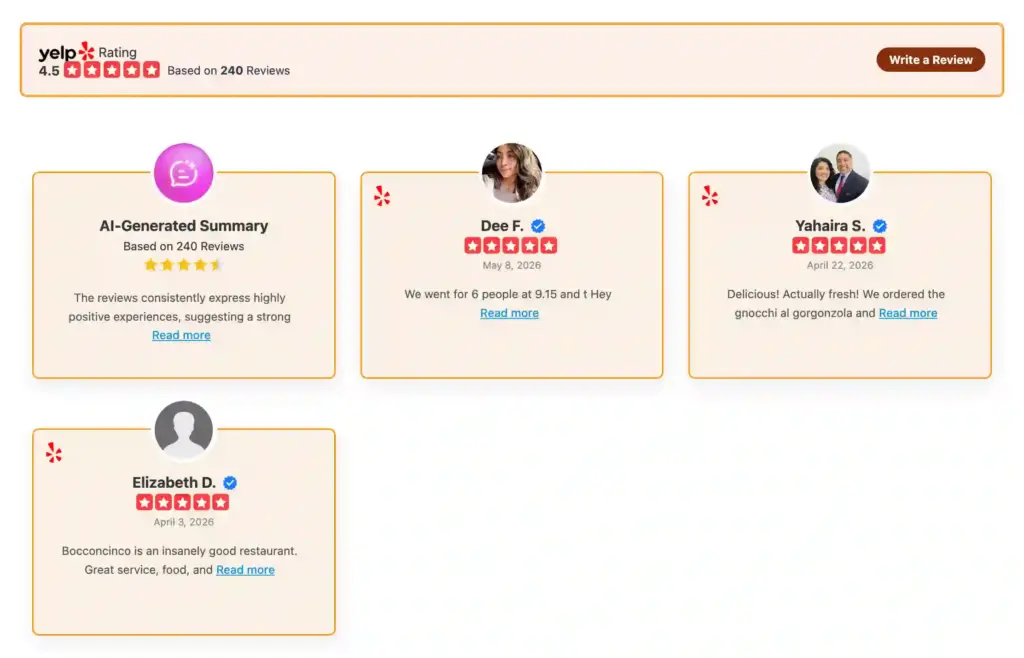
After customization, click Save, copy the shortcode, and paste it anywhere on your website. Here’s how I showed it on my site.
Important Information:
Yelp’s API no longer provides reviews for free. To fetch Yelp reviews in WP Social Ninja, you need a Yelp Pro plan:
Pro Enhanced → Up to 3 review excerpts per business.
Pro Premium → Up to 7 review excerpts per business.
These limits are controlled by Yelp, not WP Social Ninja. Check Yelp Plan and Pricing.
Start displaying your Yelp reviews today
Yelp reviews are one of the strongest trust signals your business has. But they only work when your website visitors can actually see them. Keeping them buried on Yelp means you are leaving conversions on the table every single day.
WP Social Ninja makes it simple to bring those reviews to your site. A few minutes of setup, no coding, and your best Yelp feedback is live and updating automatically. All you’ll need to do is ensure the best quality service.
Frequently Asked Questions (FAQs)
What if my Yelp business page has very few reviews?
Start by displaying what you have. Even a handful of genuine reviews builds more trust than none. Use WP Social Ninja’s QR code feature to collect more reviews from real customers over time.
Can I hide negative reviews from showing on my site?
Yes. WP Social Ninja lets you filter reviews by minimum star rating and exclude specific reviews manually. You stay in full control of what appears on your site.
Will embedding Yelp reviews slow down my website?
No. WP Social Ninja is built to be lightweight. It stores reviewer images locally and is designed to have minimal impact on your page speed.
Can I display Yelp reviews on a specific page only?
Yes. WP Social Ninja uses shortcodes, so you can paste your Yelp reviews widget on any page, post, or section you choose. It will not appear anywhere else unless you add it.
Should I buy Yelp reviews?
No, you should never buy reviews. Yelp’s algorithm is known for detecting and removing fake reviews. Bought reviews can get your business flagged or even removed from Yelp entirely. Focus on collecting genuine reviews from real customers instead.
Is Yelp reviews integration free with WP Social Ninja?
Displaying Yelp reviews requires a paid Yelp Fusion API plan. Yelp no longer provides review data for free. You will need at least the Yelp Pro Enhanced plan to fetch review excerpts for your business.

Subscribe To Get
Weekly Email Newsletter
Connect, Customize, and Display Social Feeds, Reviews, and Chat widgets


Trending Posts
-
-
 Mashfik Upal Aumy
 -

Comments
-
After study a few of the blog posts on your web site now, and I truly like your way of blogging. I bookmarked it to my bookmark website record and will likely be checking back soon. Pls take a look at my website as properly and let me know what you think.
-
Thank you!
-


Leave a Reply