How to Embed Facebook Album Feed on Your Website (Easy Way)
If you are unable to present your visual content on your website effectively, embedding a social media feed is not a complete solution. A more effective way to promote your visual content on Facebook is through the Facebook album feed.
In case you haven’t found the right social media plugin that can do this job perfectly; you are at the right place!
Both your website and your Facebook social media profile will benefit from adding a Facebook album. The presence of your Facebook album is crucial for growing your organic traffic and boosting user engagement.
In this article, we’ll show you how easily you can embed Facebook album on website in the easiest way.
So, without further ado, let’s jump to the topic;
Why embed Facebook photo albums on your website?
If you’re wondering how you could grab more attention from your website visitors and display your Facebook feed? Well, you have more to offer!
And that’s your Facebook photo album feed. To make the visual content on your website more appealing, adding a Facebook album feed would be the best option.
1. Share photos with your website visitors:
If you have a Facebook photo album that you want to share with the visitors to your website, embedding the album allows you to do so without having to upload the photos to your website separately.
2. Save space on your website:
When you embed a Facebook gallery on site, it will allow you to host the photos on Facebook’s servers, rather than on your own website, which can save space on your server and reduce your bandwidth usage.
3. Keep your website and your social media accounts connected:
If you embed Facebook photos on your website that is included in your Facebook photo album, it can help to drive traffic to your Facebook page and encourage visitors to follow you on social media.
4. Easy for visitors to view your photos:
Having a Facebook photo album on your website allows visitors to view the photos without having to leave your site or navigate to a different page.
5. User-generated content:
If you want to showcase your user-generated content, presenting them is the shortest hack for you. You may have separate albums containing the content you got from your customers. When you display them on the website it will inspire your audience more and at a time you’re promoting your brand too!
Overall, embedding a Facebook photo album on your website can be a convenient and efficient way to share photos with your visitors and connect with them on social media.
Easiest way of adding Facebook albums to your website (Step-by-step)
Adding a Facebook album feed is not complicated and tough to understand. But in some cases, it creates some unusual troubles that can make you search for another solution on the internet.
It may occur in a user-friendliness issue or another that can lead you to install another addon on your WordPress.
Anyway, WP Social Ninja lets you not worry about any of these. Because this all-in-one social media plugin can bring your Facebook album feed along with your Facebook feed to your website.
Follow the steps, and see how simple it is!
Configuration
To add the Facebook albums, first you need to step across the configuration part. This step is divided into multiple options. Choose the one you think would be perfect for you.
You have three credential types. You can choose OAuth 2.0 or Manually Connect for now (Connect Events Access Token is for creating Facebook event).
OAuth 2.0
If you choose OAuth 2.0, it will need you to verify your Facebook account and page first. Click on Continue with Facebook.
This will take you to give your Facebook login credentials. Submit them and confirm your Facebook page.
And that’s all! Your Facebook has successfully connected through the OAuth 2.0 configuration. Your page is now to ready to create amazing templates with your Facebook albums!
Manually Connect a page
Are you concerned about your Facebook account privacy? If you are, this configuration method is for you.
In the manual setup process, instead of giving your login information, you can complete the integration by creating an access token.
Select the Manually Connect page from the Credential Type;
Next, go to access token page. This will take you to the WP Social Ninja’s own access token generator page. Scroll down your page and find the Facebook Feed.
Click on Continue with Facebook; In the next step, you can find the access token generated will appear below. Copy the access token code.
Now go back to the WP Social Ninja configuration page, and paste the code.
Now, complete the process by clicking on Connect, and you’re done! Your Facebook page is now ready to create a beautiful Facebook album feed.
Hit on Add New Template to proceed to the next steps. It will directly take you to the template setting panel.
This is how it will look when you create a template for the Facebook album;
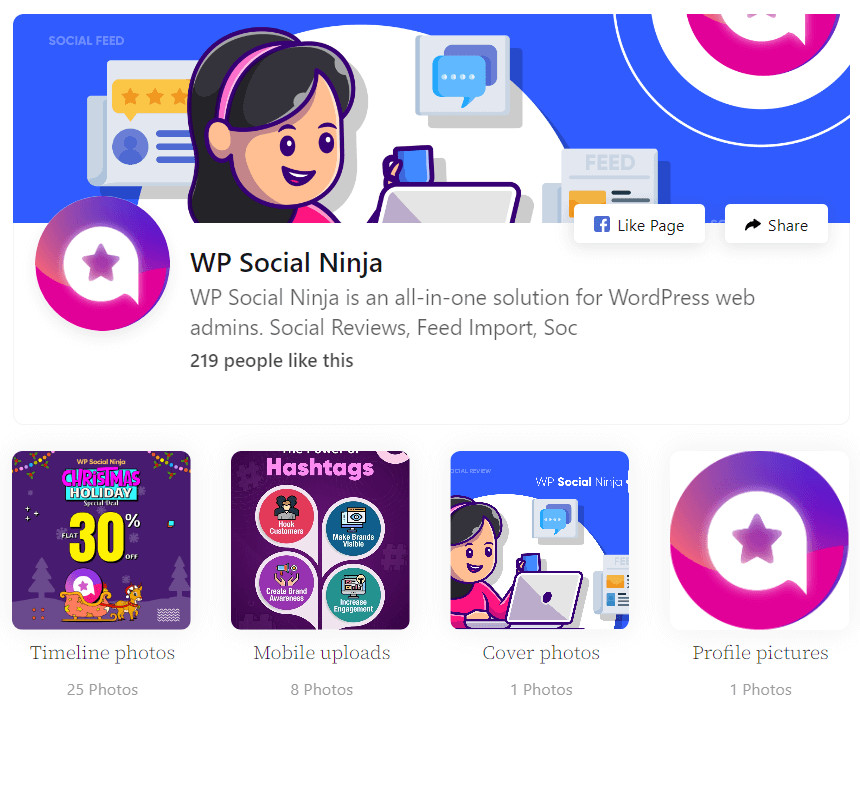
And that’s how you can fetch your feed easily with one click. Now that you know how to create it, let’s check out how the setting panel works and how you can customize your template setting.
Template editor settings panel
To create your Facebook album feed, select Albums from the feed type drop-down in the General setting.
Click on Fetch Feed, you can see the albums will be presented on the left side of your setting panel.
You’ve successfully fetched your album feed. Now it’s time to decorate your template. Let’s move on to the custom Facebook settings;
Number of column
Do you want to put your albums on your template in some fixed column numbers? Well, you can organize your feed by placing it in a number of columns as you want. We’re setting it on 4 columns here.
Column Gap
Next, you have column gap, where you can adjust the gap between your column.
Feed
In the Feed section, it will allow you to choose whether you want to show your post in a pop-up box or on your Facebook page. Select any of these two options under the Feed drop-down.
Header
This part lets you customize the header section of your feed template. You can decide which elements of your header you want to keep or remove.
If you don’t want to show the header section that contains the cover picture, description, profile picture, and the following counts; simply disable the button beside the Display Header.
And to customize the header elements, do it by enabling/disabling the buttons you see under the Account to Display.
Like Button
Just like you can customize every other element here, you can edit your page CTA button too. You can invite your page visitors to like your Facebook page. You will have three option here to place the Like page button.
Enable the Display Like button first (If you don’t want to show the the CTA, disable the button).
You will have three options for placing the CTA; at the header, or footer, or in both. Choose any one from the Like Button Position drop-down.
Also, You can select your text whatever you put on in your CTA button. Write it on Button Text box.
Share Button
It’s obvious if anyone finds a Facebook album feed nice or informative, they would like to share this to their friends or close ones too.
After showcasing your album feed if you want your audience share your page to their personal Facebook pages, you have sharing option.
Turn on the Display Share Button;
And then place it wherever you like from the given option. And lastly, enter the text you want to show on your Button text.
Pagination
Pagination, the last part of your setting. If there’s not more than one page, you can set it to none, and if it’s more than one, you can select the Load More option.
Or you can modify the text Load More to “Next”, or anything you wish to keep.
So, you’re done! You have finished the General setting of your feed template for the Facebook feed.
But there’s more. If you want to custom more style options for your album feed try the style editor panel.
Style
For beginning with the custom style, first, turn on the button beside the Enable Style. It will open the options for styling your Header, Content, Like and Share Button, Pagination, and Item Box options.
For instance, let’s style the Header part.
You see, you have plenty of styling options for how you want to present your album feed. From customizing the text color, and typography to the background color and spacing between your contents, you’ve got to custom them all!
If you want to know more about custom style editor of WP Social Ninja, check out the blog:
Complete Custom Style Editor for Your Website (No CSS or Theme Builders)
Anyway, don’t you want to see how have made your Facebook photo album feed? After all the customization, finish it by hitting the button Save Template. Copy the shortcode and paste it on the New post page.
Here you go! The Facebook album feed for your WordPress website.
Wrapping up
That’s all you had to know about embedding Facebook albums on your WordPress feed. Just a few clicks with WP Social Ninja and you’re done.
Also, you got to know why you need to embed Facebook photo albums on the website. You may now easily start and build your business by displaying social media feeds with relevant Facebook albums!
Win your customers’ hearts with exceptional features
Discover how WP Social Ninja can assist you in designing outstanding customer experiences.
You might also like to give read to these articles:
- Quick Fixes on Facebook Posts Not Showing Up
- 9 Interactive Facebook Posts Ideas to Boost User Engagement
- 5 Best Facebook Review Plugin for WordPress Websites
Also, don’t forget to follow us on Twitter, Facebook, and YouTube. And feel free to share your queries on our Facebook group.

Subscribe To Get
Weekly Email Newsletter
Connect, Customize, and Display Social Feeds, Reviews, and Chat widgets







Leave a Reply