How to Embed Social Media Feeds on Your Website in Five Minutes
SHARE :


Looking for the easiest solution to embed social media feeds on your WordPress website?
In 2024, people love to hear a story, including you, isn’t it? Similarly, your users like to see social proof and hear real-life stories before they purchase something.
It helps them to make a perfect decision instantly. And it’s a no-brainer that social media feeds are the best platform to tell about your brand’s stories.
In this article, we’ll show you how to embed social media feeds within a few clicks!
Why your website needs social media feeds
Whether it’s a small business or a giant one, these days, every business knows that it is important to embed social media feeds.
Popular social platforms like Facebook, Instagram, and YouTube are becoming hubs for small and large businesses. According to HubSpot research, 22% of consumers discover new brands via social media.
Here are some key benefits of embedding social media feeds:
- Better engagement rate
- Expanded reach
- Brand discovery
- Increases social media followers
- Value addition to social media marketing efforts
- Build trust with social proof
- Higher conversion rate
- Reduce bounce rate
- Drive traffic through multiple channels
- Cross-promotion
- Improve the website’s UI with the dynamicity of social feeds
In 2024, social platforms are on the rise, and marketers need to look at the graph.
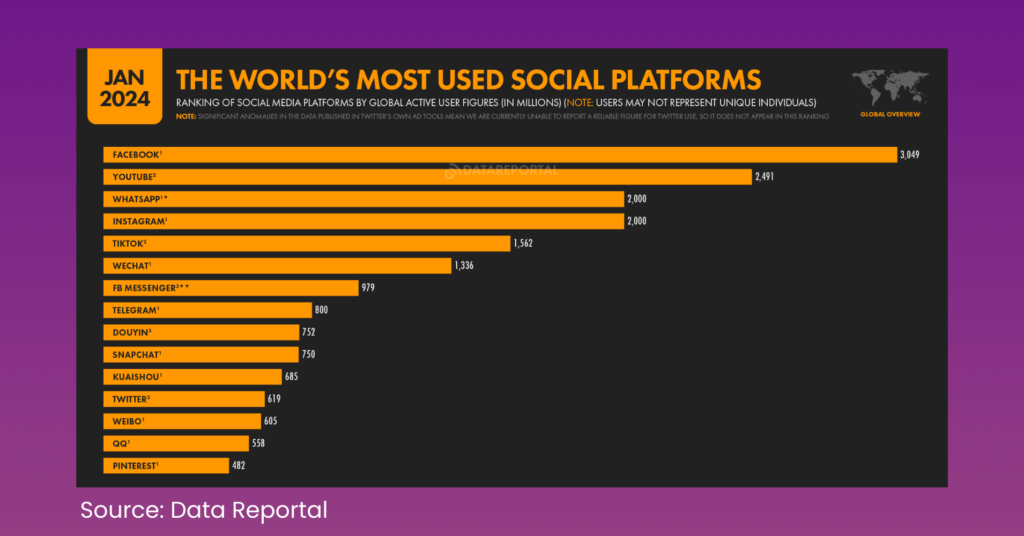
So, back to the question: Why does your website need to embed social media feeds?
Well, digital platforms increase social media followers and boost social engagements. Moreover, it automatically converts the leads into sales and expands the business.

Get exclusive social media marketing tips and tutorials in your inbox!
How to embed social media feeds on your website
For WordPress websites, it will be easy to embed social media feeds with the help of a plugin. There are many social media plugins in the WordPress directory. But let us help you avoid the painful process of trial and error to find the most suitable plugin.
In that case, we would like to recommend WP Social Ninja, an all-in-one social media plugin for WordPress websites.
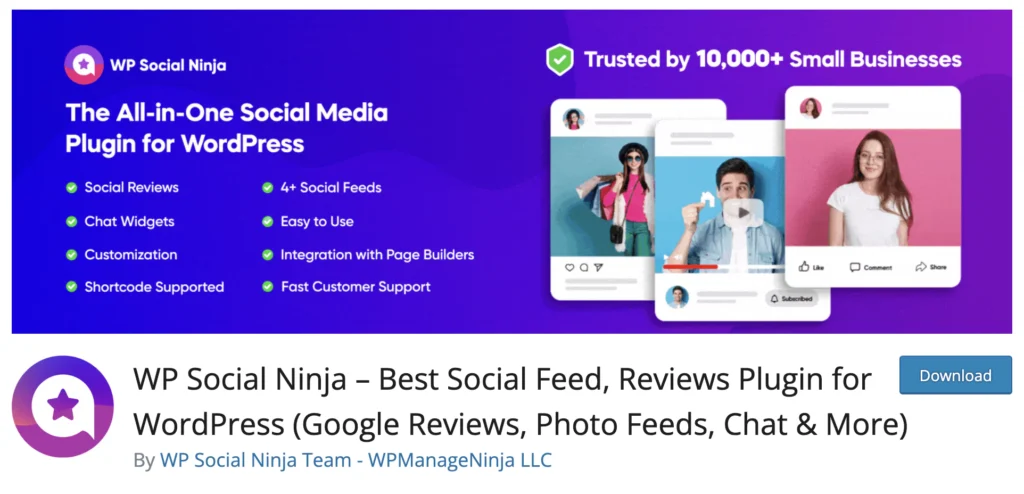
With this plugin, you can embed Facebook, Instagram, YouTube, and TikTok feeds on your site easily and tailor them to your needs.
Additionally, you can filter out posts, add events and album feeds, create a shoppable Instagram feed, and much more.
With WP Social Ninja, you can also add social reviews from 10+ platforms, including WooCommerce, Google Business Profile, etc, and 15+ chat widgets to maximize your business.
Not just that, you can create custom testimonials and add notification popups to your needs. WP Social Ninja will cover all the aspects of social media plugins. But let’s stick to social feeds in this article.
Social media feeds installation and activation process
Anyone can pick up WP Social Ninja without even being tech-savvy. You have two options for installation and activation-
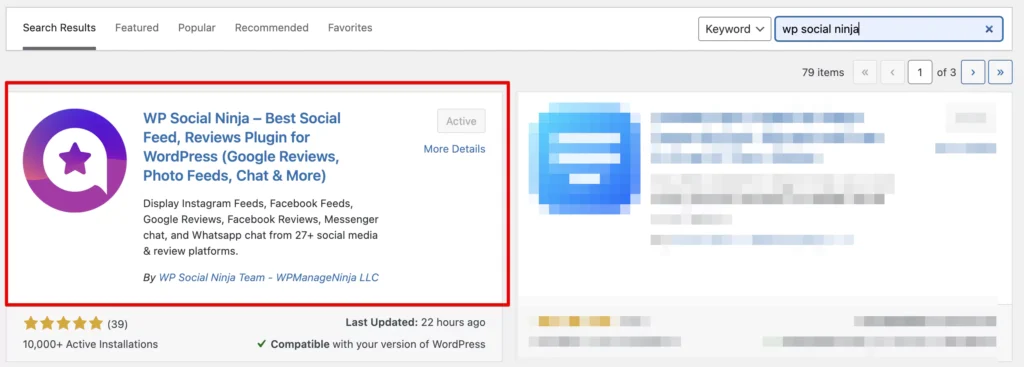
From your Dashboard
- Navigate to the WordPress Admin panel. From the WordPress Dashboard, go to Plugins > Add New
- Next, on the search input field, type WP Social Ninja and wait for a moment for it to come up
- Now click on the Install Now button
- Then Activate
From WordPress Directory
- Download WP Social Ninja from the WordPress directory
- Go to Plugins > Add New > Upload Plugin > Choose the zip file > Install Now > Activate
Pick any option that is easy for you!
Social media feed configurations
Social proofs say a lot about your business and boost your brand’s credibility. Moreover, WP Social Ninja is a full package with the most popular social media feeds.
- TikTok
- YouTube
From now on, we will show you how you can connect these social feeds with WP Social Ninja on your WordPress websites!
Facebook feed configuration
Buckle up! This section will show you the easiest Facebook feed integration process!
Step-1
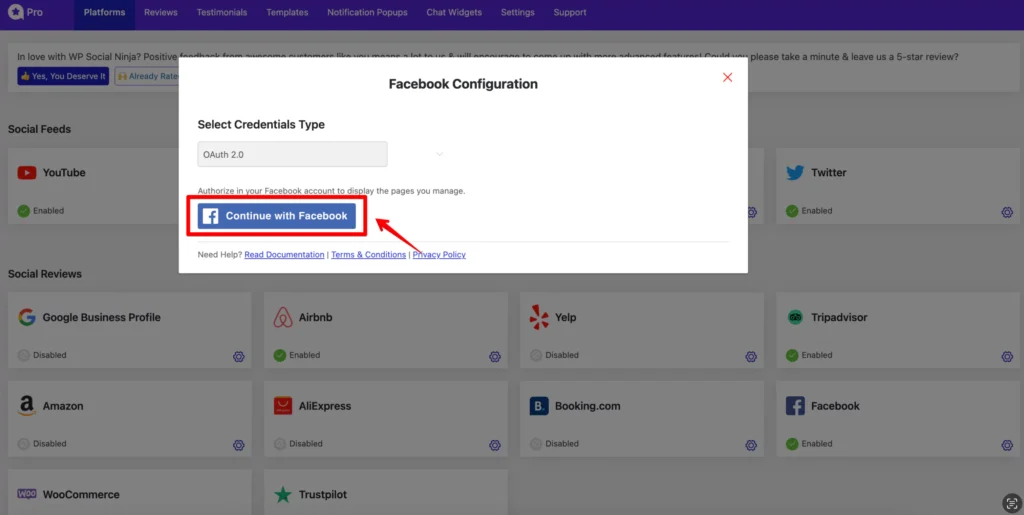
You first need to authorize your account to connect the Facebook feed to your website. Simply click the Continue with Facebook button to authorize the procedure.
Step-2
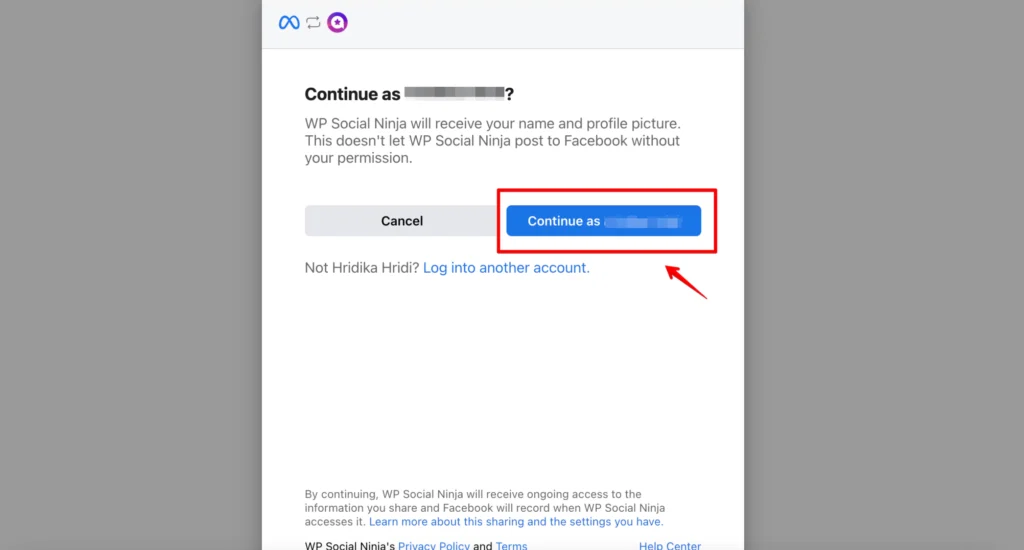
In this section, it will be redirected to a new page where you have to click on the “Continue as Username” button.
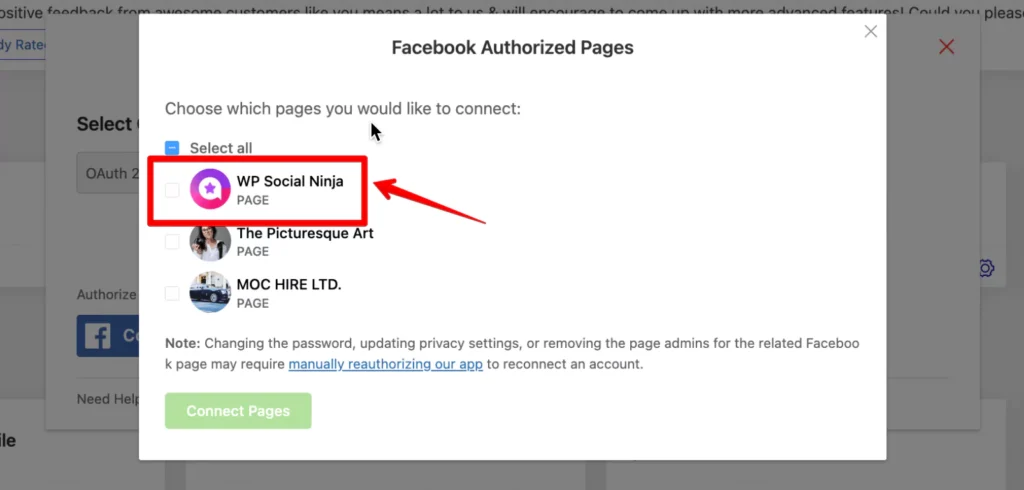
To connect to your Facebook business account, you need to log in to your account. To continue, you must now pick the relevant pages and click the Connect Pages button.
Step-3
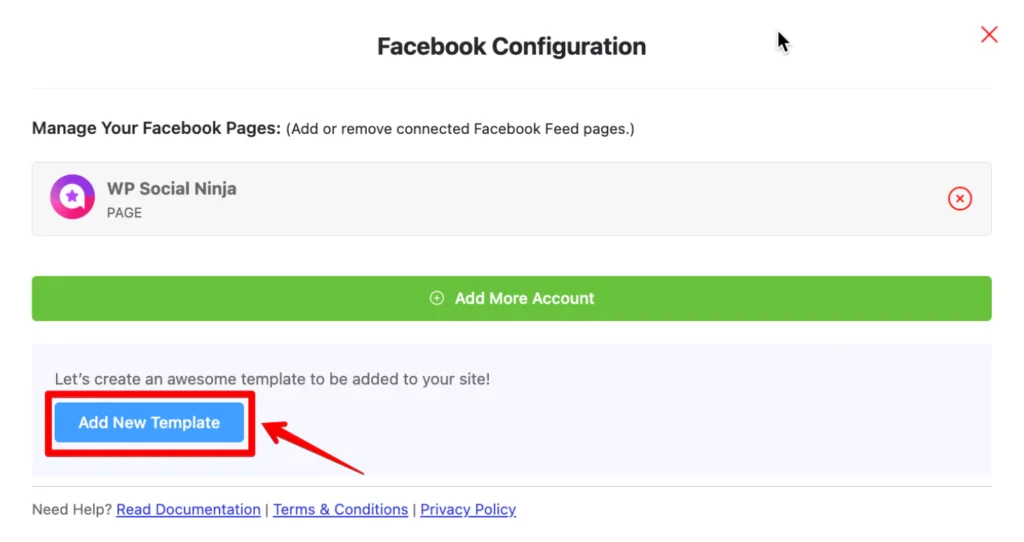
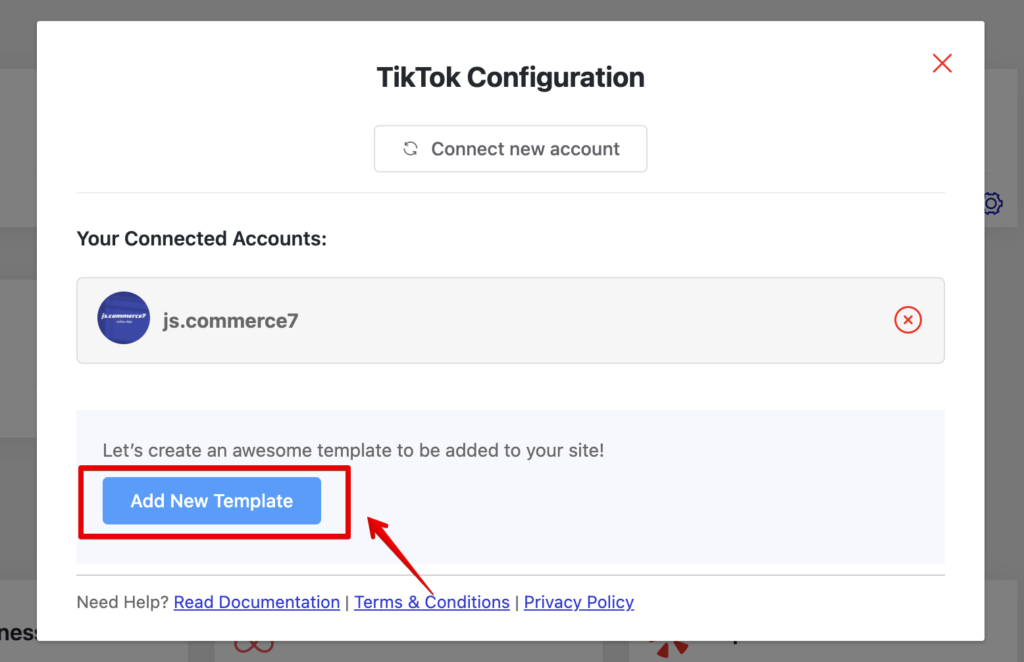
Well, you are connected! Easy, right? Now, if you want to customize, click on the Add New Template button and tailor your feed in the most suitable way!
We have Documentation ready if you still have any questions!
Instagram feed configuration
Configuring an Instagram feed with WP Social Ninja is much easier. You have the full flexibility and multiple options to connect any type of account.
Whether it’s a personal account, a business account, or you want to connect an account manually without any password, the choice is yours!
How to connect a personal account
- Go to the Platforms section and select Instagram
- Then select the Connect Your Personal Account option and click on the Continue with Instagram button
- Make sure that you are logged in to your account. In this step, click on the Allow button, and you will be successfully connected
- Click on the Add New Template button to customize your feed. After customization, save the template, copy the shortcode that appears on the top, and paste it to the page where you like to show your feed
How to connect a business account
- Select the Connect Your Business Account option
- Once you select the Business Account, click on the Continue with Facebook button
- Next, click on the Continue as (Your Account Name) button to connect the business account
- We recommend the Select All option during this stage. You’ll have the opportunity to designate a particular account in the final step
- Select your Instagram Business account and click the Next button to continue
- Here, select the page you would like to use with WP Social Ninja
- Keep all permissions as they are (these are required for WP Social Ninja to work) and click on Done
- You have linked with WP Social Ninja! Click OK to go further. Now, in this stage, select All Accounts or the specific ones and click on the Connect Accounts button
- In case you want to add more accounts, click on the Add More Account button
- If you have already authorized your business account and you want to connect to another account without going through the authorization process, click on the View Accounts button and connect your account
How to manually connect an account
- Select the Manually Connect an Account option from the dropdown, and a new page will appear where you need to enter the Access Token
- Click on the access token generator. After that, a new page will appear. Then click the Get Access Token button
- You will see two options there: Personal account and Business account. Select your type of account
- Click Allow to proceed further. Click Show Connection Info, and you will have your access token ready
- Now that you have your access token ready. Copy the token, go back to the dashboard, paste your token, and click Connect this Account button
If you still find it difficult to configure your Instagram account with WP Social Ninja, check out the detailed Documentation.
TikTok feed configuration
You can connect your TikTok feeds in only three steps with Custom Feed for TikTok by WP Social Ninja. On a special note, these two plugins are affiliated with one another. So, you will need both of them installed and activated on your site to Integrate TikTok feeds.
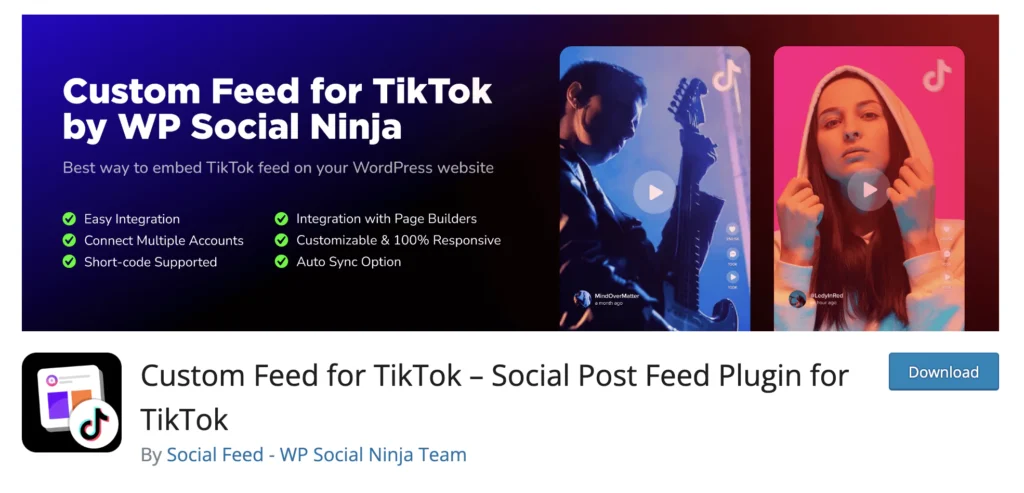
But don’t worry. It will be a breeze to integrate TikTok feeds with Custom Feed for TikTok at WP Social Ninja. Let’s have a look.
Step 1: Install and Activate Custom TikTok Feed by WP Social Ninja
You need to install and activate Custom Feed for TikTok if you are already using WP Social Ninja. The process is the same as we mentioned earlier. You can do that in two ways:
- From your Dashboard
- From WordPress Repository
Here’s how to install it from your Dashboard:
- Navigate to the WordPress Admin panel. From the WordPress Dashboard, go to Plugins > Add New
- Next, on the search input field, type Custom Feed for TikTok and wait for a moment for them to come up
- Now click on the Install Now button
- Then Activate
If you decide to install from WordPress Repository:
- Search Custom Feed for TikTok in the WordPress Repository, and it will appear on the top. Once you click it, hit the Download button
- Now go to the Dashboard and go to Plugins > Add New > Upload Plugin > Choose the zip file
- After that, click the Install Now button and then Activate
Step 2: Connect your account
First, go to the Platforms section of WP Social Ninja. There, you will find TikTok under the banner of Social Feeds.

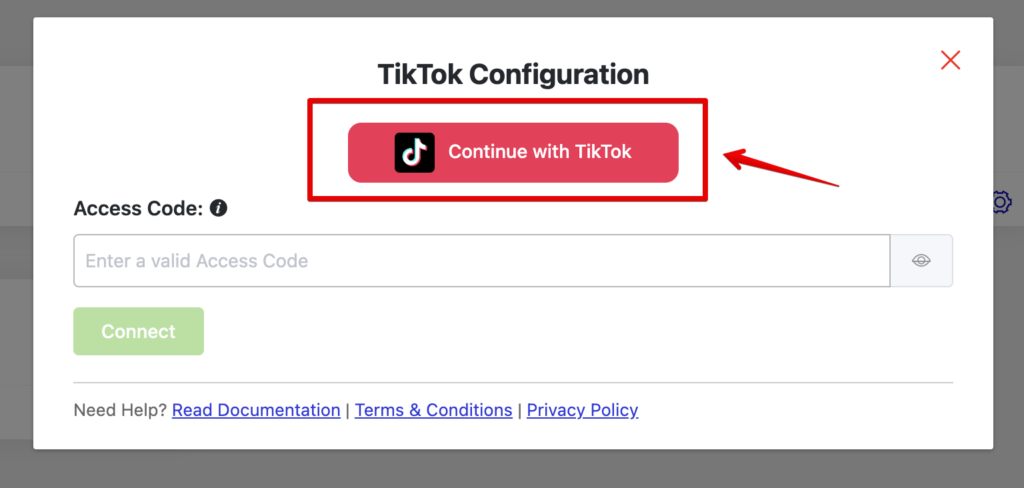
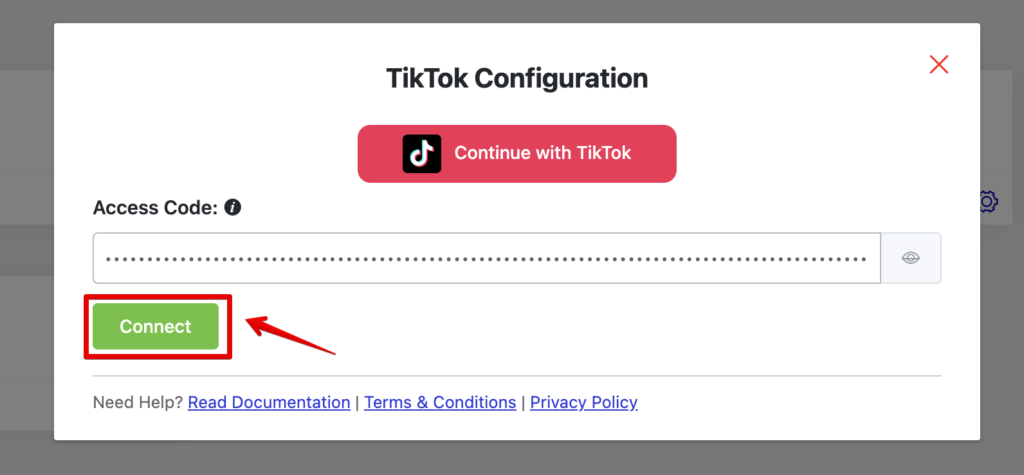
Click on the TikTok button to configure your account with an Access Code. Select the Continue with TikTok button to get your code. But make sure that you are logged into your TikTok account.
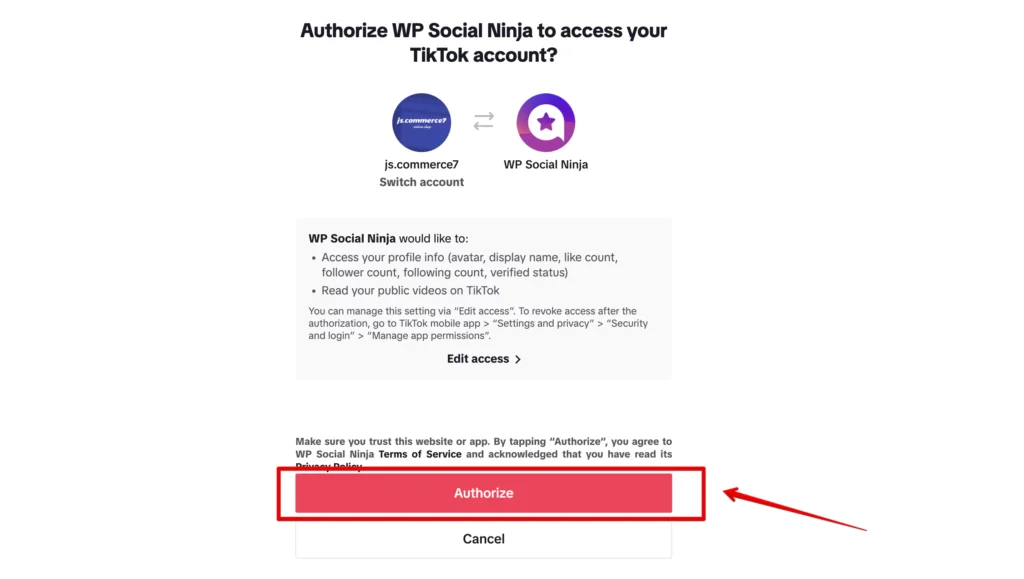
Then, you will be redirected to the Authorization page. There, WP Social Ninja will ask for some access, and then you will have to click the Authorize button.
After that, you will directed to the next page, where you will find your Access Code. Now, hit the Copy button.
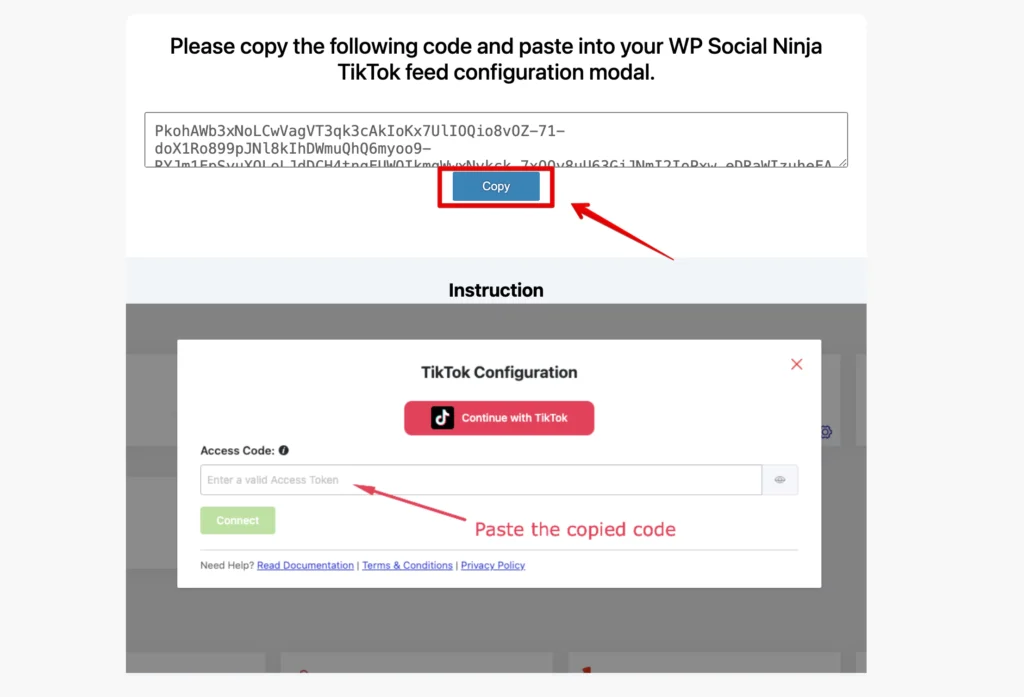
Now, all you have to do is go to the previous tab, paste the code, and hit the Connect button. You are successfully connected!
Step 3: Customize the template from your TikTok widget
Here comes the main attraction! With Custom Feed for TikTok, you can customize your feed and display content on your site the way it seems perfect. You have the utmost flexibility.
To create your personalized template, click on the Add New Template button.
YouTube feed configuration
You can connect a YouTube feed with an API Key or OAuth 2.0 credential type.
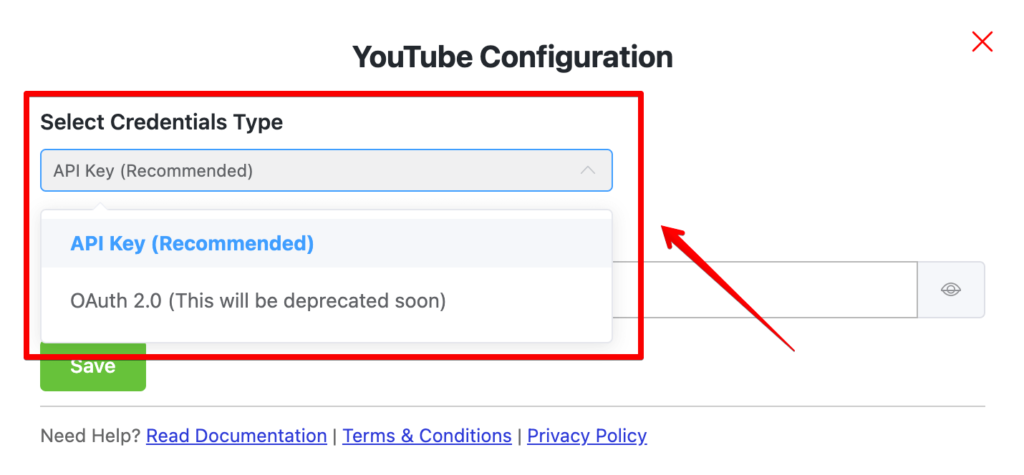
But as the API key is the recommended method, we are going to talk about that here!
- Go to console.developers.google.com oauth to acquire the API Key from the Google APIs
- Click on the Credentials from APIs & Services to get the API Key
- Click on the Create Credentials button to create an API Key
- Next, click on the API Key button
- Congratulations! You have got your YouTube API Key
- Now, to configure the YouTube Feed, you need to enable the YouTube Data API v3 button; otherwise, the API Key will not work
- Click on the Library to enable the YouTube Data API v3
- From the API Library, scroll down and select the YouTube Data API v3
- Now Enable the button
- In this step, copy and paste it to insert the API Key to configure YouTube Feeds
- Now click on the Save button to verify the YouTube Social Feed
- You have successfully managed to fetch the YouTube social media feeds
If you still find it hard to process, check the Documentation for a more detailed procedure!
Final words
At present, social media is irreplaceable. And in the realm of business, your brand needs it the most!
In this article, I tried to give you a general idea about how easily you can fetch social media feeds on your website with WP Social Ninja. The intention was to direct you in the right direction with the finest social media plugin.
I hope you found this helpful article. If you did, you might also take a look at the following resources-
Piya Choudhury
Being a social media enthusiast, I am passionate about real-life stories that connect with my readers. I mostly deal with social media marketing, user reviews, feeds & communication processes. And when I’m not writing, you’ll find me binge-watching on Netflix.

Subscribe To Get
Weekly Email Newsletter
Connect and display your social feeds, reviews, and chat widgets on WordPress!




Leave a Reply