

How to Add Facebook Reviews on WordPress Website (Easy Steps)


Do you want to display Facebook reviews on your WordPress website?
Social media has become the backbone of digital marketing strategies and a solid platform to excel. It is no surprise that social media platforms have become much more than a means of connecting with friends and familiar ones. Your business gets great exposure when you partner with a popular social network.
When discussing the most used social media, Facebook comes to mind as a supreme social platform. Facebook offers various facilities for businesses, and people rely on Facebook to discover or research a brand before making their purchase decisions.
So without further ado, let’s see how to embed Facebook reviews on your WordPress website in the easiest possible way.
What is the meaning of embedding Facebook reviews?
Embedding Facebook reviews on your WordPress website means you are displaying Facebook page reviews, and your website visitors are able to see them without going through your page.
If you are familiar with embedding Facebook feeds, you can comprehend the concept easily. You can choose any recent or previous reviews to embed, and whenever visitors see them on a page, they can have a glimpse of your Facebook reviews and have a clear idea of what your customers think about you.
Why should you embed Facebook reviews on your website?
Almost 90% of consumers go through social media reviews before buying a product online. Though there are dedicated social review platforms like Yelp, Airbnb, etc., Facebook reviews are still at the top.
Whenever a customer is satisfied with your business, there is a high chance that he/she will leave Facebook page reviews to share the experience with others. Reviews are like a recommendation from a friend and can make or break a business.
Let’s look at some key reasons why you should consider embedding Facebook reviews on your site:
- Social proof: Potential customers go through reviews to overcome their trust issues. As Facebook is the biggest social platform, embedding business page reviews on your site can be an excellent form of social proof of the quality of your service or product.
- Higher conversion rate: Positive reviews can play a huge role in converting potential customers into regular ones. Embedded Facebook reviews have the power to create good impressions and convince visitors to buy from you.
- Cross-promotion: Embedded reviews can help you get more Facebook followers and likes. Facebook marketing for small businesses can be quite tough. However, it is easier to rank with your optimized landing page, and this makes it easier for people to find you and drive traffic from your site to your Facebook business page.
What is the easiest way to embed Facebook reviews?
There are two ways to embed Facebook reviews on WordPress websites:
- Embed reviews manually
- Embed reviews with a plugin
If you decide to embed Facebook reviews manually, you need to go to your page, select reviews, copy the embed code, and paste it manually on the back end. You must go through this process every time to add a review. However, this is not a recommended method if you are serious about your social selling!
The best way to embed Facebook reviews on WordPress websites is to use a social media plugin. A plugin will fetch reviews automatically and allow you to curate them. There are plenty of Facebook review plugins for your convenience.
However, choosing the most suitable plugin can be quite bothersome, to be honest. To avoid this hassle, let’s meet with WP Social Ninja, an all-in-one social media solution for WordPress websites.

With this plugin, you can embed Facebook reviews along with 10+ platforms, including WooCommerce, Google Business Profile, Yelp, Tripadvisor, and more. Additionally, you have full customization flexibility with WP Social Ninja.
You can choose from multiple layouts, trim the review length, filter out reviews based on ratings, avail different templates, and much more with WP Social Ninja.
You can check the Facebook Reviews page for more details.
But this super social plugin has much more to offer. This plugin will let you collaborate with 30+ social platforms. You can connect your Facebook, YouTube, and TikTok feeds, add custom testimonials, create chat widgets with 15+ platforms, add notification popups, and much more.
How to add Facebook reviews with WP Social Ninja
In this section, we’ll show how to embed Facebook reviews into your WordPress website in 2 minutes! We will break down the whole integration process into easy steps.
Step 1: Install and activate WP Social Ninja
WP Social Ninja is a lightweight and user-friendly plugin available in the WordPress repository. If you are familiar with installing WordPress plugins, WP Social Ninja is no different. It will take only a few steps.
You can do that in two ways:
- From your Dashboard
- From WordPress Repository
Here’s how to install it from your Dashboard:
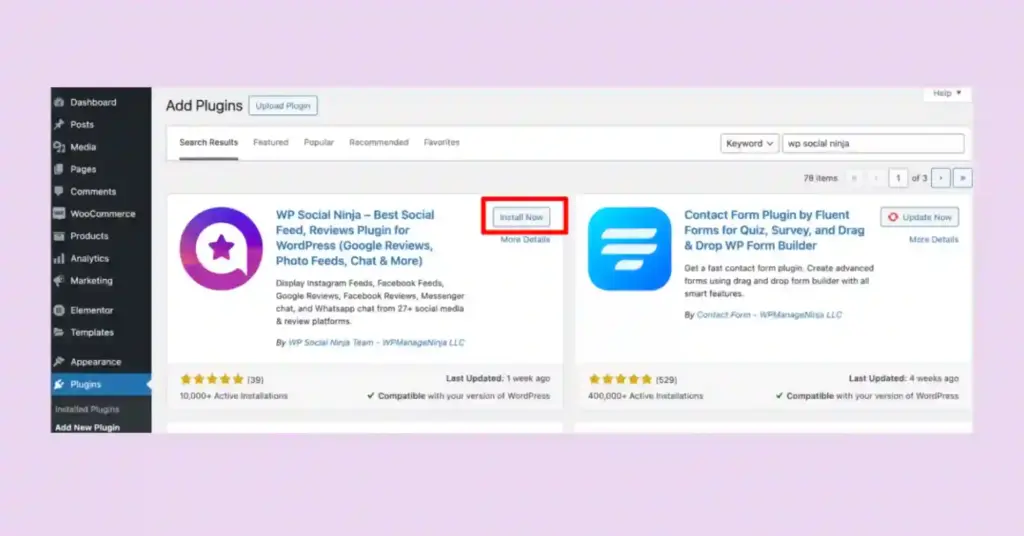
- Navigate to the WordPress Admin panel. From the WordPress Dashboard, go to Plugins > Add New
- Next, in the search input field, type WP Social Ninja and wait for a moment for it to come up
- Now, click on the Install Now button
- Then Activate
If you decide to install from the WordPress Repository:
- Search WP Social Ninja in the WordPress Repository, and it will appear at the top. Once you click it, hit the Download button
- Now go to the Dashboard and go to Plugins > Add New > Upload Plugin > Choose the zip file
- After that, click the Install Now button and then Activate
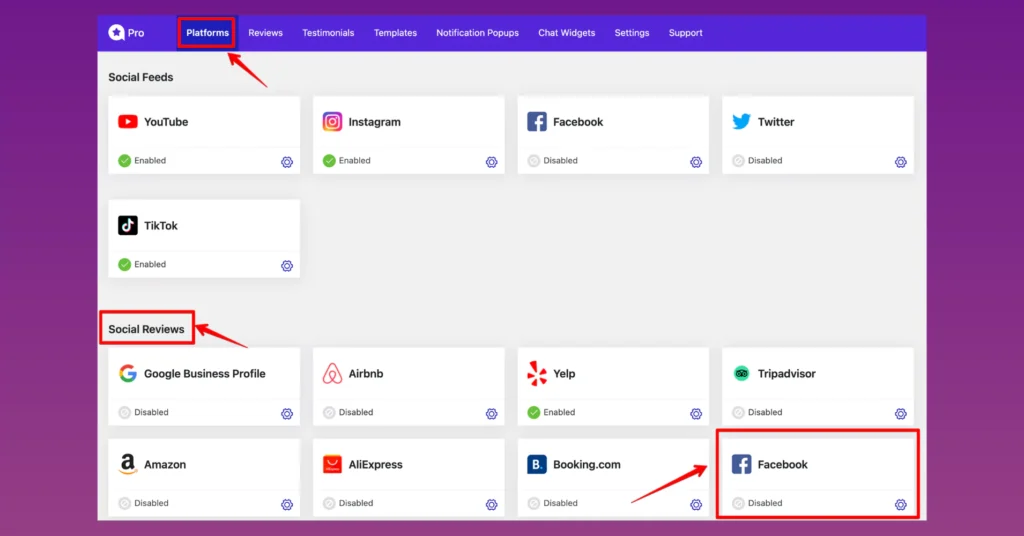
Step 2: Configure your Facebook page
Select the Facebook review feed from the Social Reviews section of your dashboard.
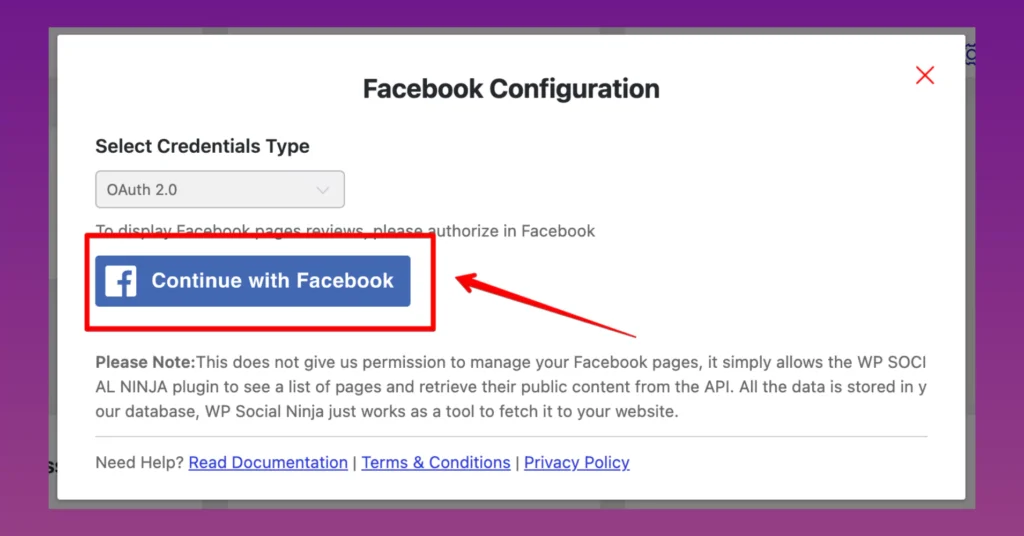
Then, click on the Continue with Facebook button.
While connecting with your Facebook Account, click on Continue as {Your Name} to complete the steps, and your account will be verified. Make sure you are logged in on the device you are working on.
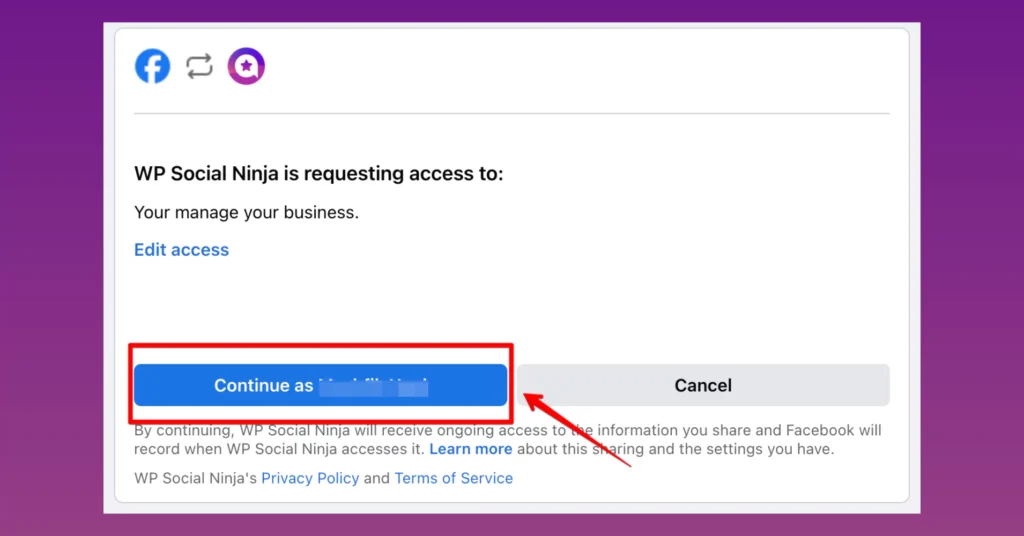
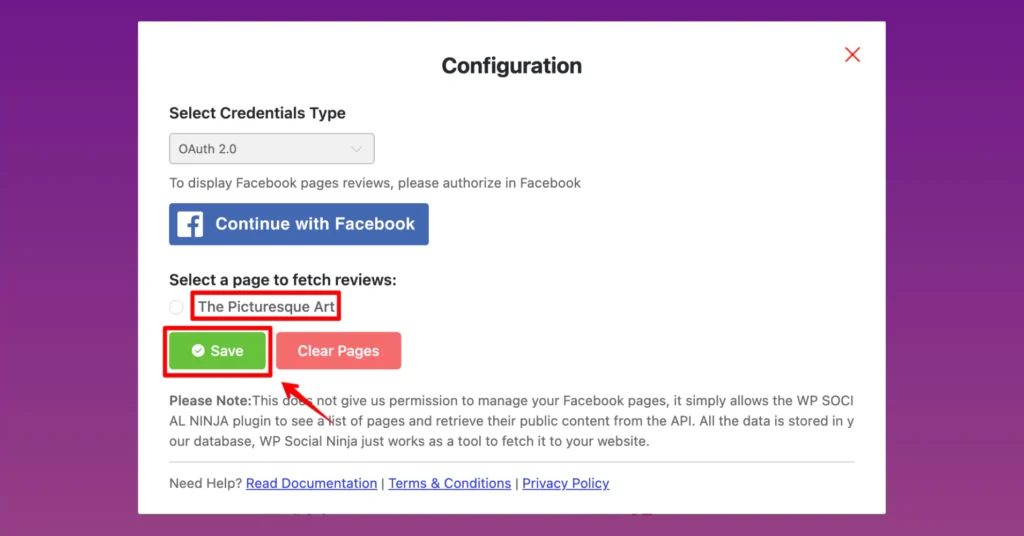
After that, select your page and click on the Save button. You are successfully connected.
Step 3: Customize your template
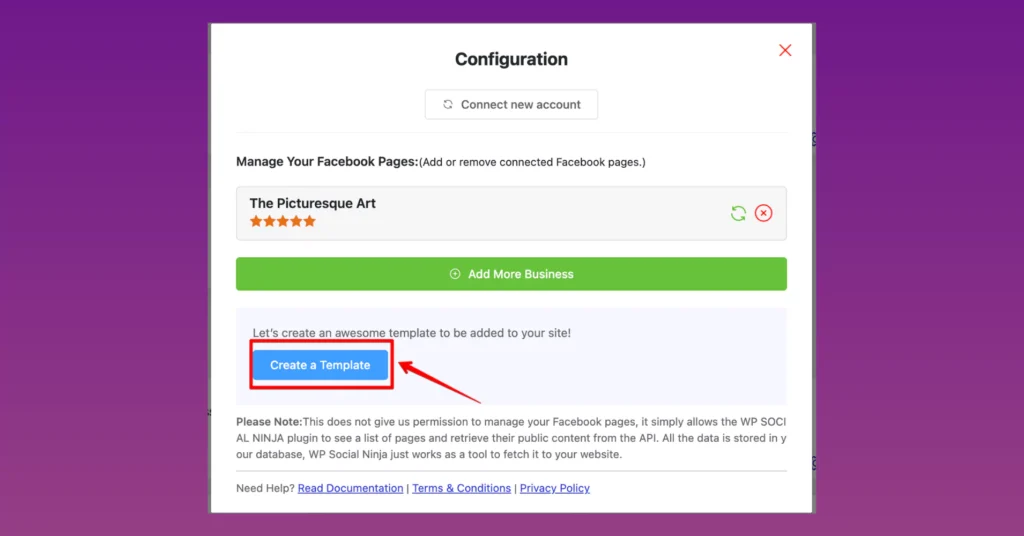
Click on the Add New Template button to customize your reviews.
After that, you will see two options: General and Style.
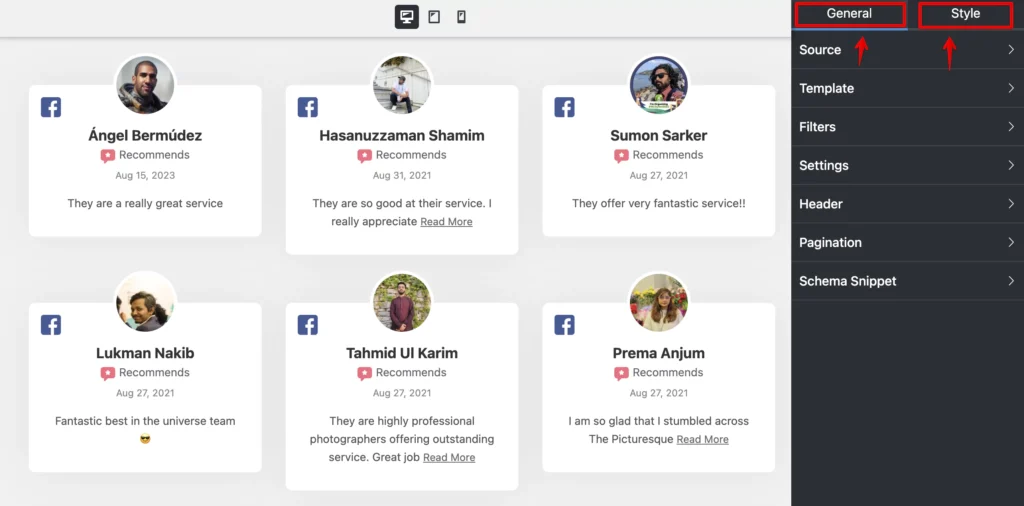
You can collect multiple pages and select reviews from multiple review platforms in the Source section. You can select from multiple templates, use the advanced Filters option where you sort reviews based on different specific criteria, and much more.
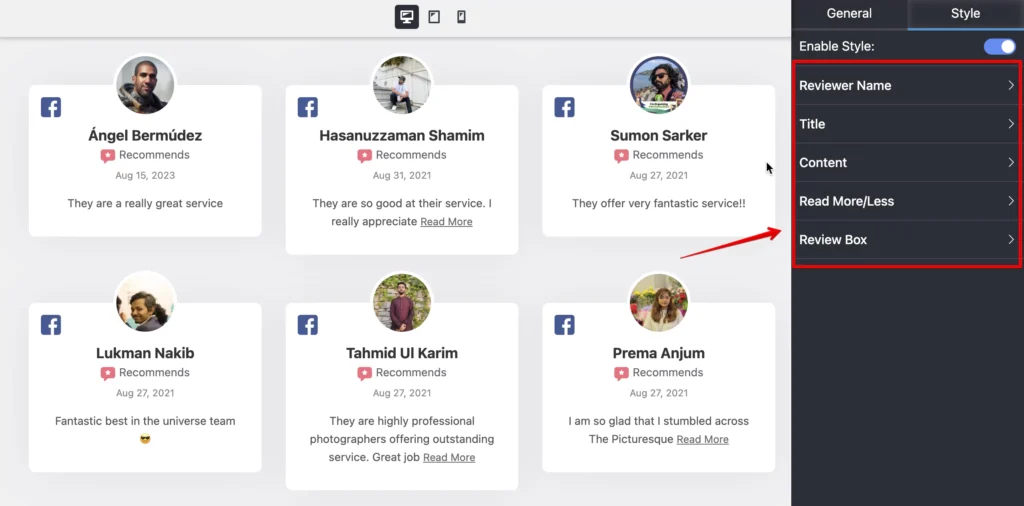
From the Style section, you can customize your reviews down to the last elements. You customize different elements like fonts, colors, and many more.
Check out the detailed Documentation for customization tips.
After customization, click on the Save Template button, copy the shortcode, and paste it to the page where you like to show your reviews.
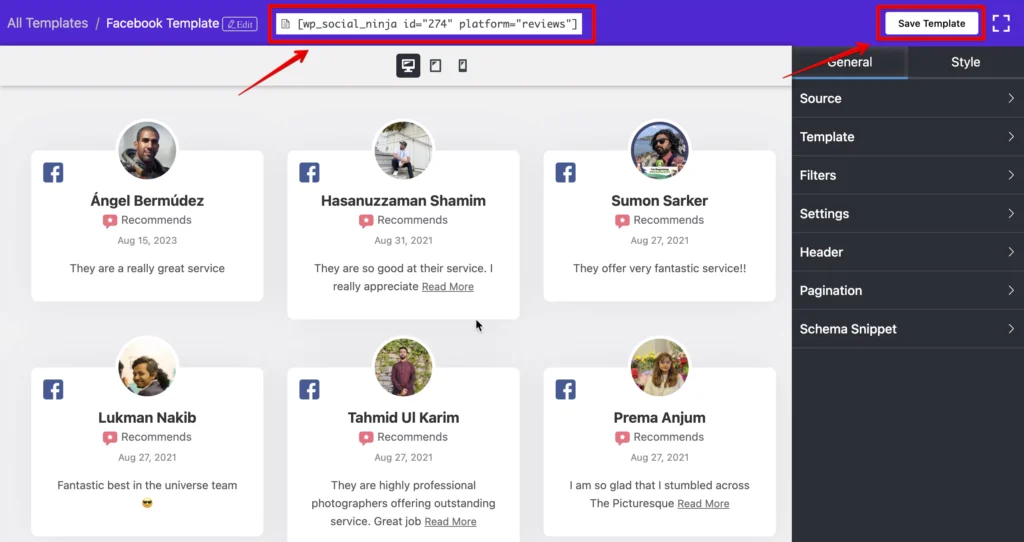
The front-end view should look like this.

Final thoughts
Facebook is the largest social media platform, and WordPress is the biggest content management system on this planet. They can open the door to huge opportunities for businesses.
However, choosing the right Facebook reviews widget for your site is important. WP Social Ninja can surely be your biggest ally in this venture.
Win your customers’ hearts with exceptional features
Discover how WP Social Ninja can assist you in designing outstanding customer experiences.

But remember one thing. Quality is the king. Therefore, always ensure that your business consistently delivers top-notch quality products or services. We wish you all the best.

Subscribe To Get
Weekly Email Newsletter
Connect, Customize, and Display Social Feeds, Reviews, and Chat widgets


Trending Posts
-

-
 Mashfik Upal Aumy
 -


Leave a Reply