The Instagram feed has a user-friendly and diverse setting panel for the users. Let’s explore –
Filters #
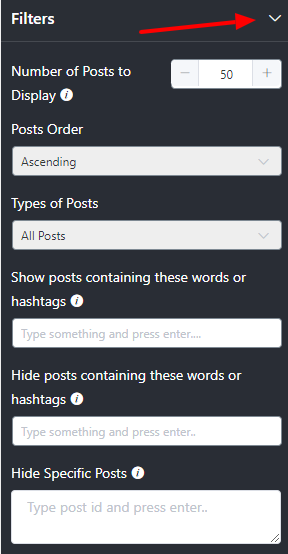
Click on the Filter button and a drop-down menu will appear.

The Filter has six sections to display your Instagram feeds; Number of Posts to Display, Posts Order, Types of Posts, Show posts containing these words or hashtags, Hide posts containing these words or hashtags and Hide Specific Posts.
Number of Posts to Display #
Here, you will be able to select the Number of Posts to Display on your website. Moreover, you can increase or decrease the Number of Posts.
To do that, click on the Plus or Minus sign.
Posts Order #
Next is Posts Order. In this section, you can adjust your post order from the following options; Ascending, Descending, Most Popular, Least Popular, and Random.
Remember: Most Popular, Least Popular, and Random posts order are for Pro features.
We have selected the Ascending Posts Order. You may select any for your feed.
Types of Posts #
After Posts Order you can set up your Types of Posts. Click on the drop-down menu and a few options will appear.
At the moment we have All Posts, Videos Only and Images Only.
We have selected Images Only and you can see all the images are displayed.
Furthermore, Types of Posts have a show/hide button that contains Searchterms or Hashtags. So now you can display a post that has a specific word or hashtag.
In this screenshot, you can see the post contains the hashtag #genesis. Similarly, you can hide your posts with a specific search term or hashtags.
Here, you can see the hashtag post is not displayed.
You can also hide your Instagram posts using the Hide Specific Posts option. You can find the ID of a Post by viewing the post on Instagram and copy/paste the ID number from the end of the URL.
Don’t forget to show/hide posts you can use multiple search terms or hashtags in the editor panel.
Post #
Once you are done with Filters the next setting is Post.
Click on the drop-down menu to continue the editing. Here we can adjust five settings; Open Post In, Display Caption, Trim Caption Words, Display Likes Count, and Display Comments Count.
Open Post In #
In this Open Post In section, you can customize where you want to open your post. We have three options at the moment; None, Open on Instagram, and Open in Popup Box.
If you click on the open on the Instagram button this will take you to the Instagram post. On the other hand, clicking on the Open in Popup Box will end up with a popup on your feed. However, Popup Box has a separate settings panel.
Open in Popup Box #
If you select Open in Popup Box a drop-down menu will appear with a few unique options.
Display Sidebar #
If you turn on the Popup Box Display Sidebar your sidebar information will be displayed on your popup box.
However, if you don’t want to display the sidebar, turn off the button.
Display Profile Photo #
Next is Display Profile Photo. Turn on the button in order to display the profile picture.
You may turn off the button to hide the profile picture.
Display User Name #
To show your username on your popup box turn on the Display Username button.
Or if you want to hide the username then you can turn off the button.
Display Caption #
The next feature is Display Caption. In this section, you can display your caption by turning on the button.
And turn off the button if you want to hide the display caption.
Display Date #
In this section, you can take control of your Display Date.
Enable the Display Date button to show the date. If you don’t want to show the date disable the button.
Display Comments #
Here, show or hide your Display Comments section.
To do that turn on/off the button. Remember, Comments are only available for posts from a business account.
Display Call to Action Button #
Next is the Display Call to Action Button. You can control your Call to Action Button in this section.
Enable or disable the button to show/hide the Display Call to Action Button on your website.
Display Caption #
Display Caption is another feature that helps to adjust the feed. Here, you will be able to control the display caption of your Instagram posts.
If you turn on the button you can see the post caption. However, turn it off if you don’t want to display the caption on your website.
Trim Caption Words #
Trim Caption Words allow you to control your caption size that will display along with the post.
Here, you can see that 15 words are displayed in your post. Click on the plus sign to increase the words. However, you can also decrease the word limits by clicking on the minus sign.
Display Likes Count #
The next filter is Display Likes Count. In this part, if you turn on the button you will be able to see the likes count on your post.
On the other hand, turning off the button hides all the likes count from your post. Remember, the Likes count is not available for personal accounts due to restrictions set by Instagram.
Display Comments Count #
Similar to Display Likes Count, Display Comments Count will allow you to show all the comments on your post.
In case you don’t want to display the comments, turn off the button.
Remember in order to adjust your Display Likes Count and Display Comments Count you need an Instagram Business Account. And comments count is not available for a personal account due to restrictions set by Instagram
Header #
For Header settings click on the arrow sign and a drop-down menu will appear.
At the moment we have ten options in the Header field.
Display Header #
In this section, you can show your Header on your feed. To do that, turn on the Display Header button.
However, if you don’t want to show the display header you can turn off the button.
Account to Display #
Once you turn on the Display Header button, this will automatically turn on the Account to Display option.
Click on the arrow button and select any account to set which account to display.
Display Profile Picture #
Once you set your display account next you need to adjust your Display Profile Picture.
Here you can see the Display Profile Photo button is turned on and the profile picture is showing. Turn off the button if you don’t want to display the profile photo.
Note that a Profile picture is not available for personal accounts due to restrictions set by Instagram, in that case, you can upload a custom profile picture from our [Header → Custom Profile Photo] option.
Display Username #
Next is Display Username. You can show your username by enabling the button.
To hide the username you can disable the button.
Display Full Name #
After Display Username you can customize your Display Full Name.
You can enable/disable the button to customize your Display Full Name.
Display Bio Text #
After you set up your Display Full Name, you need to customize your Display Bio Text. In order to do that, turn on the display bio text and your bio will be displayed on your website.
If you don’t want to show your bio on your website just turn off the button.
Remember, Profile Bio text is not available for personal accounts due to restrictions set by Instagram, in that case, you can upload custom profile bio text from our [ Header → Custom Bio Text ] option.
Display Posts Count #
The next field is Display Posts Count. Here, you can show your display post counts by enabling the button.
However, disable the button in order to hide your display posts count.
Display Followers Count #
In this section, you can adjust your Display Followers Count. You can see the button is turned on and the followers count are showing.
Turn off the button if you don’t like to show the followers count on your website.
Note that Followers count is not available for personal accounts due to restrictions set by Instagram.
Custom Profile Photo #
In this Custom Profile Photo section, you can add your new image to display it on your website.
However, you can also replace the image.
Custom Bio Text #
Lastly, you can customize your Custom Bio Text and insert something that suits your brand.
Once you are done click on the Save Template button to preserve your settings.
To adjust your Display Posts Count, Display Followers Count, Custom Profile Photo, and Custom Bio Text you need to upgrade to the Premium version.
Follow Button #
The next feature is the Follow Button. To get this feature you need to upgrade to the Pro version.
Once you click on the arrow button a drop-down will come up.
Display Follow Button #
Turn on the Display Follow Button to adjust Follow Button Position and Button Text.
Follow Button Position #
Here, you can select your Follow Button Position on your website. Click on the arrow and a drop-down menu will come.
At the moment we have three options; Header, Footer, and Both. As you can see the Follow on Instagram is in the Header area. You may select any position for your brand.
Button Text #
Once you are done with the Follow Button Position you can edit your Button Text.
Here, you can write any custom text for your website.
After you are done don’t forget to click on the Save Template button to save your settings.
Pagination #
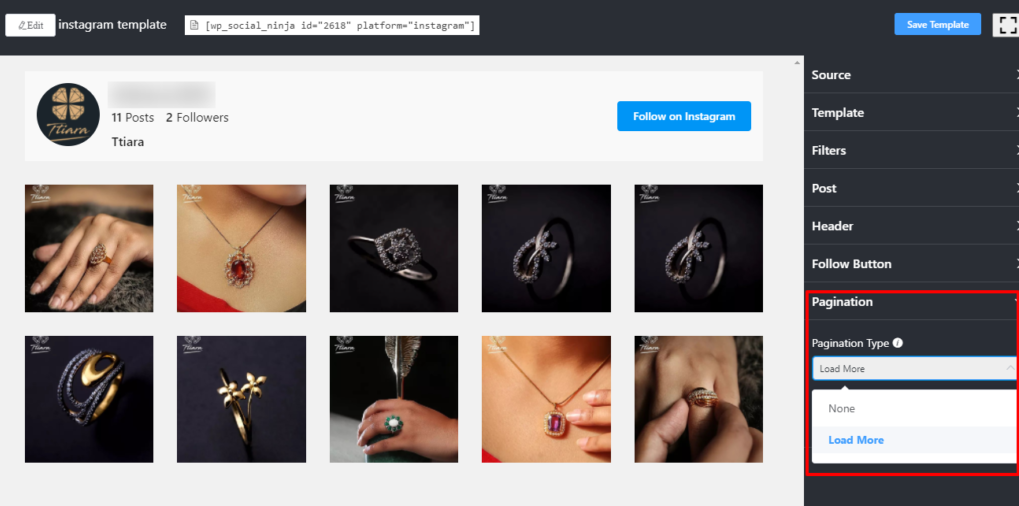
At this stage, you can adjust the Pagination from the settings.

Pagination Style has two options at the moment. You can pick any from None or Load More.

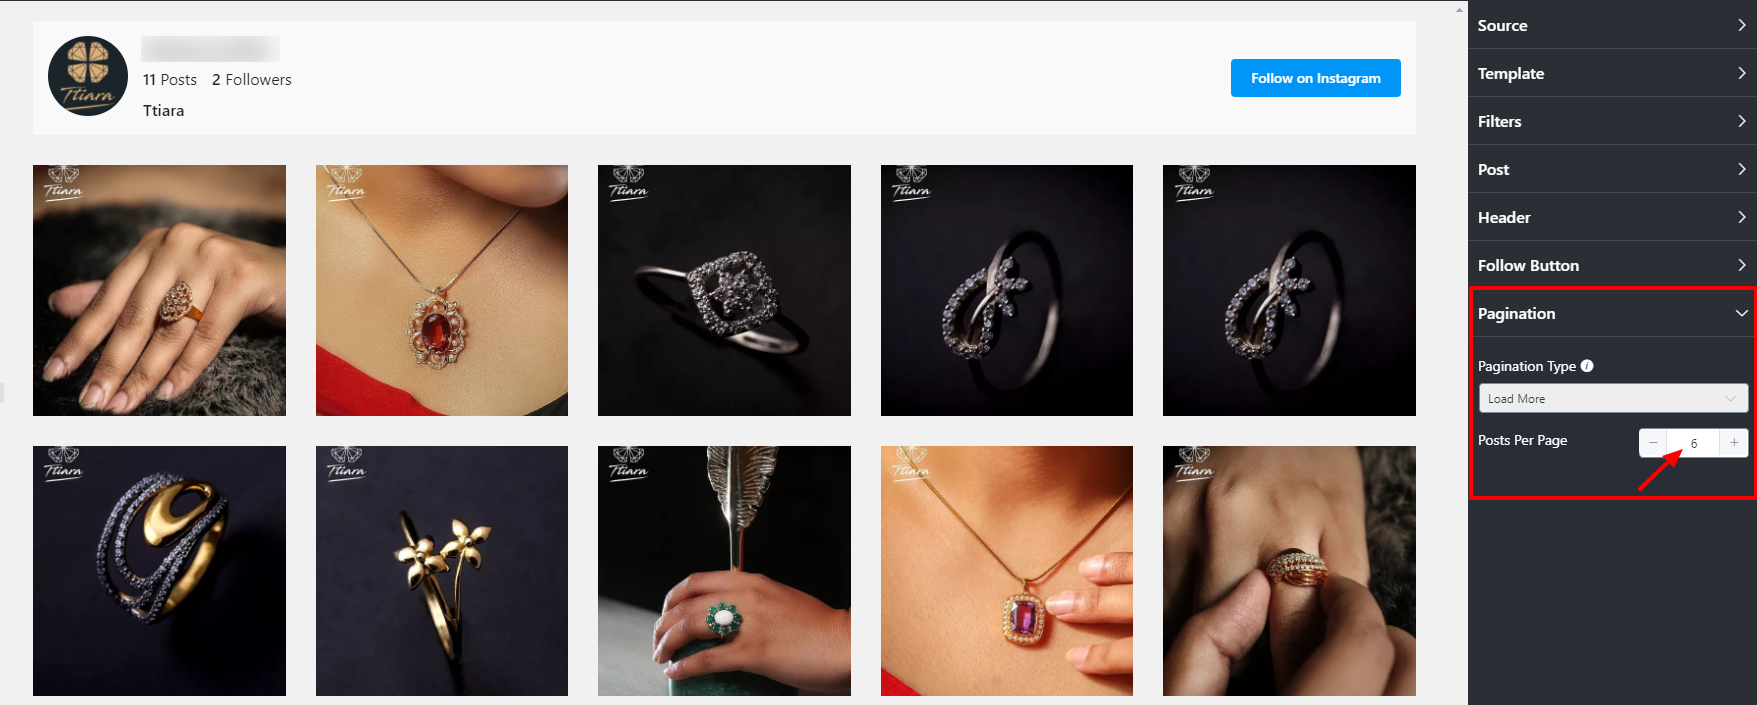
If you select the Load More option, it’ll ask you to adjust your Post Per Page.
Note: The Load More button will only display on your site’s preview/live pages/posts not while you’re in editing mode in the WordPress Editor.
Easy and Simple Instagram setup!
Also, check out – Instagram Feed Layout


