
Changing Template Layouts are fun to do. You have the authority to change your Layouts the way you want.
Template Layouts #
Let’s check how you can change your Social Reviews Template Layouts in just a few clicks.
Source #
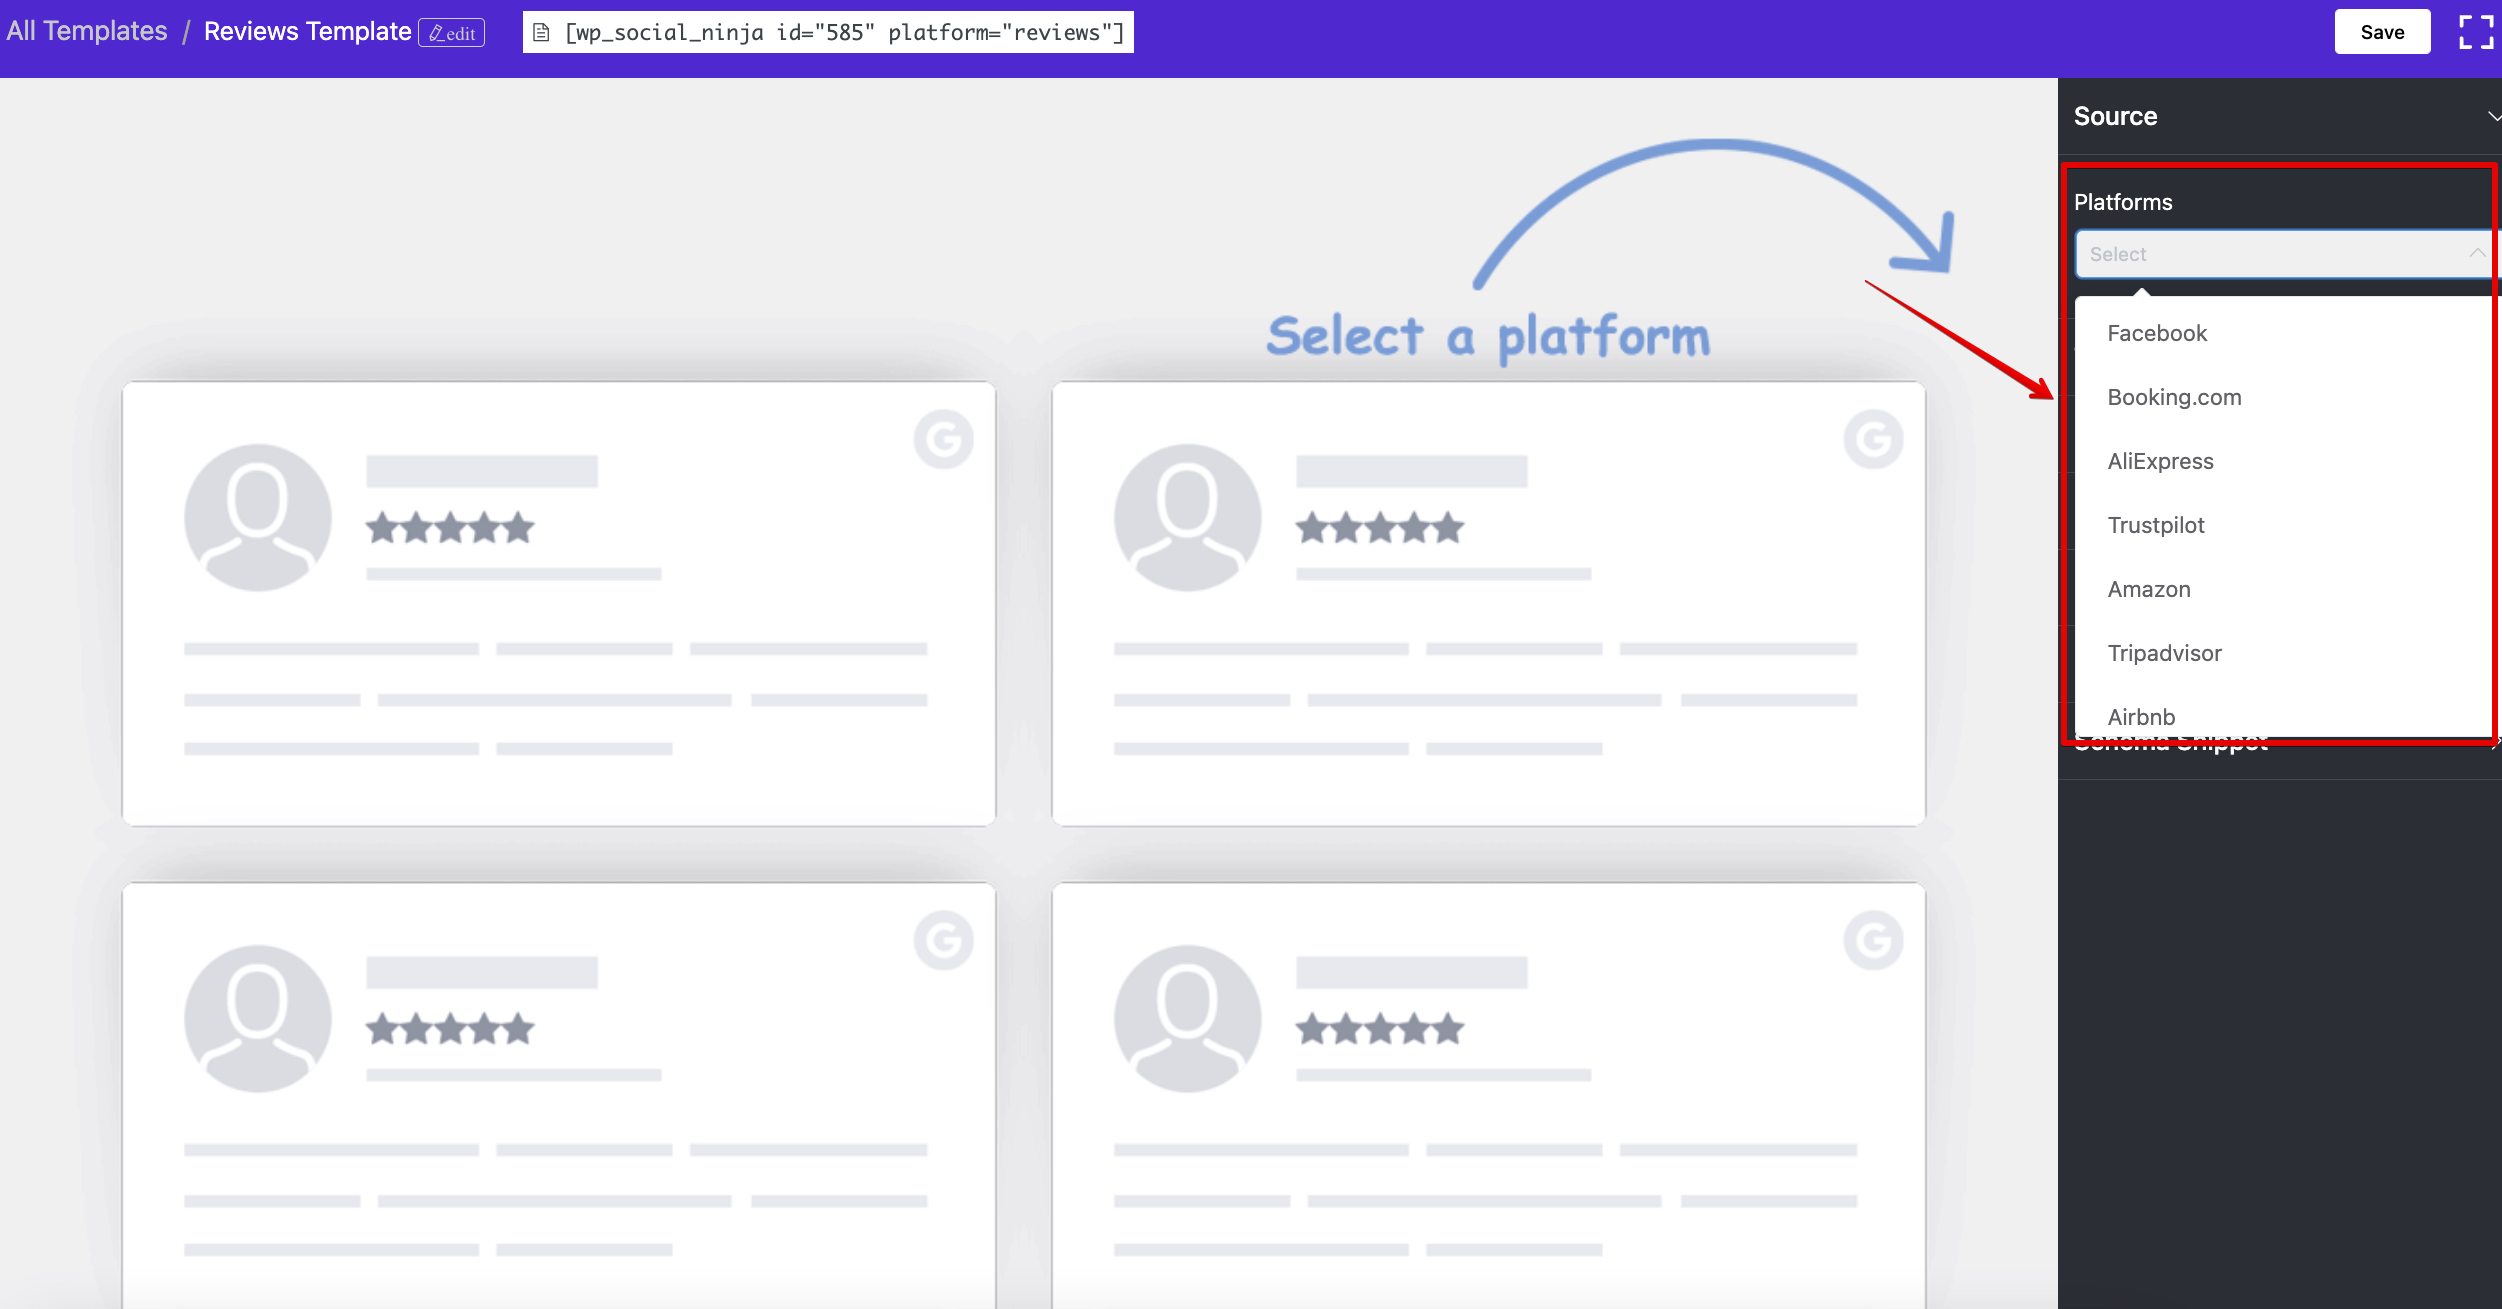
To change your Template Layout, click the Source button, and a drop-down menu will appear. You can Select a Platform, or you can select all the Platforms.
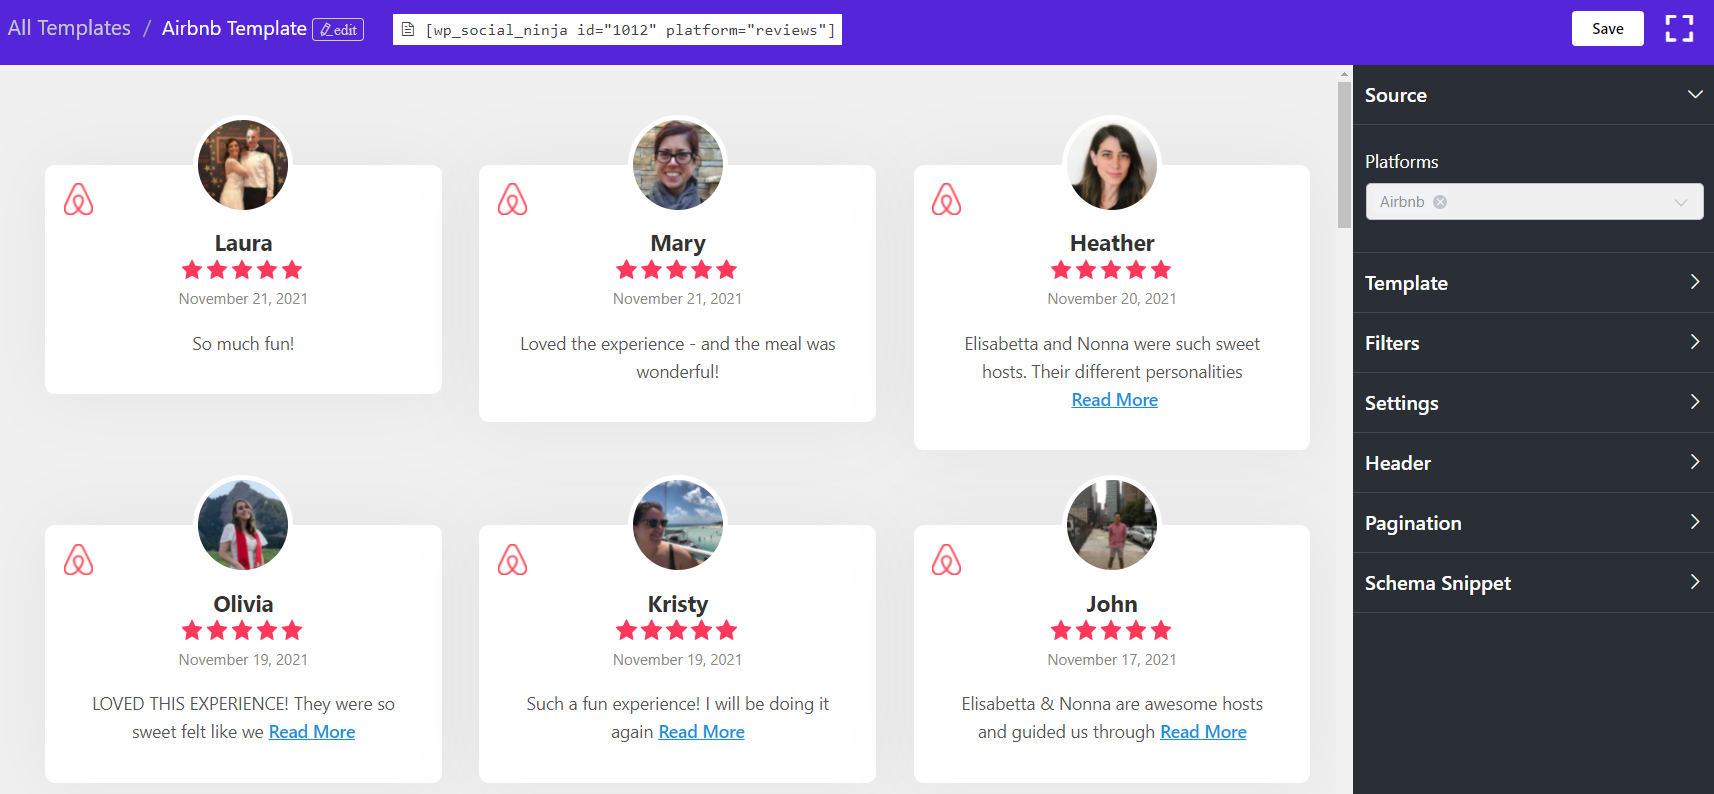
Here, the Airbnb platform was selected. Reviews/Recommendations have appeared automatically after selecting multiple Platforms.
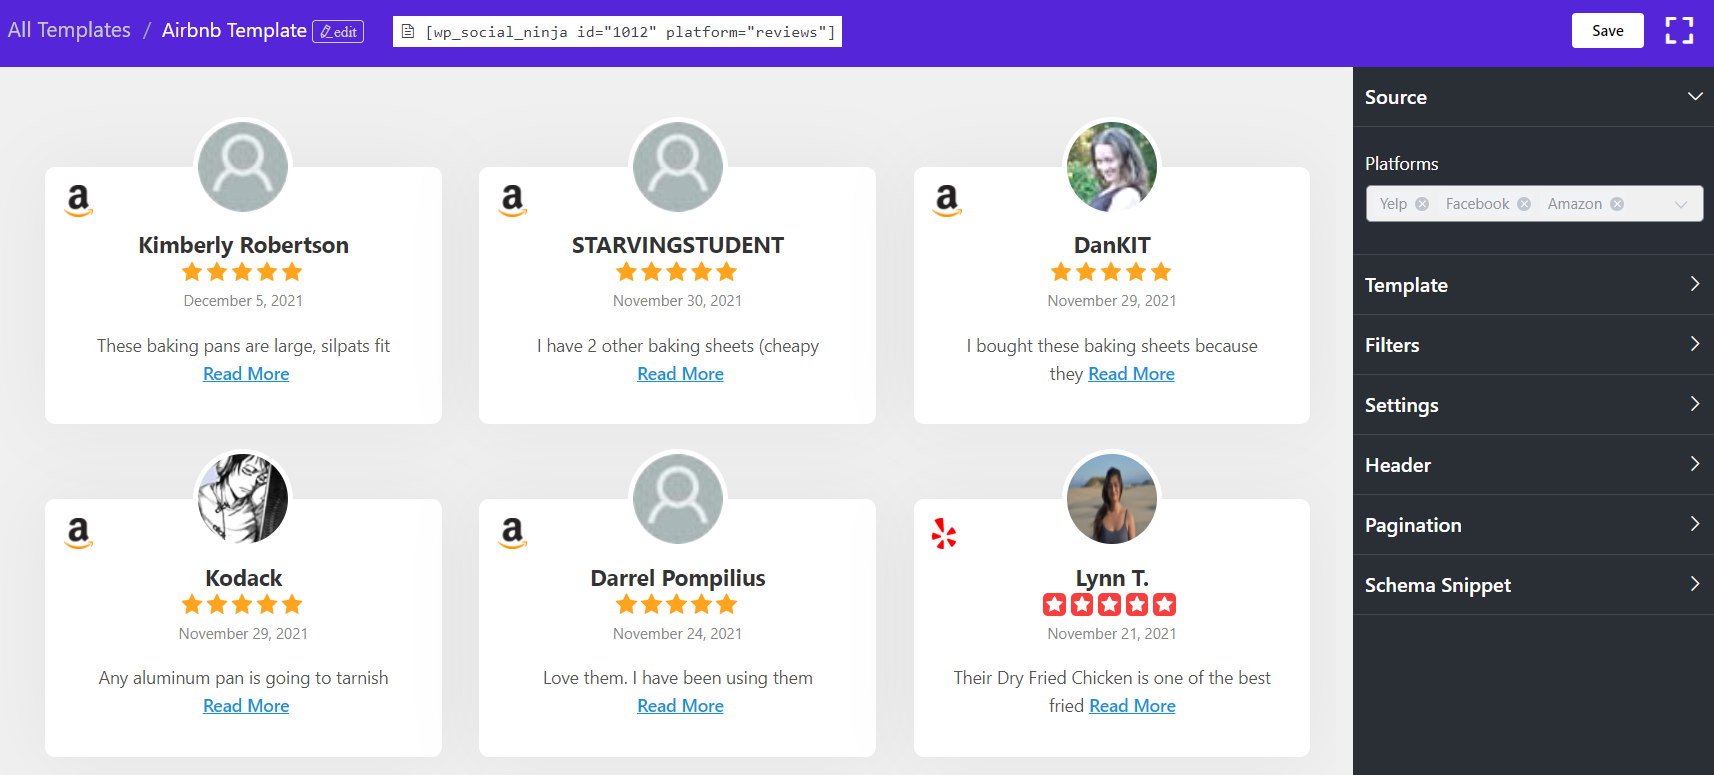
You can see multiple Platforms are selected, and all the Reviews/Recommendations are displayed on the Front End.
In this section, we will guide you on how you can easily adjust your Template Layouts using WP Social Ninja to design your Website.
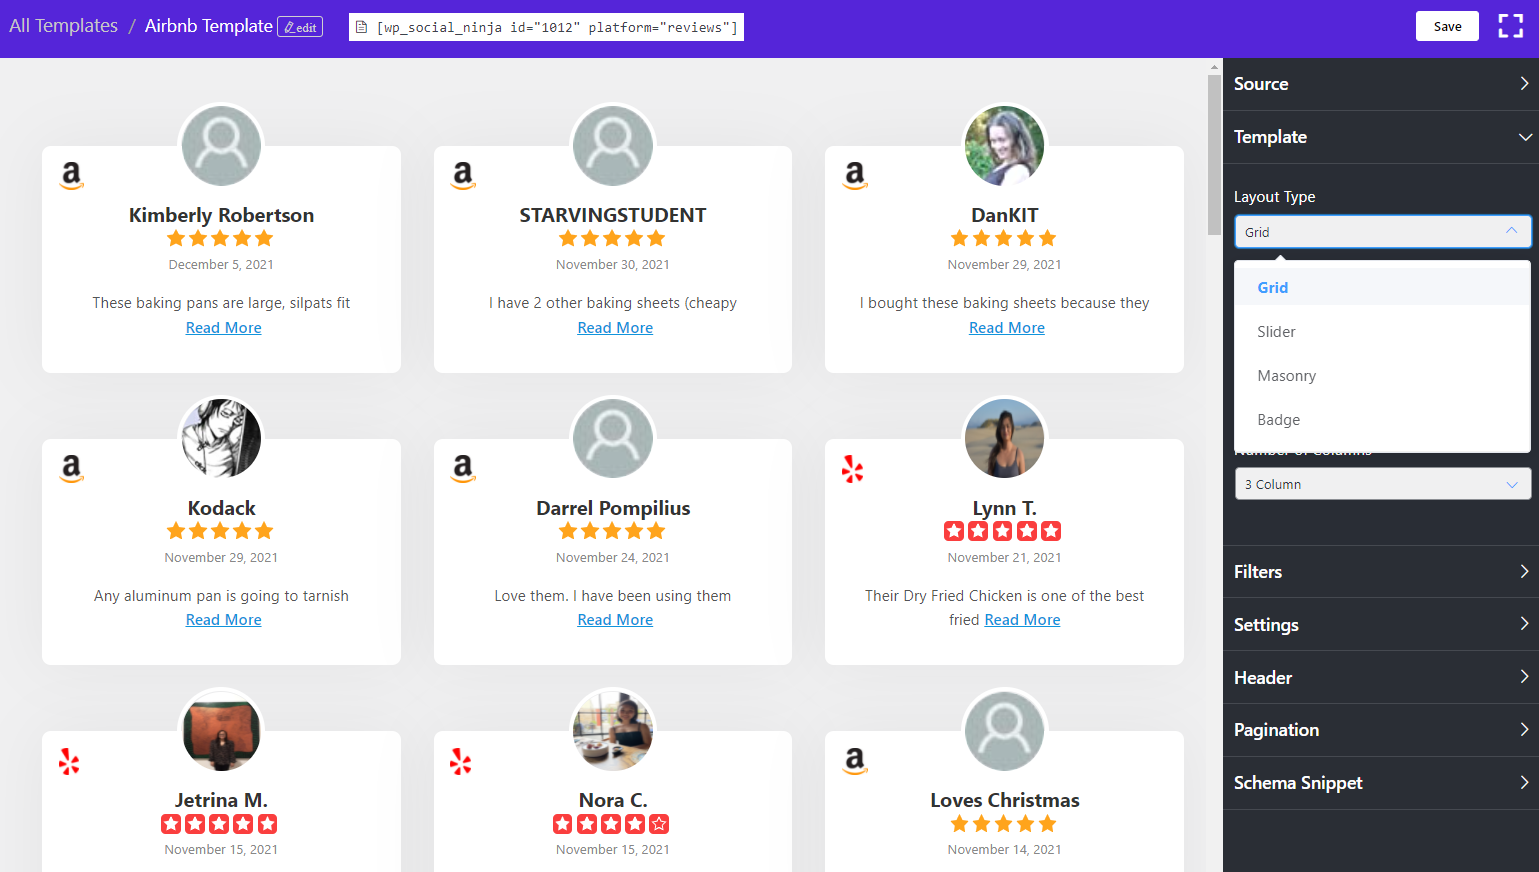
Template #
You can change your Layout Type from the drop-down option. Three Types of Layouts are available right now. Grid, Slider, Masonry and Badge – these Layouts have specific designs to structure contents.
Template Types #
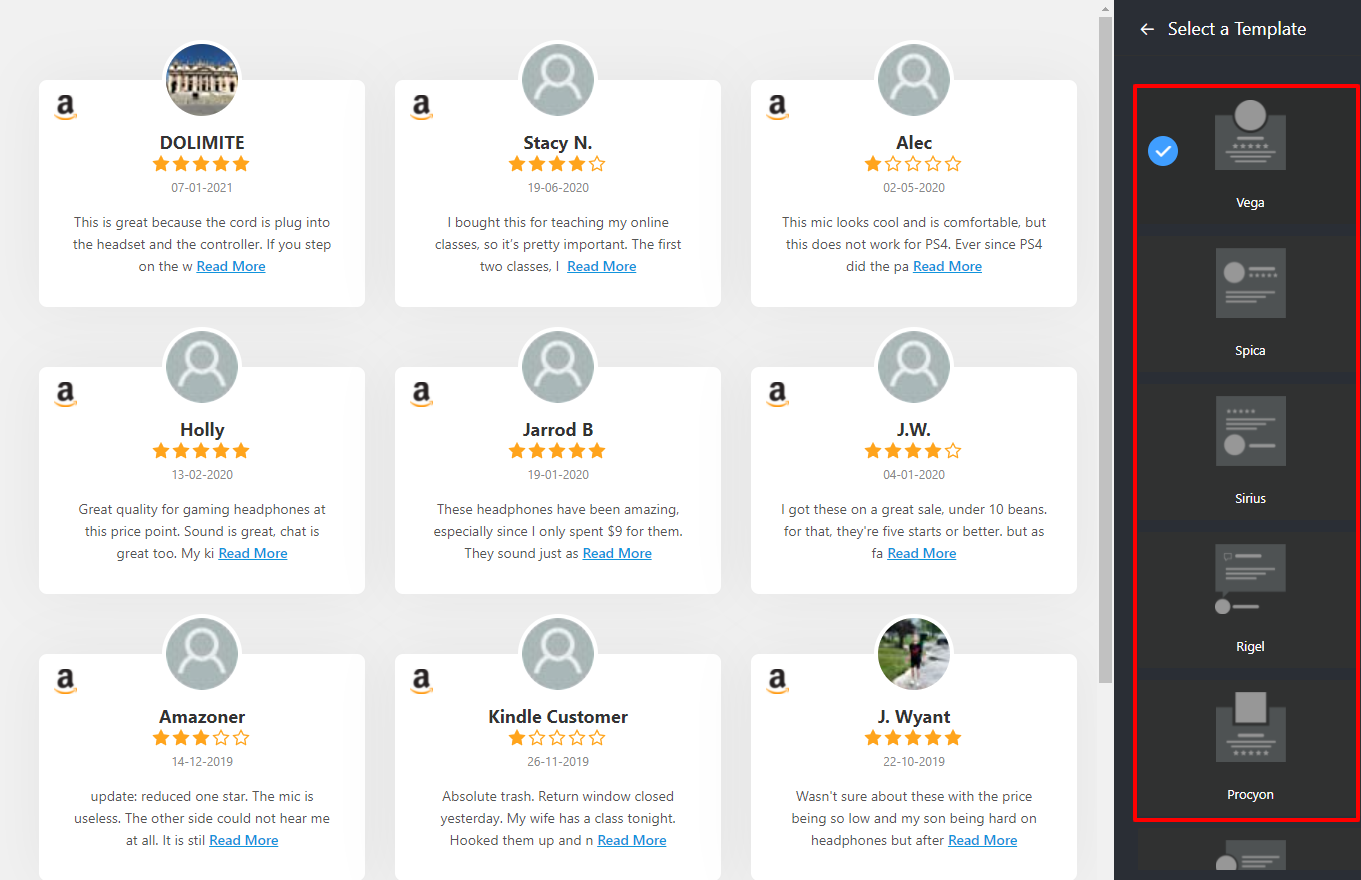
Select a Template to redesign your Layout. There are Ten Template Types are available at the moment.
Vega, Spica, Sirius, Rigel, Procyon, Pollux, Mimosa, Hadar, Deneb, and Polaris. Like Layout Types, different Templates have the power to change the outlook of your Website.
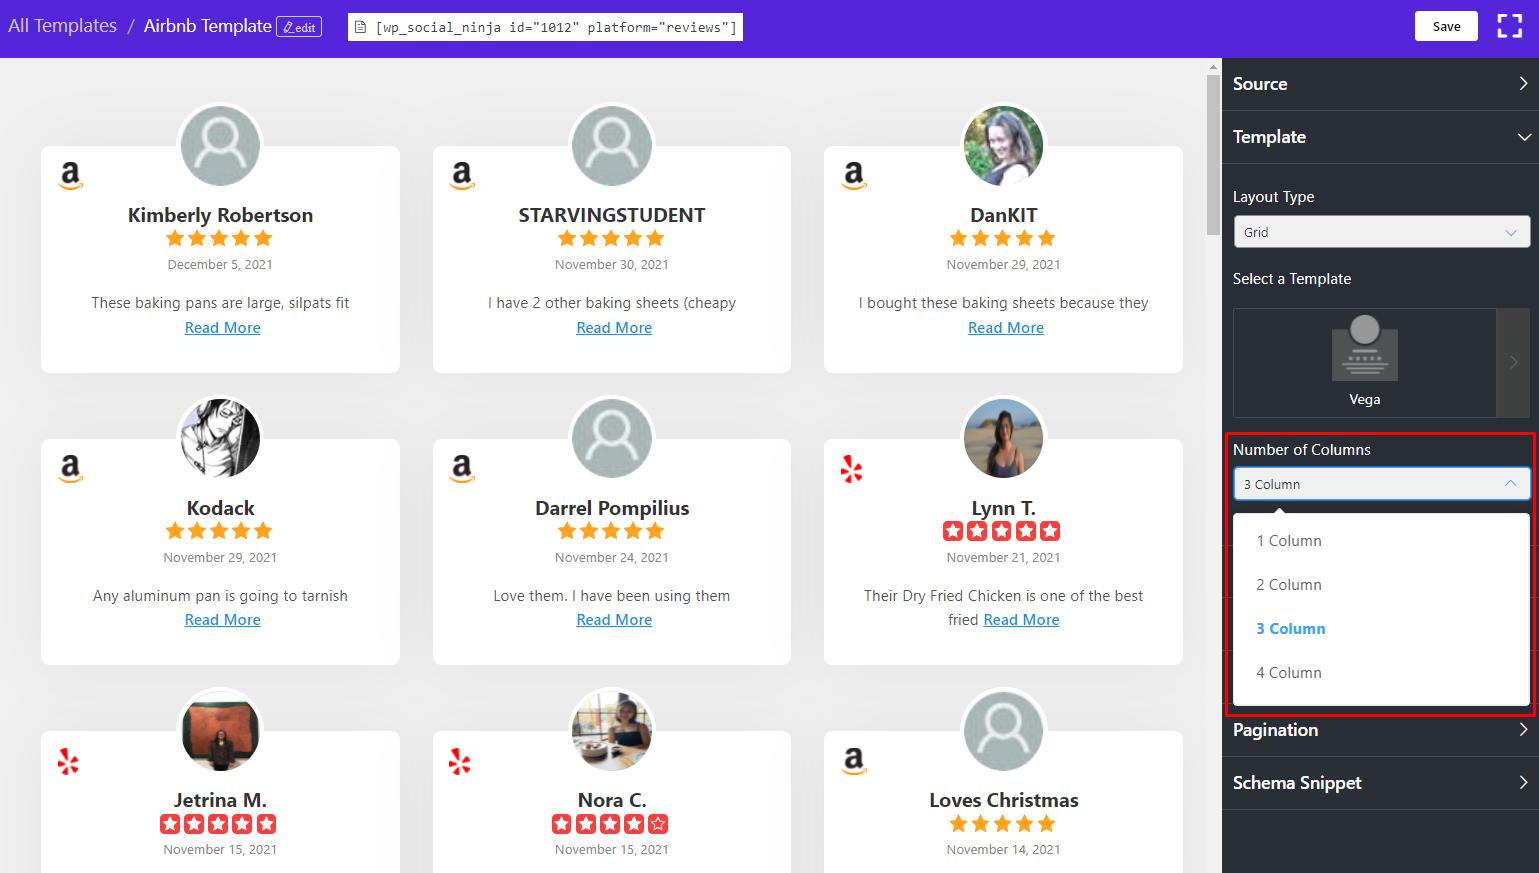
Number of Columns #
Once you are done with the Layout Type, you can also customize the Number of Columns. Here, you can choose from column options from the drop-down menu. Right now we have 1 Column to 4 Columns.
In our demonstration, 3 Columns are selected to display the reviews.
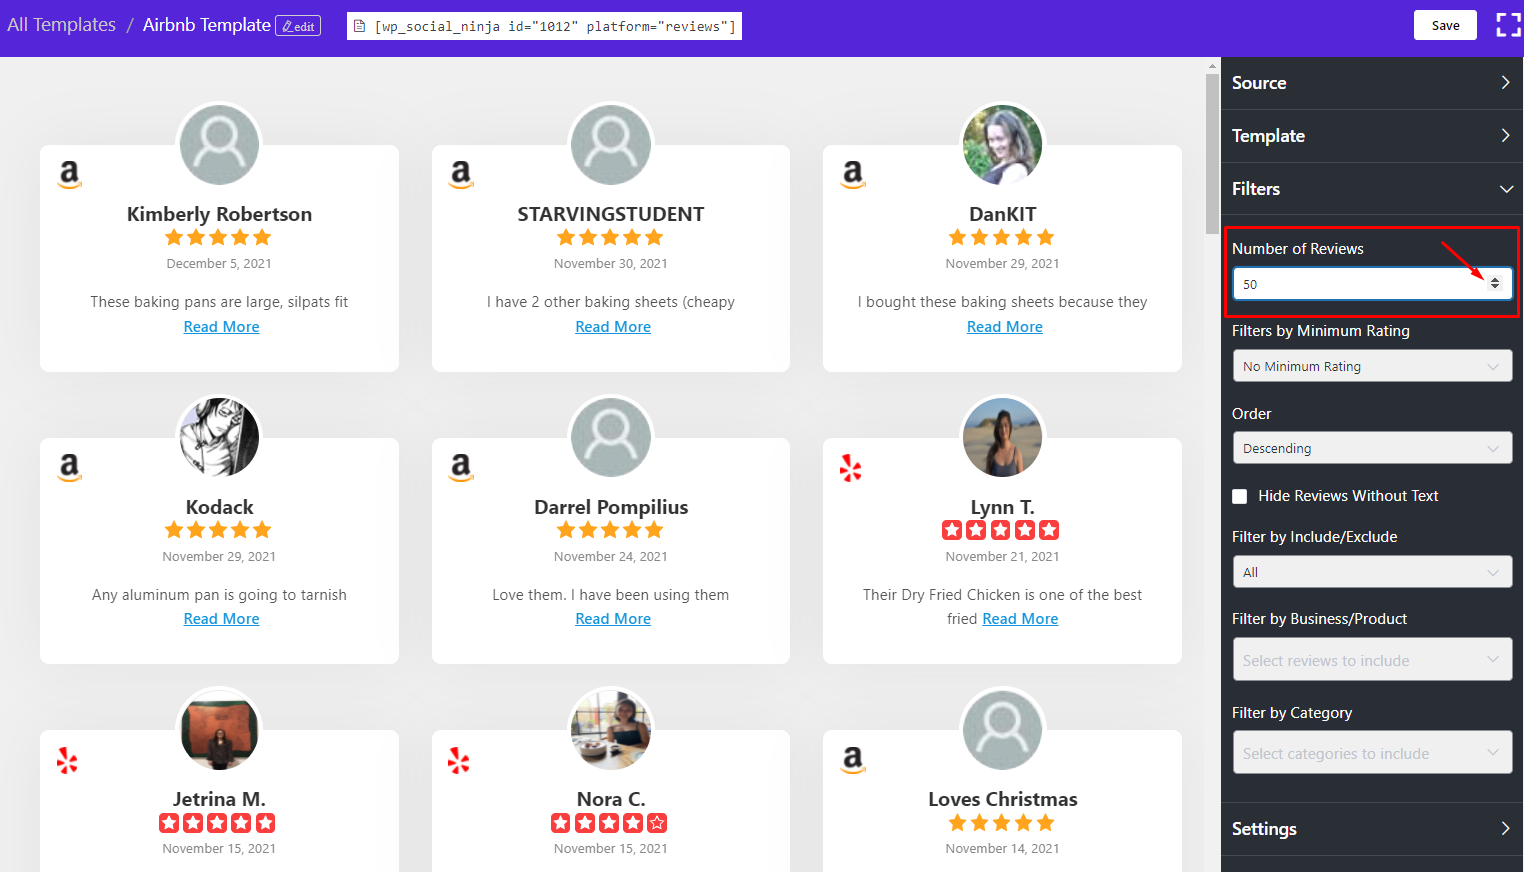
Filters #
Next, the Number of Reviews will appear. You can change the numbers according to your preference from the scroll bar.
For each platform, you can select up to 100 reviews from the scroll bar.
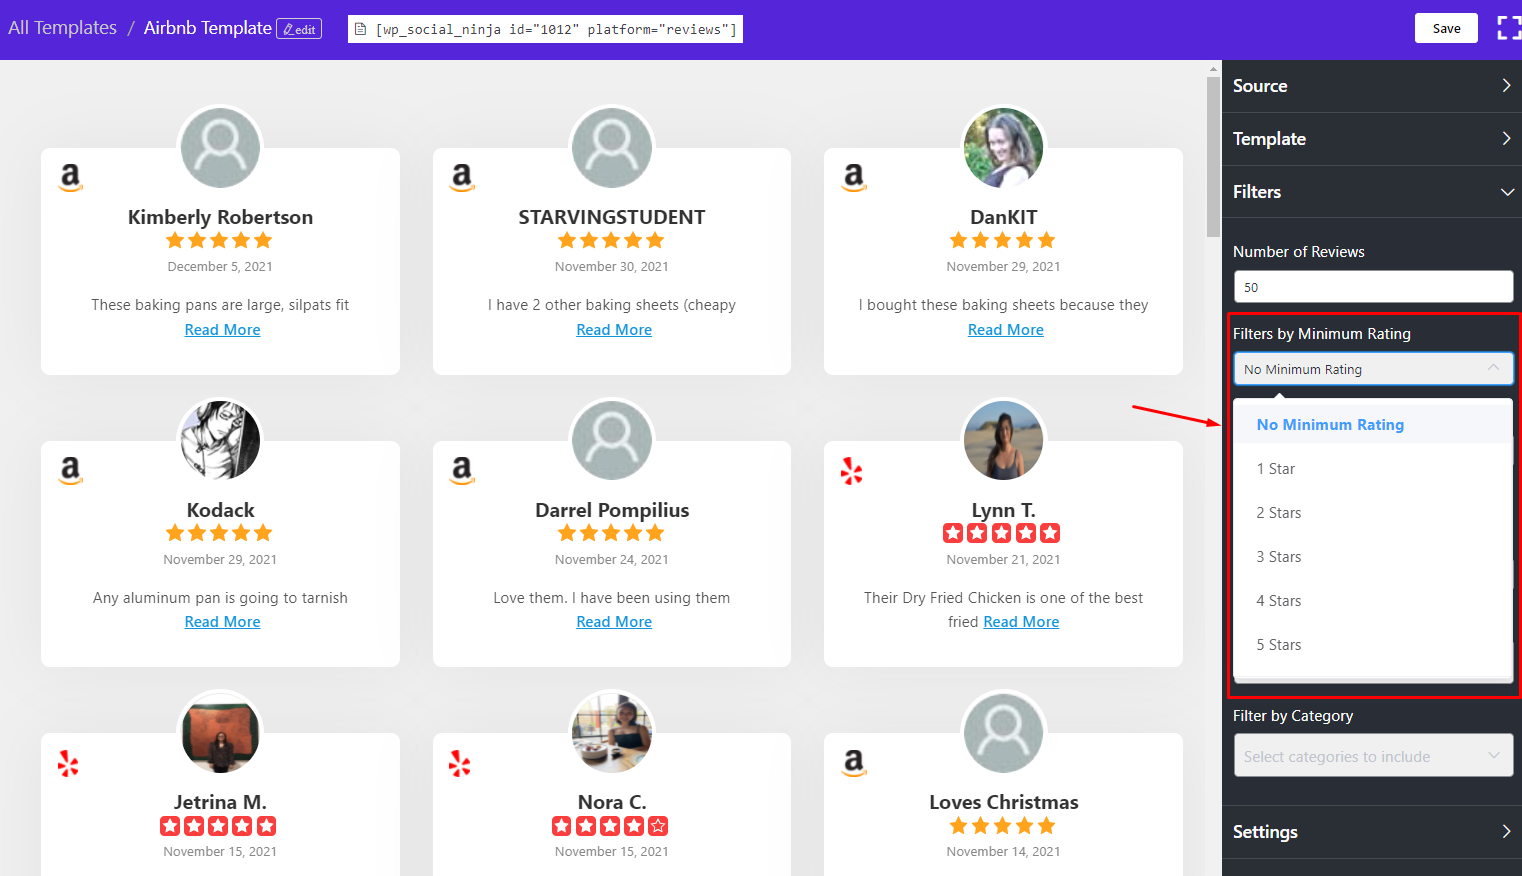
Filters by Minimum Rating #
Did you know that you can filter your Review Ratings? If you want to add only a specific number of stars, you also have that option.
You will have six options to choose from No Minimum Rating to Five Star to display your Reviews. Here, we have selected No Minimum Rating.
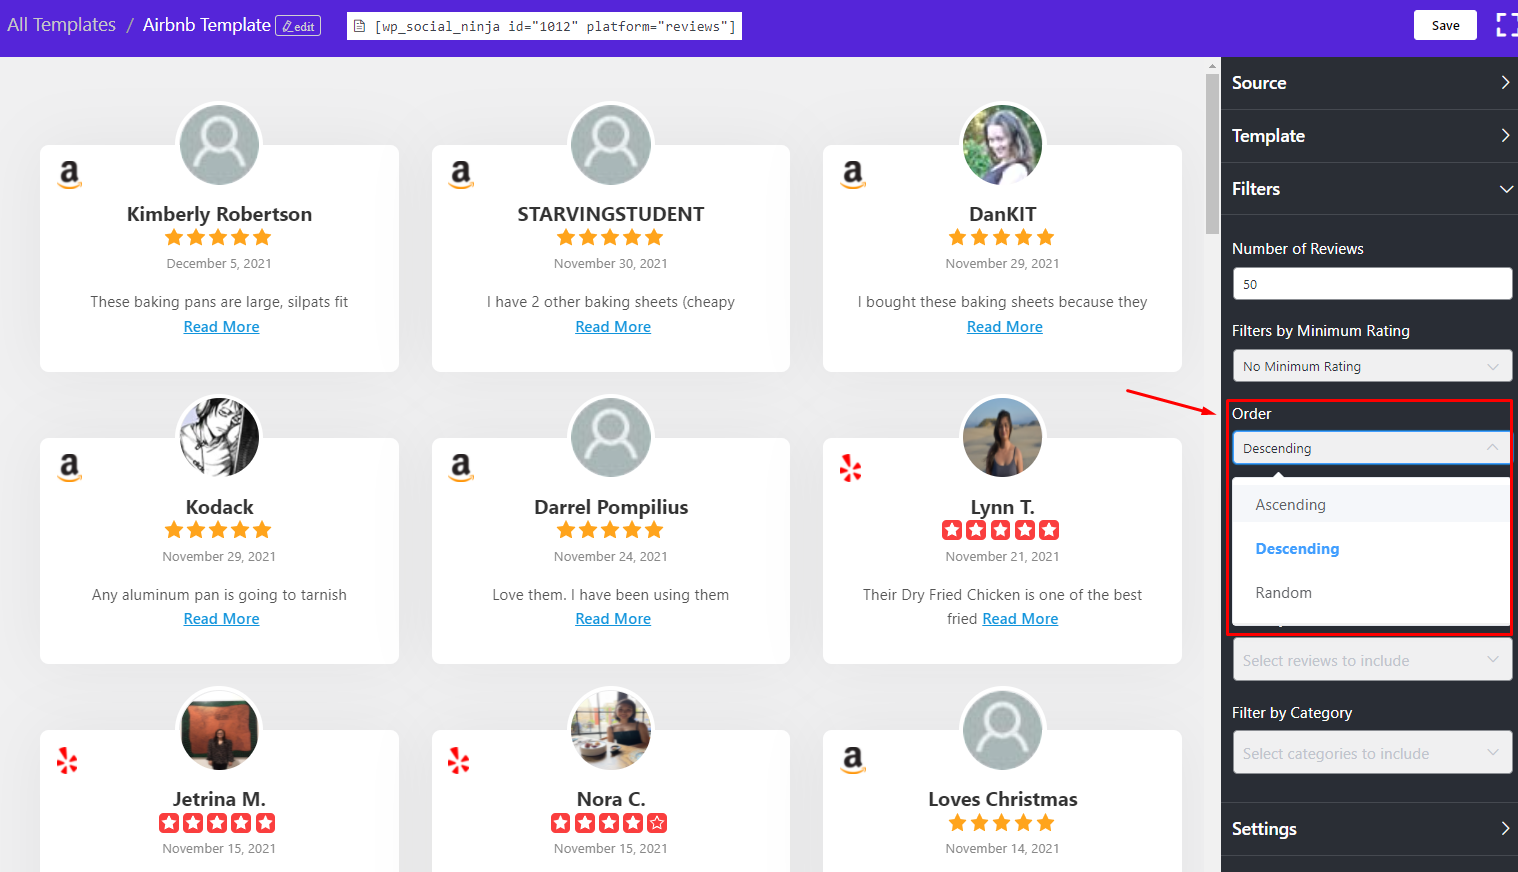
Filter by Order #
Here, you have two options! You can choose the reviews to be displayed in Ascending, Descending, or Random order.
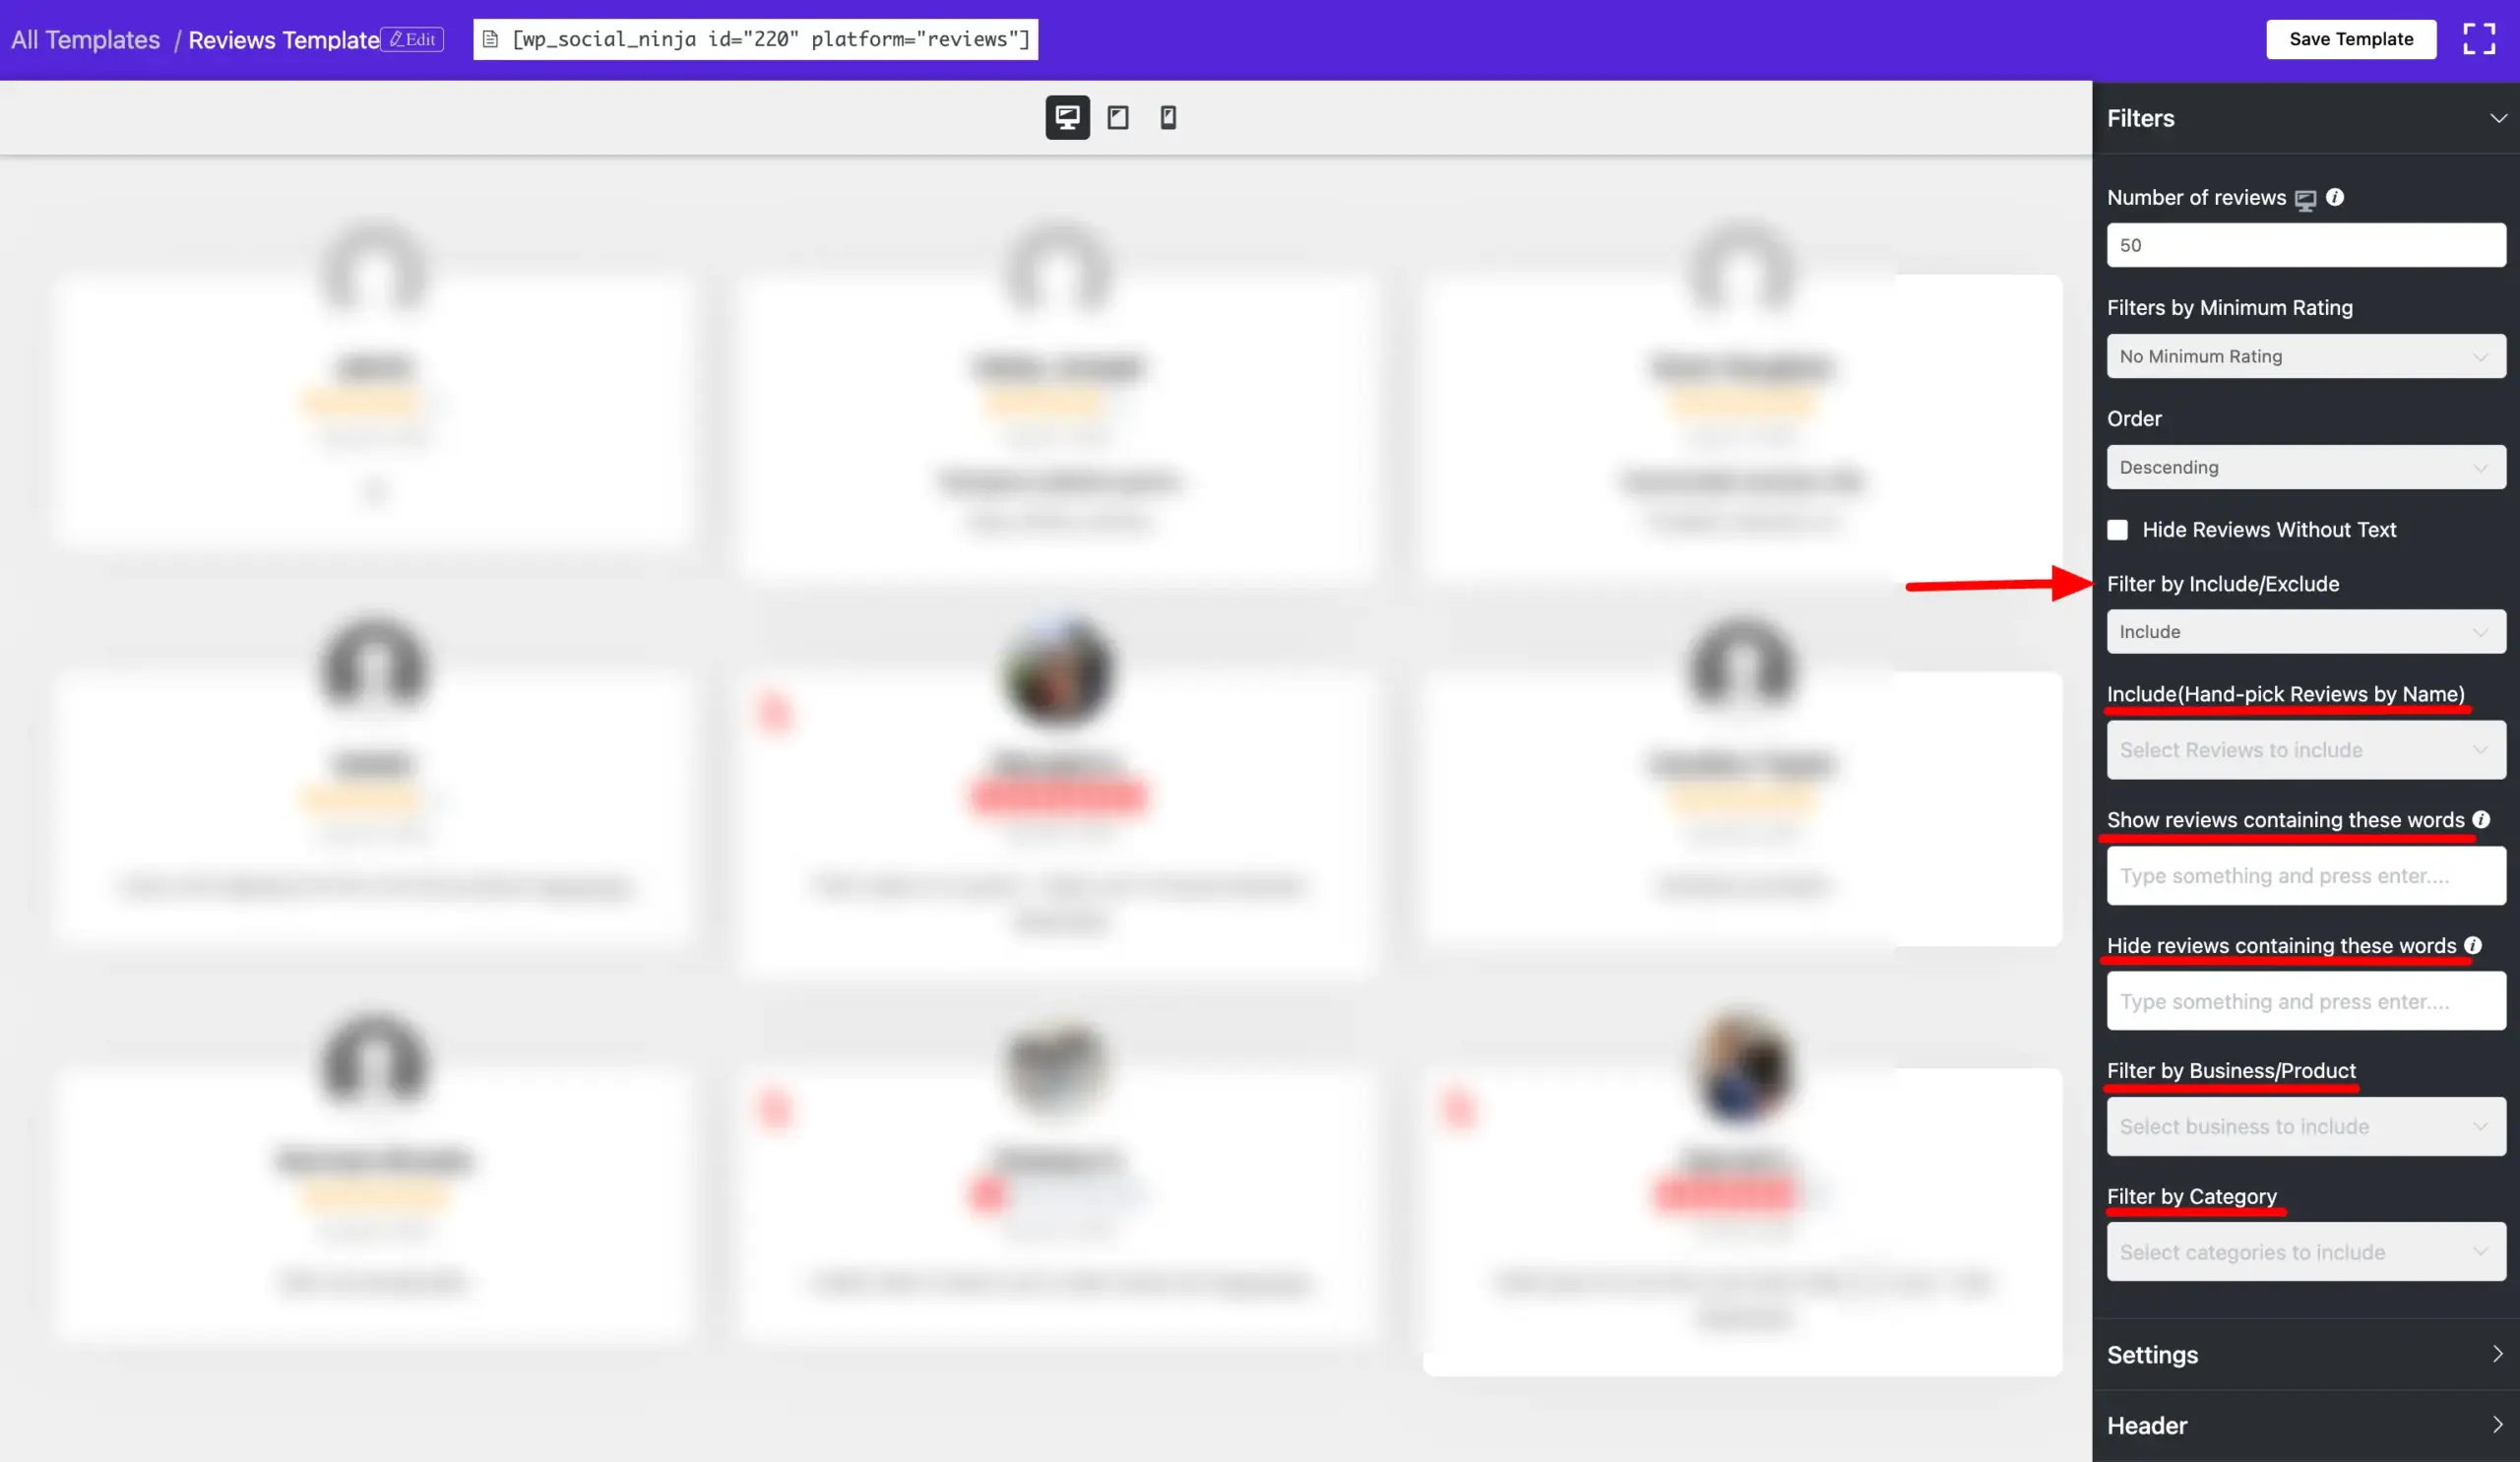
Filter by Include/Exclude #
If you click Include/Exclude, a drop-down menu will appear, and you can pick the Hand-picked reviews by the reviewer names, words or filter them by Business/Product. And by clicking All from the dropdown, you are allowing all the Reviews/Recommendations to display on your site.
However, you can also Exclude specific reviews by following the same way you have Included.
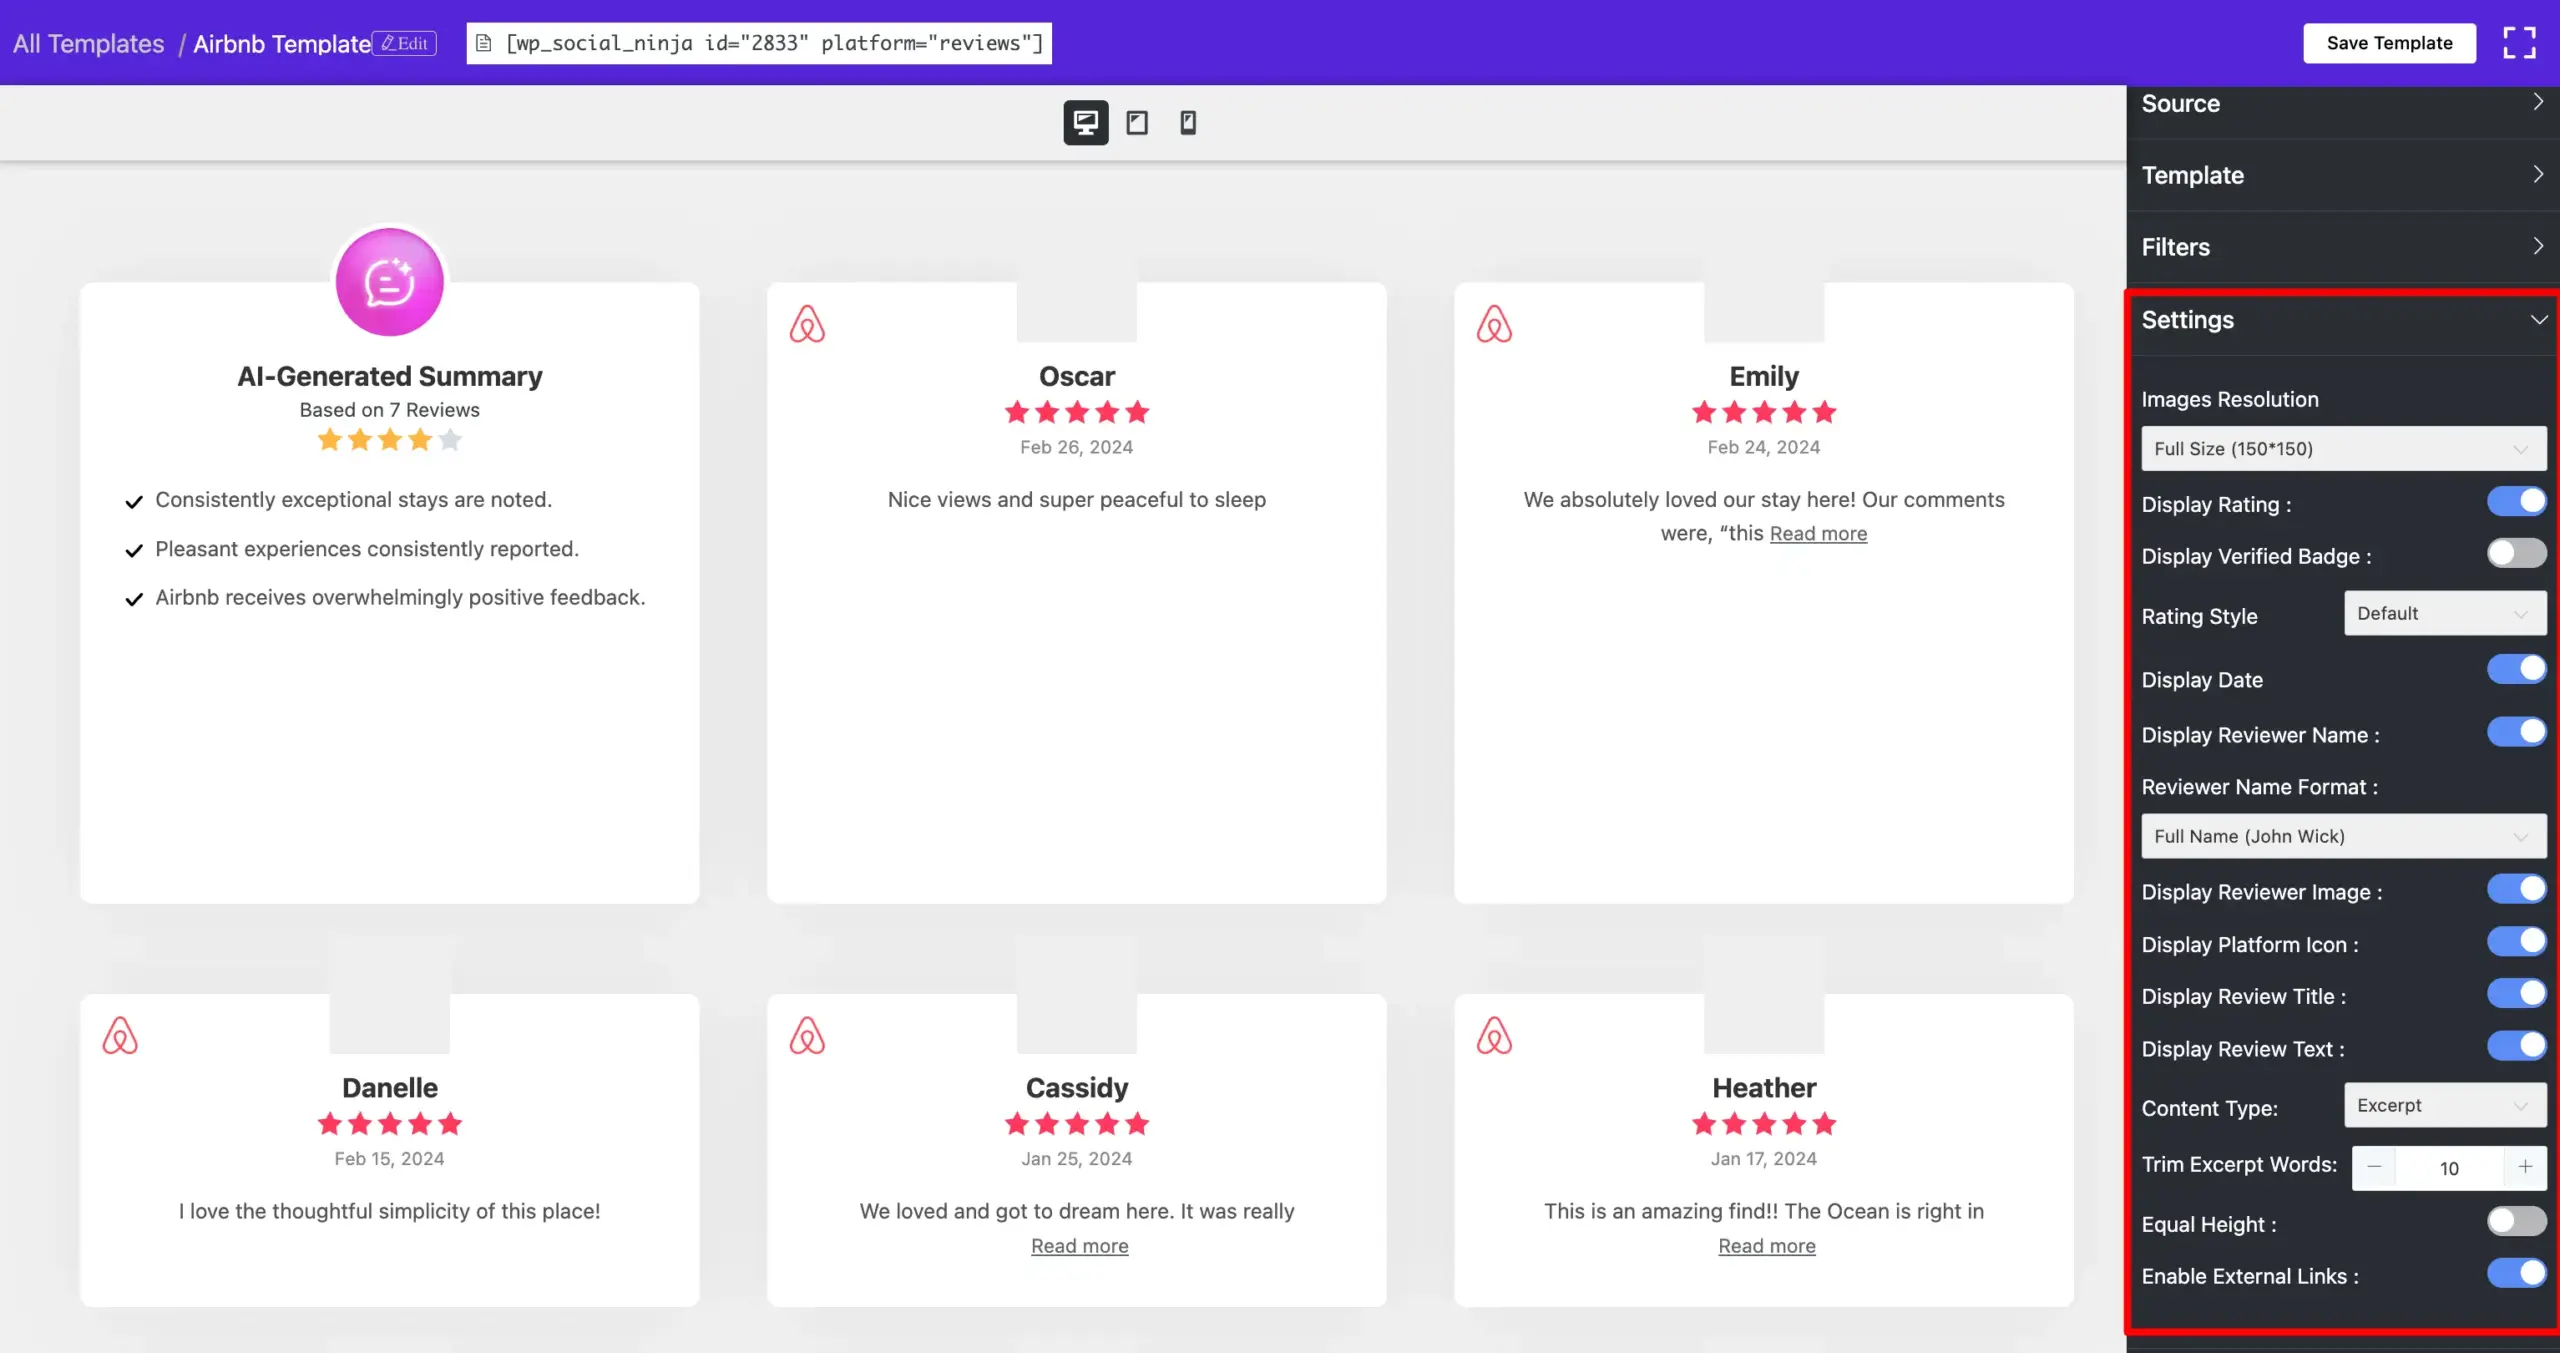
Template Settings #
This panel lets you control the details shown in your review templates. Use these toggles and dropdowns to fine-tune the layout, text, and visual elements.
Visual Options
- Images Resolution: Choose the resolution for reviewer images. Full size shows clearer thumbnails.
- Rating Style: Select how the star ratings will be styled (e.g., Default, Outline, Gradient).
- Equal Height: Turn this ON to keep all review boxes the same height. This ensures a tidy layout regardless of content length.
Reviewer and Review Display
- Display Rating: Show or hide the star rating for each review.
- Display Verified Badge: Show a badge to indicate the review is from a verified reviewer on the original platform. This helps build trust by confirming authenticity.
- Display Date: Show the date when the review was posted.
- Display Reviewer Name: Turn this ON to display the name of the reviewer.
- Reviewer Name Format: Choose whether names are shown in full or initials (e.g., John Wick vs. J.W.).
- Display Reviewer Image: Show or hide profile pictures for each reviewer.
- Display Platform Icon: Toggle this ON to display the source icon (e.g., Airbnb).
- Display Review Title: Enable this to show the title of each review (if available).
- Display Review Text: Show or hide the full or partial review text.
Text Handling
- Content Type: Choose between Full Text or Excerpt to control how much of the review content is visible.
- Trim Excerpt Words: If using Excerpt, set the number of words to show from each review.
- Enable External Links: Toggle this ON to make “Read more” or other links in the review clickable.
Display Header #
Toggle this switch ON to show a header section above your reviews. The header usually contains the platform logo (e.g., Yelp, Google, WooCommerce), the overall rating, number of reviews, and a “Write a Review” button.
Header Template #
Choose from the available header design styles (Template 1, Template 2 ( Only for WooCommerce Review, etc.). Each template changes how the header looks (layout, alignment, and style).
Header Elements to Display #
Here you can choose what information to show in the header.
- Display Logo: Shows the source logo (e.g., Yelp, Google, WooCommerce icon).
- Display Title: Shows the review source title, such as “Yelp Rating” or “WooCommerce Reviews.”
- Display Rating: Displays the average rating.
- Display Number of Reviews: Shows how many total reviews are available (e.g., “Based on 1,506 Reviews”).
- Display Write a Review Button: Adds a button so users can submit their own reviews.
Custom Title Text #
Override the default platform title with your own text.
Example: Instead of “Yelp Rating,” you could write “Customer Love” or “What People Say.”
Custom Number of Reviews Text #
Change the text that appears next to the total number of reviews.
Example: Default is “Based on {total_reviews} Reviews.” You could change it to “Trusted by {total_reviews} happy customers.”
Custom Button Text #
Change the text on the “Write a Review” button.
Example: Instead of “Write a Review,” you could write “Share Your Experience” or “Leave Feedback.”
Add “Write a Review” URL? #
When enabled, this option allows you to link the “Write a Review” button to an external form URL or another page (instead of a Fluent Form).
Button Source Type #
Select how the “Write a Review” button will work.
- Fluent Form Shortcode ID: Use a Fluent Form as the review submission form.
- Custom URL: Use Custom URL for review submission.
Custom URL #
Instead of connecting the “Write a Review” button to a Fluent Form, you can link it to any external or internal page.
- Custom URL: Enter the link where you want users to go when they click the button.
Example: You can link to a dedicated “Review Us” page, a Google review link, or a support form. - Open in new window: Toggle this ON if you want the link to open in a new browser tab. This is useful when linking to external sites (like Google or Yelp), so users don’t lose their place on your website.
Form Shortcode ID #
Enter the Fluent Form’s ID that you created for collecting reviews.
Example: If your form shortcode is , then you enter 7 here.
When users click Write a Review, this specific Fluent Form will open.
In short:
The Header section lets you control how your review block introduces itself to visitors — the logo, average rating, number of reviews, and the review submission button can all be customized to match your brand.

AI Summarizer #
The AI Summarizer automatically generates a short summary of your customer reviews and displays it inside the review widget. This helps visitors quickly understand the overall sentiment without reading every single review.
Display AI Summary: Toggle this ON to show an AI-generated summary at the top of your review section.
API Key Requirement: To use this feature, you need to connect your own AI API key (for example, from OpenAI). Without an API key, the summarizer will not work. You can add your key by clicking the “here” link in the note.
Schema Snippet #
The Schema Snippet feature lets you add structured data (JSON-LD) to your reviews. This helps search engines (like Google) understand your reviews better and may display rich snippets (stars, ratings, and business info) in search results.
Here are the available options:
Enable Schema: Turn this on to activate schema markup for your reviews. Once enabled, WP Social Ninja will generate schema code in the background based on your settings.
Business Logo: Upload or select your business logo. This is included in the schema data to represent your brand in search results.
Business Name: Enter your business or organization name exactly as it should appear in Google’s rich snippets. Example: WP Social Ninja.
Business Type: Choose the correct business/organization type that best matches your brand.
Note: Use valid schema.org types (like Organization, LocalBusiness, Store, Restaurant, SoftwareApplication).
For the full list of valid types, visit schema.org.
Business Phone Number: Add a contact number for your business. This can be displayed in the schema so users see a verified phone number in search results.
Include Business Address: If enabled, the plugin will include your business address in the schema. This is especially useful for local businesses (restaurants, salons, shops).
Fallback Average Rating: If your reviews don’t have an average rating available, you can set a default rating value here.
Example: If you set 4.5, Google will use that as the average rating in search results when no rating data is available.
Fallback Total Rating :Similar to the fallback average rating, this is the total number of reviews you want Google to recognize if your reviews don’t provide one.
Example: If you set 10, search engines will consider it as 10 reviews.
Testing Your Schema: After configuring, you can test whether your schema is valid using Google’s Rich Results Test.
This article was for Template Layouts. Hope this was helpful! However, you can customize your templates with any Platform following those steps.
Also, check out – How to Create a Template


