WP Social Ninja always offers unique and customized Social Feeds options. The Facebook feed has an incredible formation that helps its customers change their Facebook feed Layout. As a result, you can show your brand identity in your way.
Facebook Feed Layout #
Let’s have a look at how to customize your Facebook feed Layout
Source #
To change the layout, click on the Source Button and then on Feed Type. A drop-down menu will appear at the top of the right side of your dashboard.
Feed Type #
Currently, we have three Feed Types; Timeline Feed, Videos, and Photos. By changing the Feed Type, for example, if you select Videos, all the videos from your feed will appear on your site automatically.
Similarly, you can choose any Feed Type from this section and show your social presence on your website.
Select Pages #
After selecting the Feed Type, you have to select the pages from the Select Pages option from where you want to collect your Facebook content.

Here, we have selected the WP Social Ninja Facebook page. You can choose multiple pages from here.
Total Feed #
This input field will allow you to set how many posts to retrieve from Facebook. Here you have the option to show a maximum of 100 posts from the Facebook page.
Once you select the page and set the number for Total Feed, Click on the Fetch Feeds button.
Now Facebook feed is ready to display on your website
Note that you can fetch multiple pages simultaneously on your website.
Template #
The Facebook feed has several pretty Template features for you. Let’s check out.
Layout Type #
The Template has Layout Types to change your Facebook feed style on the right side. You can find a few options if you click on the drop-down menu.
Currently, we have Timeline, Grid, Masonry, and Carousel. You can select a template for layout, number of columns, and column gap.

Select any Layout Type that suits your brand.
Carousel Setting #
Suppose, If you select Carousel Layout Type, a new Setting will appear.
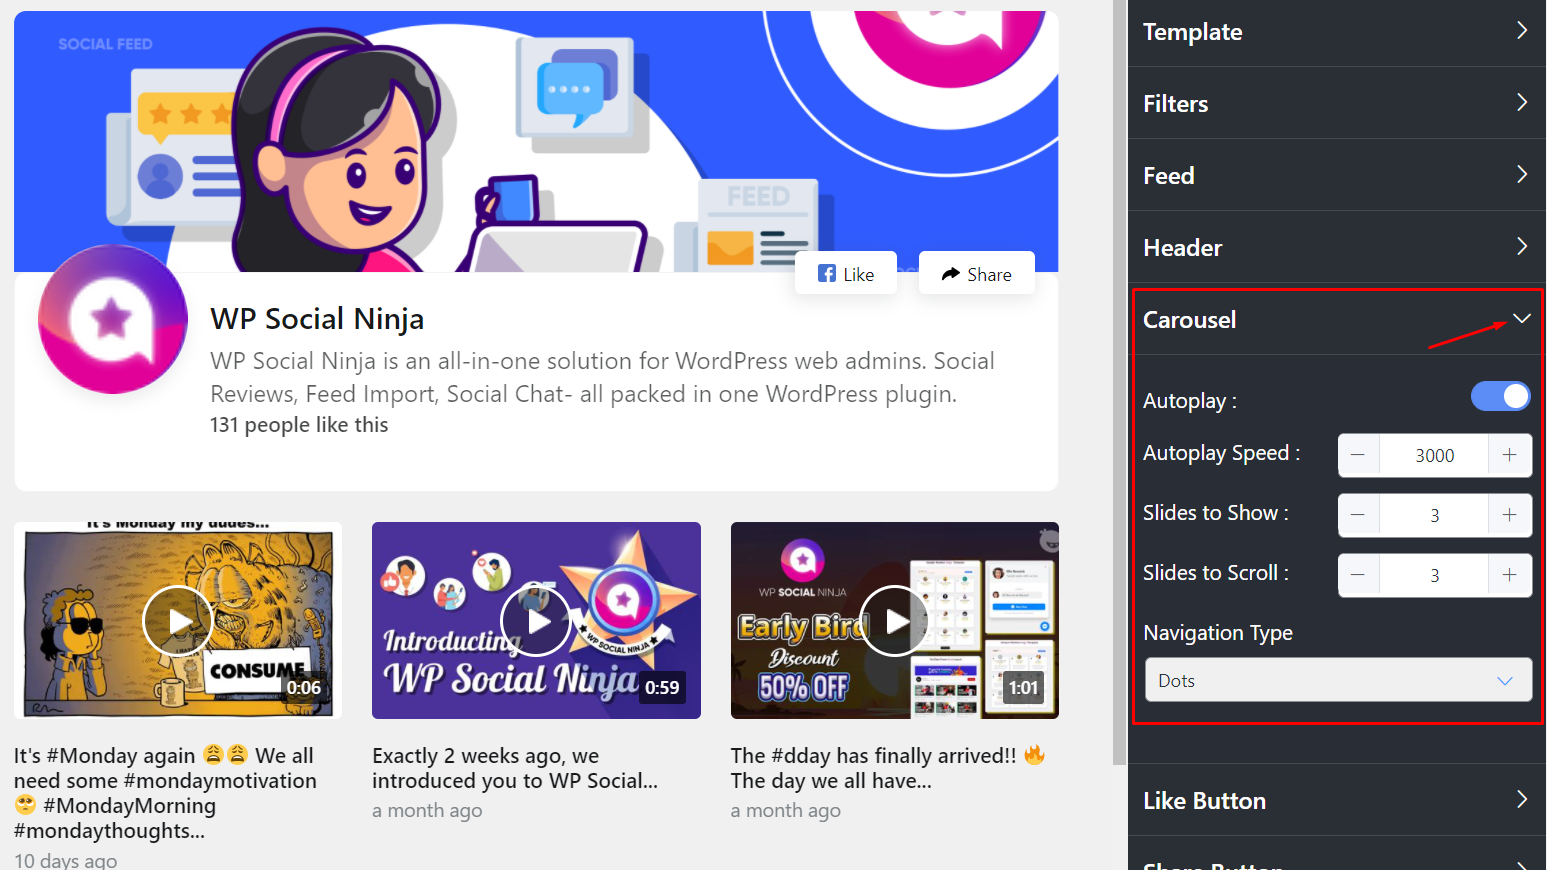
Right Now, we have five options for Carousel Settings; Autoplay, Autoplay Speed, Slides To Show, Slides to Scroll, and Navigation Type.
Autoplay #
This section can help you display your Facebook posts in Autoplay mode.
Turn off the button if you don’t want to use Autoplay.
Autoplay Speed #
Next, you will find Autoplay Speed; you can set your autoplay speed limit. To increase the speed limit, simply up the speed limit by clicking the plus sign.
Again to decrease the speed limit, turn down the speed limit by clicking the minus sign.
Slides to Show #
Here you can adjust the number of slides that will be displayed on your website.
Now we have 3 Slides to Show. So, according to your wish, you can increase or decrease the slides from the Slides to Show option.
Slides to Scroll #
After Slides to Show, you can set your number of slides to scroll from the Slides to Scroll button.
You can adjust the number from the Slides to Scroll option from the settings panel. Here we picked digit three, so it scrolls three posts at a time and shows the following posts on your display.
Navigation Type #
Our navigation section has four options; Arrows and Dots, Arrows, Dots, and None.
In this Screenshot, we have selected Dots. But you can select any.
Now let’s look at how it looks at the front end.
Similarly, you can look stylish with the other 3 Layout Types.
Template Type #
Next, you have Template Type; select a style from the Settings Panel.
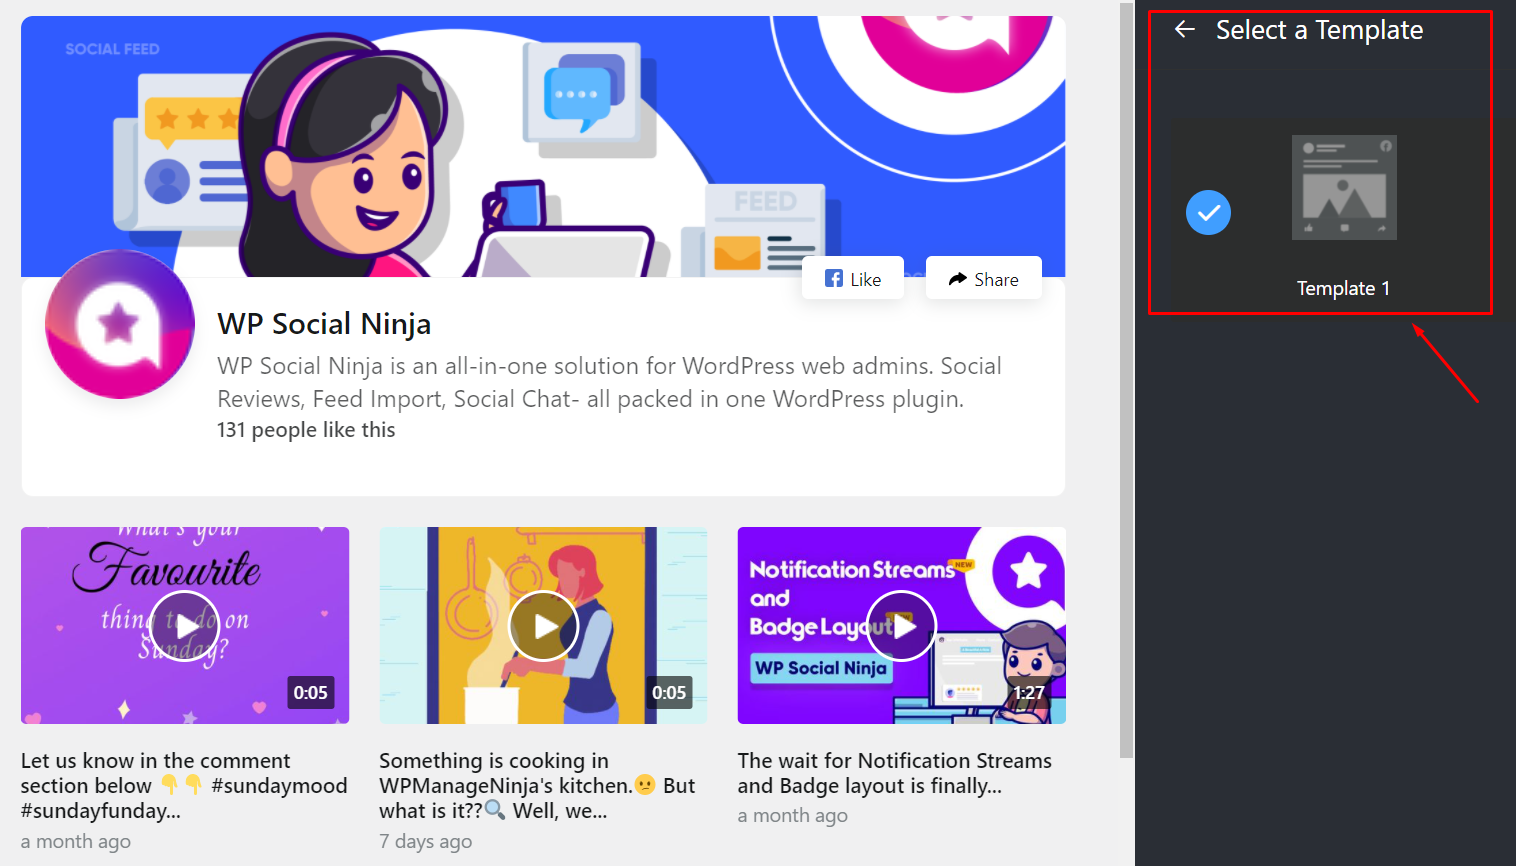
Currently, we have only one Template Type.
Number of Columns #
In this section, you can change the Number of Columns.
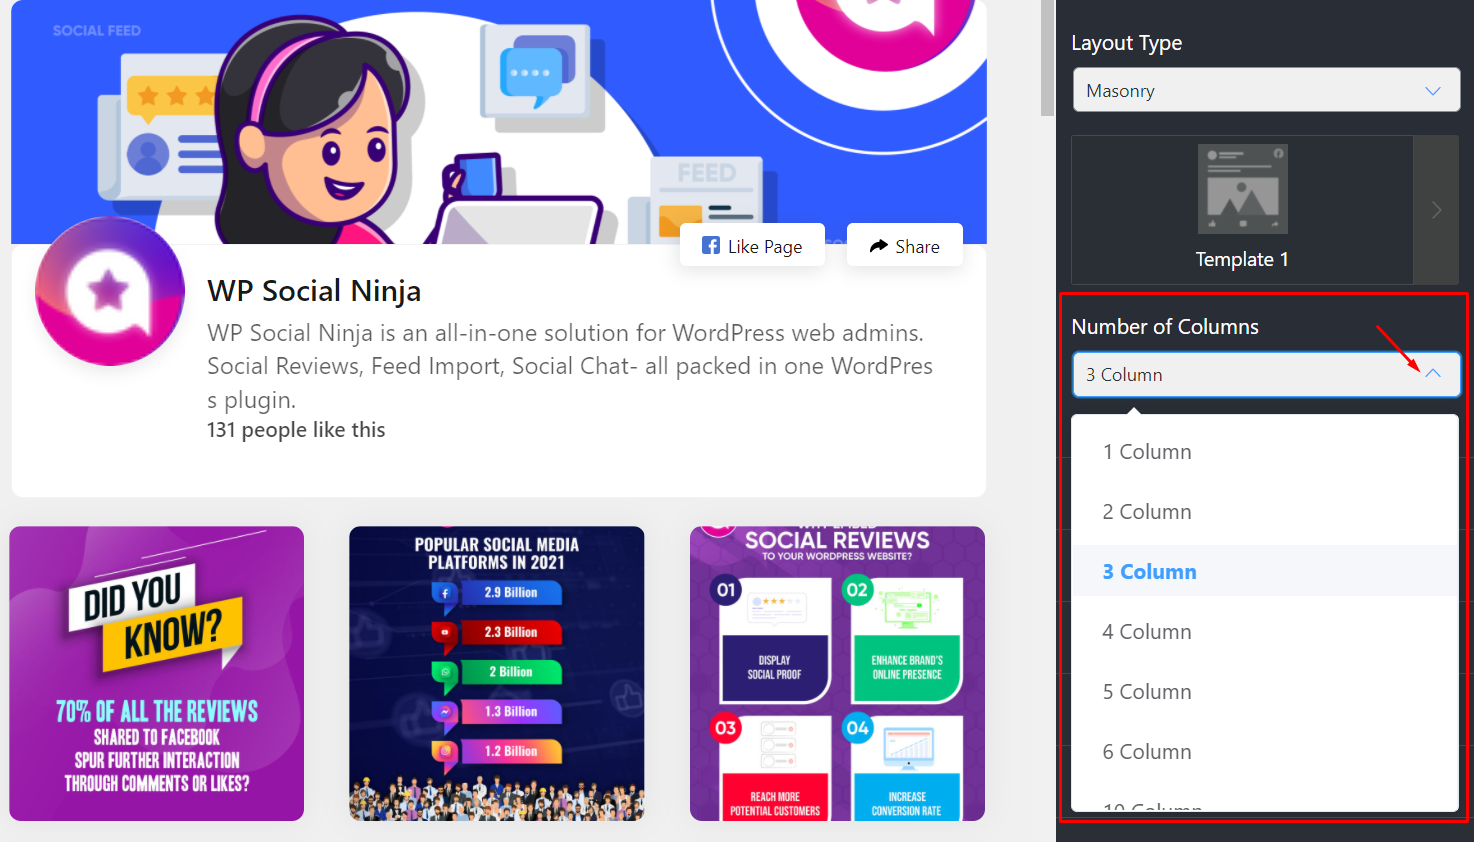
Here you can set the website columns you want to display. Right now, we have seven ways to sort the Number of Columns; 1 Column to 6 Columns. Select any that compliments your brand.
Columns Gap #
Next is Columns Gap; right now, we have five types of Columns Gaps available; No Gap, Narrow, Small, Wide, and Wider.
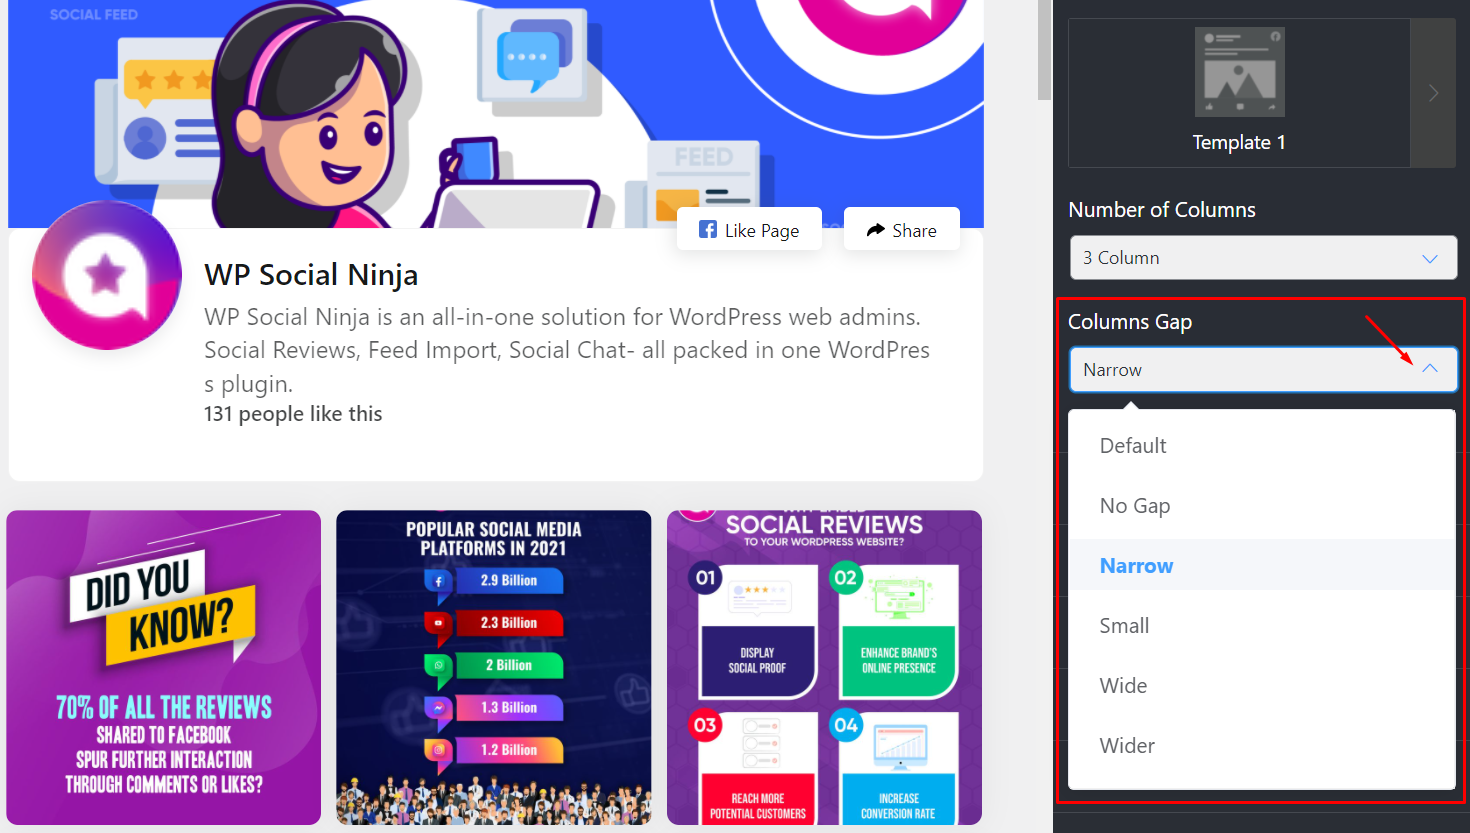
We have selected the Narrow option; you can select any.
Filters #
Once you click on the Filters, a drop-down menu will appear.

Let’s check out how it works.
Number of Feeds to Display #
This feature has various options to filter your Timeline, videos, and photos according to your requirements. You can adjust the Number of Feeds to Display by clicking the +/- icon.
You can fetch up to 100 posts.
Post Order #
You can choose what order you want to display your posts using the Posts Order option. Currently, there are five options available; Ascending, Descending, Most Popular, Least Popular, and Random.
Choose any of them that you think will look good on your website.
Show/Hide Post #
Next is Show posts containing these words or hashtags; you can use this setting to show posts containing specific words or hashtags in the caption by separating multiple words or hashtags using commas.
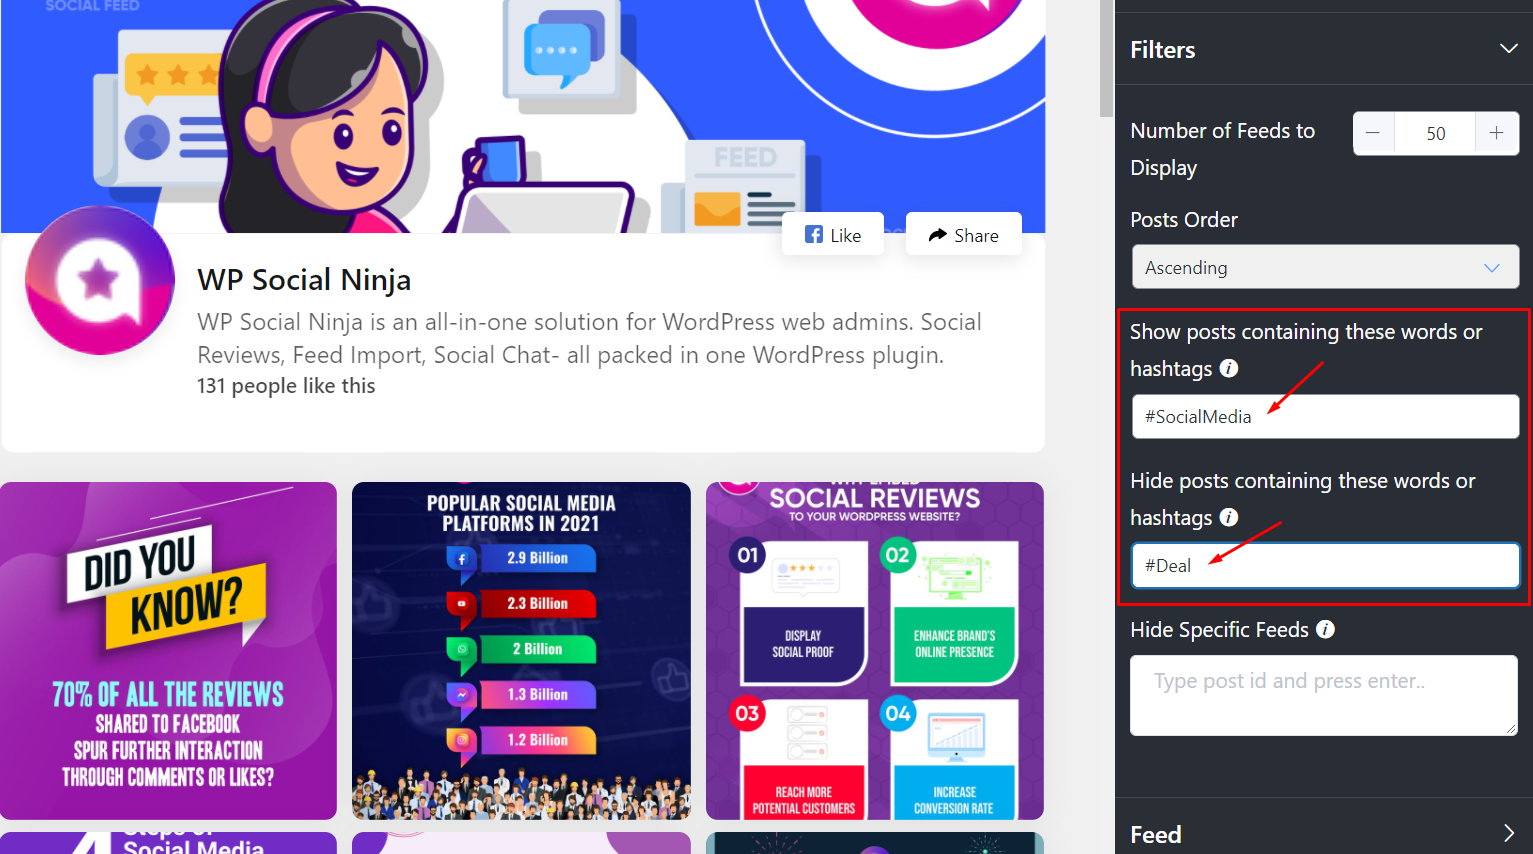
Example: #SocialMedia. Moreover, with the Hide posts containing these words or hashtags, you can hide posts similarly by typing specific words or hashtags in the Hide post containing these words or hashtags. For instance, use #deal to hide all posts with that hashtag.
Hide Specific Feeds #
The Hide Specific Feeds option lets you hide a particular post by its Post ID. You can find the post’s ID by clicking on the Facebook icon on the post and then copying & pasting the ID Number from the end of the URL.
Example: https://www.facebook.com/229248910907303/posts/ [247142819117912]/
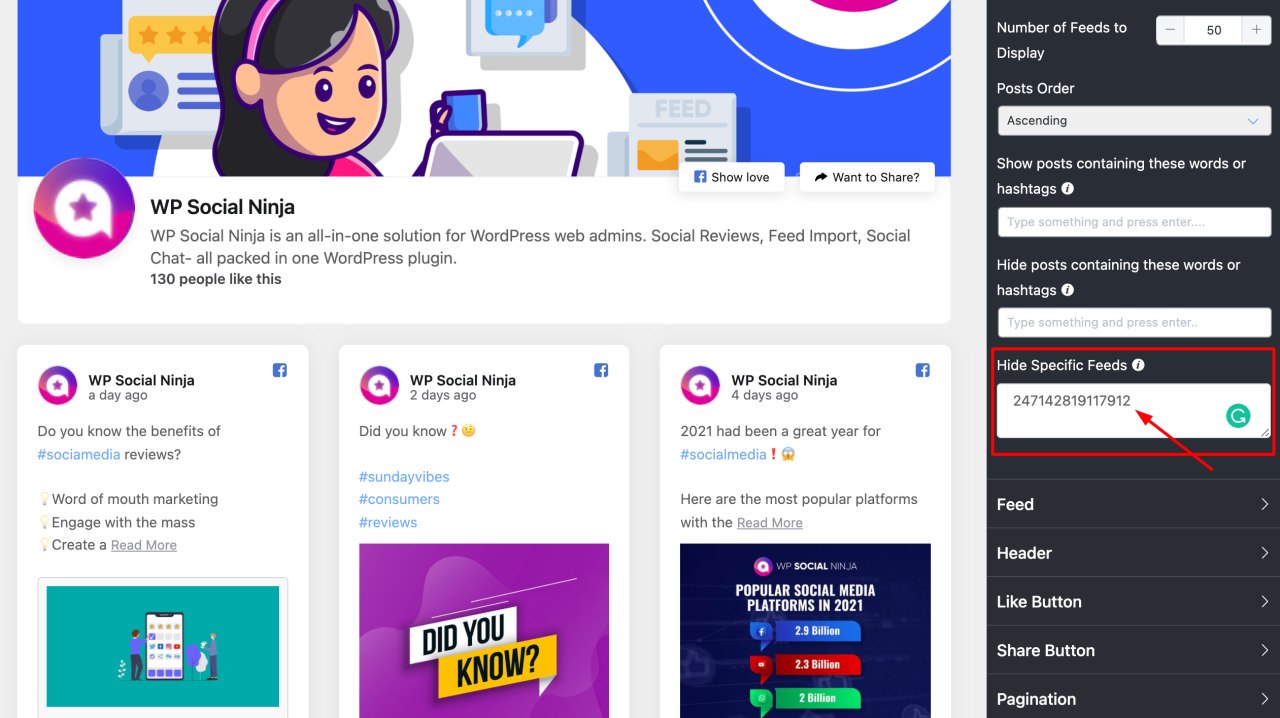
Make sure you select the ID Number correctly and copy and paste it into the Hide Specific Feeds field. The ID will look like [ 247142819117912 ]. After you have completed it, this will automatically update your feed.
Once you’re done, don’t forget to click on the Save button, and you’ve successfully done styling your Facebook feed.
Also, check out – Facebook Feed Configuration


