WP Social Ninja is a super feature-rich plugin. The Custom Review feature in WP Social Ninja lets you manually add important reviews to your website. This way, you can showcase every piece of positive feedback without missing any.
Let’s see how to do that.
Access the Custom Review #
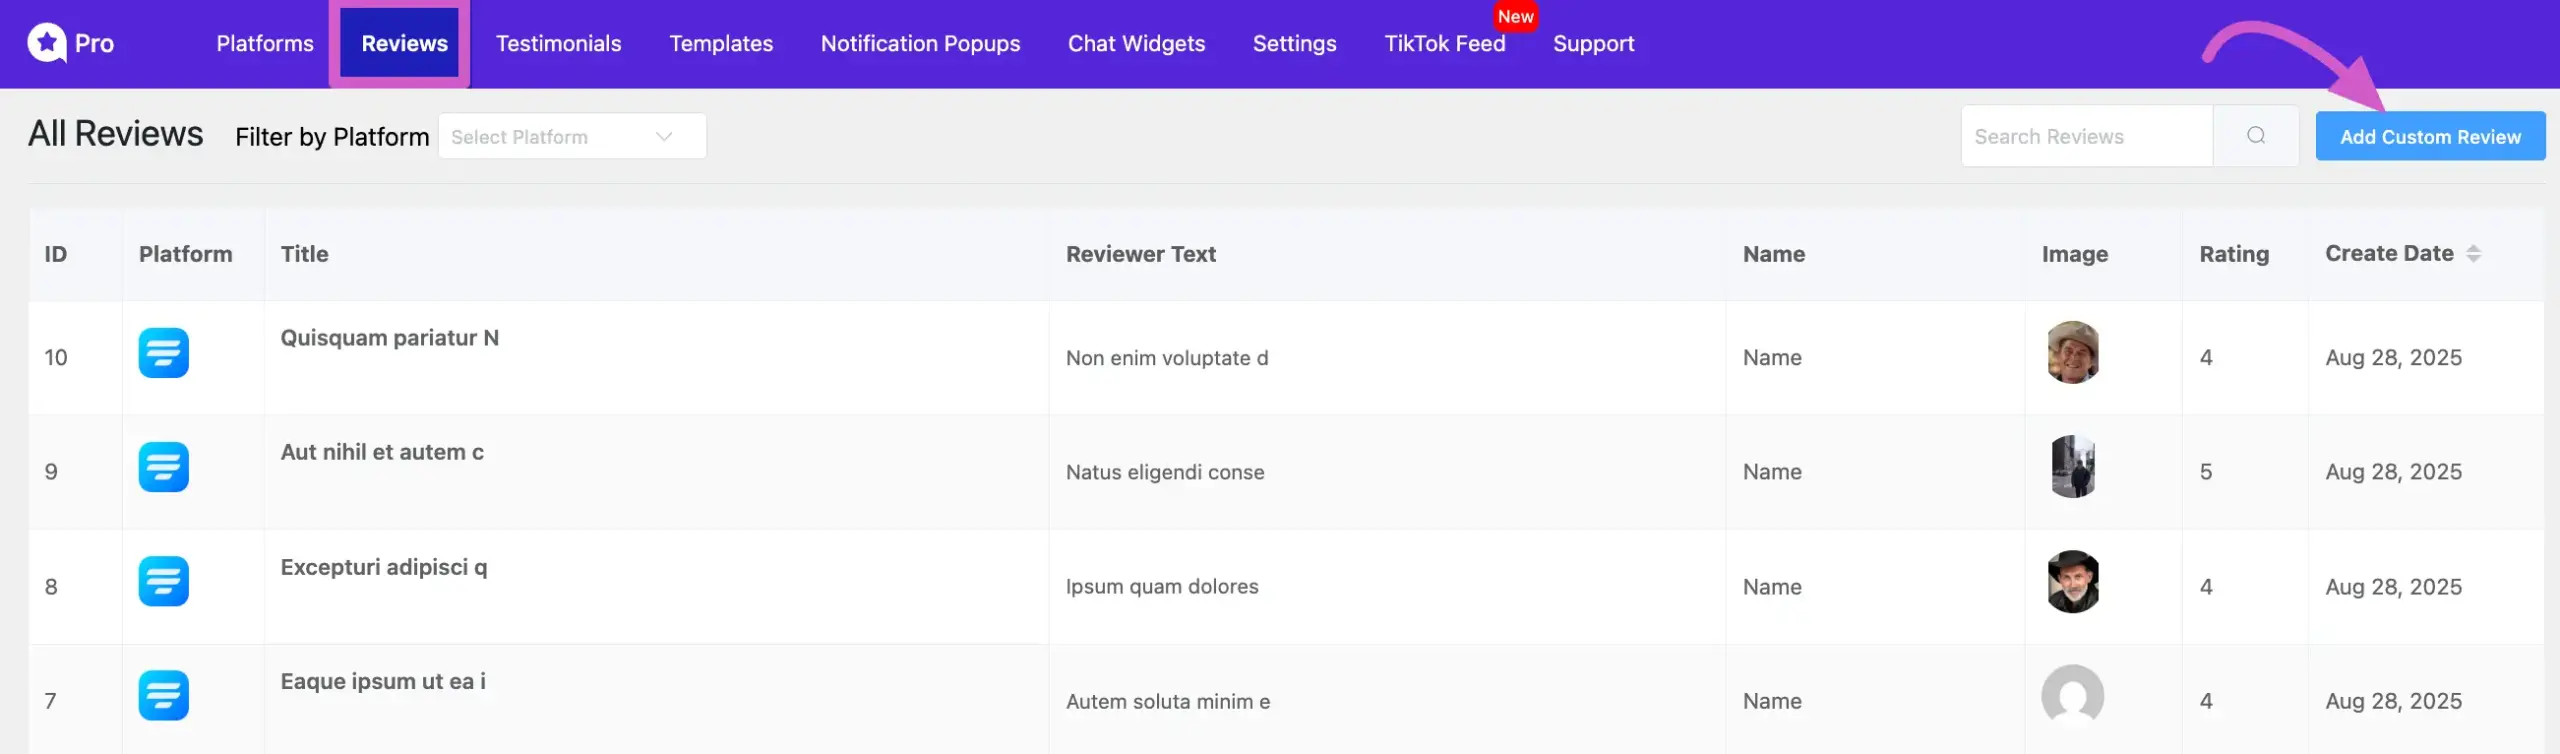
Go to the WP Social Ninja dashboard. Click on the Reviews option from the top menu bar. Next, to add custom reviews, click on the Add Custom Review button in the top right corner of the page.
Enter the Review Details #
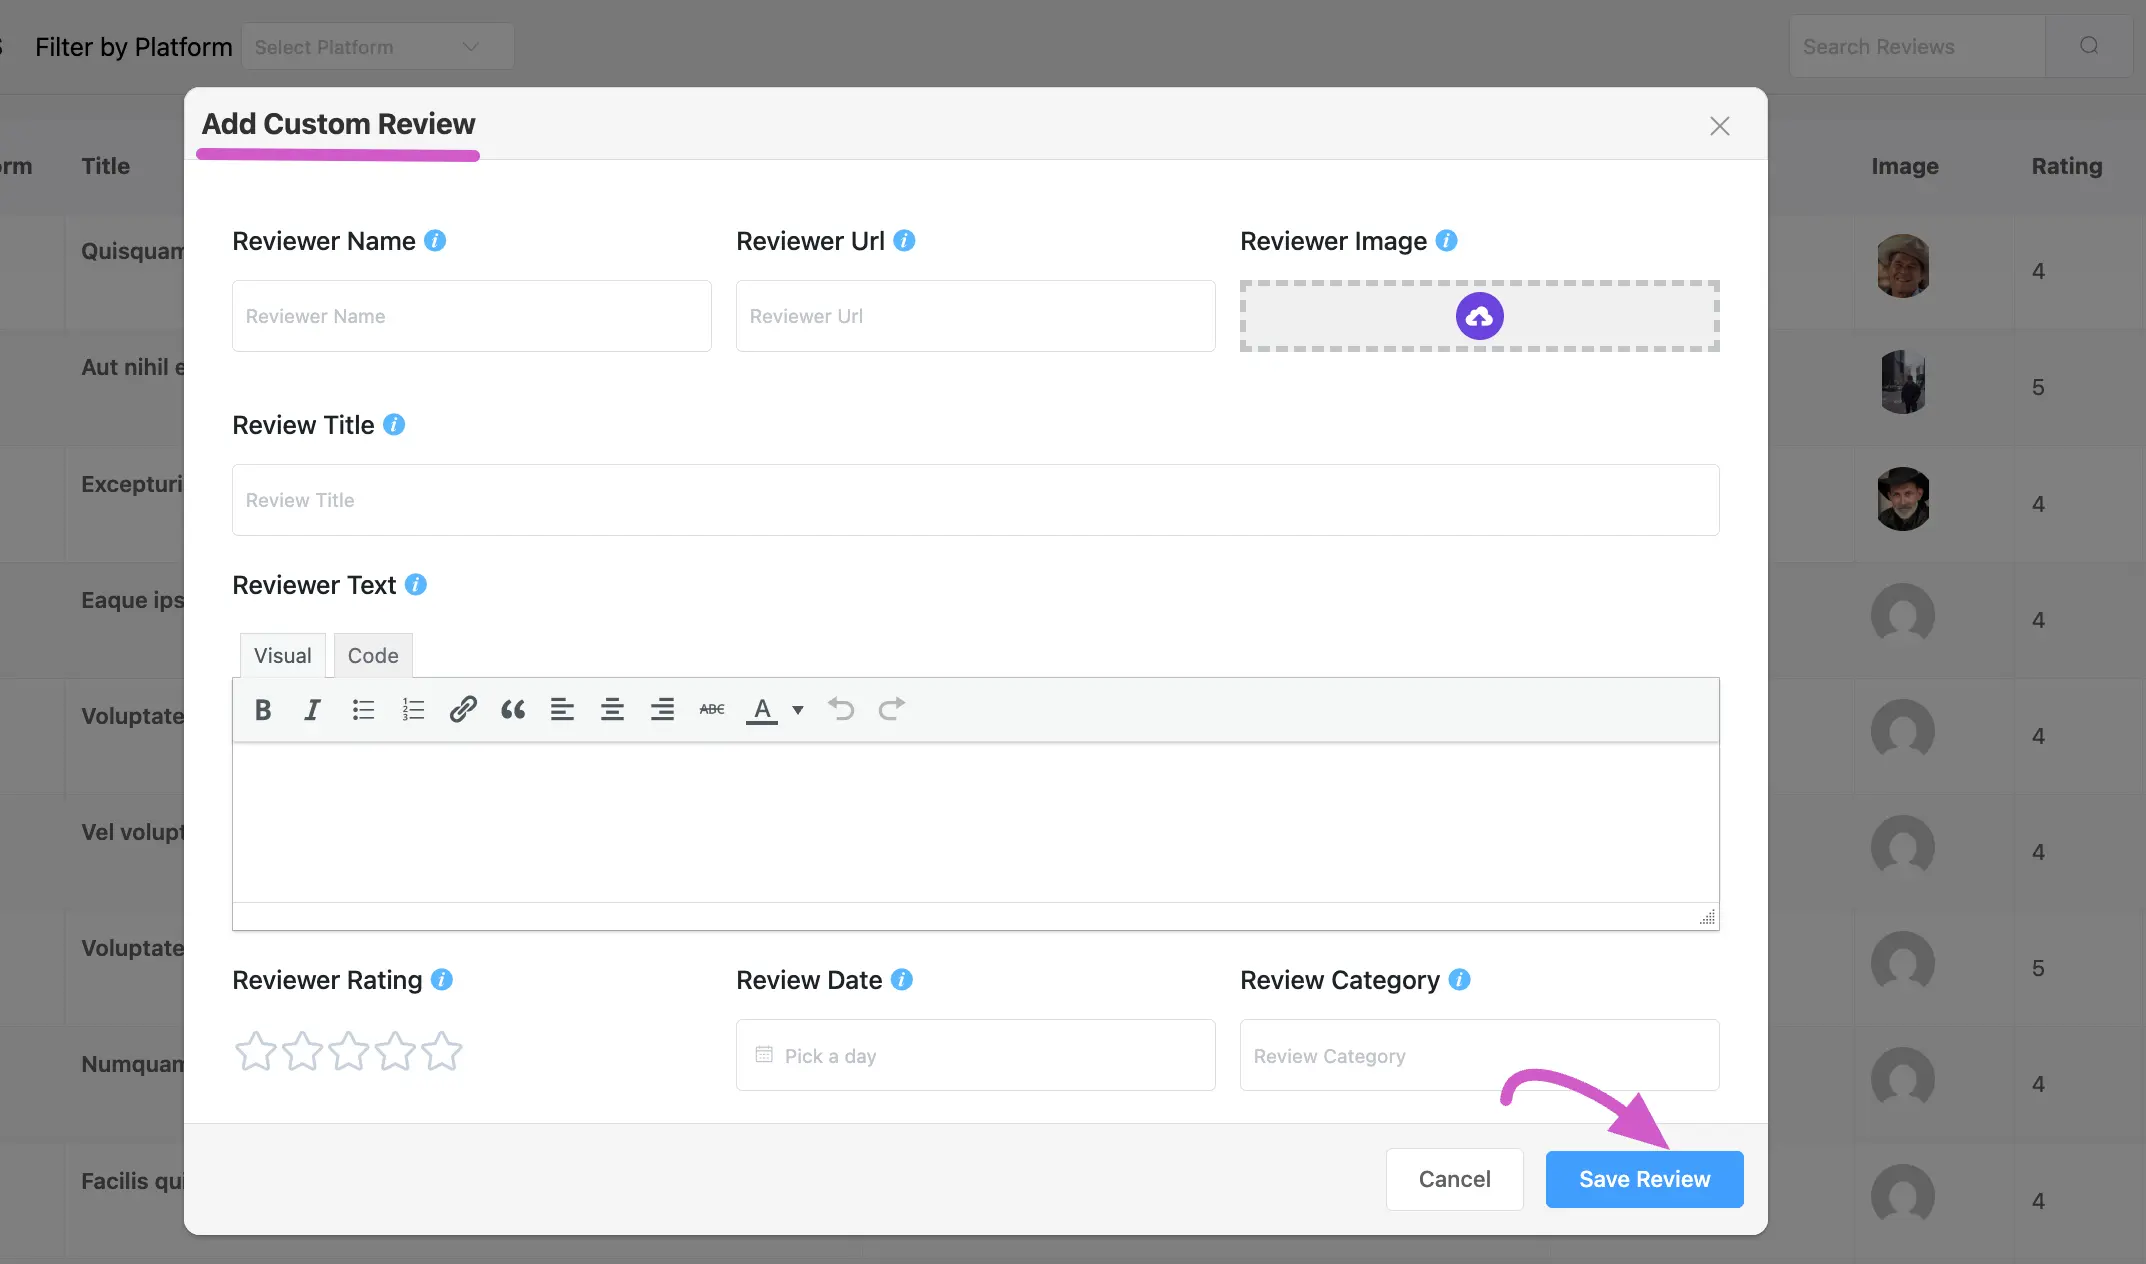
After clicking the Add Custom Review button, a pop-up form will appear where you can input the review’s content and information. Here is a detailed breakdown of each field:
- Reviewer Name: Enter the full name of the person who provided the review.
- Reviewer URL: You can add a link to the reviewer’s website or social media profile. This is an optional field.
- Reviewer Image: Upload an image of the reviewer, such as a profile picture or company logo.
- Review Title: Create a short, impactful headline for the review (e.g., “Amazing Product & Support!”).
- Reviewer Text: Enter the full text of the testimonial here. You can use the Visual or Code editor for formatting.
- Reviewer Rating: Select a star rating from 1 to 5 to visually represent the reviewer’s score.
- Review Date: Choose the date the review was originally given.
- Review Category: Assign a category to the review. This is useful for organizing and filtering reviews later in your template.
Once you have filled out all the necessary fields, click the Save Review button to add it to your collection.
Filter by Category (Optional) #
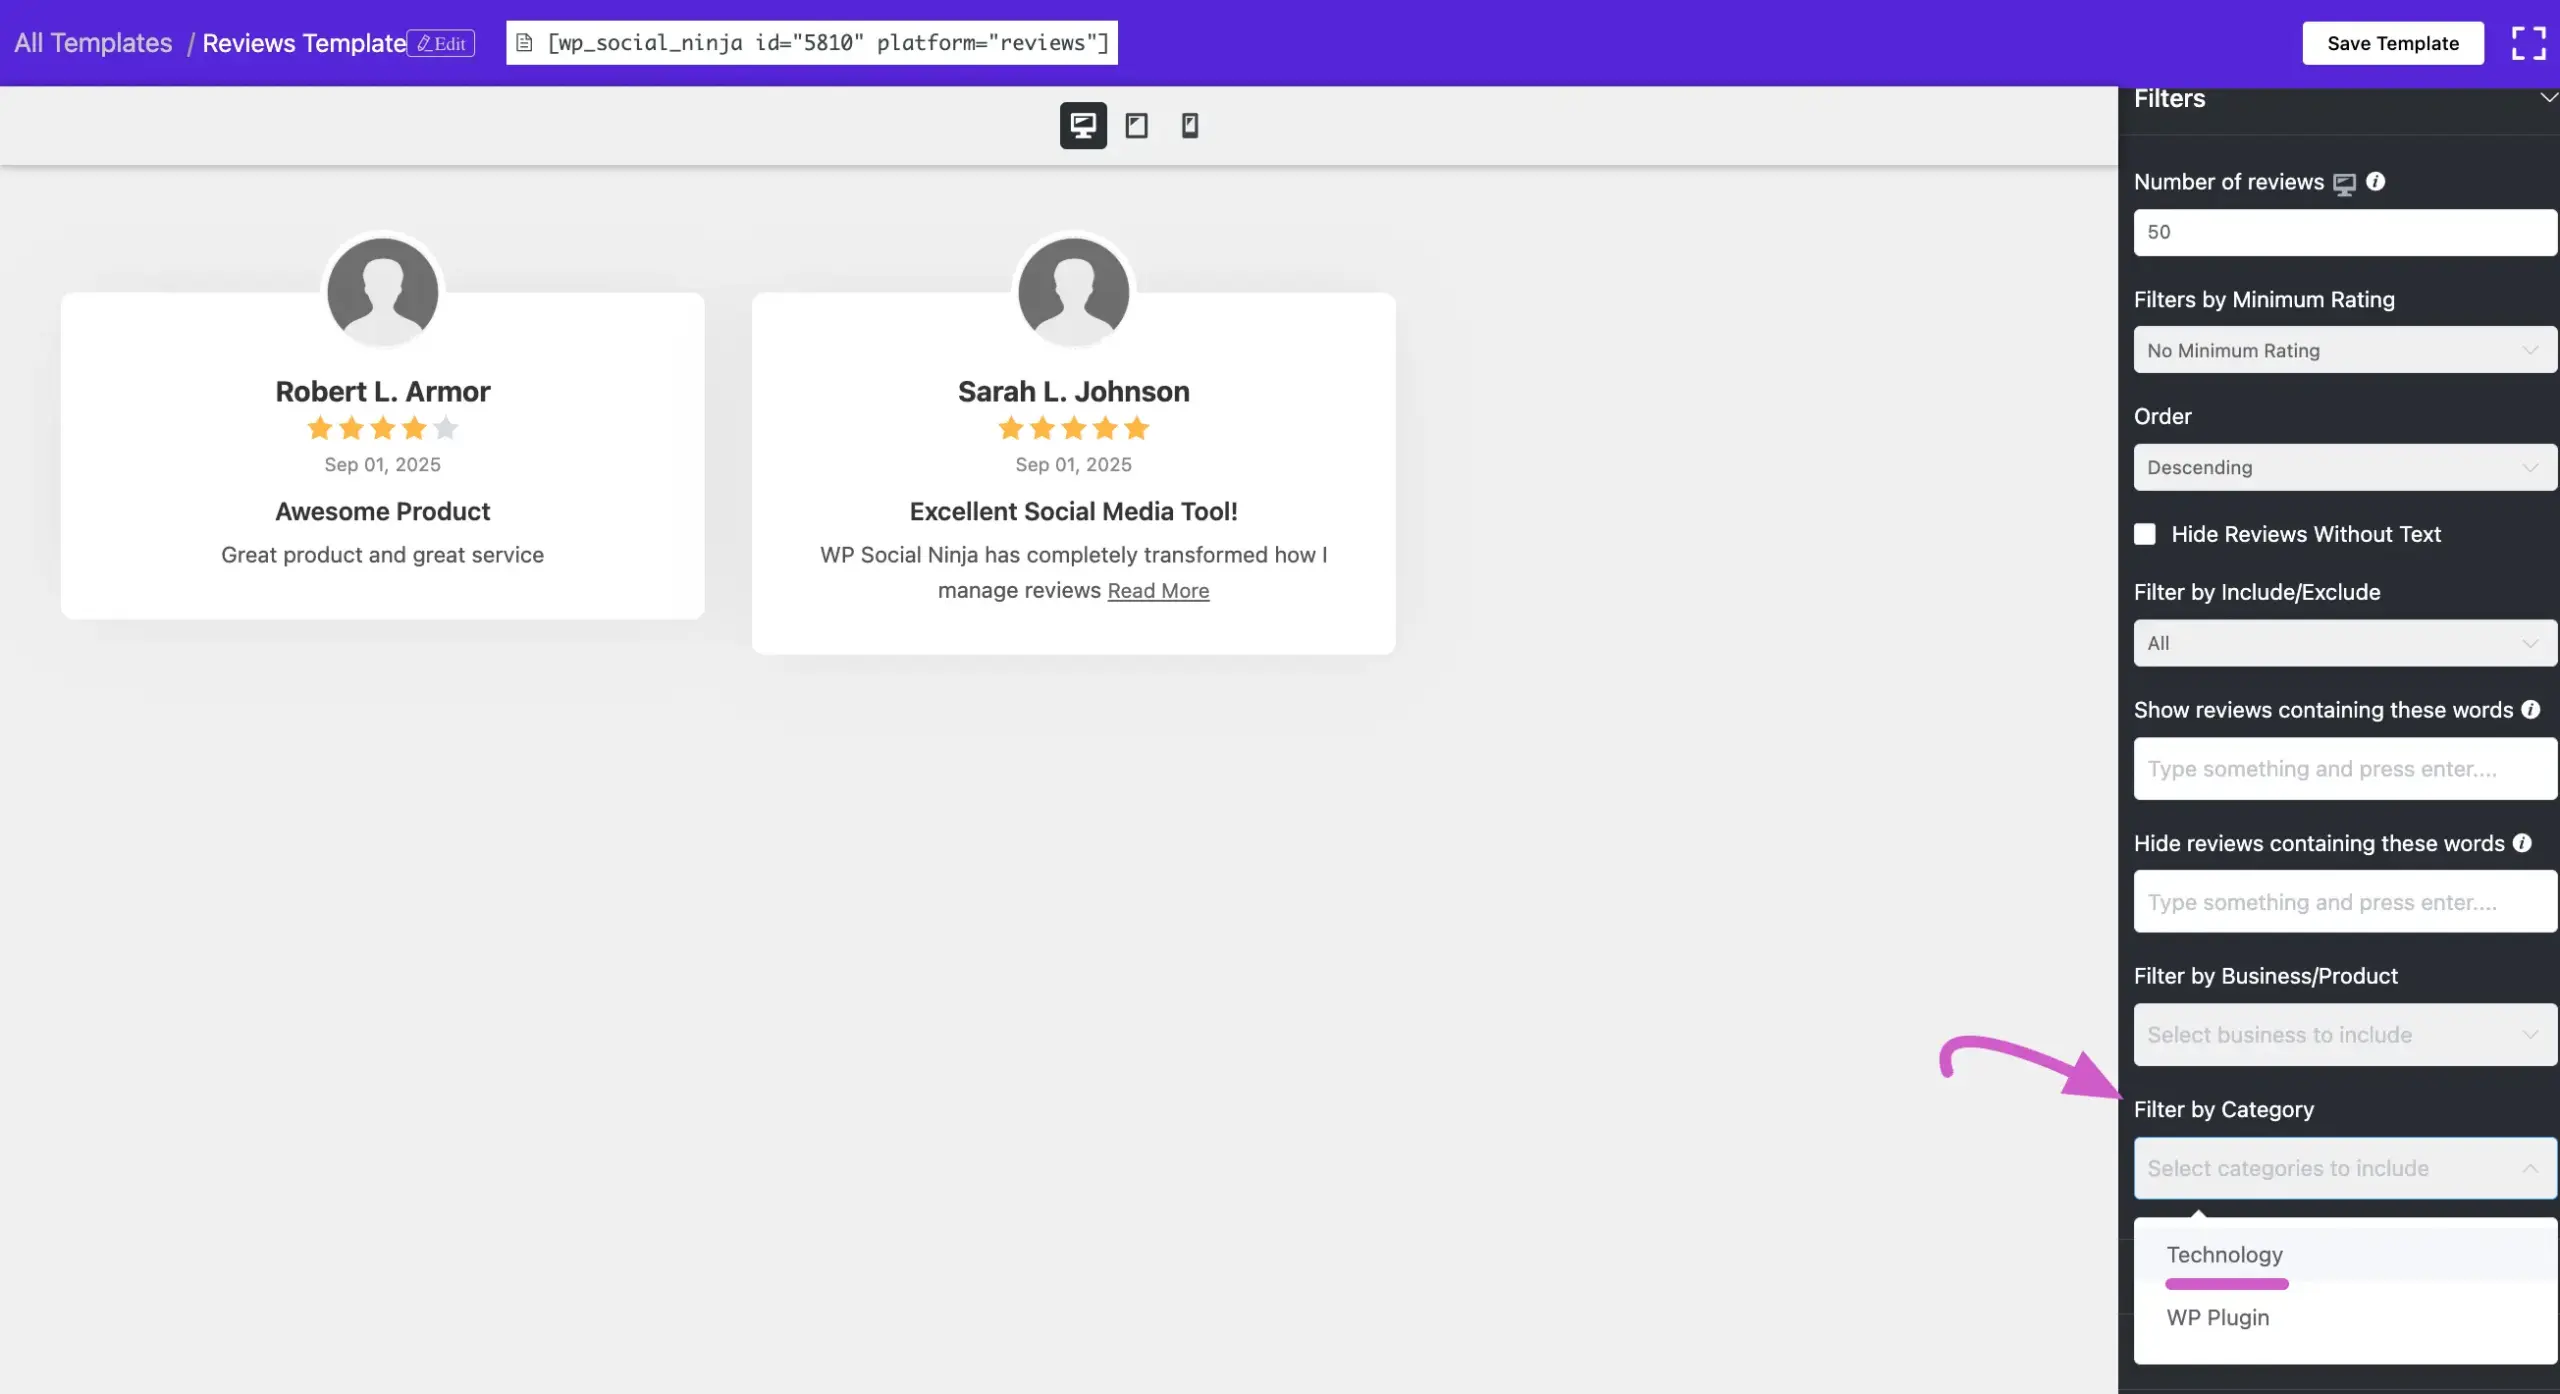
You can filter your custom reviews by the category you created. In the template editor, open the Filters section. Scroll down to the Filter by Category option and select the specific category you wish to display.
Create a Review Template #
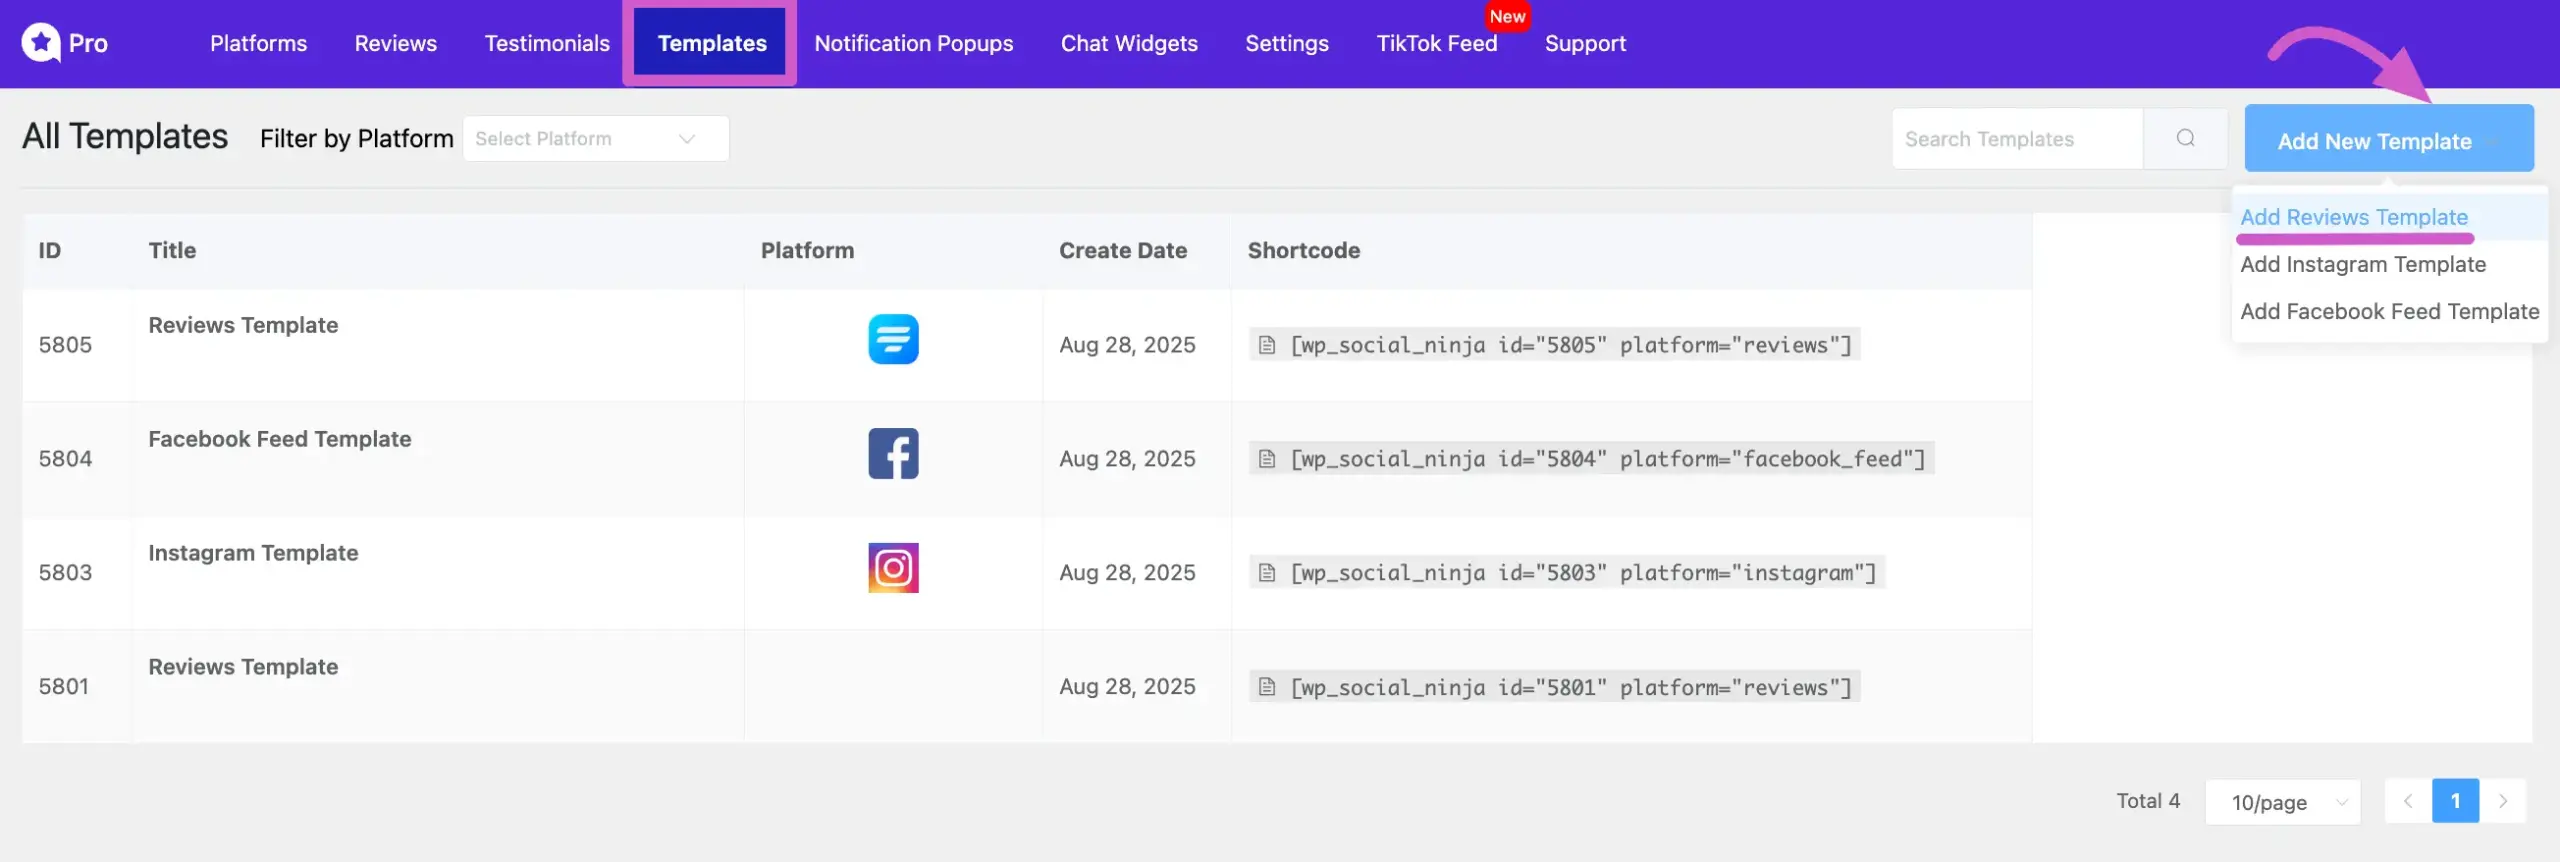
Now that your custom review is saved, you need to create a template to display it on your site. Go to the Templates tab from the main dashboard. Click the Add New Template button and select Add Reviews Template from the dropdown options.
In the template editor, go to the Source section on the right-hand side. Click on the Platforms dropdown menu and select the Custom option. This will load the custom reviews you have created.

And that’s it! Your custom review template is now ready to be embedded on your website using its shortcode. You may also be interested in learning how to add Fluent Forms Review.


