Using Fluent Forms, WP Social Ninja has introduced an incredible feature for collecting Testimonials. You must need to know how to integrate Fluent Forms with WP Social Ninja to collect testimonials using Fluent Forms on your website.
Let’s look at how WP Social Ninja may help your business by gathering Testimonials using Fluent Forms.
Enable the Fluent Forms Integration Module #
First, you need to enable the integration from the Fluent Forms dashboard.
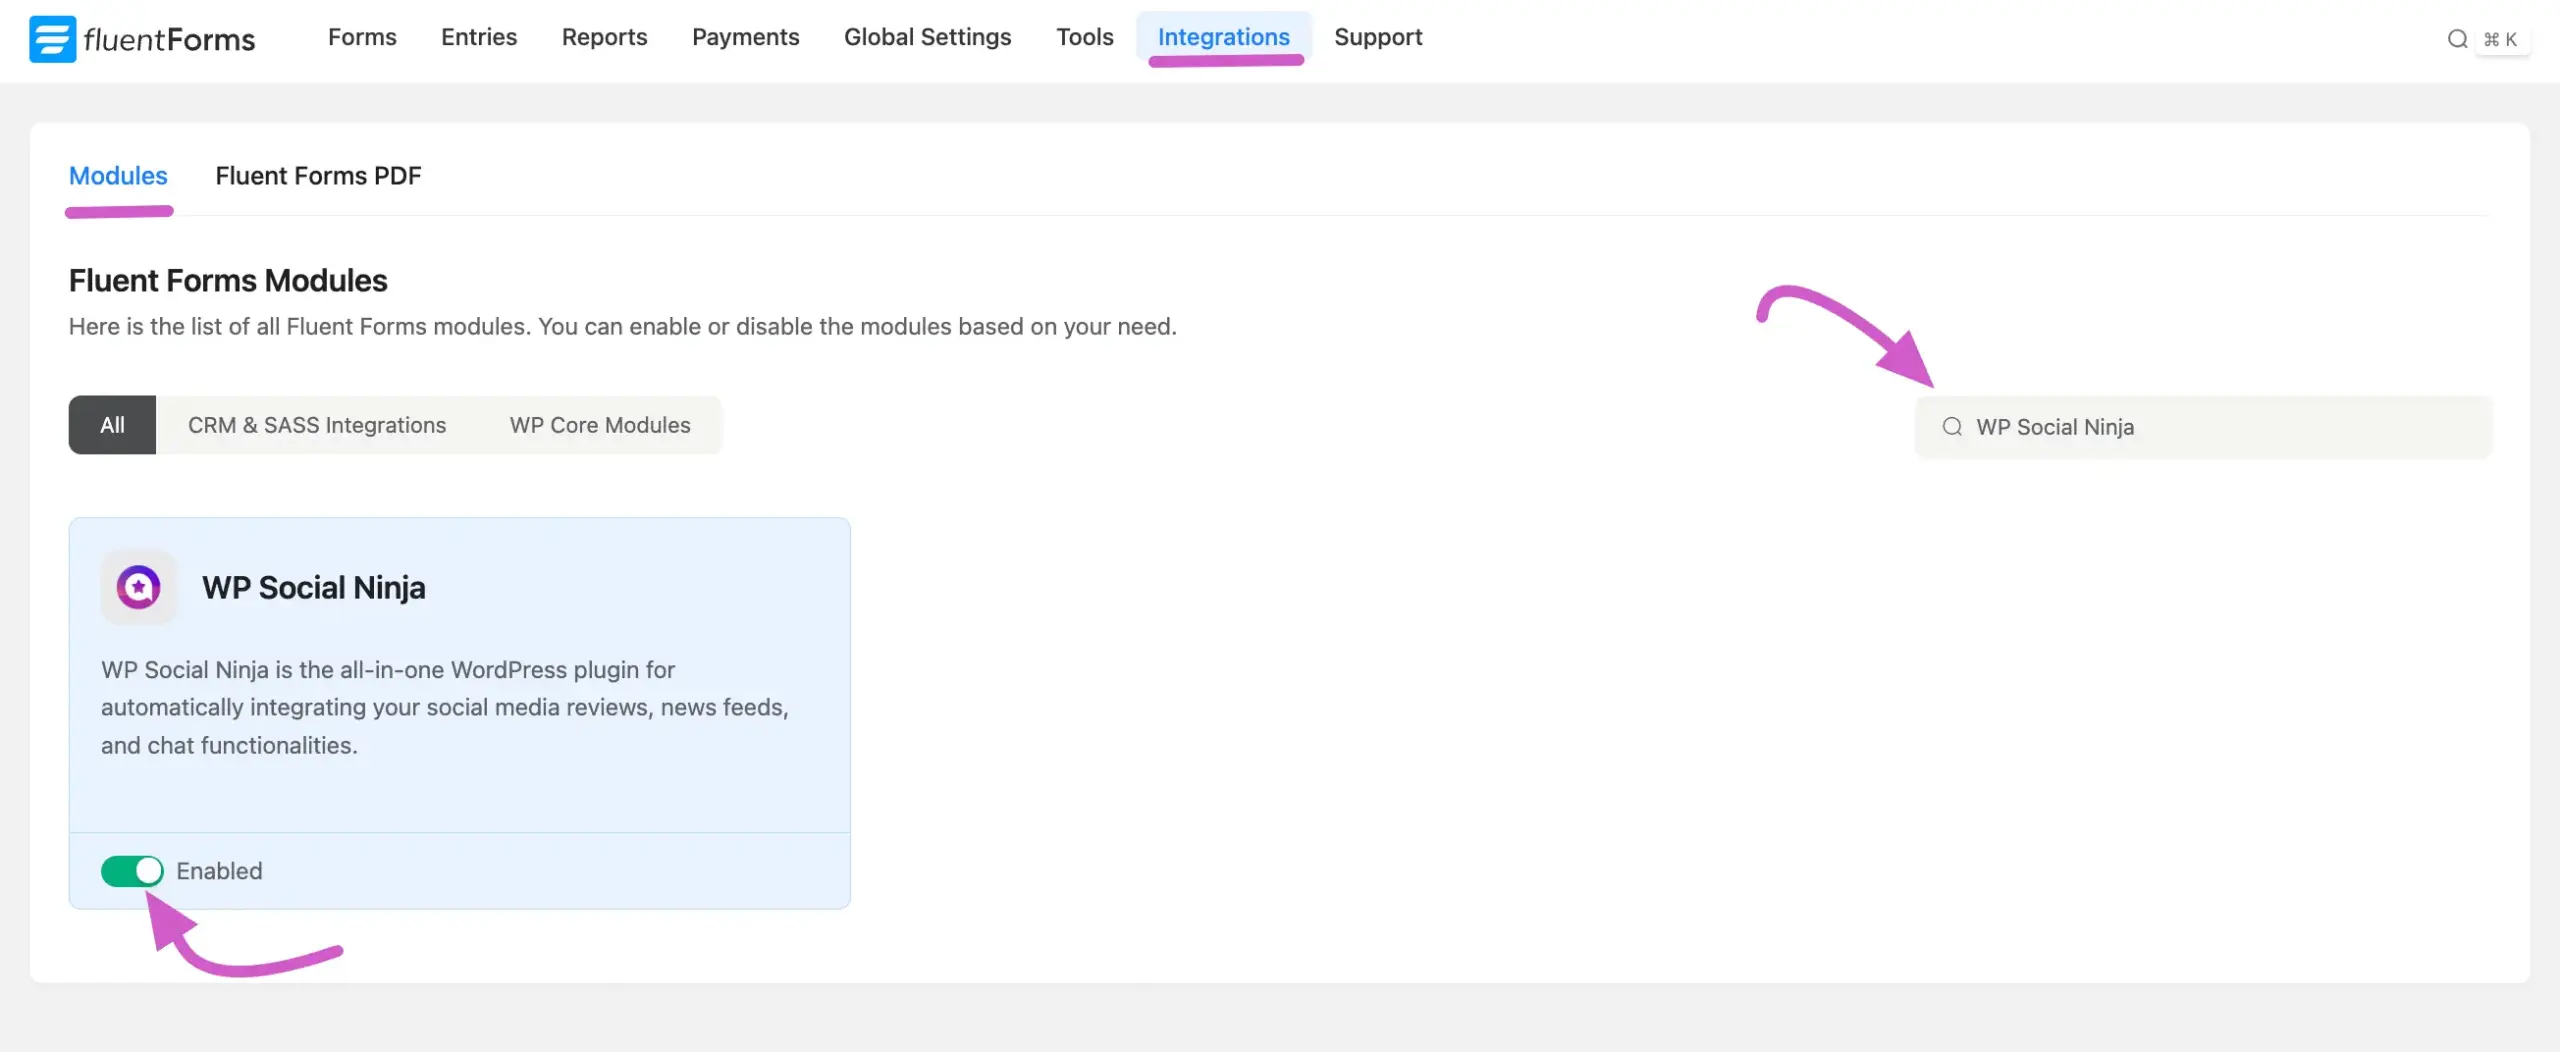
- First, go to Integrations from the Fluent Forms Navbar.
- Search for WP Social Ninja through the search bar or scroll down to find the WP Social Ninja module from the list.
- Toggle the switch to Enable the module.
This action connects Fluent Forms with WP Social Ninja, allowing them to share data.
Create Your Testimonial Collection Form #
Next, you need to configure the specific form you want to use for collecting reviews.
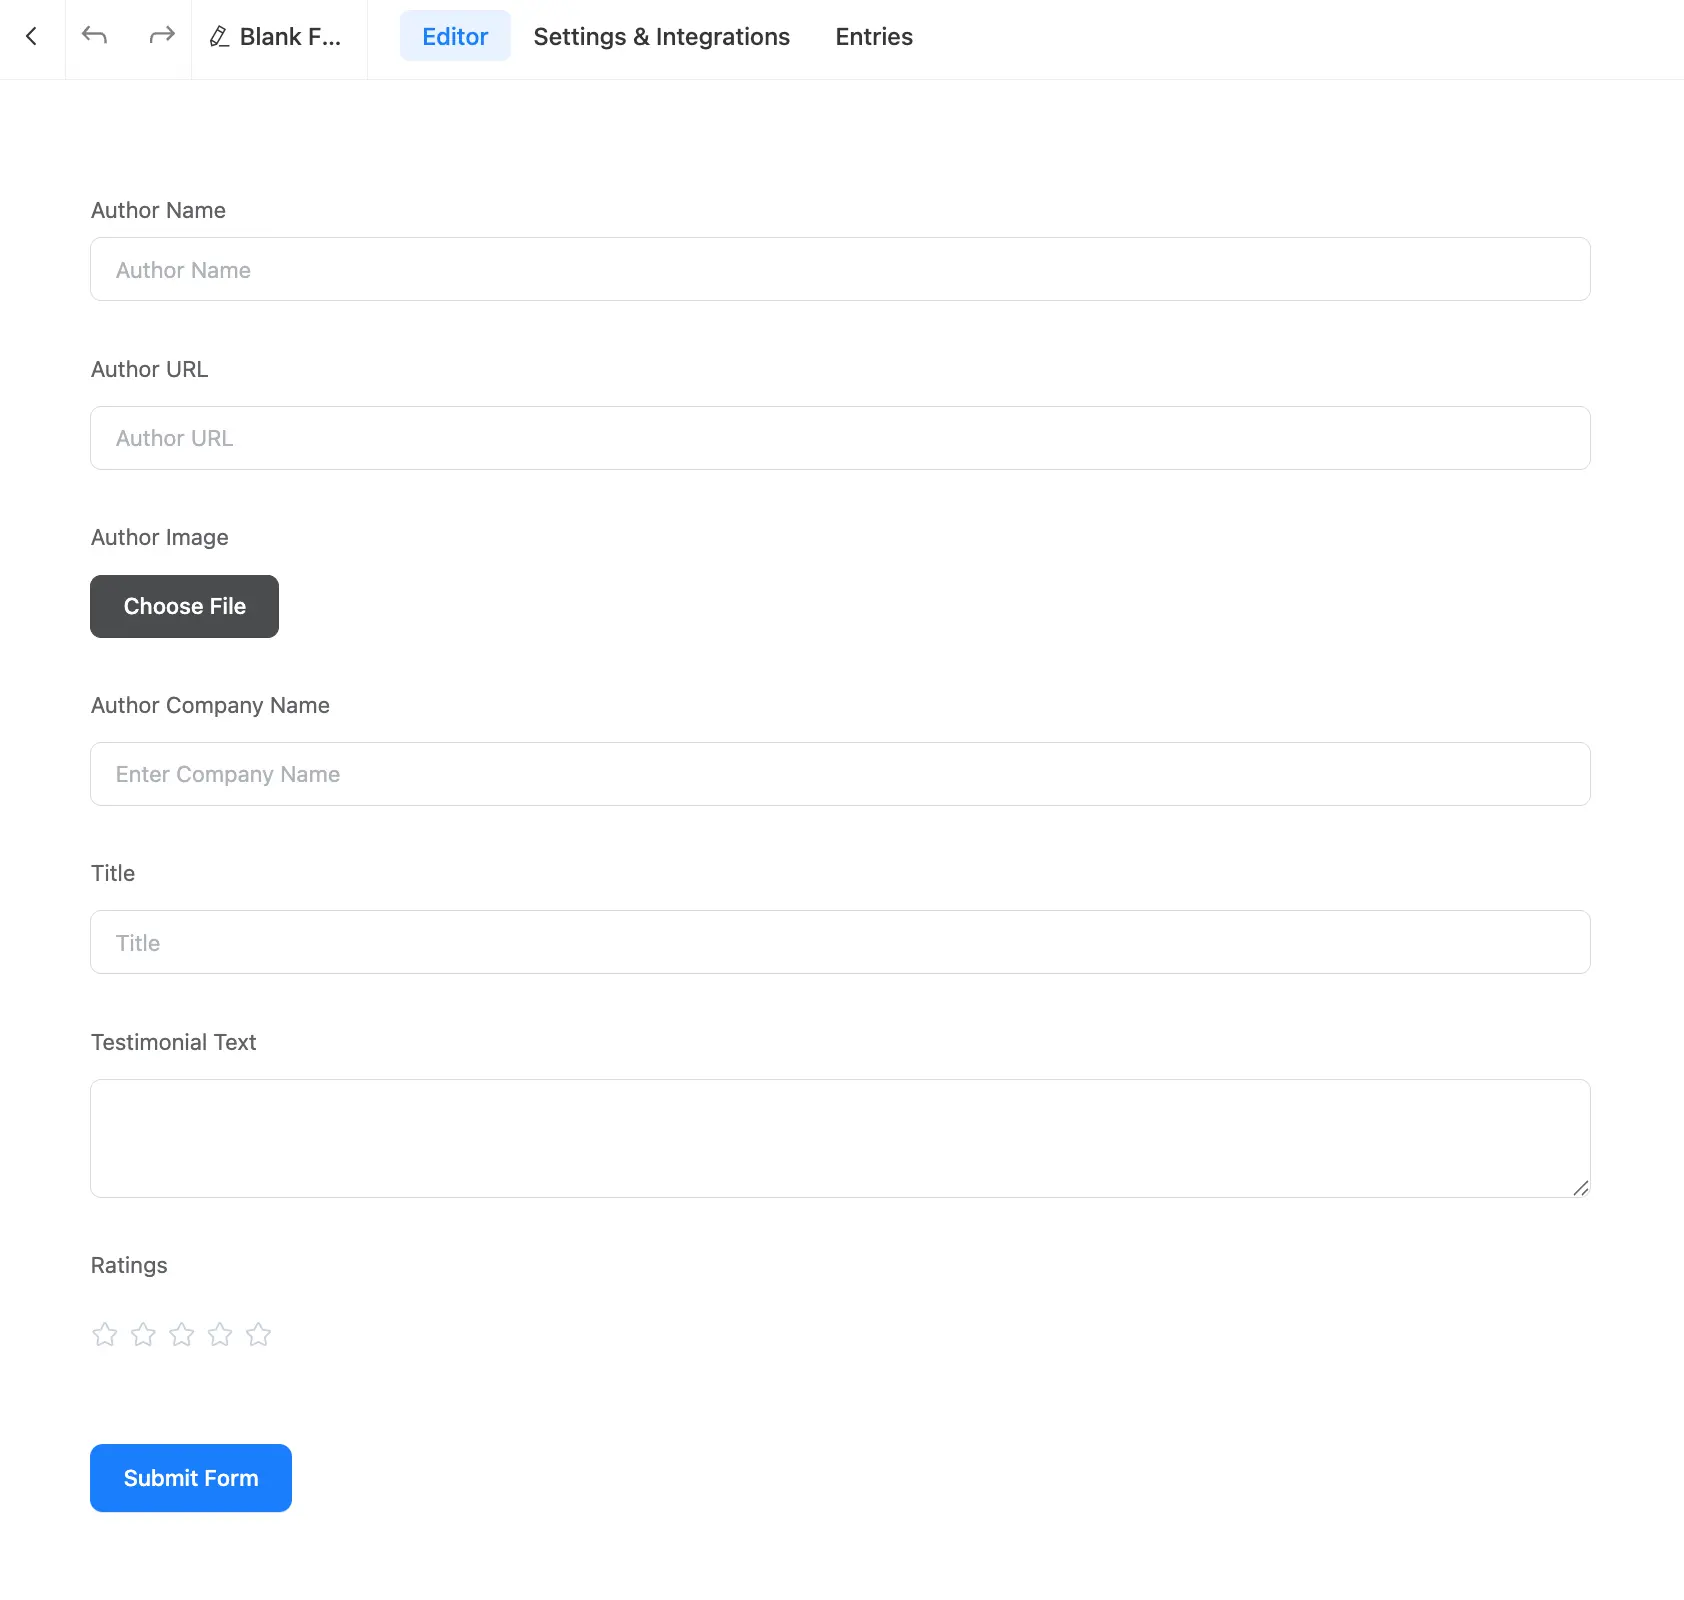
Go to your Fluent Forms dashboard. You can either Add a New Form or edit an existing one. Ensure your form contains all the fields you want to collect. Recommended fields include:
- Author Name (Text Field)
- Author URL (URL Field)
- Author Image (File Upload Field)
- Author Company Name (Text Field)
- Title (Text Field)
- Testimonial Text (Text Area Field)
- Ratings (Ratings Field)
Configure the WP Social Ninja Integration Feed #
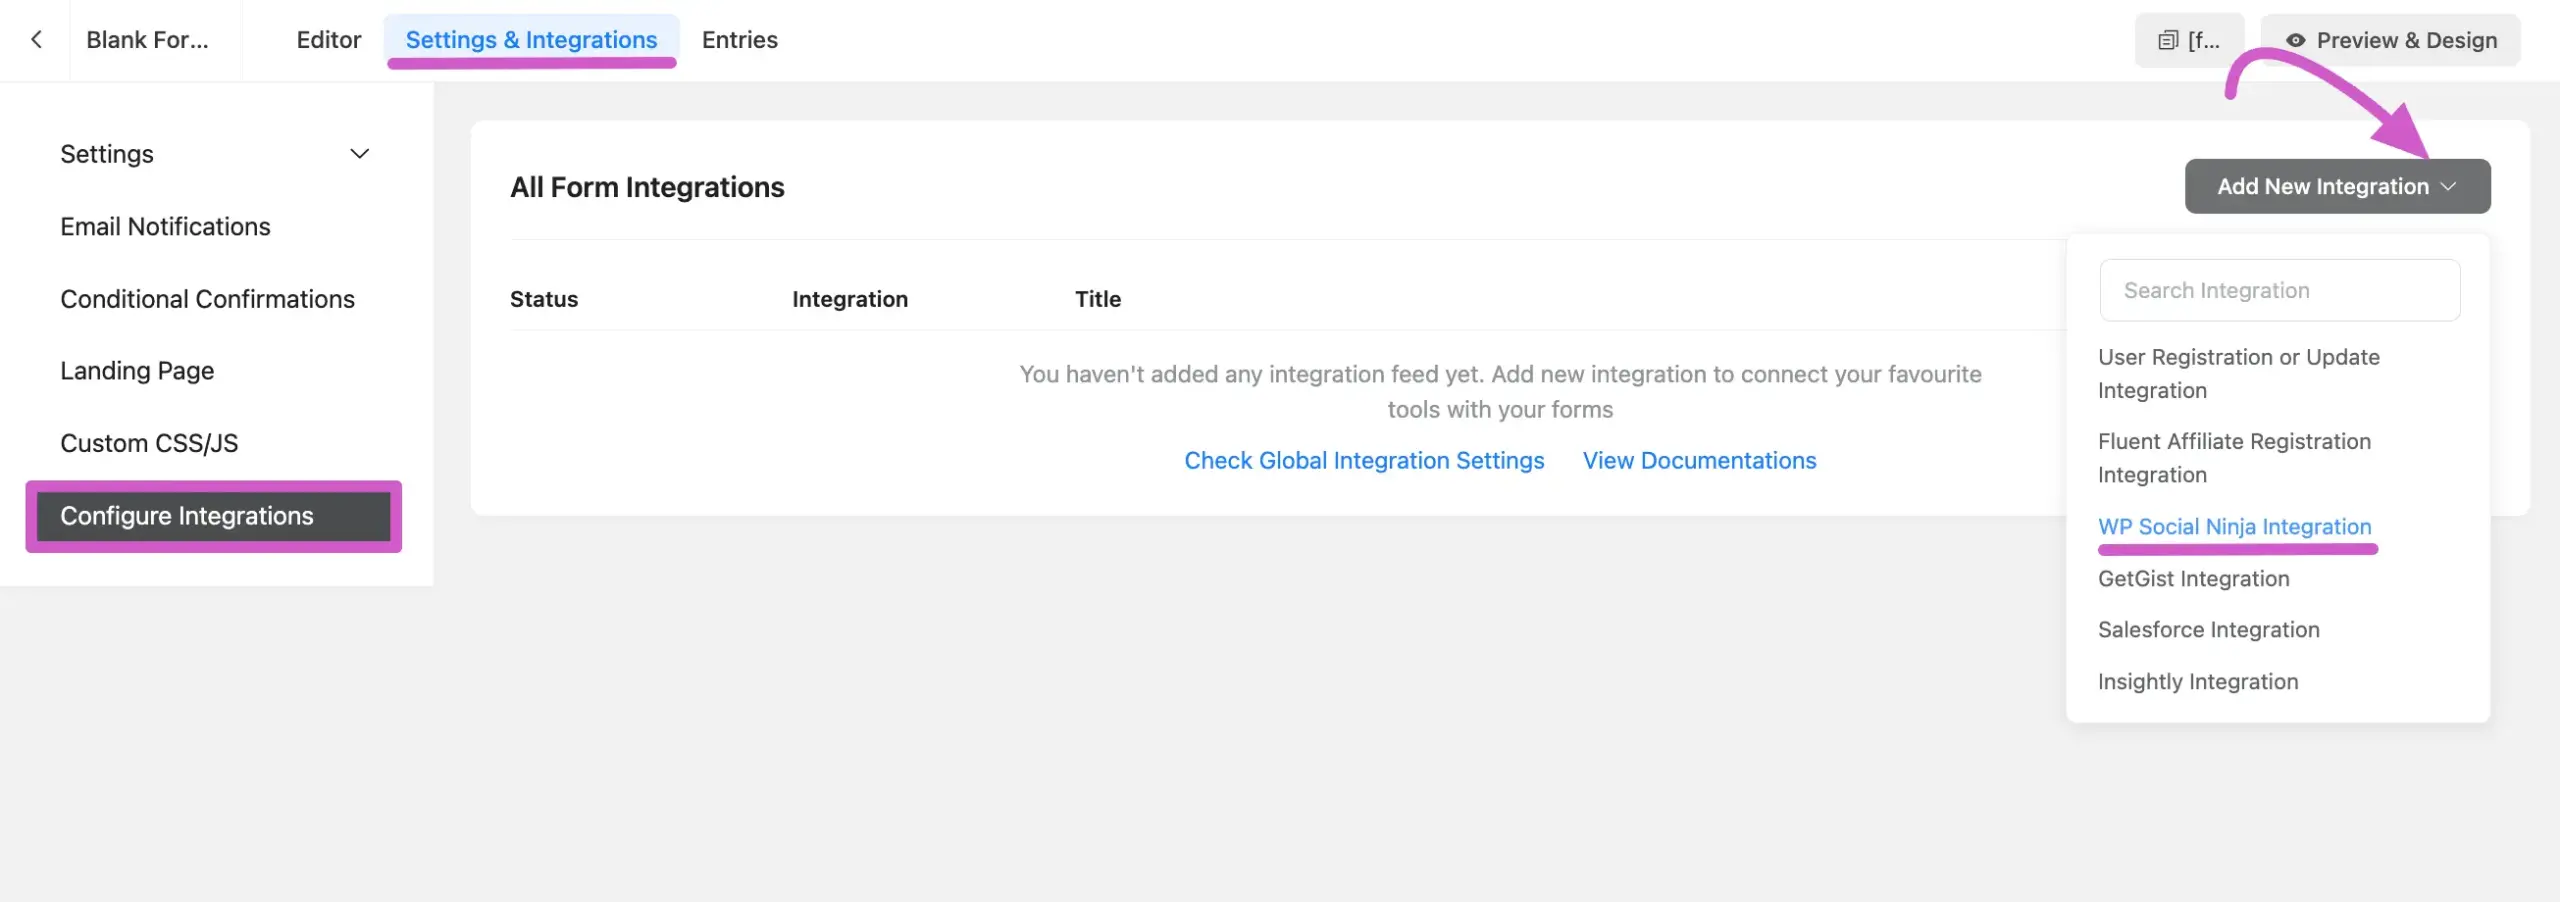
Once your form is ready, go to the Settings & Integrations section, navigate to the Configuration Integrations tab. Click the Add New Integration button, and select the WPSocial Ninja Integration feed from the dropdown list.
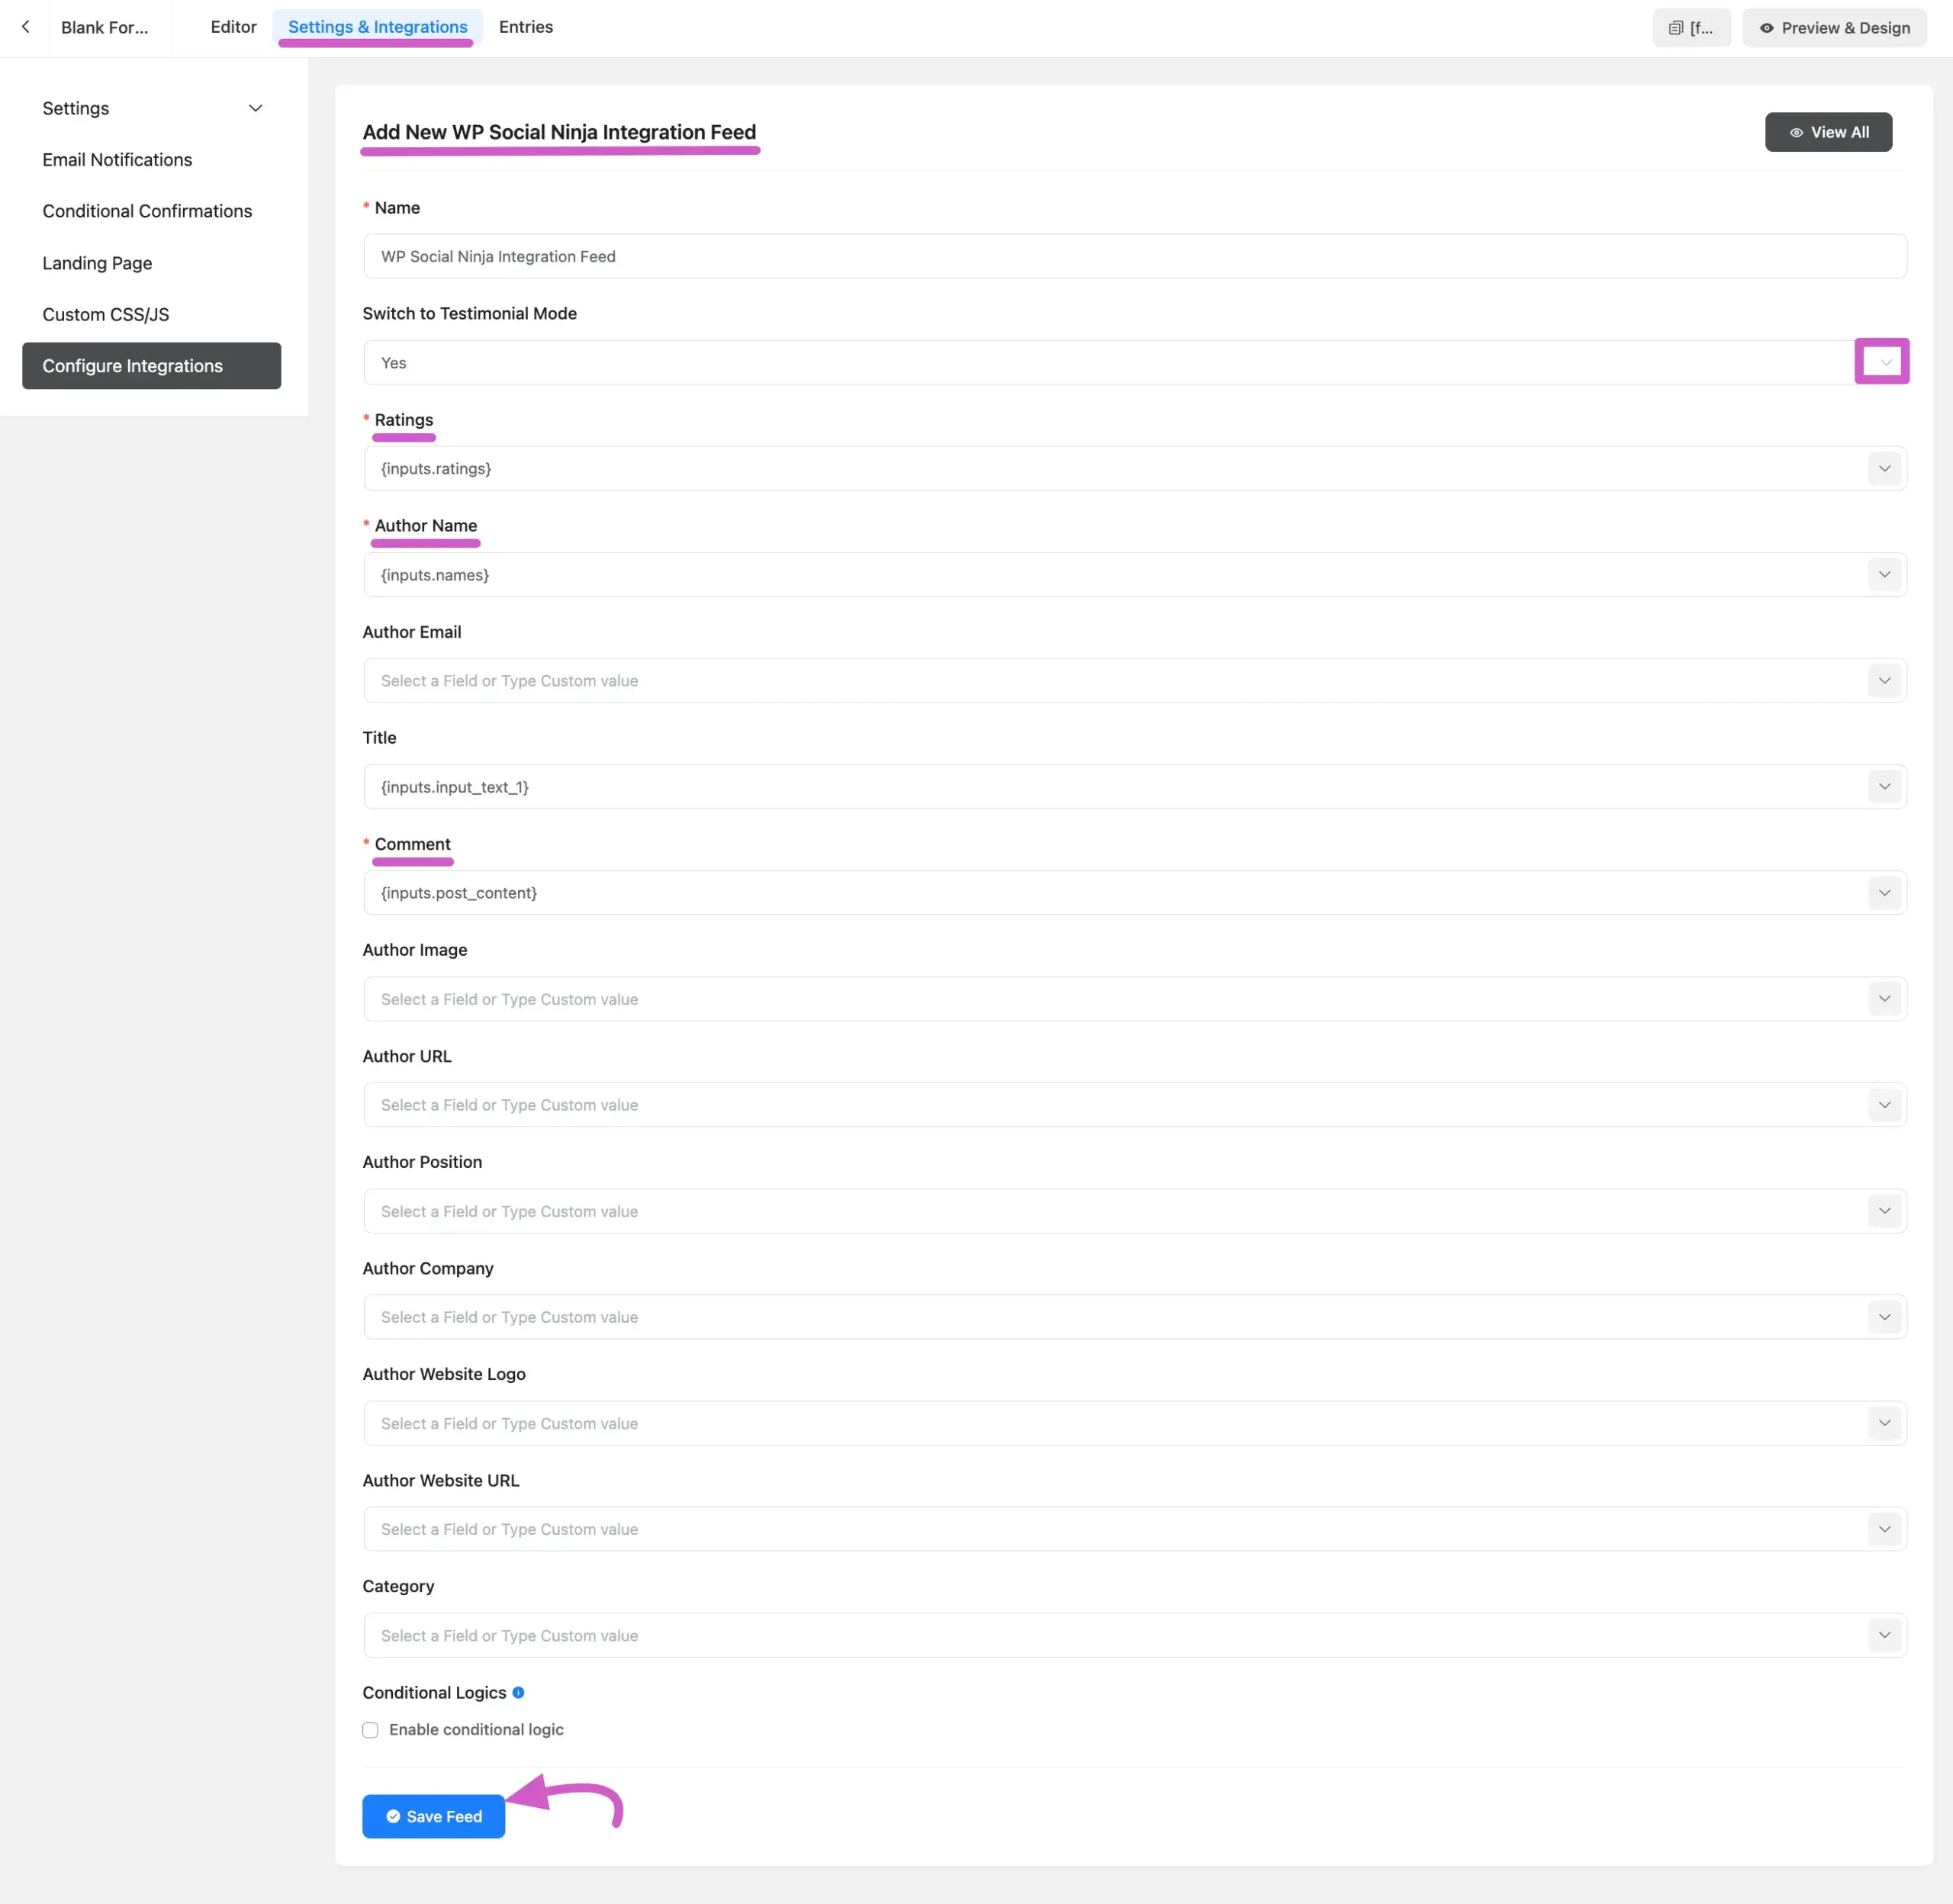
After you select the WP Social Ninja integration, a configuration panel will appear. Then, you will find the configuration panel where you must map your form fields to the corresponding testimonial fields in WP Social Ninja.
Here is a breakdown of the fields you need to configure:
- Name: Enter a name for this specific integration feed.
- Switch to Testimonial Mode: Select Yes from the dropdown. This is crucial for mapping testimonial-specific fields like Author Position and Company.
- Ratings (Required): Map this to the Ratings field on your form.
- Author Name (Required): Map this to the name field on your form.
- Comment (Required): Map this to the text area field where users write their testimonial.
- Title, Author Email, Author Image, etc.: Map the remaining fields (like Author Position, Company, Website URL) to their corresponding fields on your form.
- Conditional Logic: You can enable this to set rules for submissions. For example, you can set a rule to only accept submissions with a 4-star rating or higher.
After mapping the fields, click the Save Feed button. Your integration is now active and will appear in the list, where you can edit or delete it later.
The form has been integrated successfully. You can modify or remove the feed by selecting the Settings or Delete icon. After that, you can copy the Form’s shortcode and paste it into any page/post.

Add a Custom Testimonial #
First, go to your WP Social Ninja dashboard. From the top menu bar, click on the Testimonials tab. This will take you to the “All Testimonials” page. To add a new entry, click the Add Testimonial button located in the top-right corner.

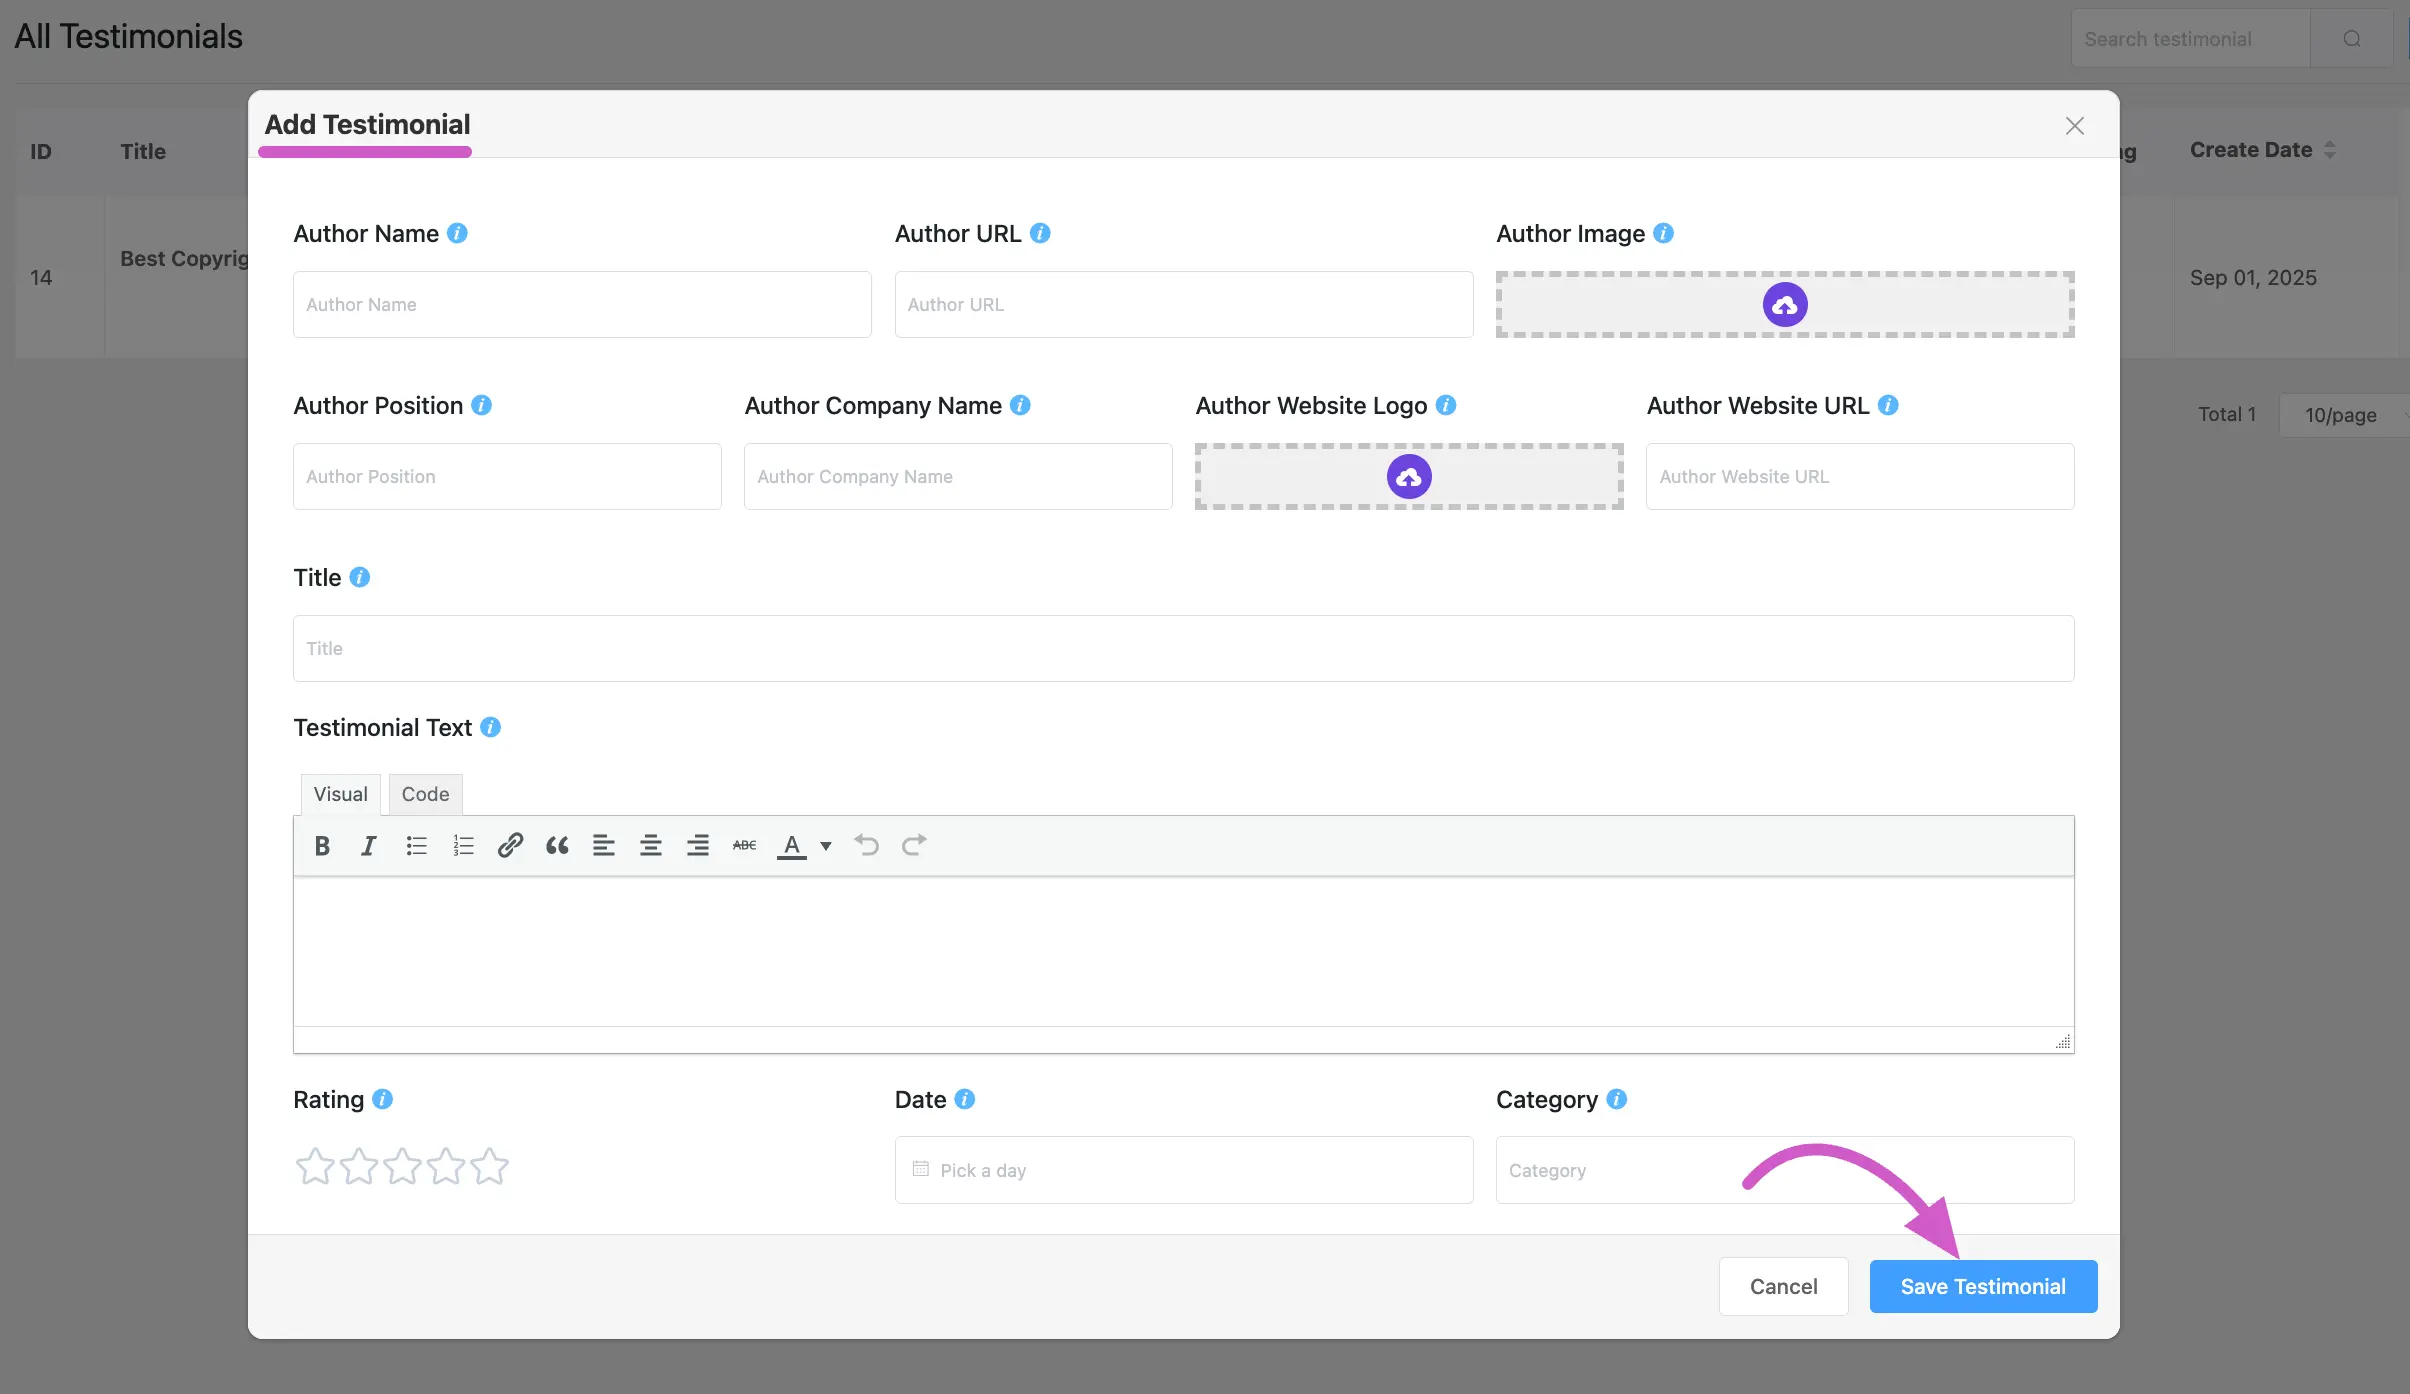
Enter the Testimonial Details #
After clicking the button, a pop-up form will appear. Here, you can fill in all the details for the testimonial. Once you have entered all the information, click the Save Testimonial button at the bottom of the form to add it to your collection. After saving, your new testimonial will appear in the “AllTestimonials” list.
Display Your Testimonials on Your Website #
Finally, to display the testimonials collected through your form, you need to create a template in WP Social Ninja. Copy the template’s shortcode and paste it onto any page or post where you want your testimonials to appear.
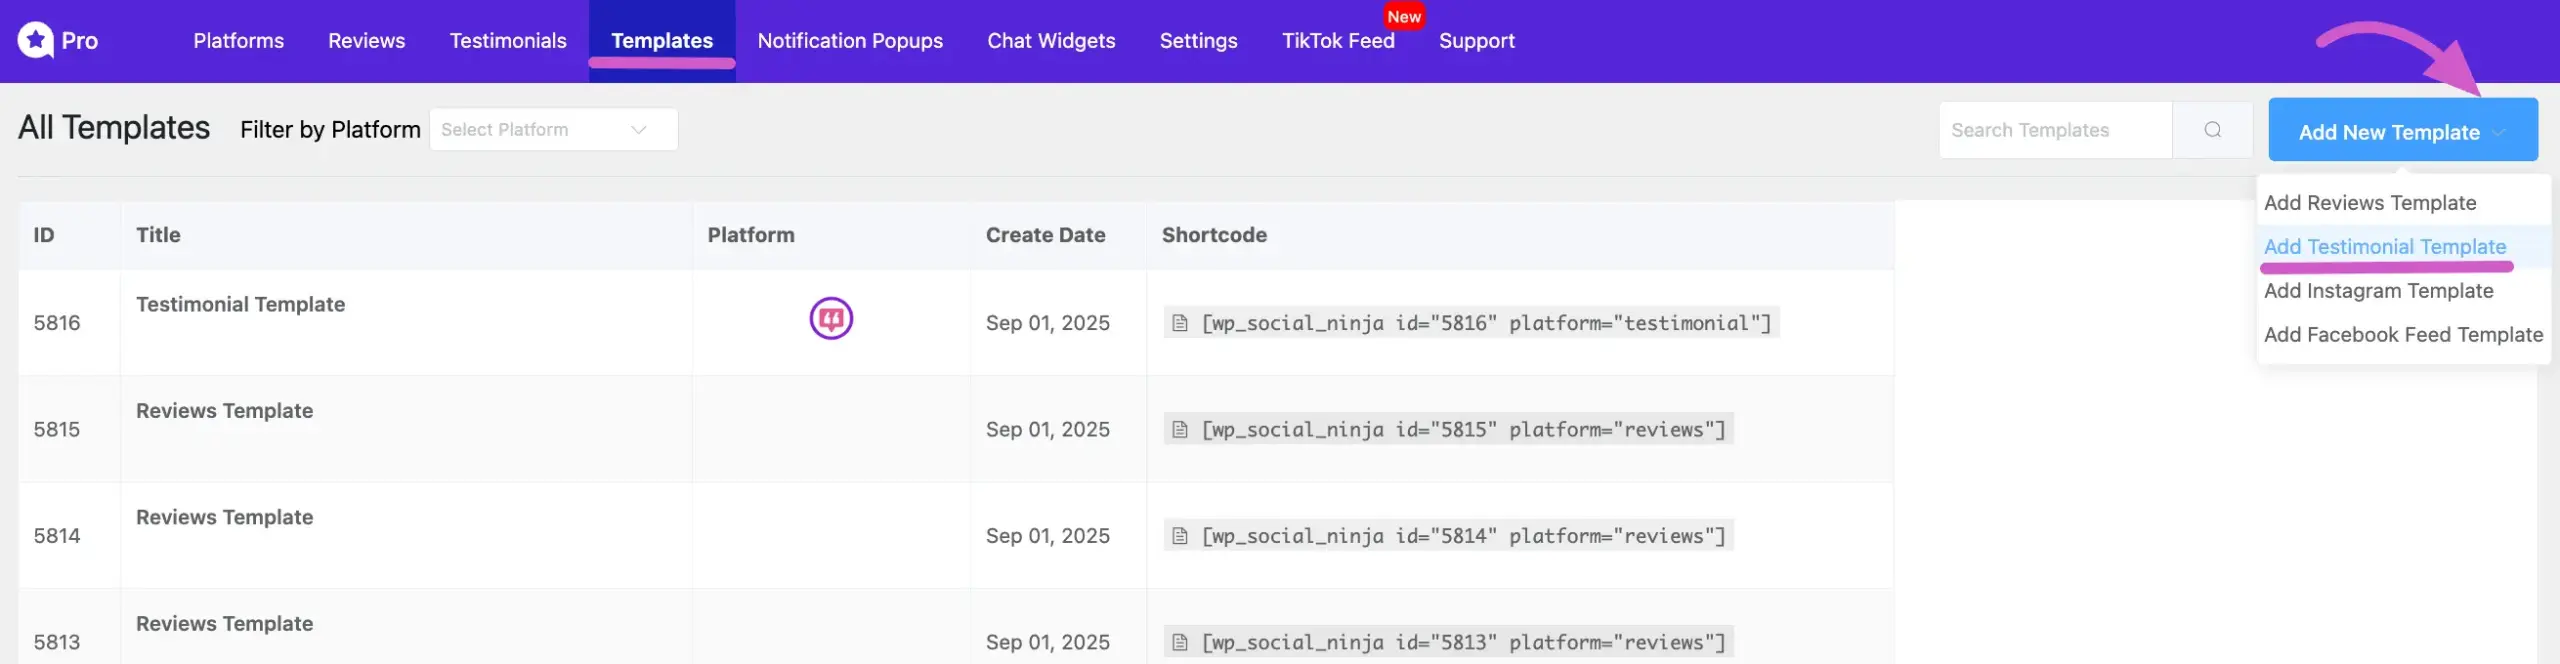
- Go to your WP Social Ninja dashboard → Templates.
- Click the Add New Template button and select Add Testimonial Template.
- Customize the layout and style of your template in the editor. The testimonials submitted through Fluent Forms will automatically be pulled into this template.
After clicking on the Add Testimonial Template, let’s look at how it looks on the frontend.
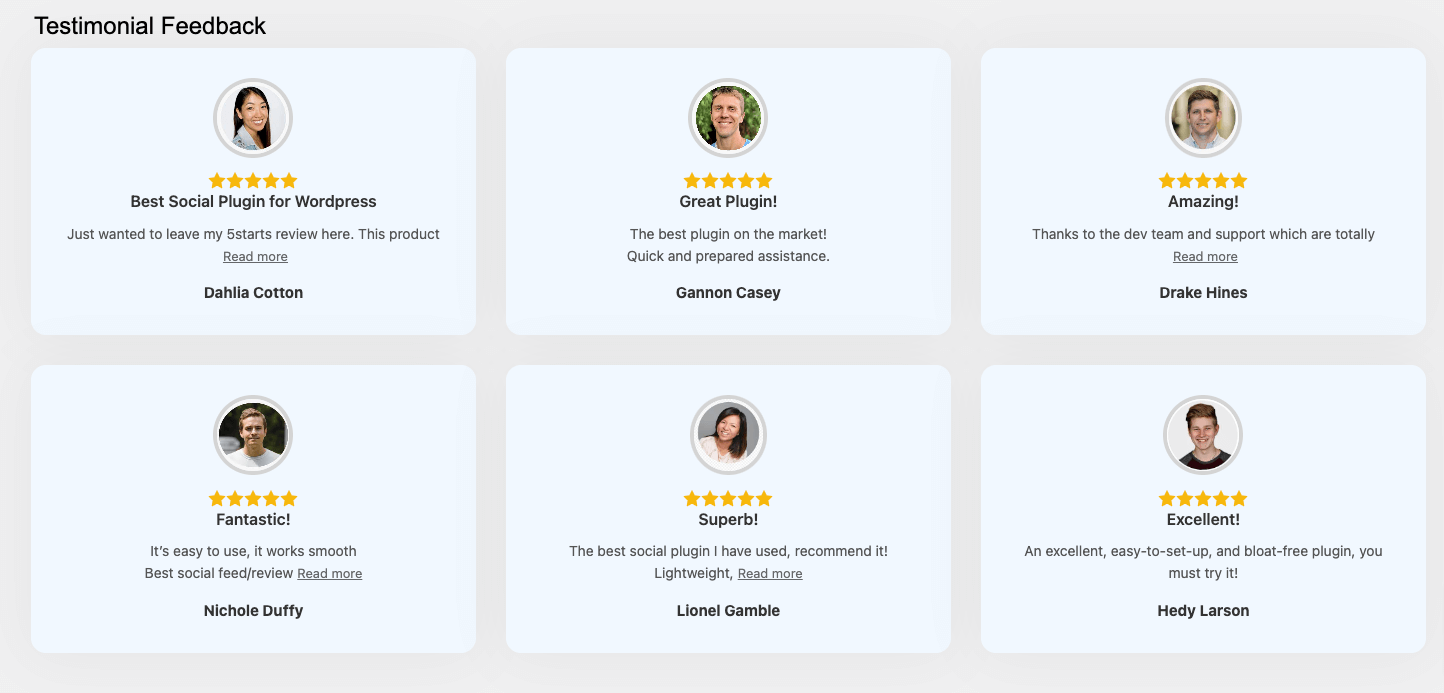
Collecting Testimonials in Fluent Forms is as simple as a slice of pie!
You can also check out – How to Add Fluent Forms Reviews with WP Social Ninja here.


WP Social Ninja module is not listed in the integrations tab of my interface.
Hello, can you please open a support ticket? Here:https://wpmanageninja.com/support-tickets/#/. Our support agents can check it and fix your issue!