WP Social Ninja Facebook feed settings have unique features to highlight your brand. Let’s see how to customize your Facebook feed easily.
Feed #
WP Social Ninja offers detailed Feed settings for users with multiple options to customize the feed section.
After clicking on the Feed, a drop-down menu will appear.
Let’s see how each setting option works.
Open Post in #
This section has three options; None, Open on Facebook and Open in Popup Box.
Selecting the Open on Facebook option will redirect you to the Facebook page to show the specific post. But, if you go for the Open in Popup Box button, you can look at the same page as a Popup modal.
Popup #
If you select Open in Popup Box, you will find a totally different popup section to customize your popup box with different key features. It has a Display Sidebar, Display Profile Photo, Display User Name, Display Caption, Display Date, Display Comments, and Display Call to Action buttons that will help you customize your pop-up.
You can enable or disable each button, depending on your preference.
Display Author Photo #
Next, you can control your Display Author Photo on your website. Decide whether you want to display the Author’s photo from here and plan accordingly.
For demonstration purposes, we have kept the button enabled. However, if you don’t want to display it on your website, turn off the button.
Display Author Name #
In Display Author Name, you can mention the author’s name. If you don’t want to display the name, you can turn off the button from the settings panel.
Here, the button is enabled, so the Author Name is displayed.
Display Date #
After Author Name, you will find Display Date. Turn on the button to show your feed date on your website.
You can turn off the button to hide the display date.
Display Description #
With the Display Description option, you can decide whether to show your post description on your website. If you don’t want to display the description, disable the button.
However, the Display Description button is enabled in this screenshot, and now you can see all the descriptions.
Display Likes Count #
Decide whether to display the number of likes by enabling/disabling the Display Likes Count button.
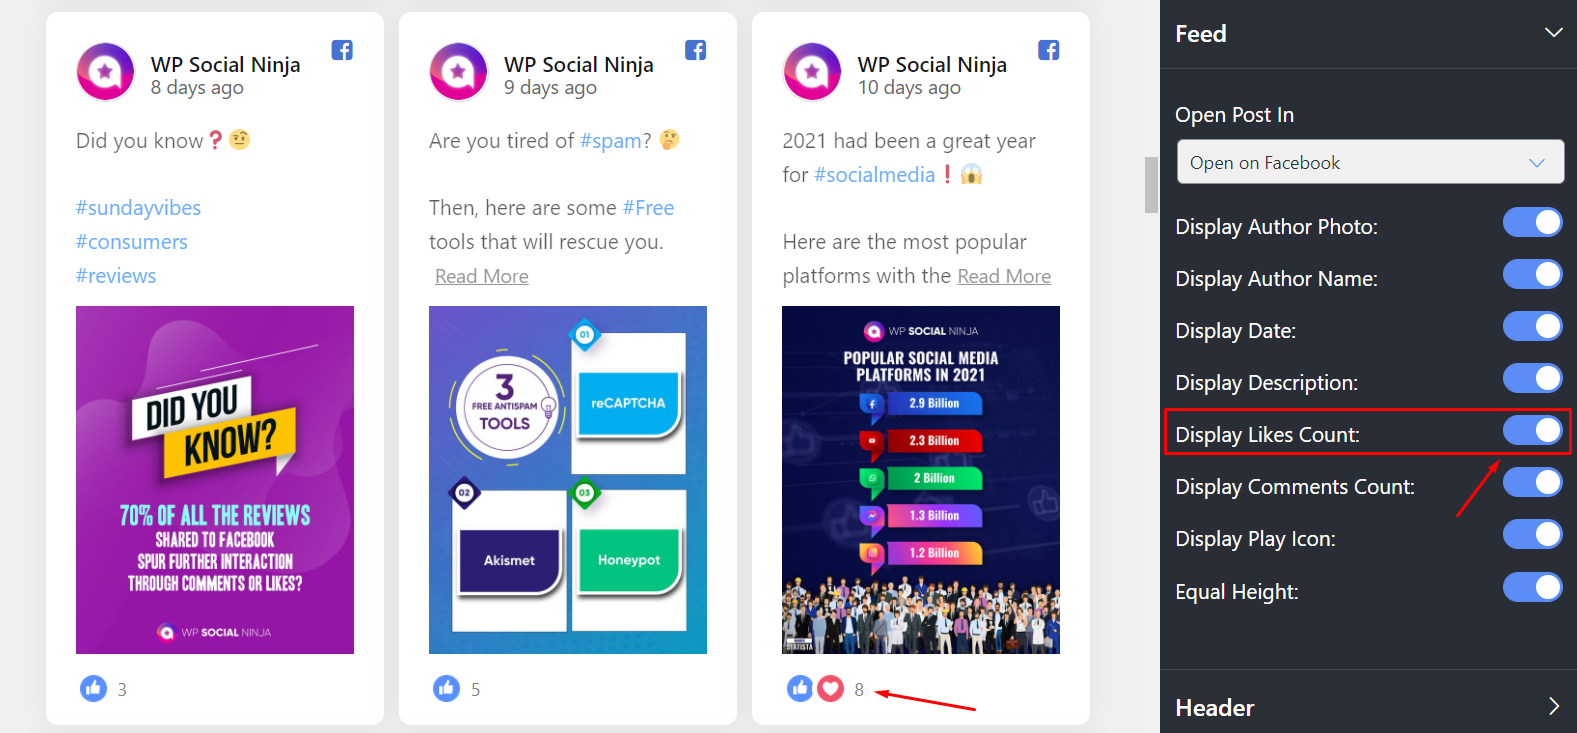
If you want to show your likes count, turn on the button, but just disable this option if you don’t want to display the likes count.
Display Comments Count #
The next option is Display Comments Count. Here you can show or hide your comments for your website.
Here, the button is enabled. So comments count is displayed. However, turn off the button if you don’t want to display it.
Display Play Icon #
At this part, you can display your video’s Play Icon.
Here we kept it on. You can turn off this option if you want.
Equal Height #
Equal Height is another convenient feature. So if you want to maintain an equal height for every post, just enable the button.
However, if you don’t want to maintain an Equal Height for your post, just turn off the button.
Header #
Header settings will appear after the Feed button.
Let’s find out how to customize the Header in the Facebook feed settings.
Display Header #
In this part, you can control the Display Header on your website. The display header button is enabled here; for that reason, you can see the entire header part. However, if you don’t want to display it on your website, turn off the button.
You can see this on the screenshot; all the additional settings are pointed.
Account to Display #
Next, you have to select the page you want to display for your website from the Account to Display button.
Here, we have selected our WP Social Ninja Facebook page to understand better.
Display Cover Photo #
You can display your Cover Photo at this stage by turning on the button to show.
But if you don’t want to show the photo, turn off the button. As a result, your cover photo will not be shown in your feed header section, but other information will remain the same.
Display Profile Photo #
After displaying the cover photo, you will find the Display Profile Photo. Turn on the button if you want to show your photo.
Here, the button is enabled, so the profile photo is displayed. You can disable the button if you don’t want to show your profile photo in the header.
Display Page Name #
The page name is your business identity. Decide whether to show your page name from Display Page Name.
As you can see here, the Display Page Name button is on, and the page name is displayed. You can turn the button off if you want.
Display Description #
With this option, you can display your Page description so that your customers can get a brief idea about your product or service. That’s why you need to turn on the Display Description button.
You can even turn off the button to hide the description if you want.
Display Likes Counter #
Similar to Display Description, you can also control whether to show pages from the Display Likes Counter option.
You can disable the button to hide the Likes Counter.
Like Button #
Once you click on the Like Button, a drop-down menu will appear again on the screen. In this segment, you can customize your Like Button in your way.
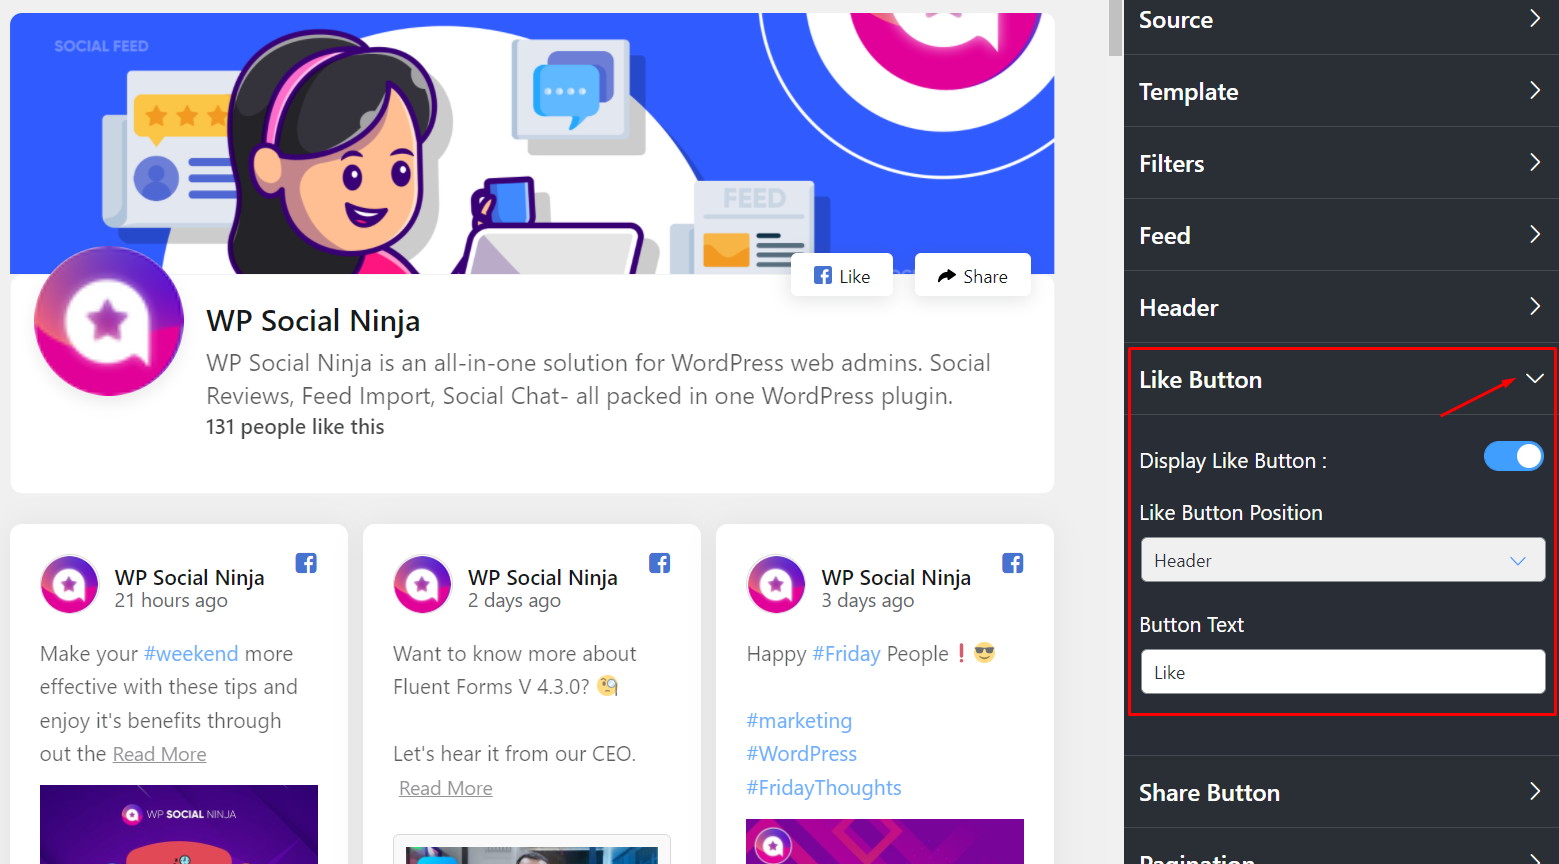
Now, let’s see how the options works.
Display Like Button #
By clicking the Display Like Button, you can turn on/off the Like button on your feed.
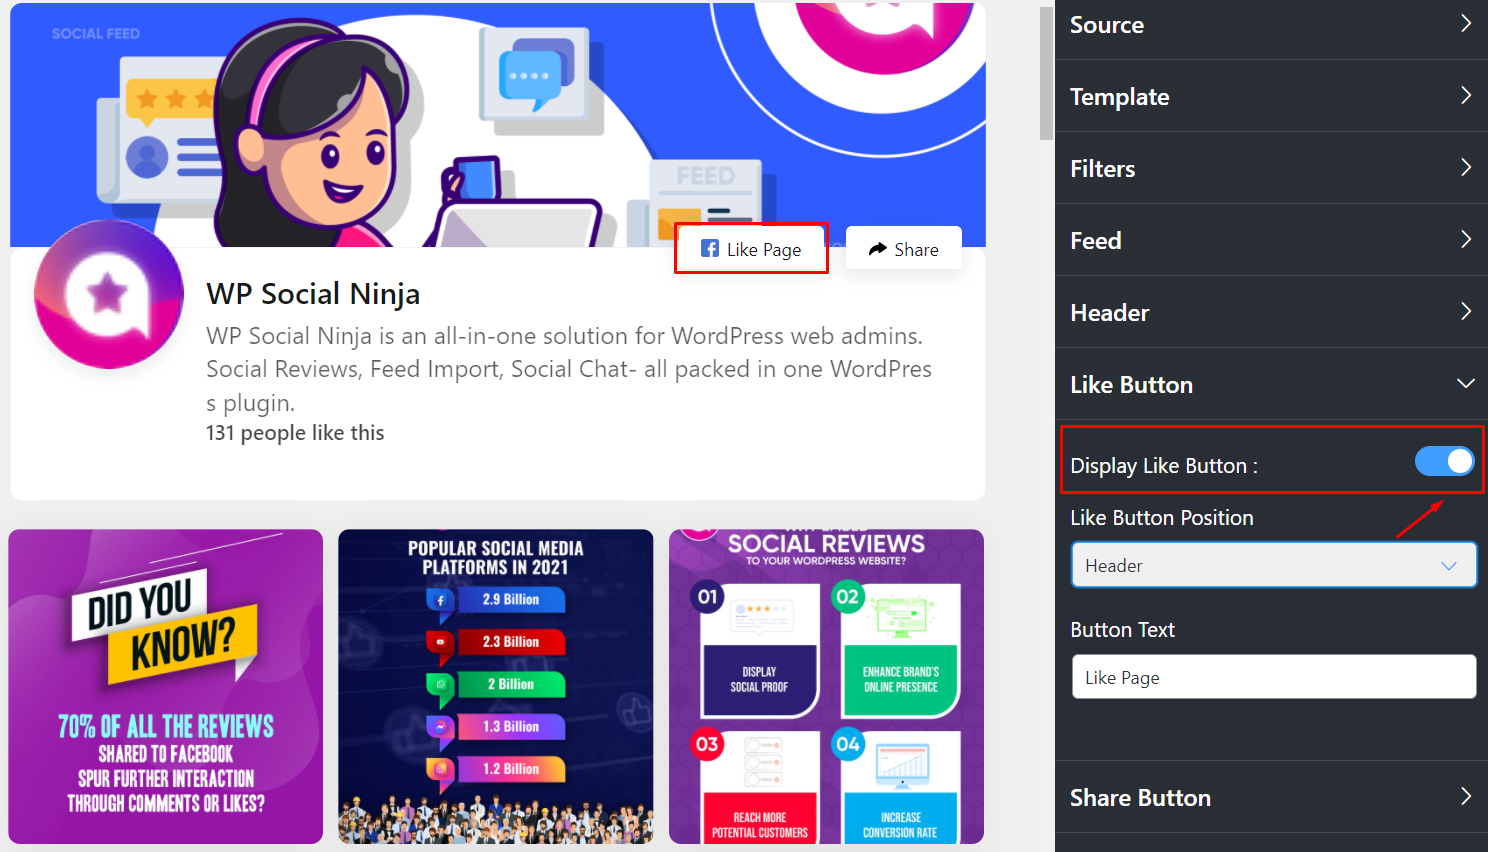
As you can see in this screenshot, we have turned it on. If you want to hide the button, just turn it off.
Like Button Position #
Right now, we have three options for Like Button Position; Header, Footer, and Both.
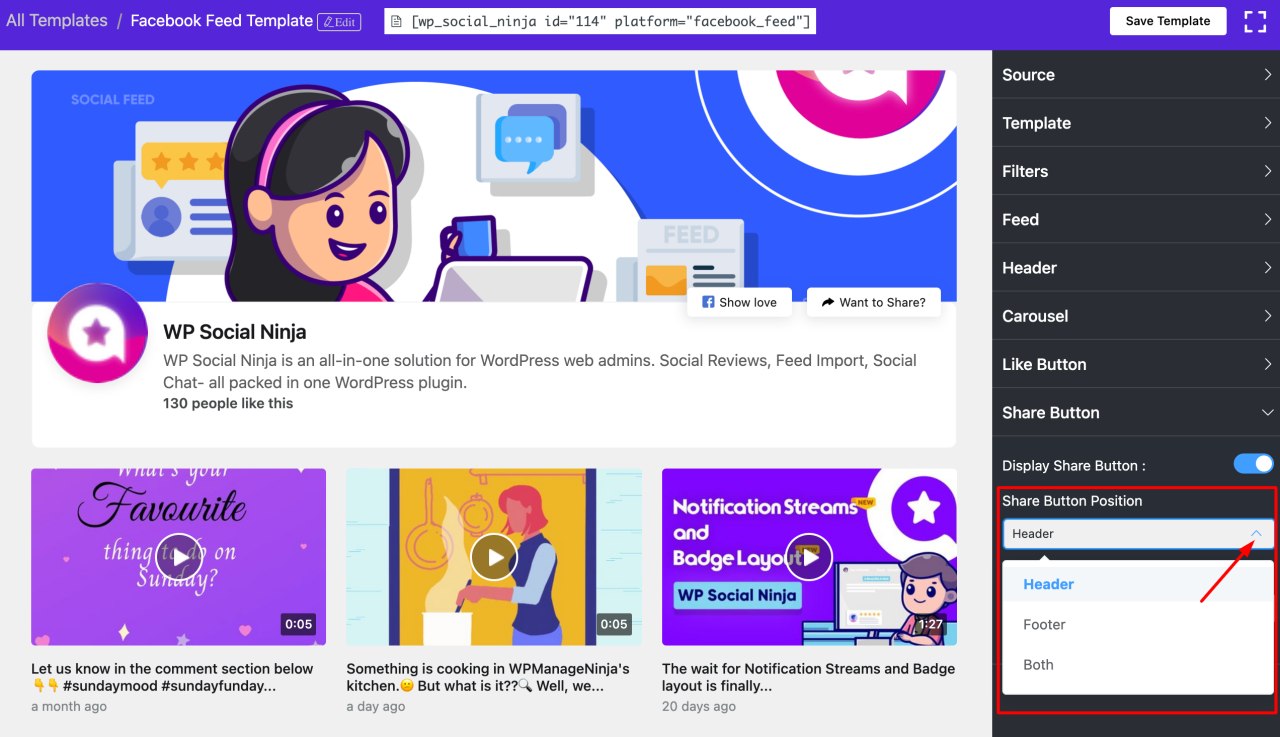
We have selected both to display the Like Button Position on the header and footer sections.
Button Text #
Button Text option will allow you to pick the correct words for your customize button.
So here, you can set your desired button text very easily.
Share Button #
The Share Button is quite similar to Like Button. So here, you can design your Share Button in your own way.
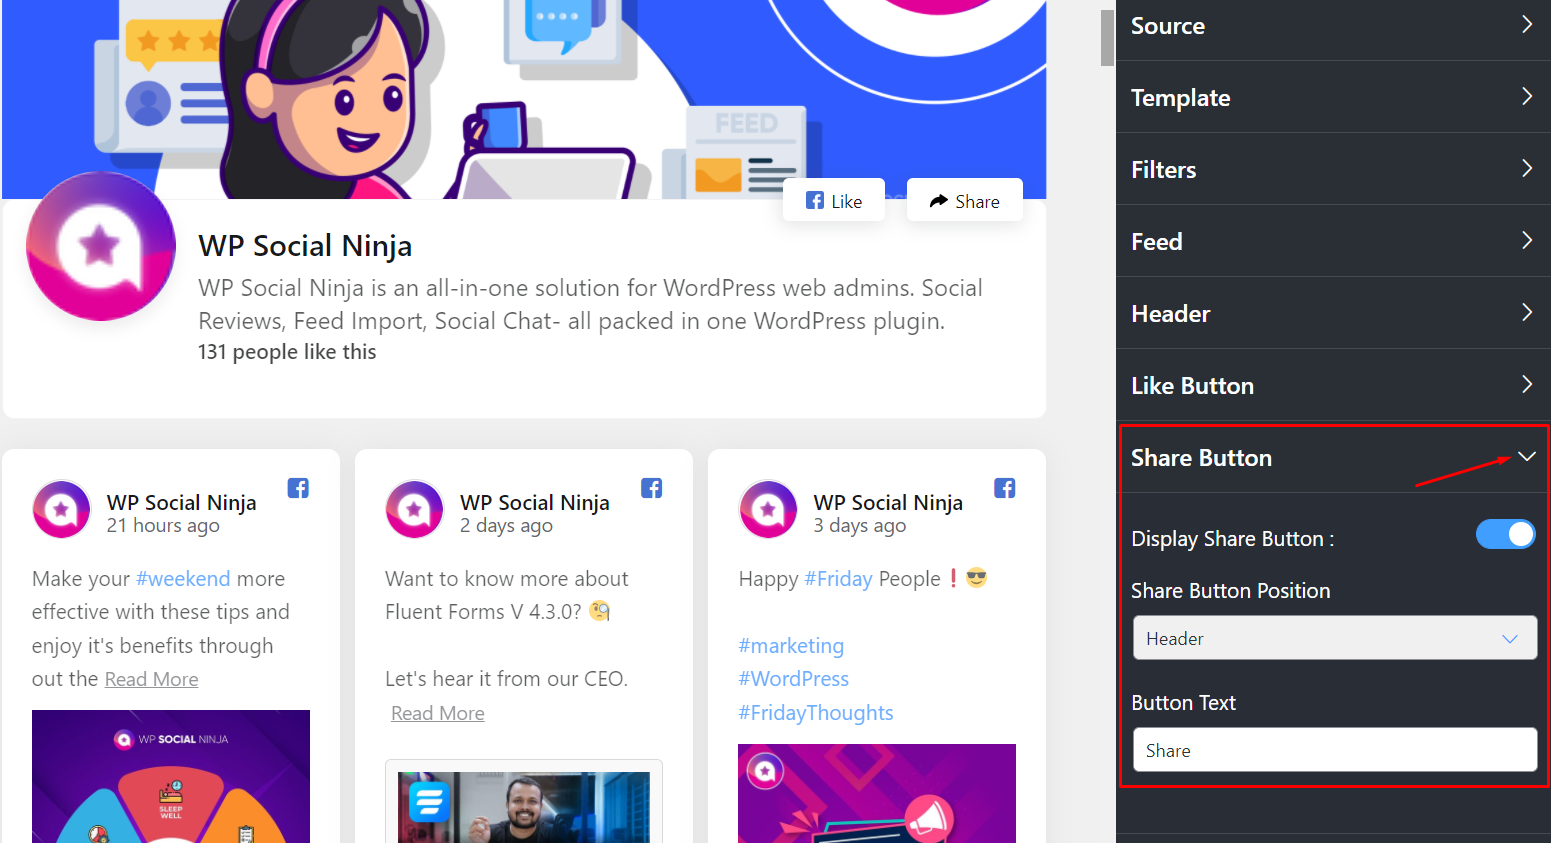
Let’s go through all the options available in Share Button.
Display Share Button #
Do you want to share your presence on the internet? Don’t worry; just turn on the Display Share Button.
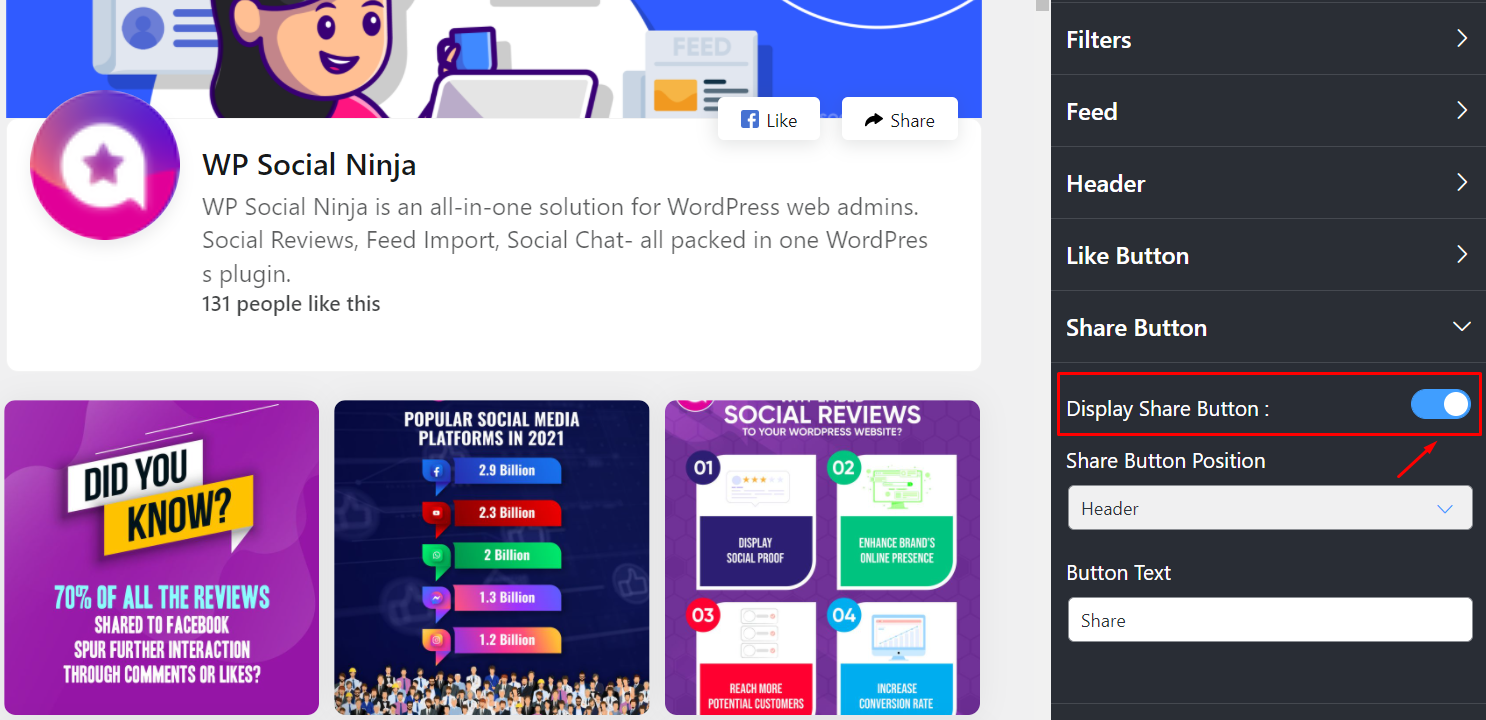
As you can see in this screenshot, we have turned it on. Turn off the Display Share Button if you want to hide this option.
Share Button Position #
There are three available options for Share Button Position, and are; Header, Footer, and Both.
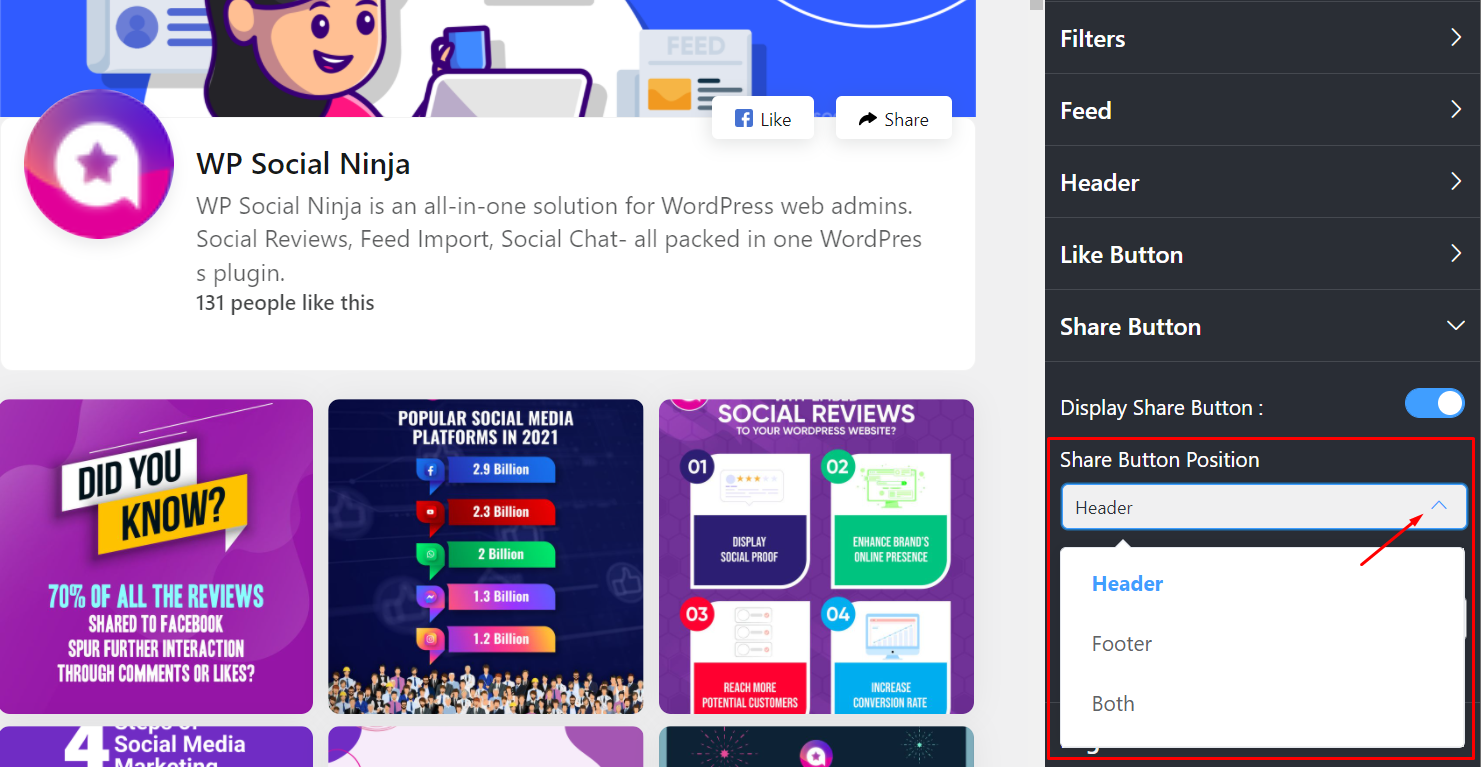
So, choose any particular one according to your wish.
Button Text #
It is a great option. So don’t miss this opportunity to customize your Button Text.
And you are all set to get more Likes and Shares.
Pagination #
At this stage, you can adjust the Pagination from the settings.
Pagination Type #
Right now, Pagination has two options; None and Load More. So you can select any.
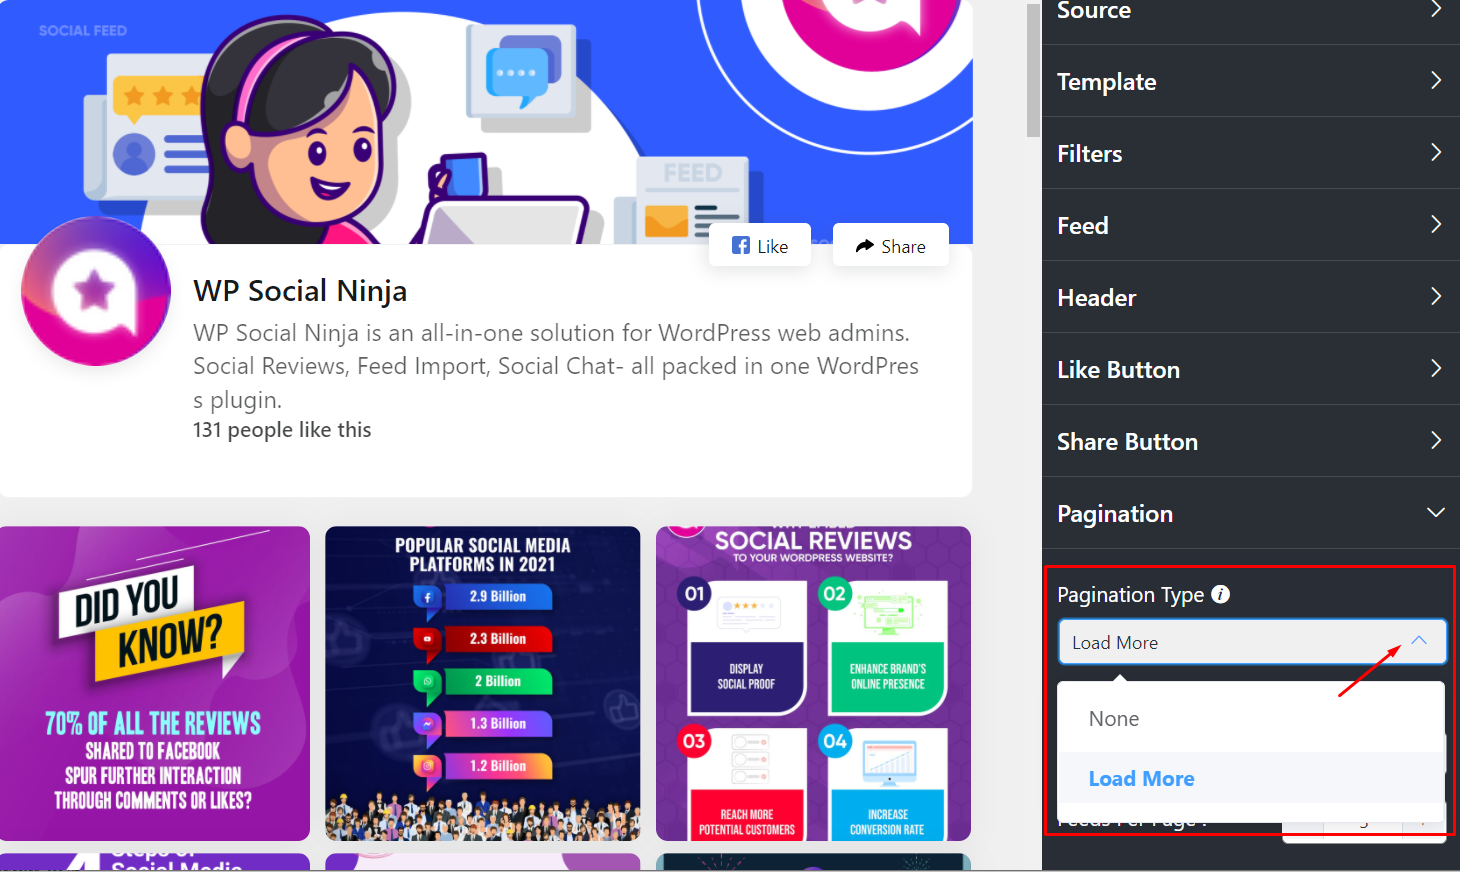
Selecting the Load More option will ask you to customize the Load More Button Text and adjust your Feeds per page. Adjust it according to your taste.
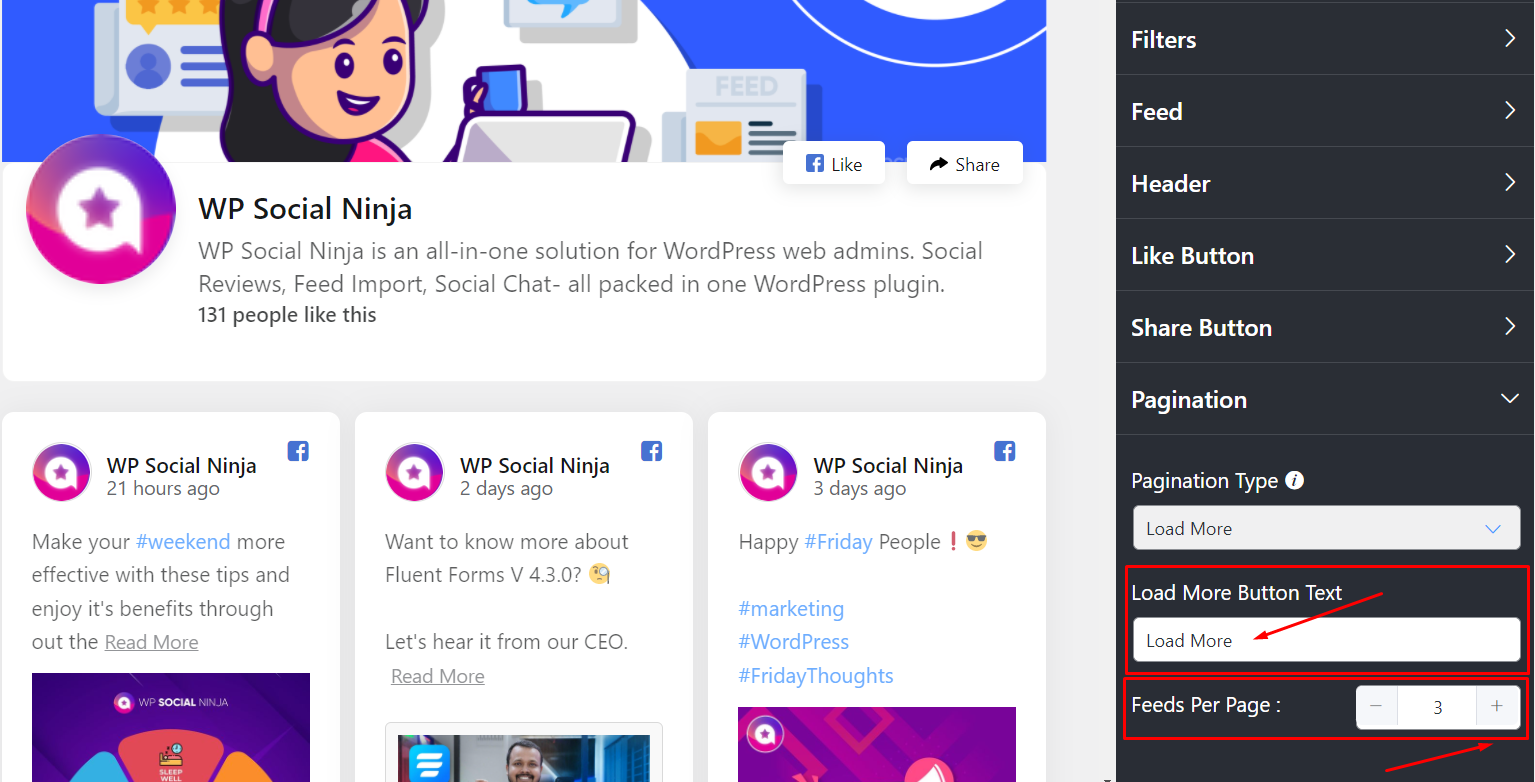
Once you’re done, don’t forget to click on the Save Template button, and you’ve successfully customized your Facebook feed.
Now let’s take a look at how it looks in the frontend.
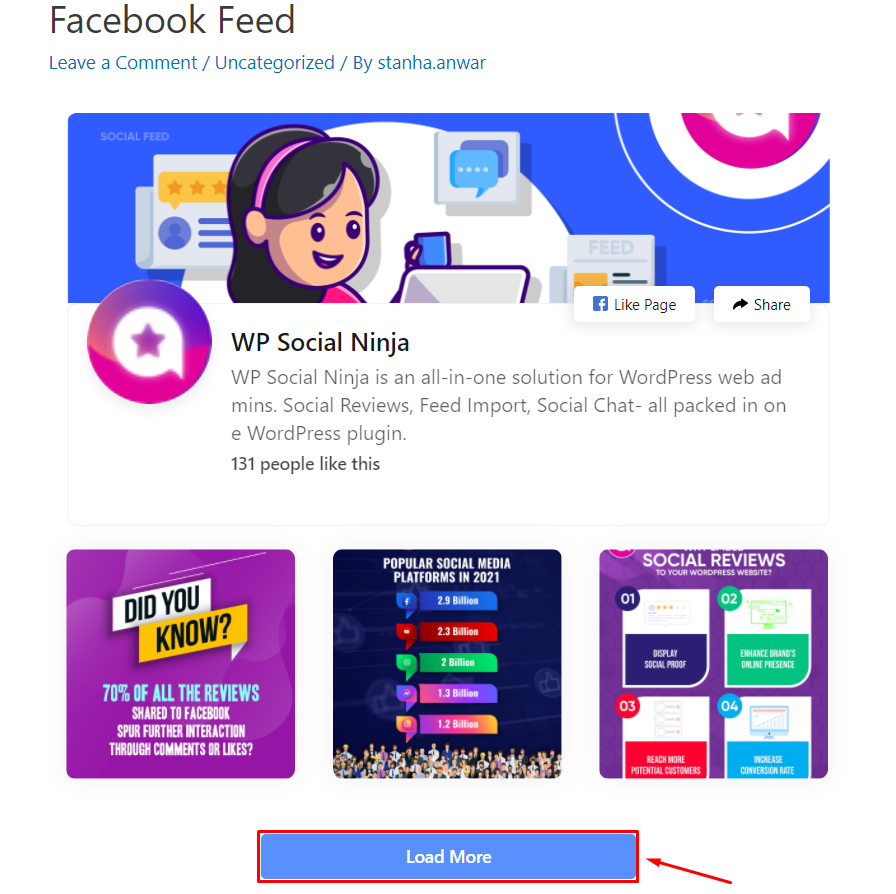
Customizing your Facebook feed with WP Social Ninja is that easy.
Also, check out – Facebook Feed Layout


