Show your Instagram Business Account feeds on your website with WP Social Ninja. Keep your audience engaged and grow your business by showcasing social media updates. Connecting your Instagram Business Account is quick and easy, requiring just a few clicks.
In this guide, we’ll walk you through the steps to connect both your Instagram Business Basic and Advanced accounts with WP Social Ninja.
Instagram Configuration #
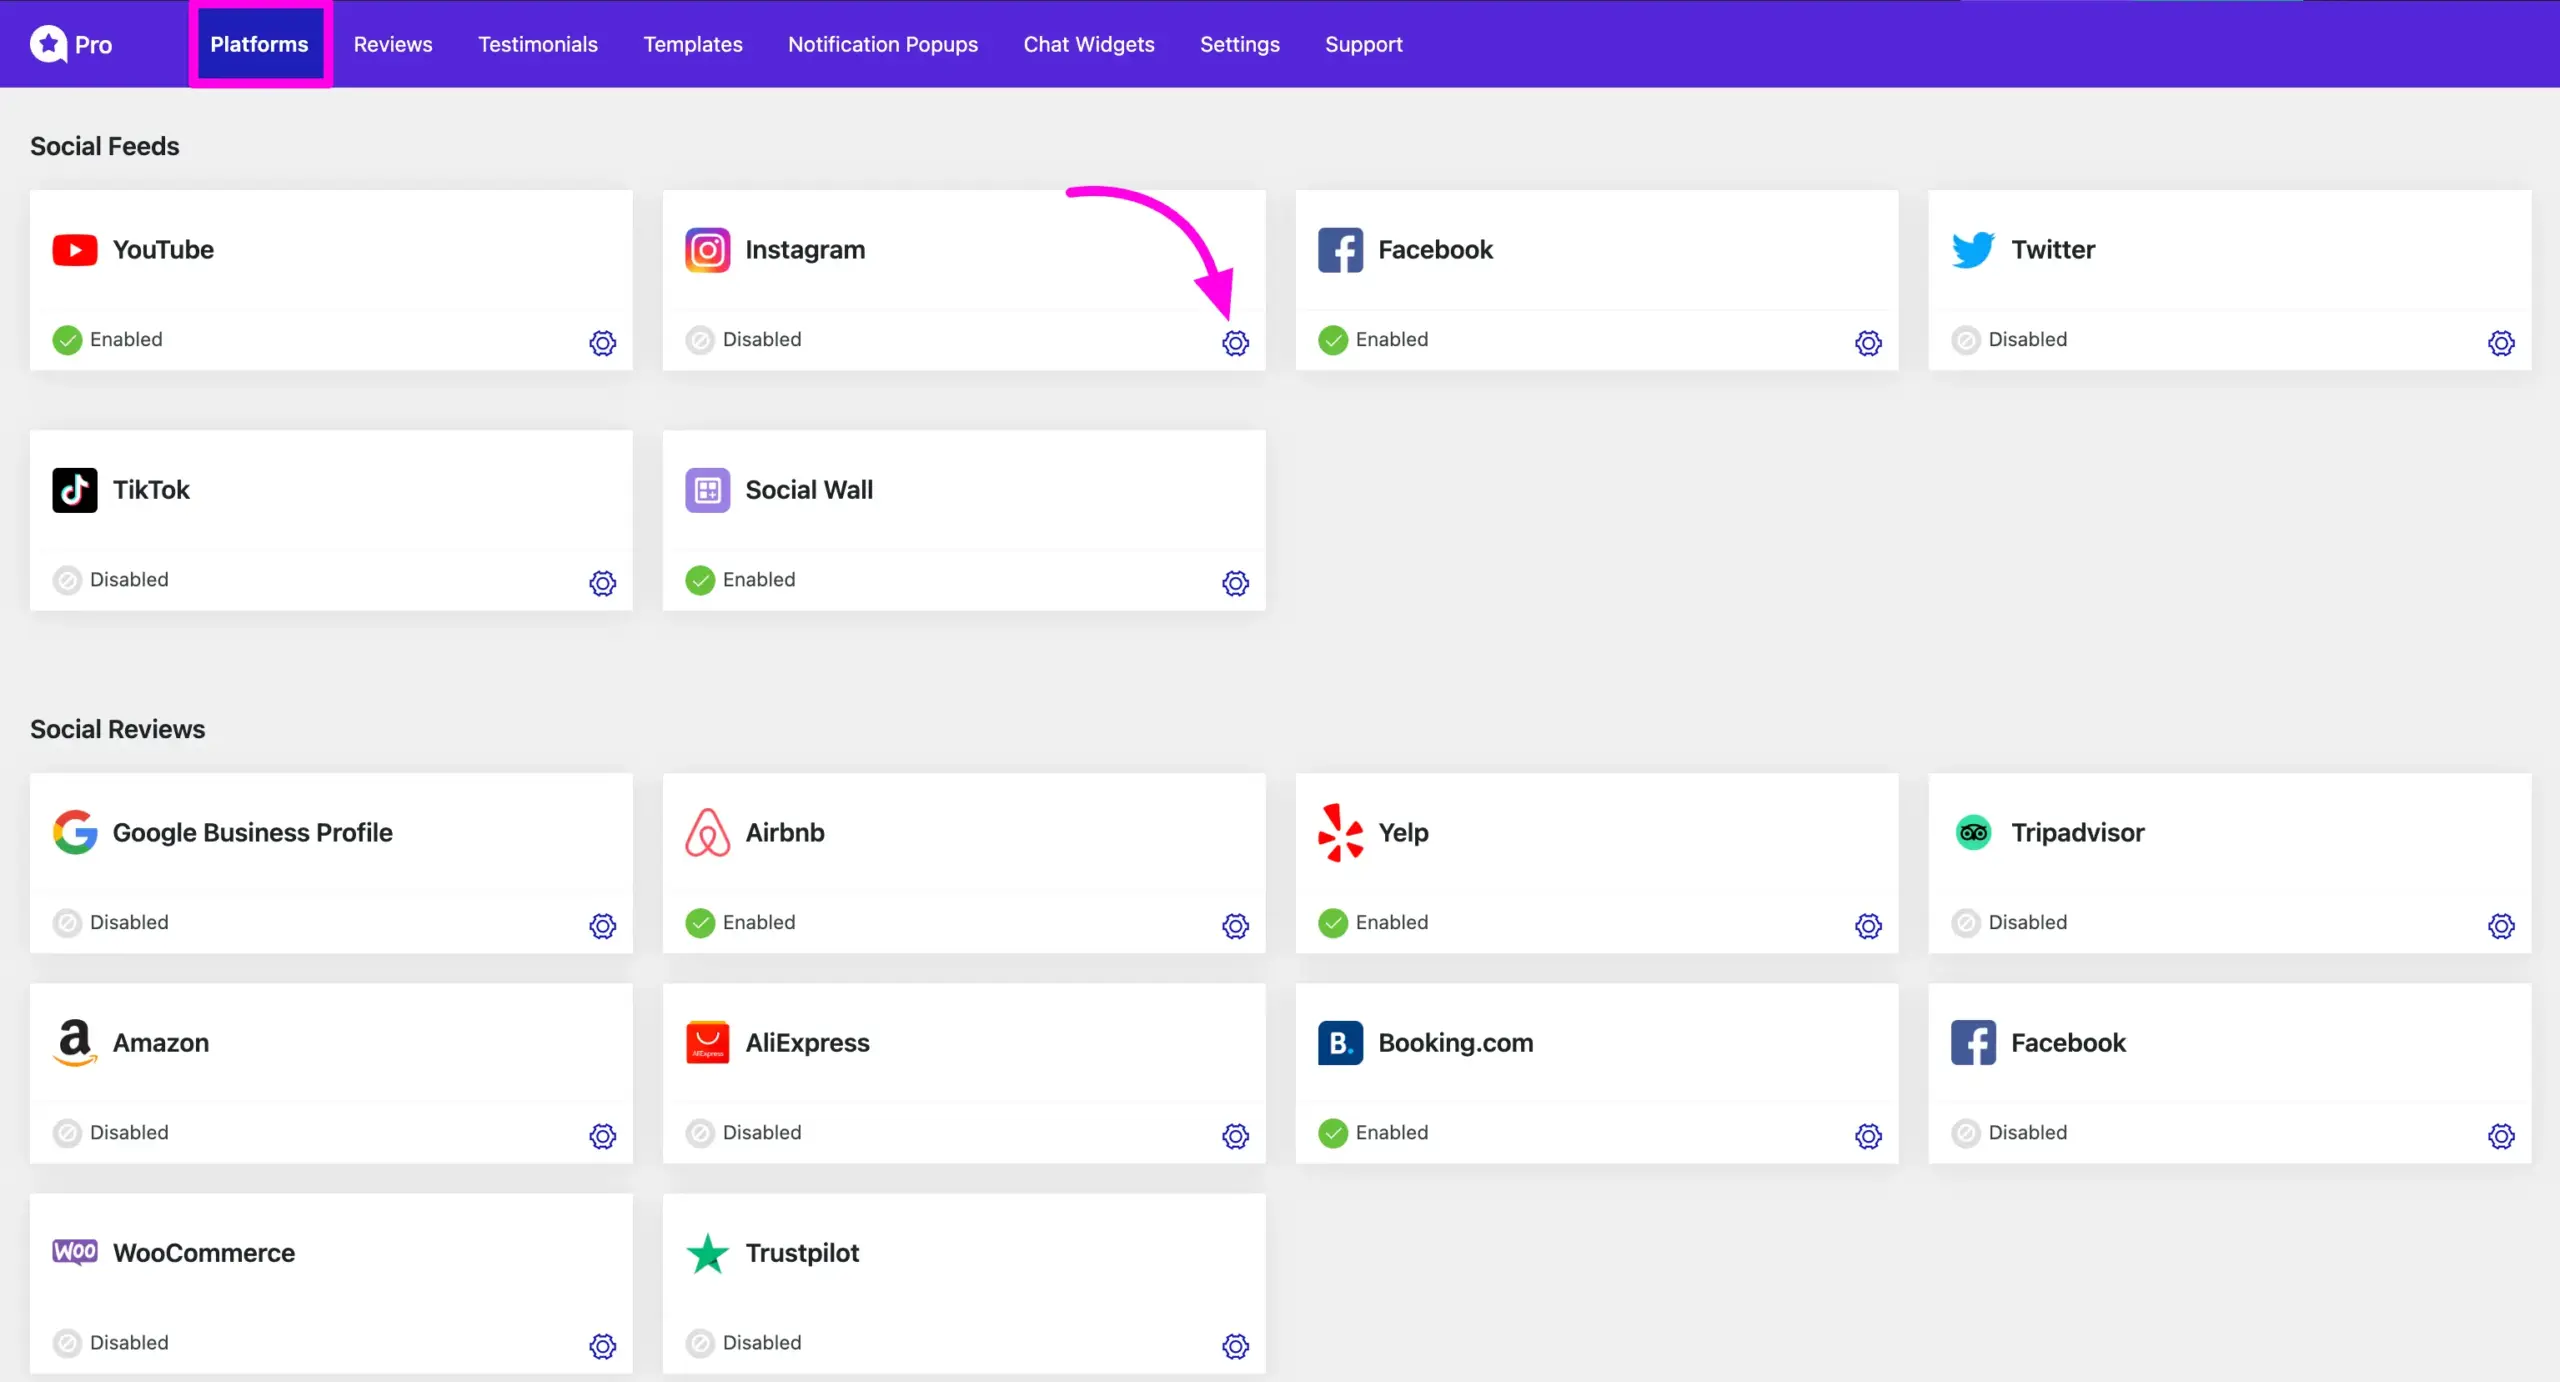
From your WordPress dashboard, navigate to WP Social Ninja and click on Platforms in the navbar. Here, you’ll find Instagram click on the Settings icon to access the configuration settings.
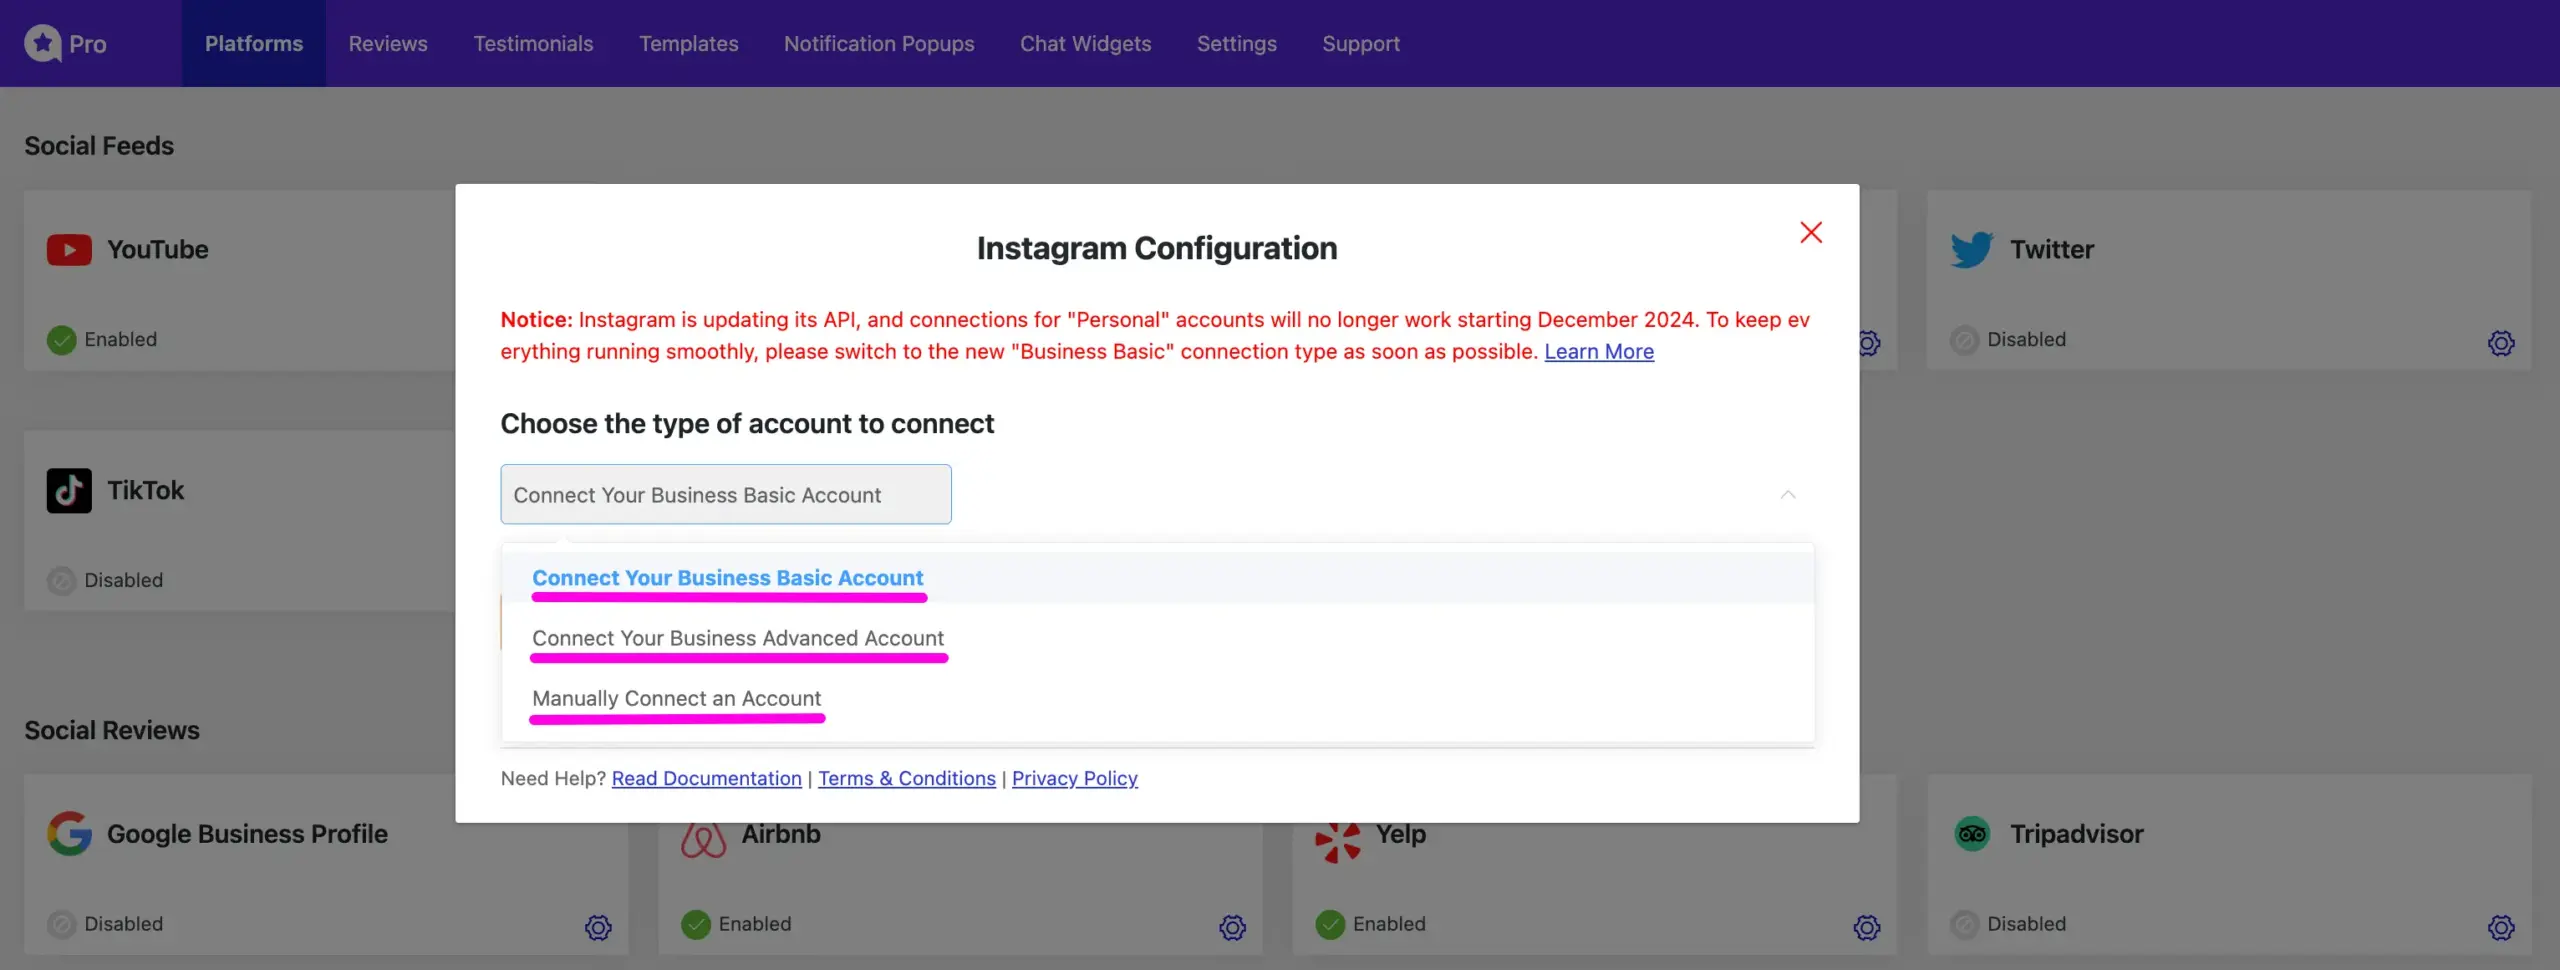
A popup will appear, prompting you to select your Instagram Account Type. In the Account Types dropdown section, you’ll see three options:
- Connect Your Business Basic Account
- Connect Your Business Advanced Account
- Manually Connect an Account
To understand the differences between a Business Basic Account and a Business Advanced Account, read this article for more details.
The Manually Connect Your Account option allows you to generate an API token from your Instagram business account and use it to connect your business account with WP Social Ninja.
Connect Your Business Basic Account #
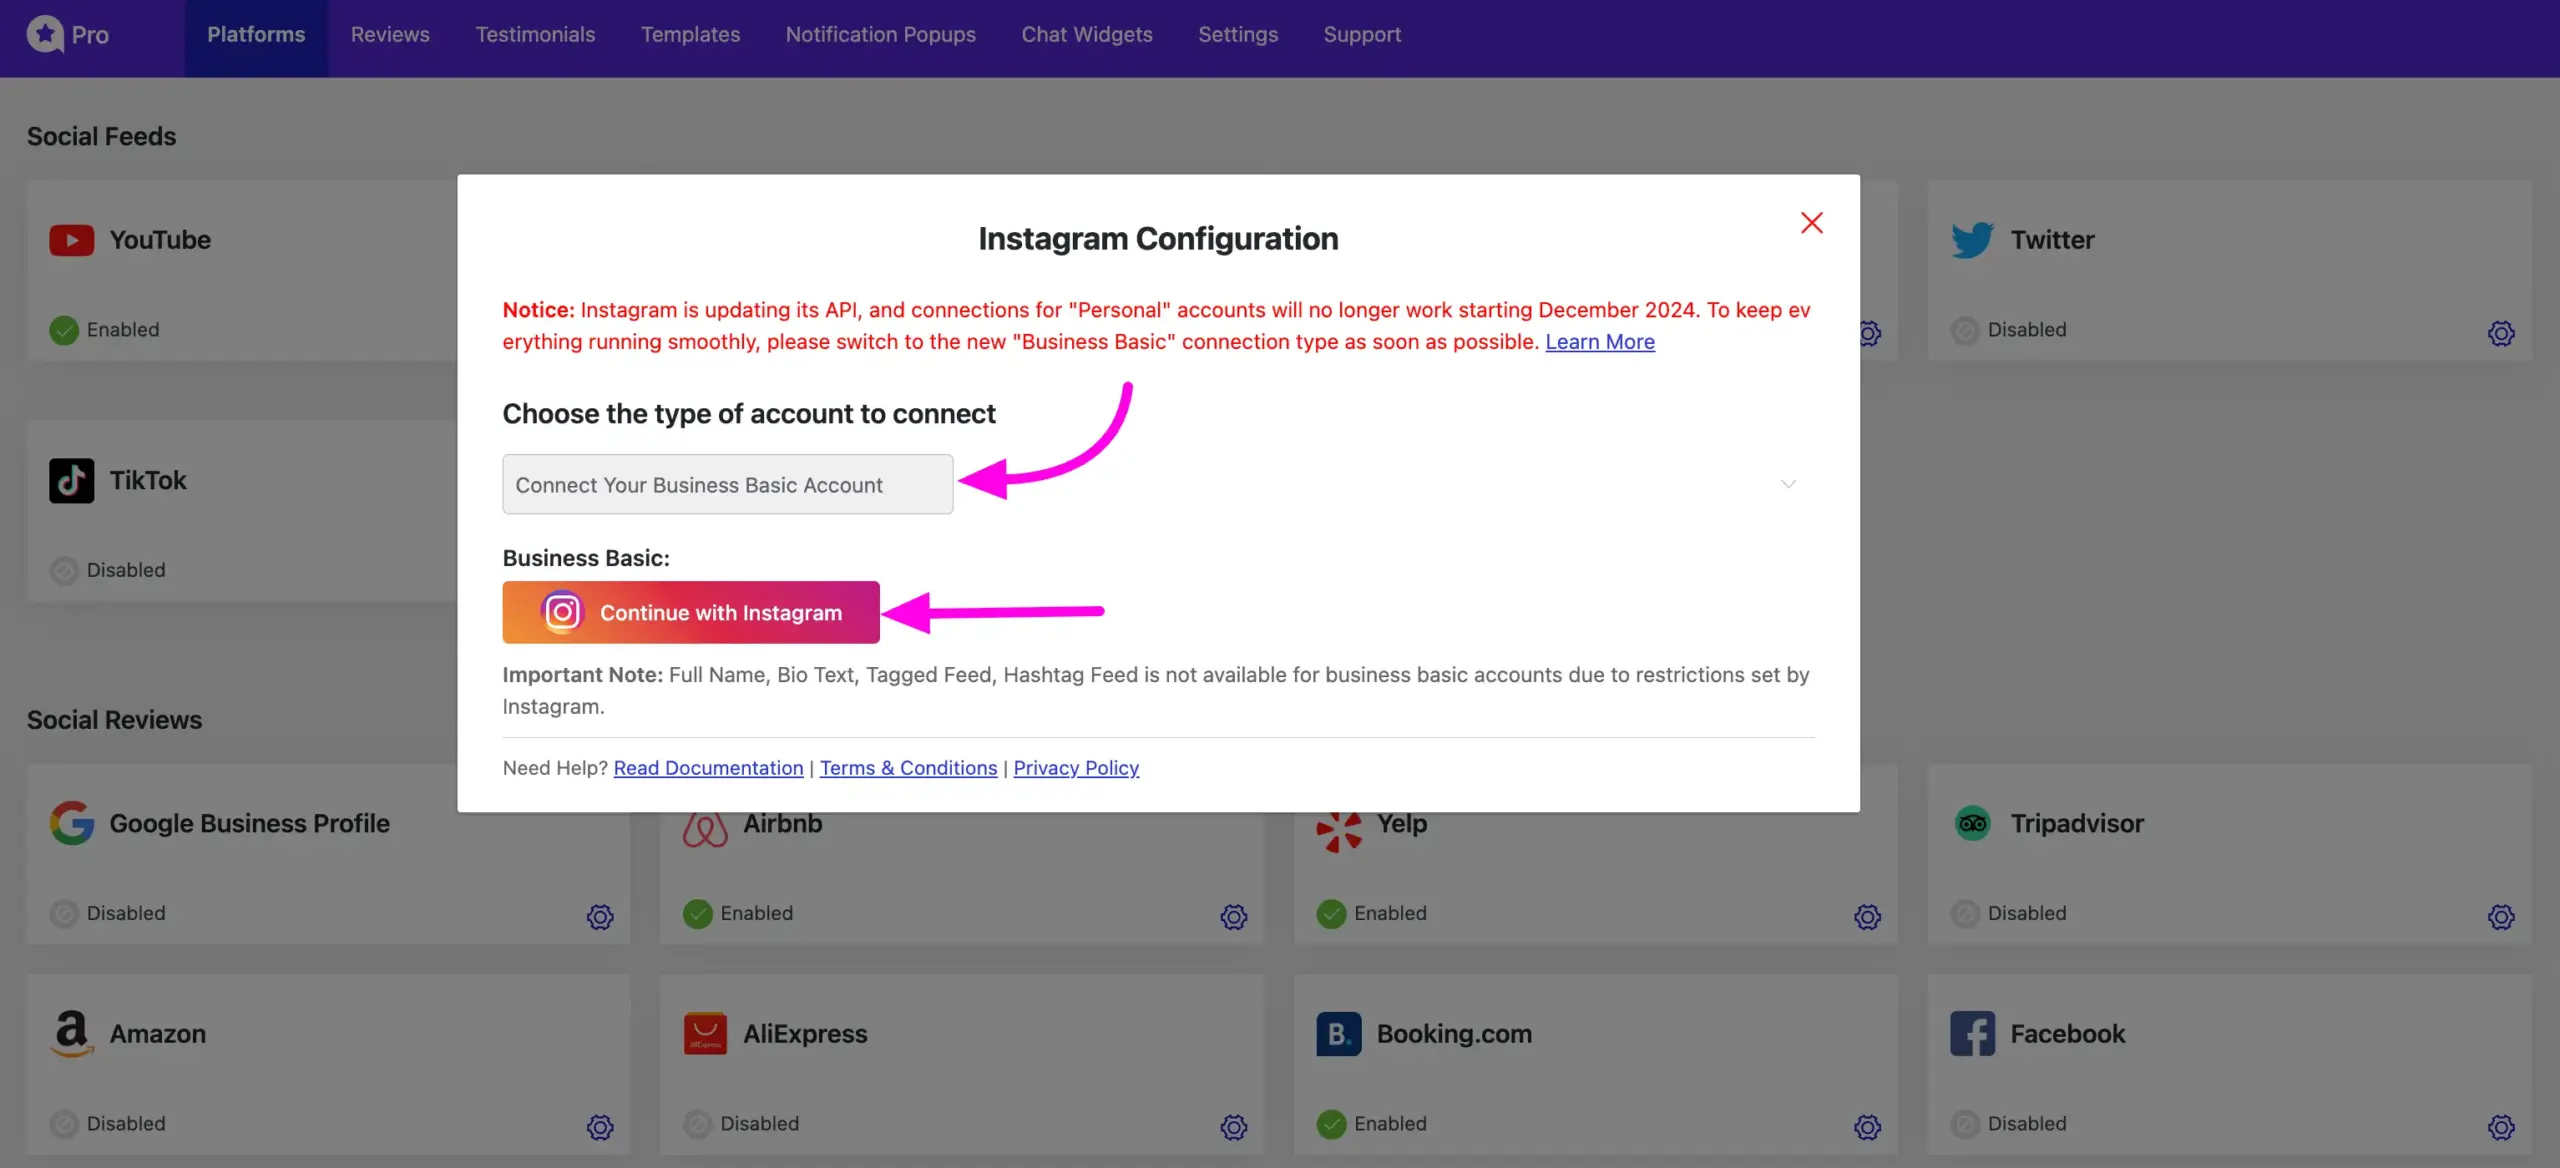
To connect your Business Basic Account with WP Social Ninja, select the Connect Your Business Basic Account option and click the Connect with Instagram button.
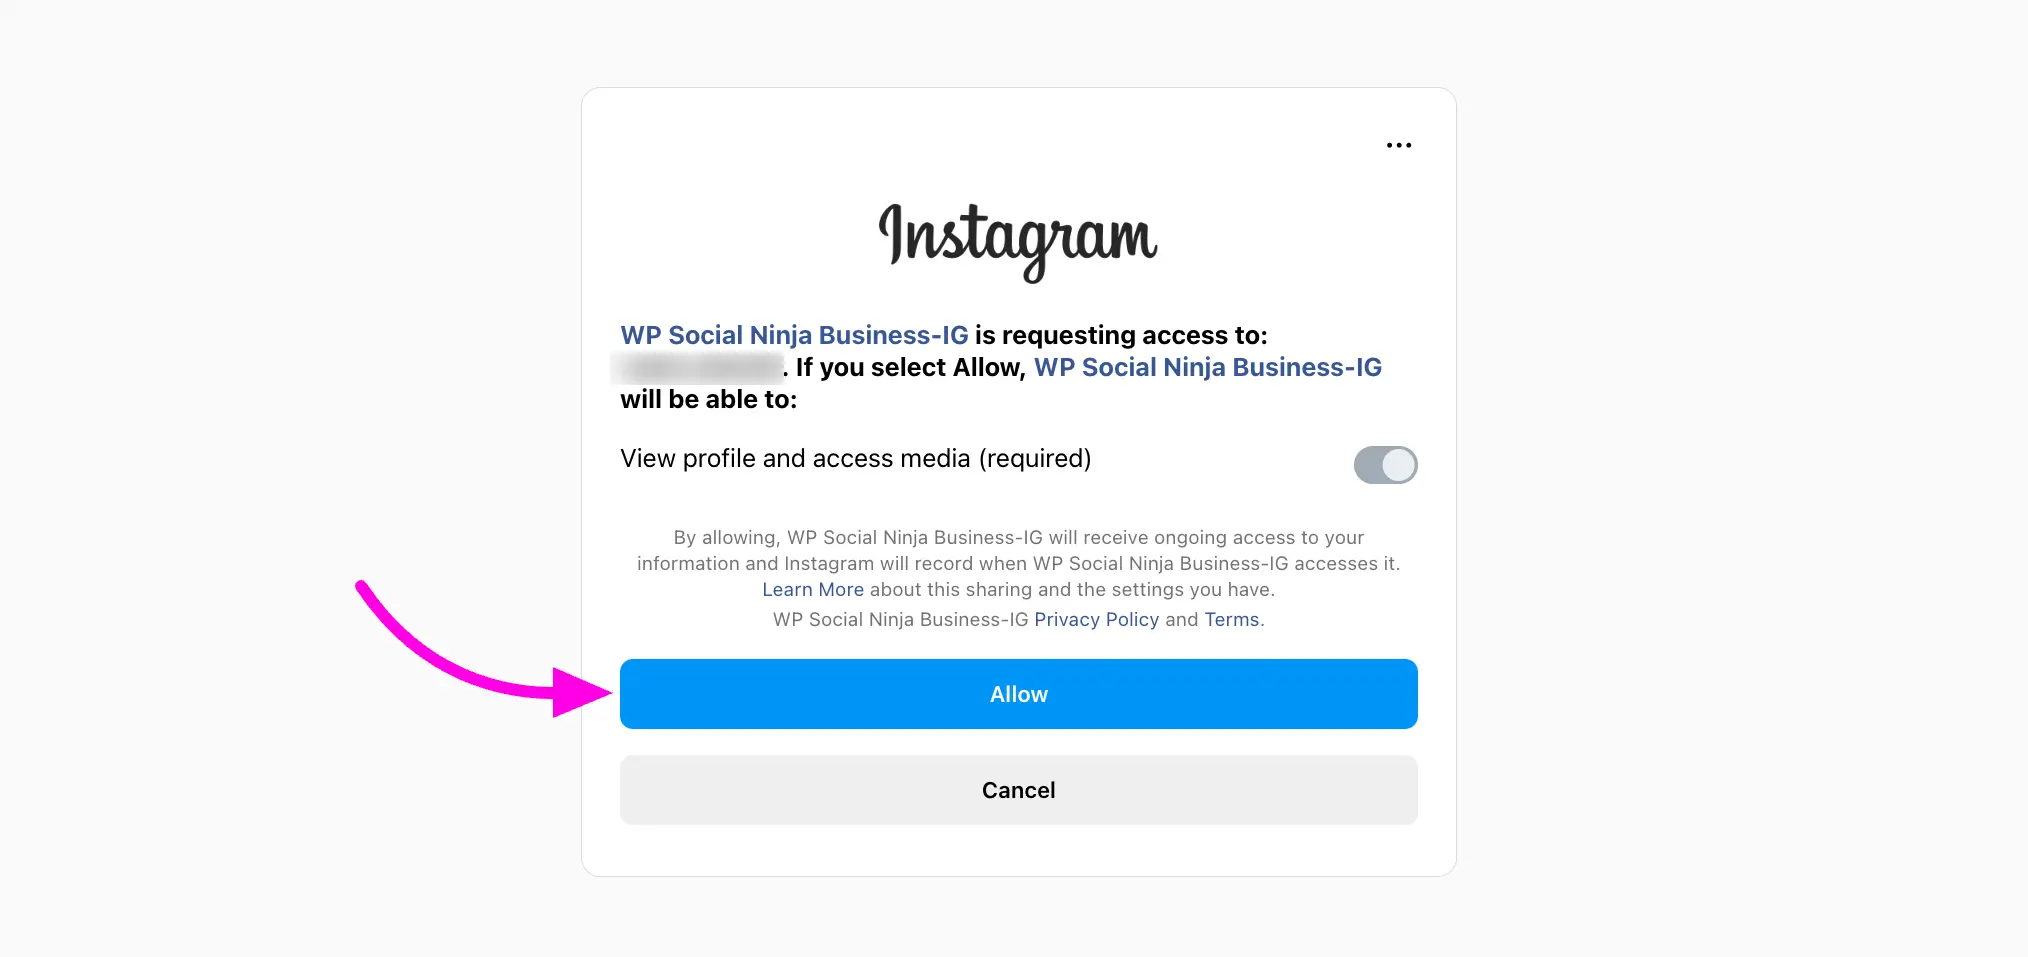
You’ll be redirected to Instagram, where you’ll first need to log in to your Business Account. After logging in, you’ll see the Access and Permissions screen for connecting your account with WP Social Ninja. Click the Allow button to grant the necessary permissions.
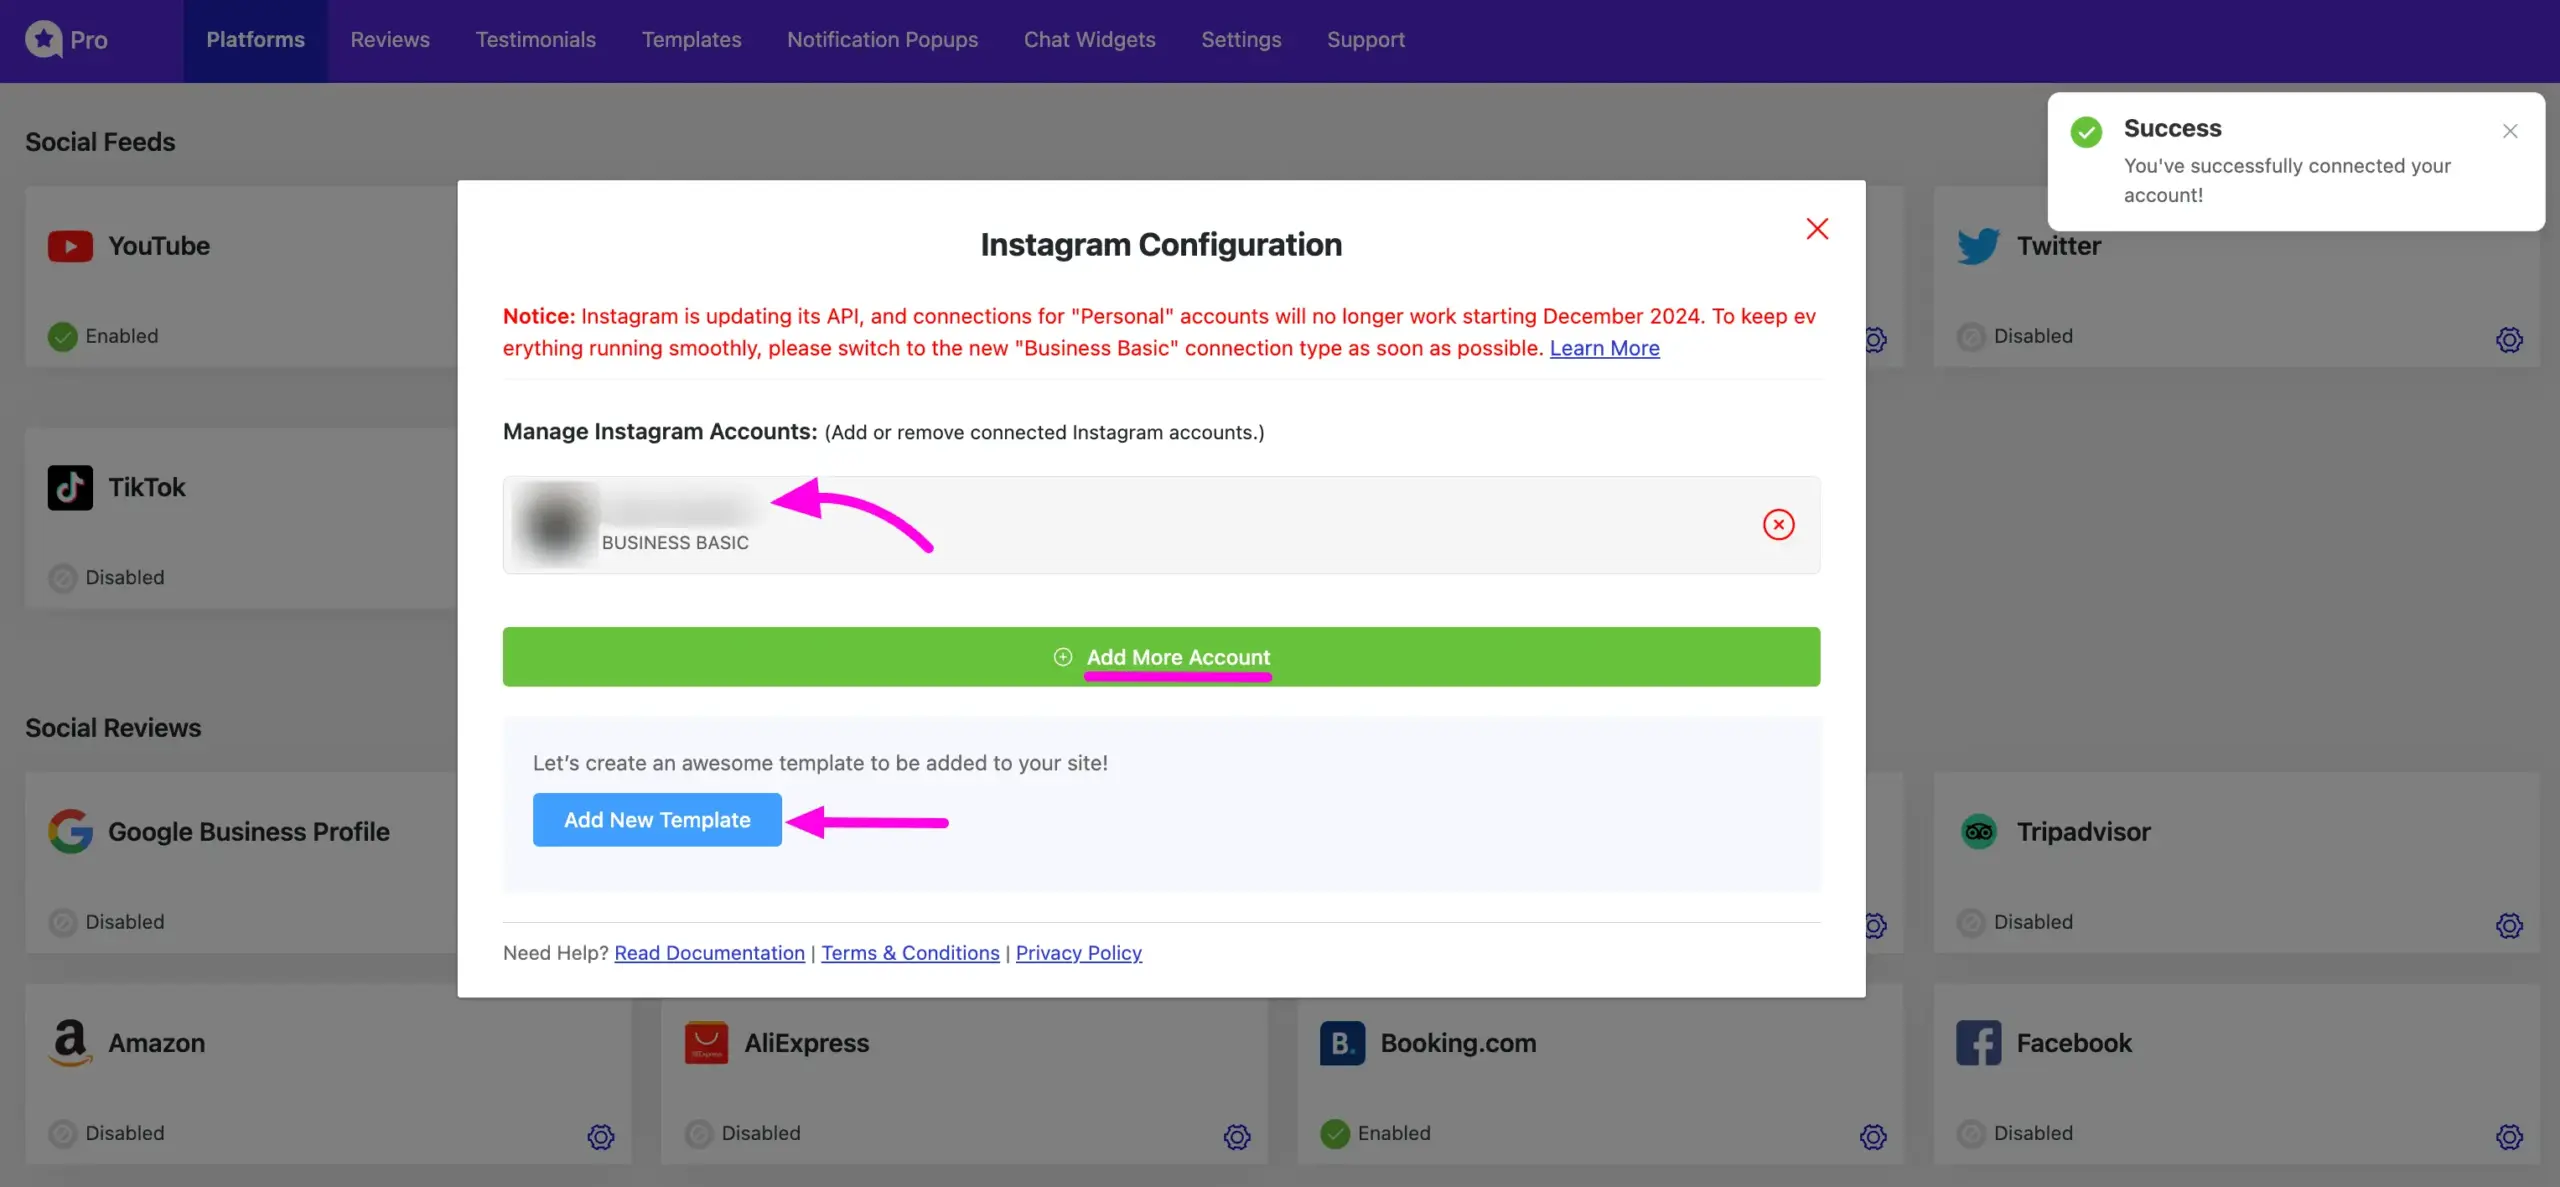
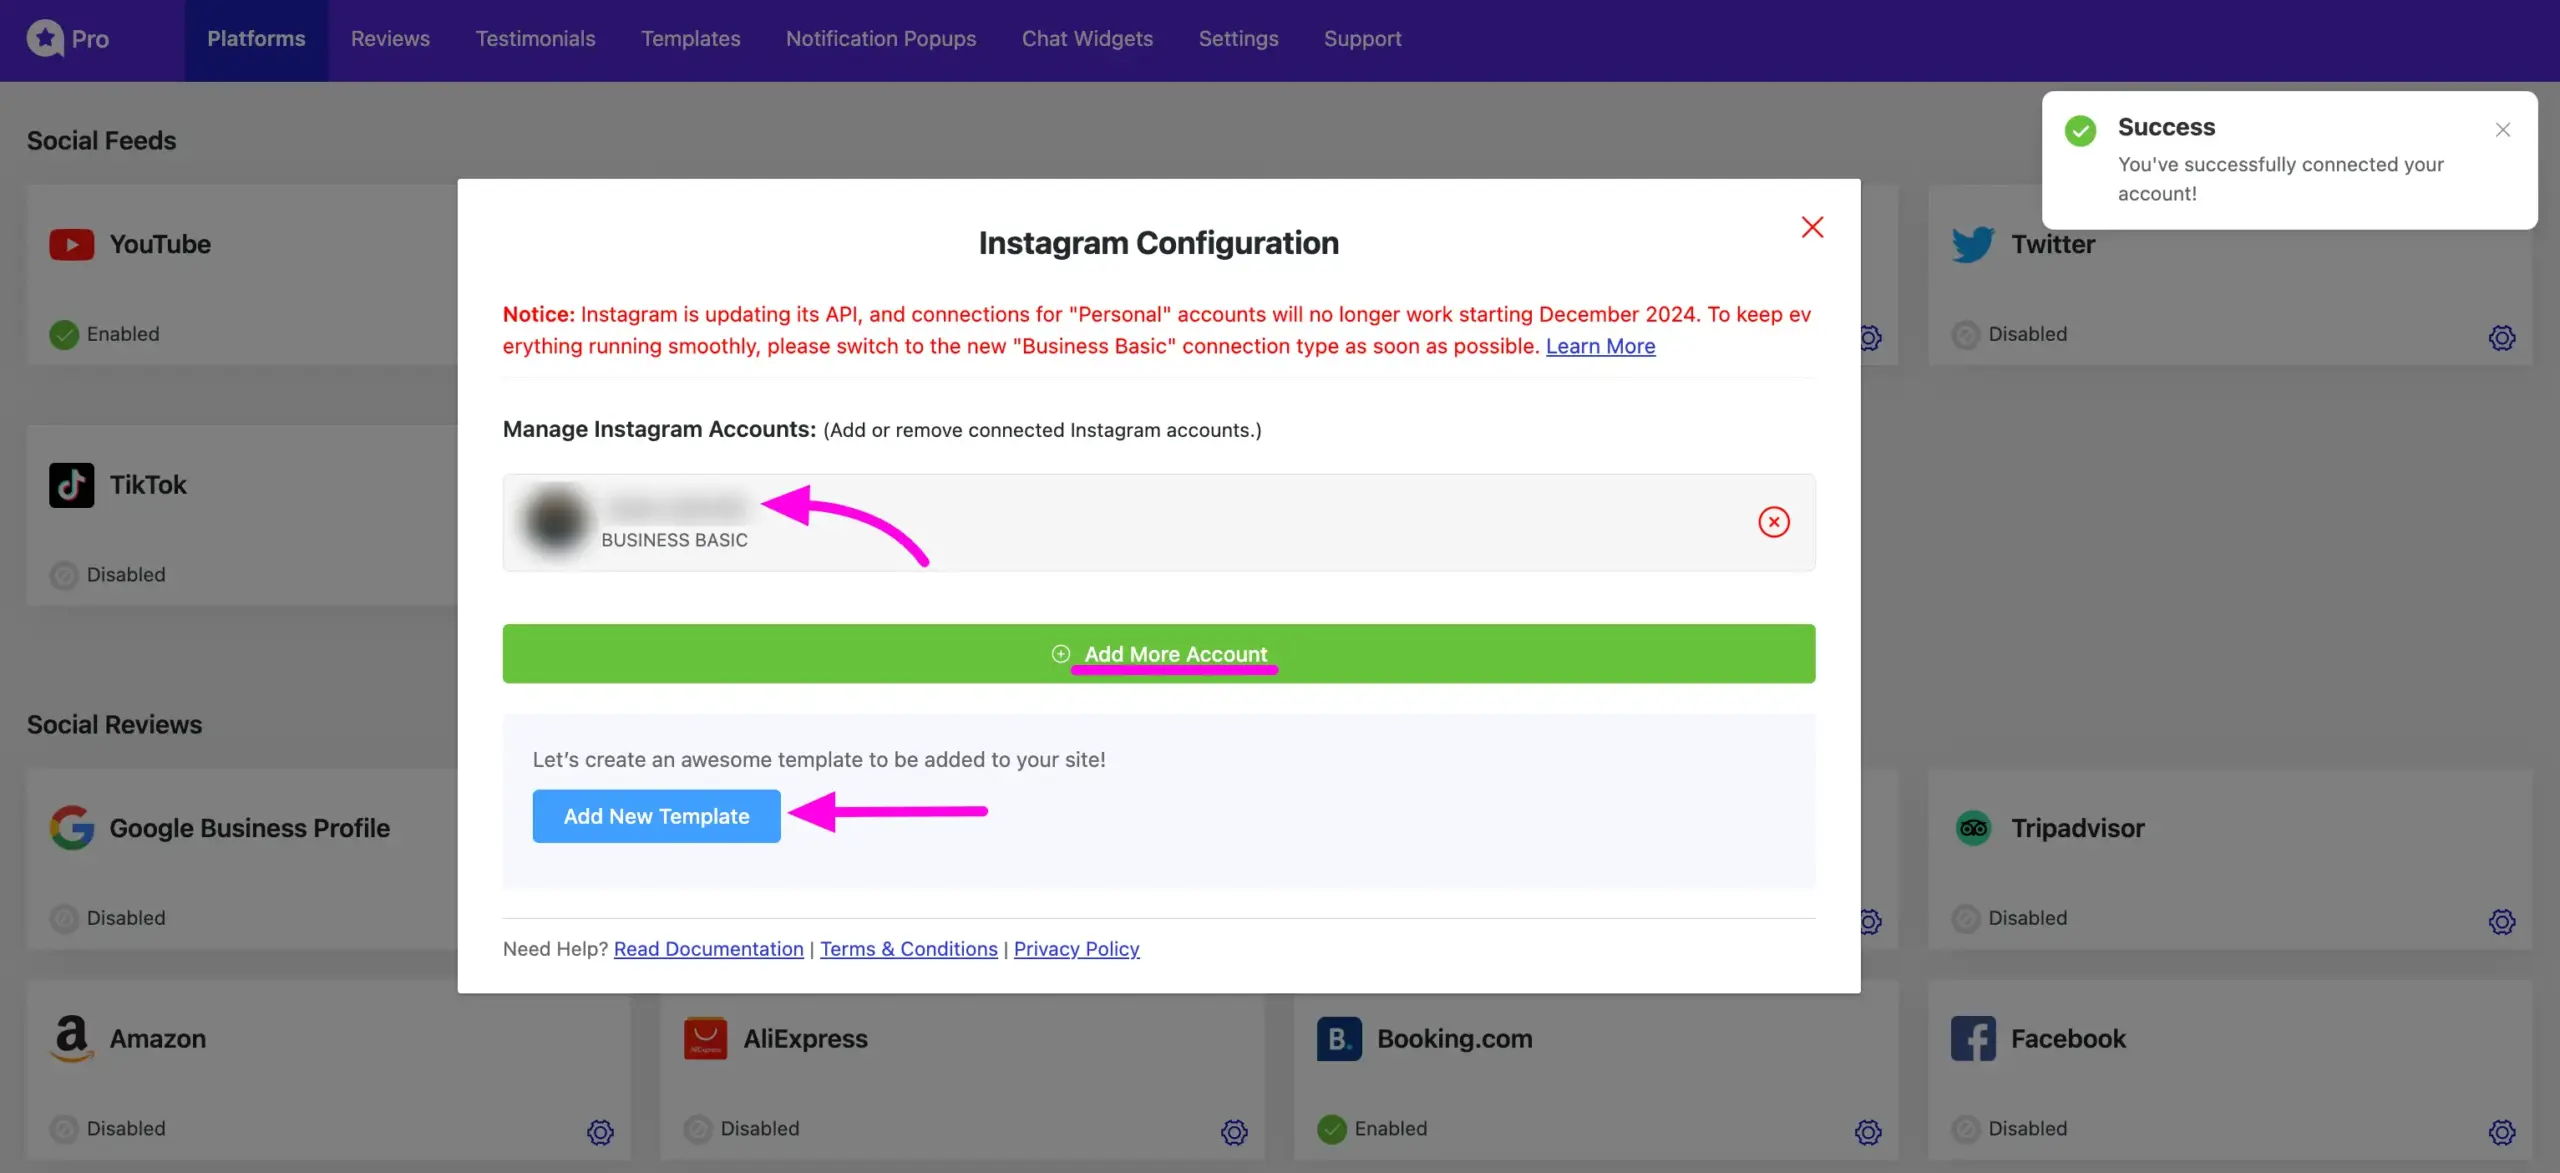
Once connected, your Instagram Business Account will be added to WP Social Ninja.
- To add another account, click the Add More Account button.
- To create or modify your Instagram Platform Template, click the Add New Template button.
Connect Your Business Advanced Account #
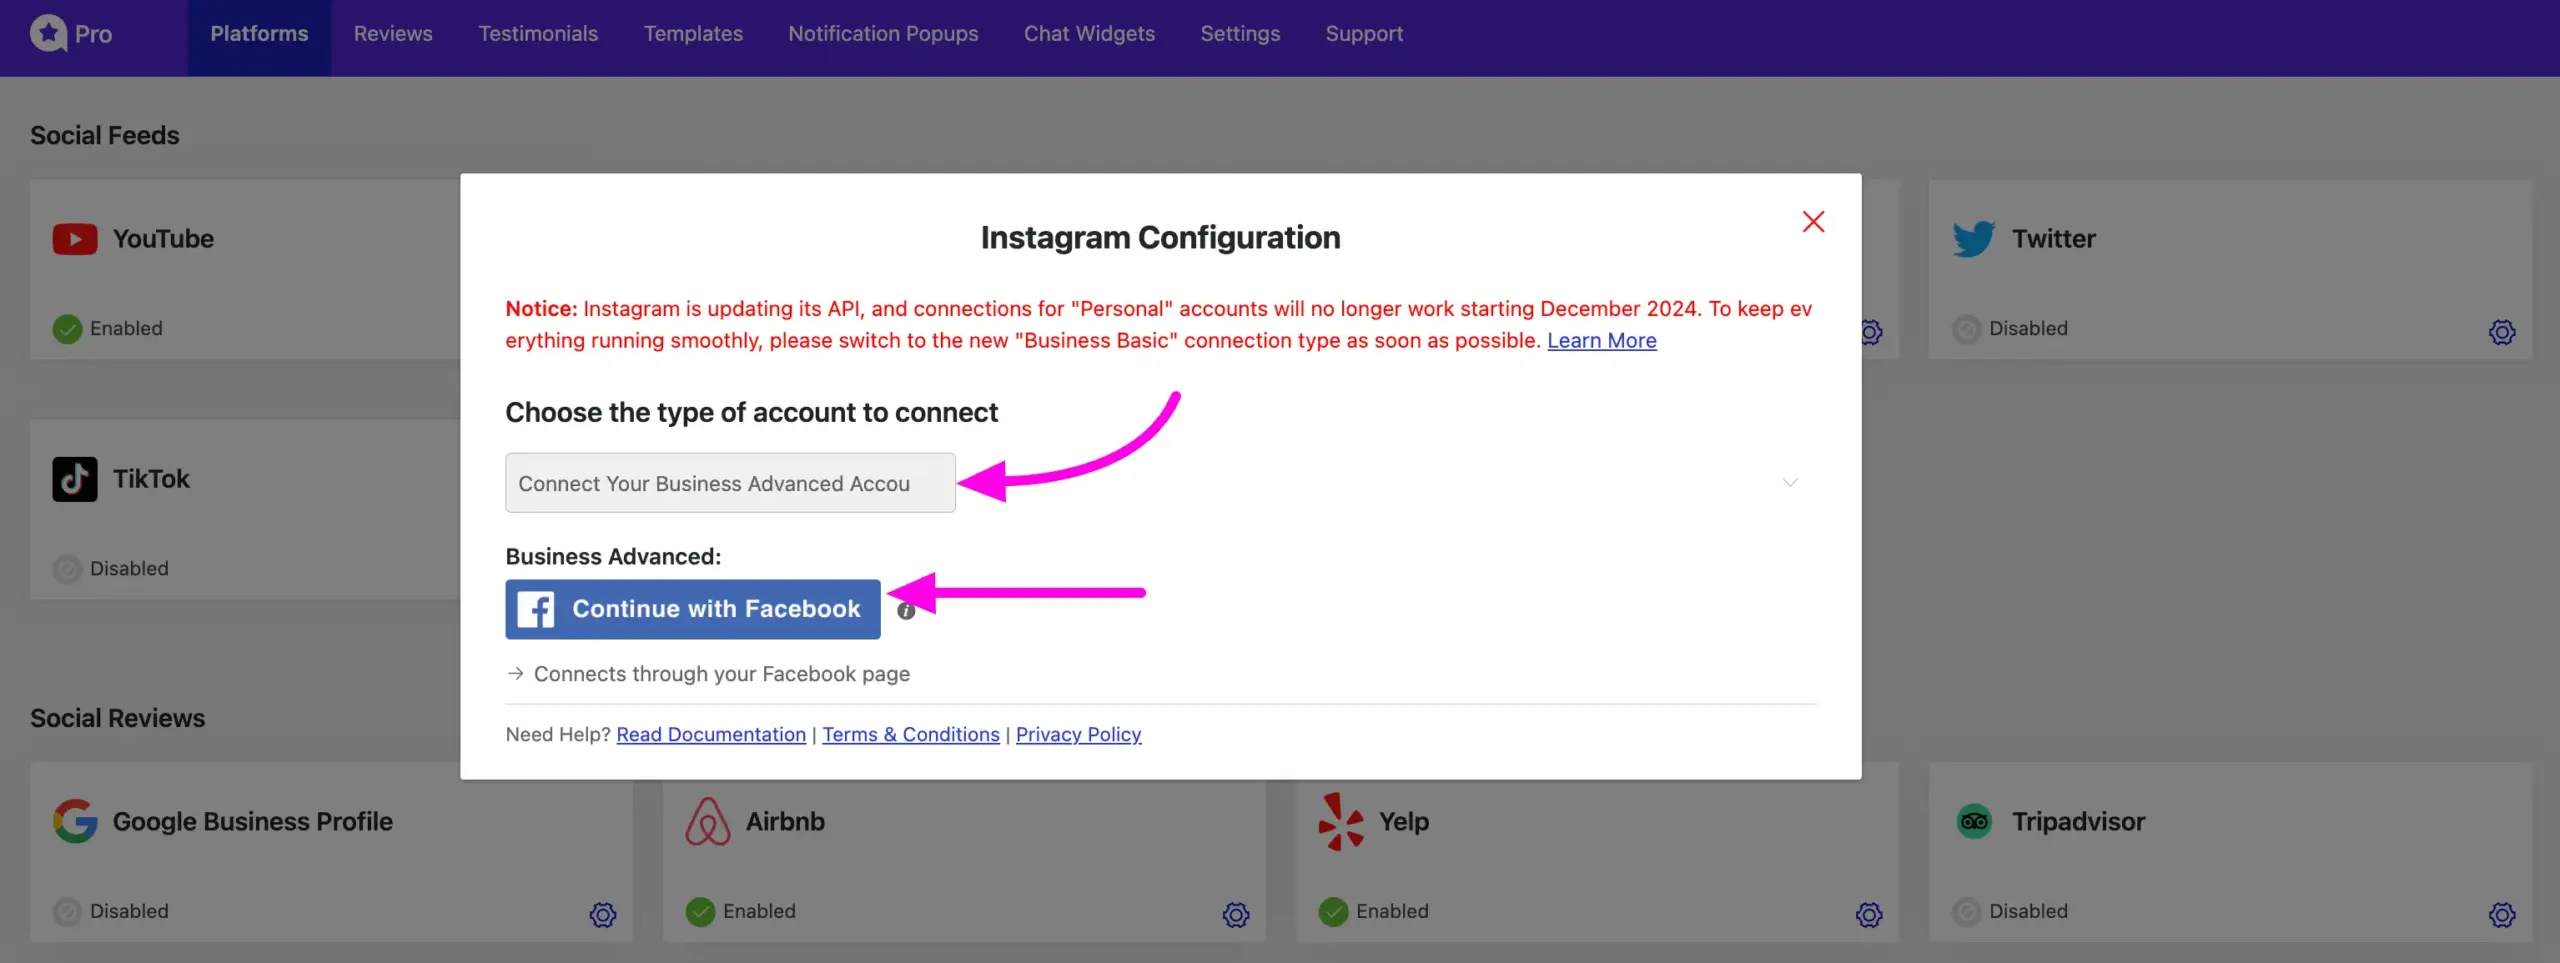
To connect your Instagram Business Account with WP Social Ninja, follow the same steps as before and select Connect Your Business Advanced Account from the dropdown menu.
Then, click on the Connect with Facebook button.
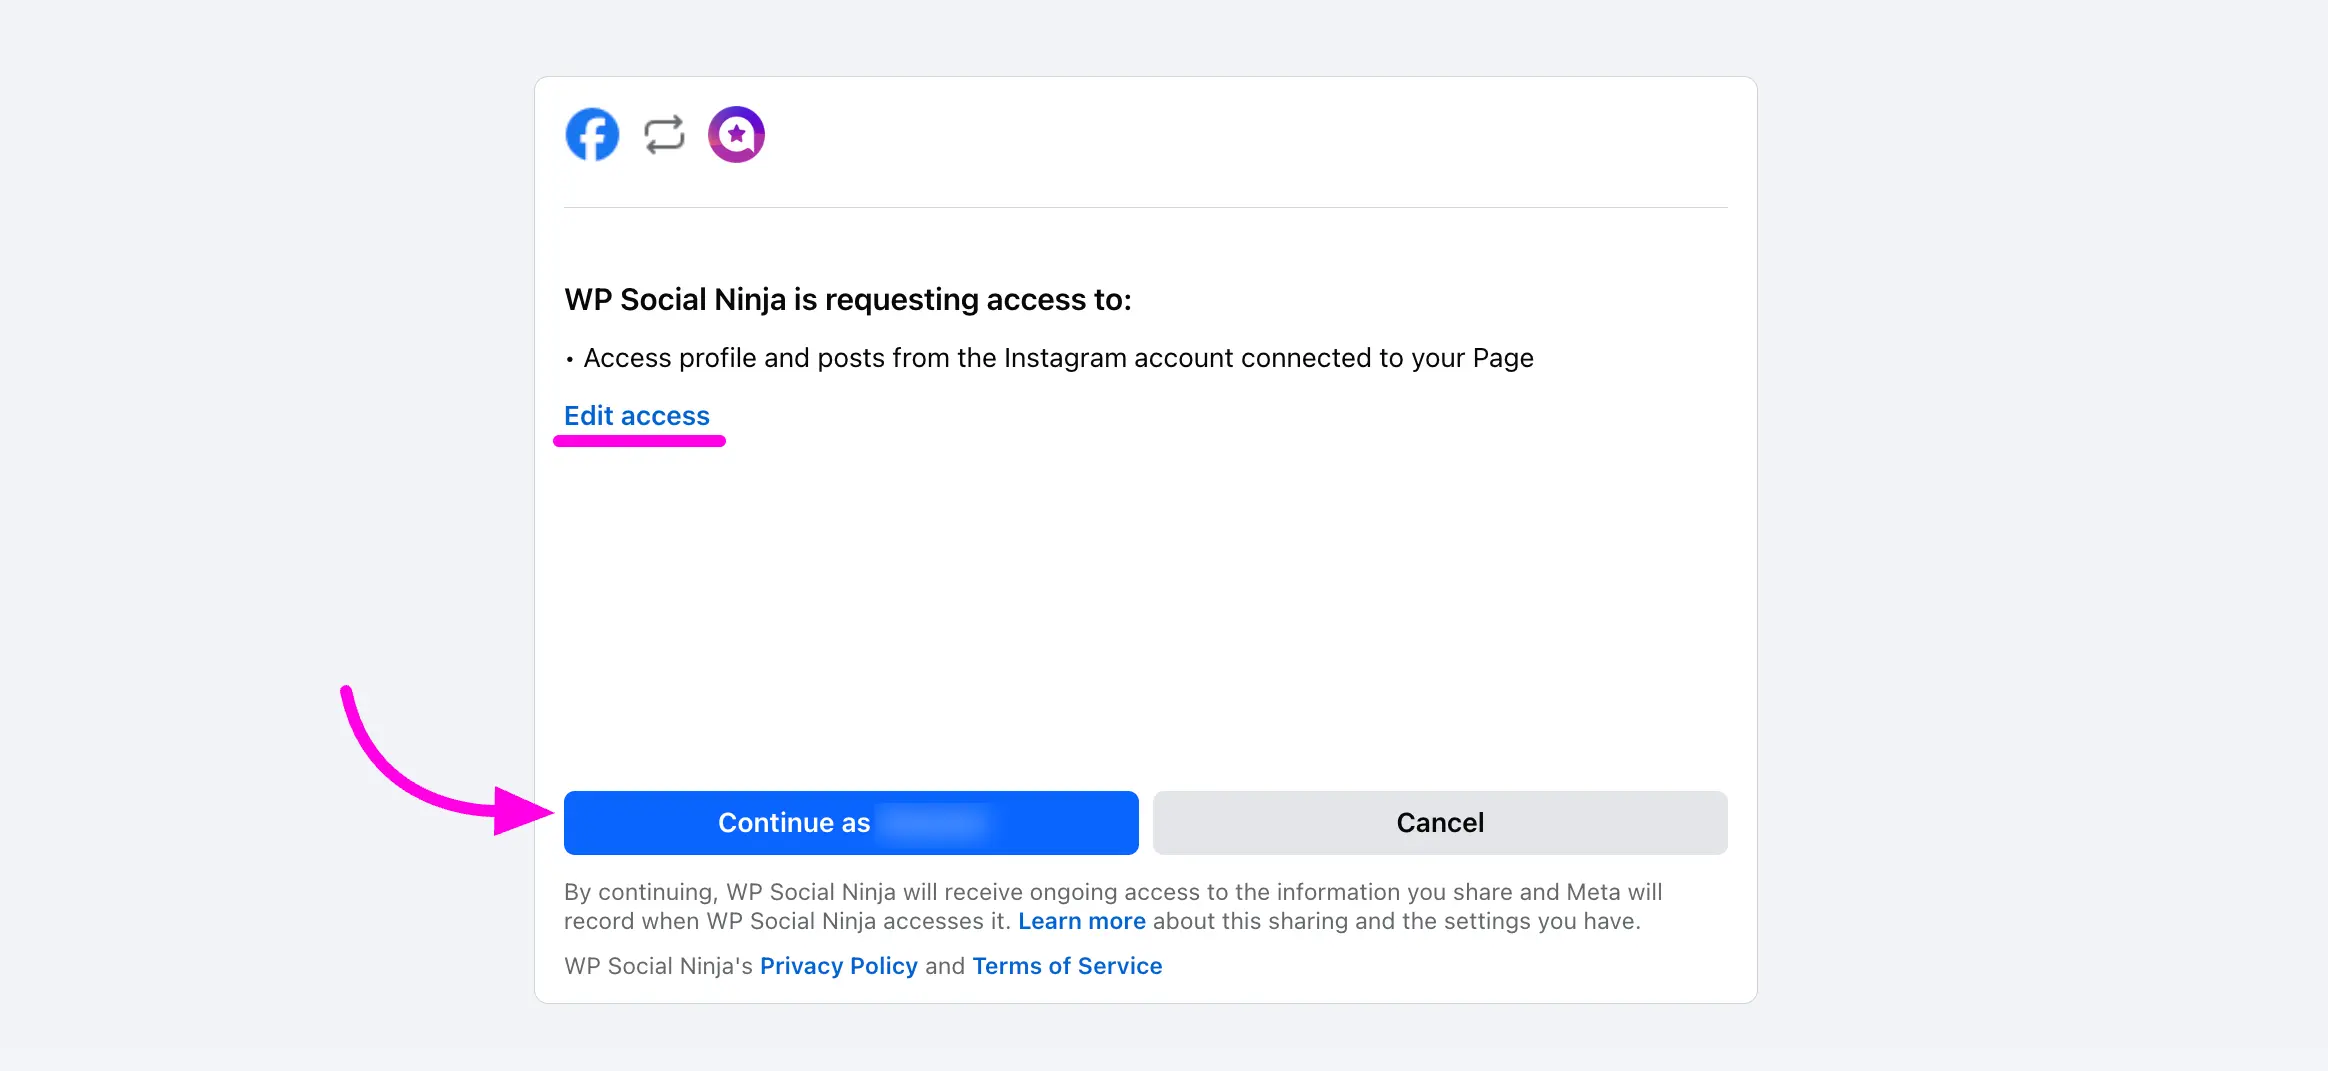
You will be redirected to Facebook, where you’ll first need to log in to your Facebook Account. After logging in, you’ll be prompted with the Access and Permissions screen to connect your account with WP Social Ninja.
If you’d like to review the accesses you’re granting, click on the Edit Access button. Then, click the Allow button to grant the necessary permissions.
After that, your Business Advanced Account will be added.
Connect Your Account Manually #
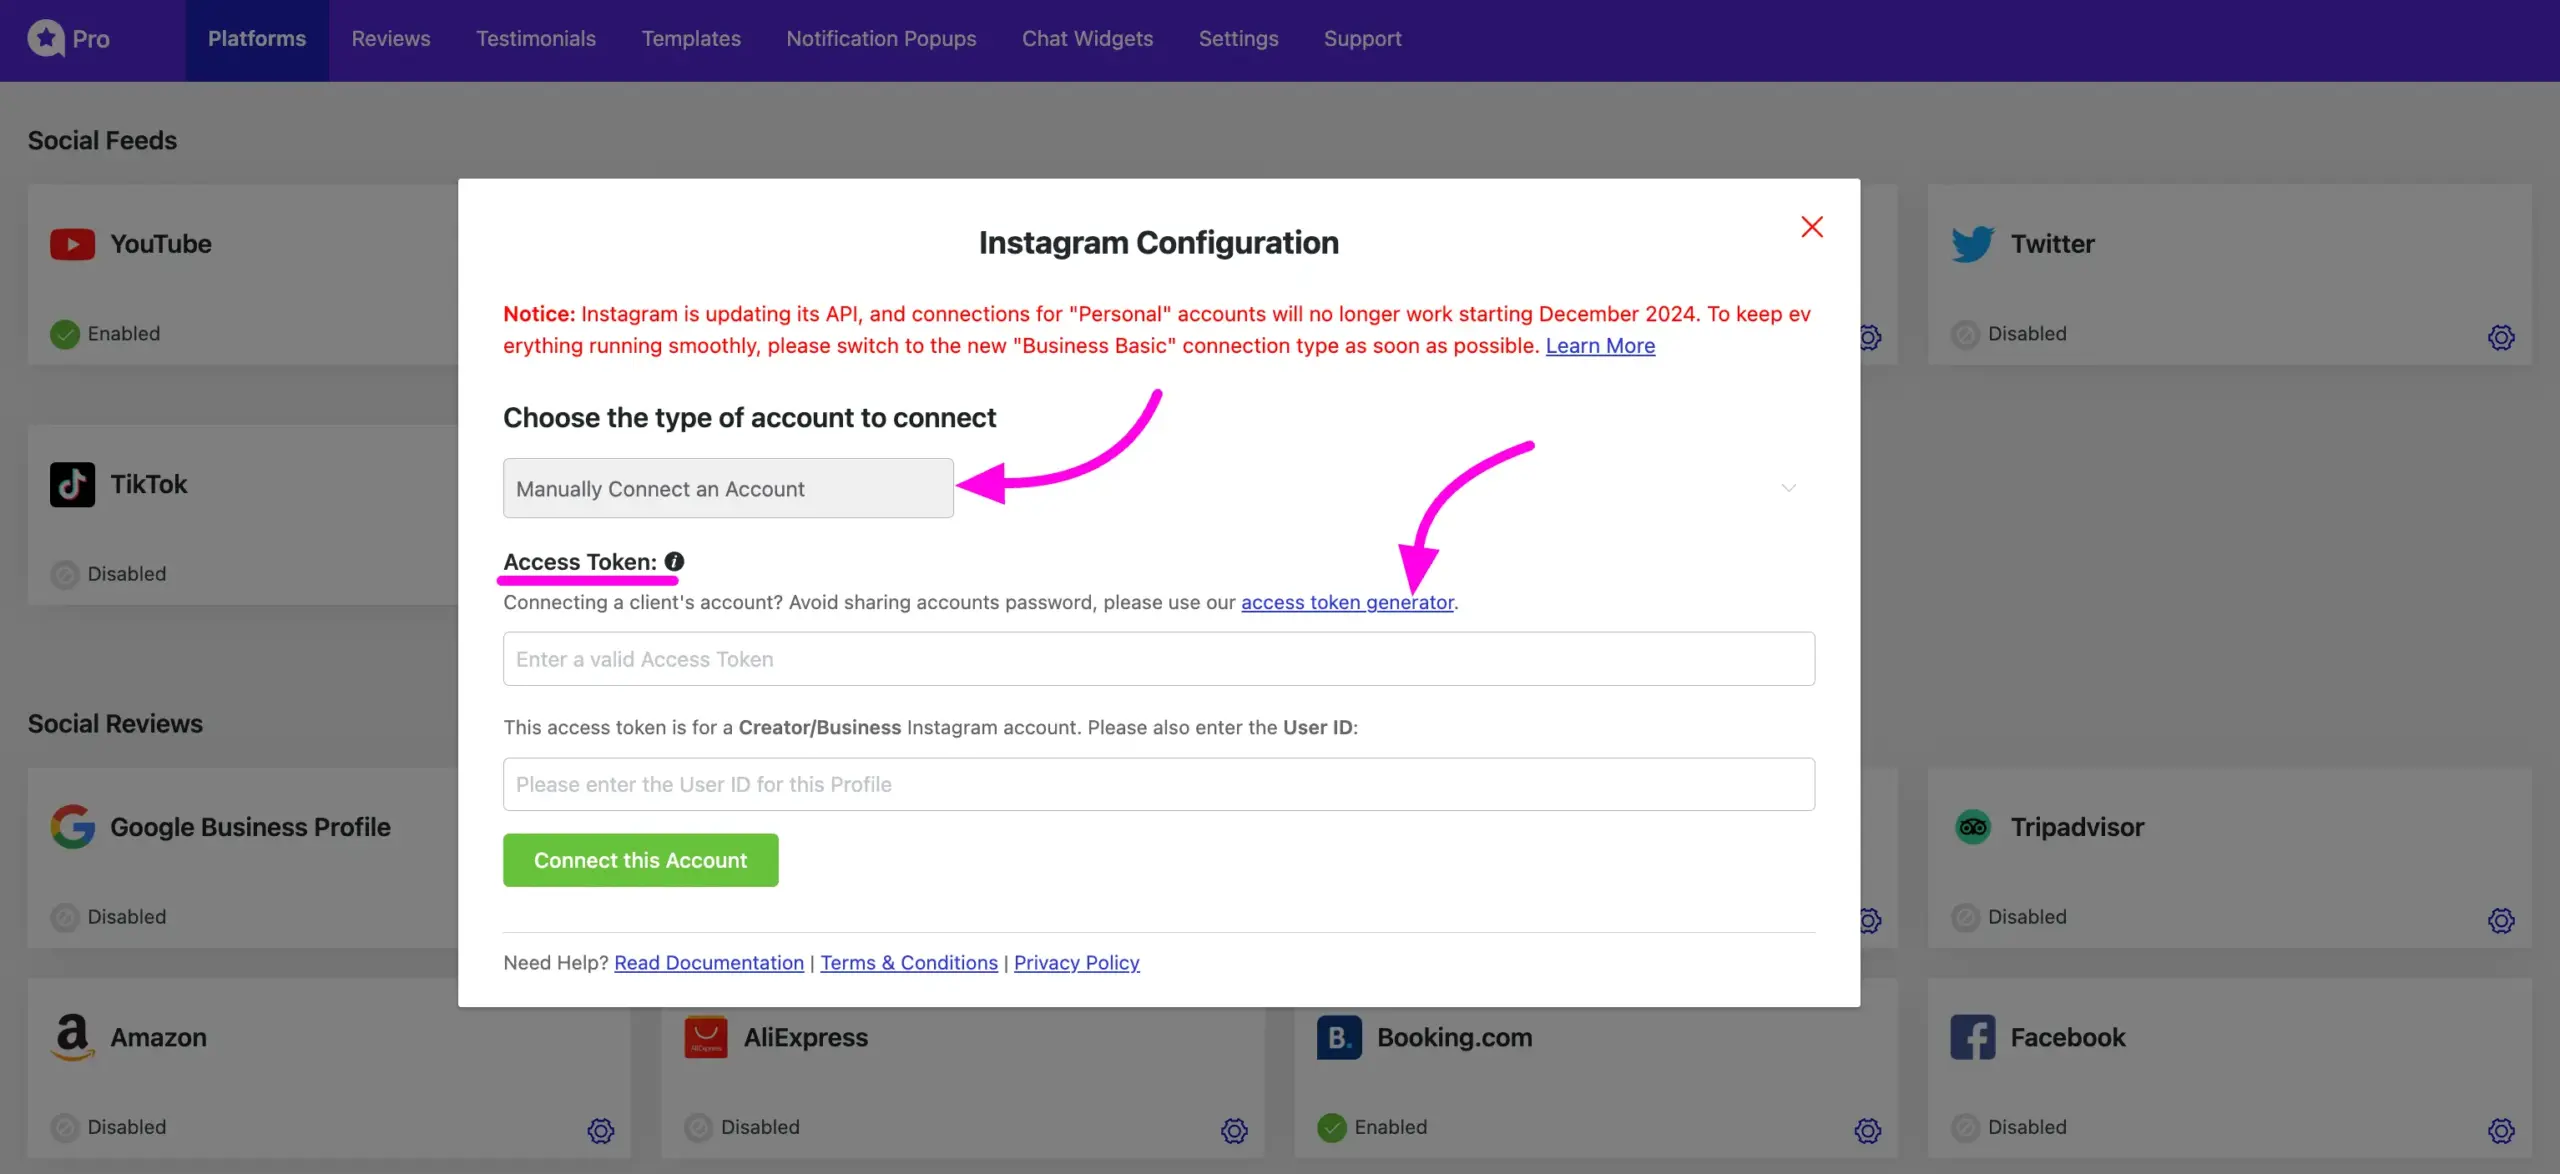
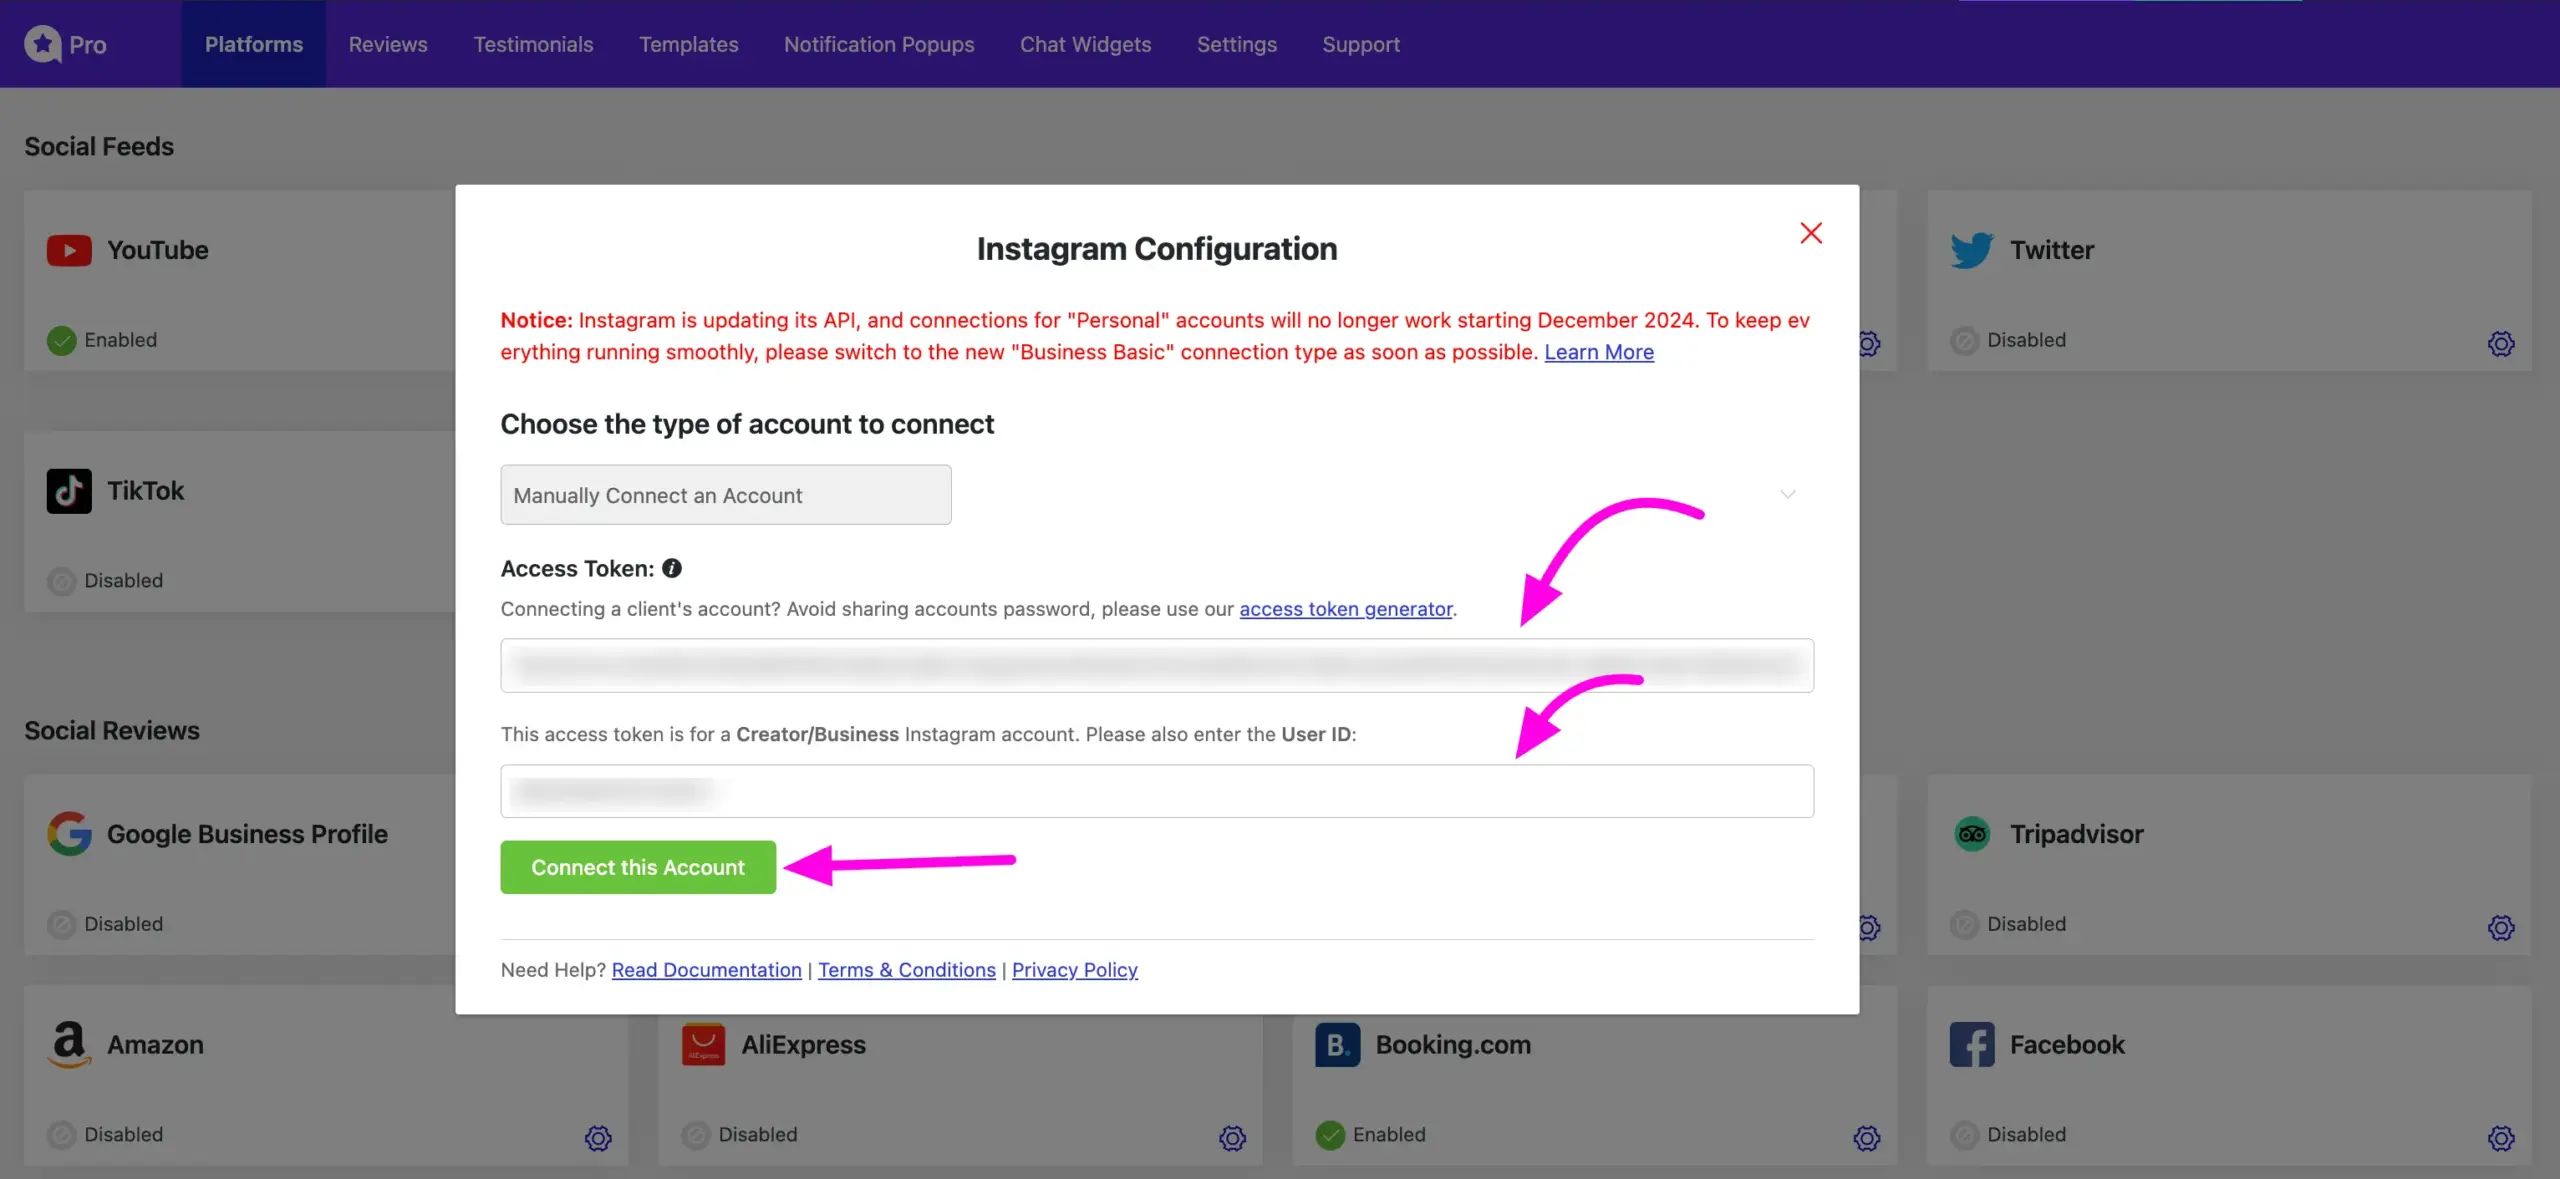
To manually connect your Business Account, select the Manually Connect Account option from the dropdown menu. You’ll then need to enter your Access Token and User ID.
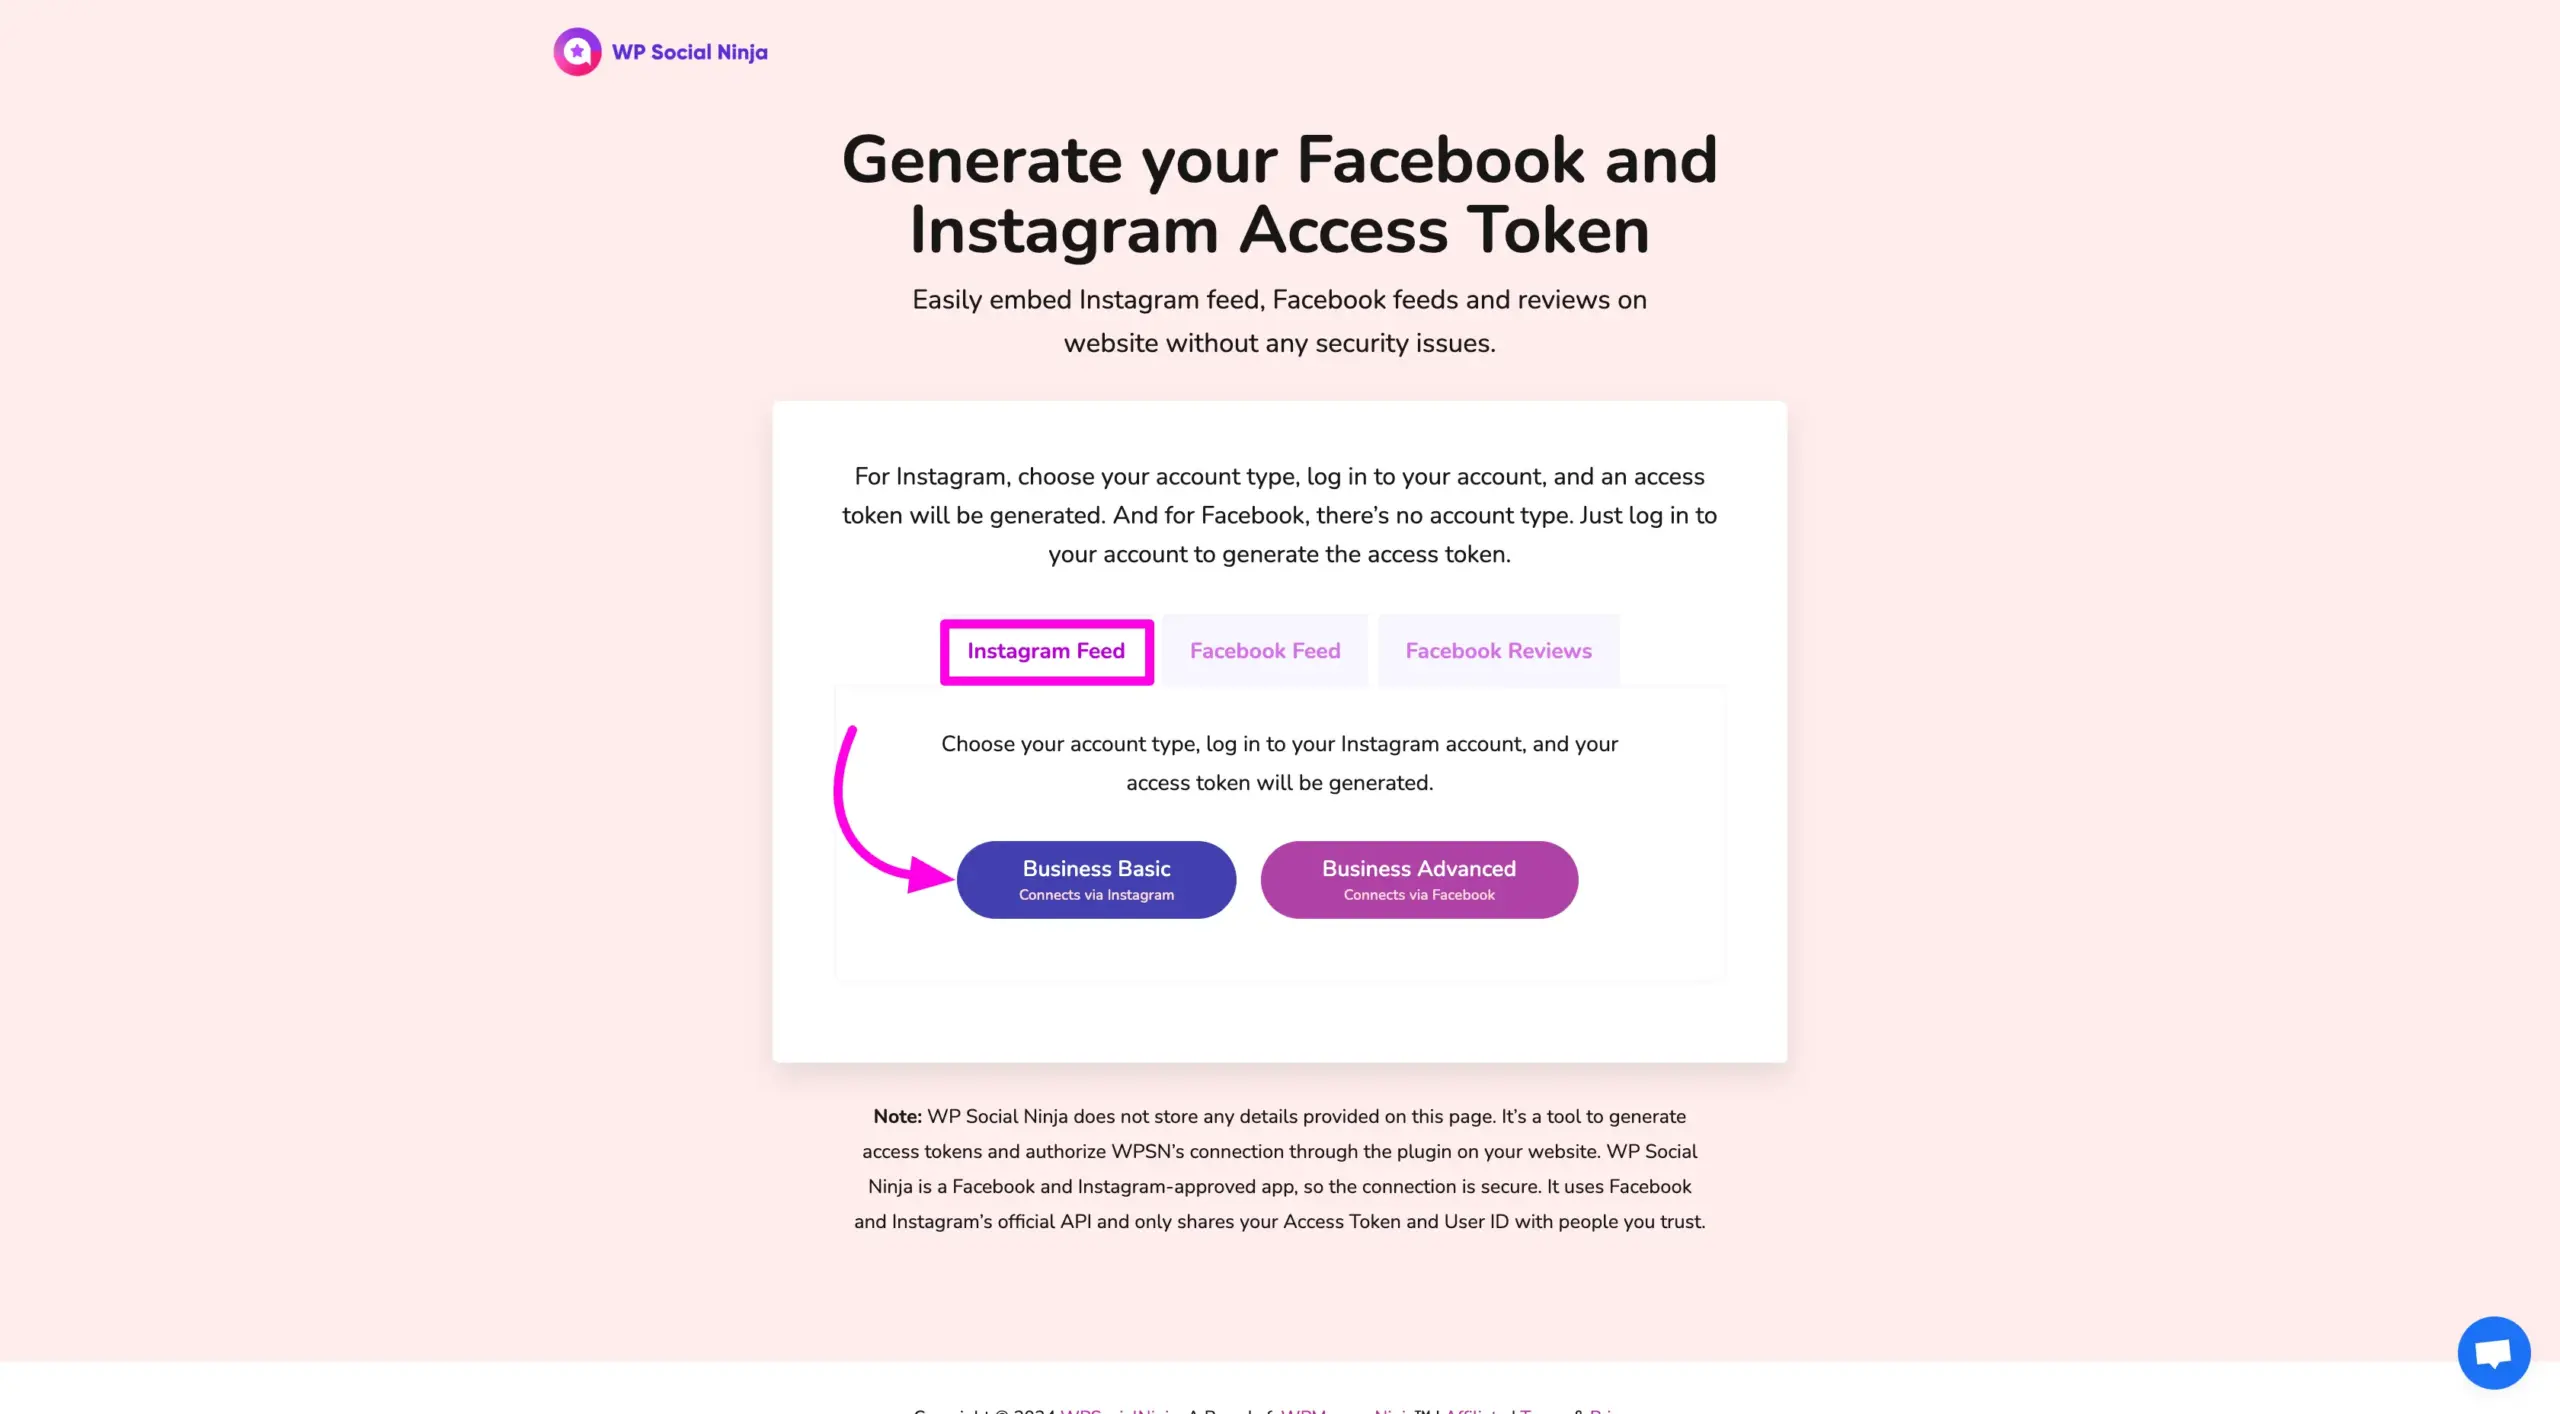
To obtain these credentials, click on the Access Token Generator.
You will be redirected to the Access Token Generator page. From there, select Instagram Feed and choose your Account Type (Business Basic or Advanced).
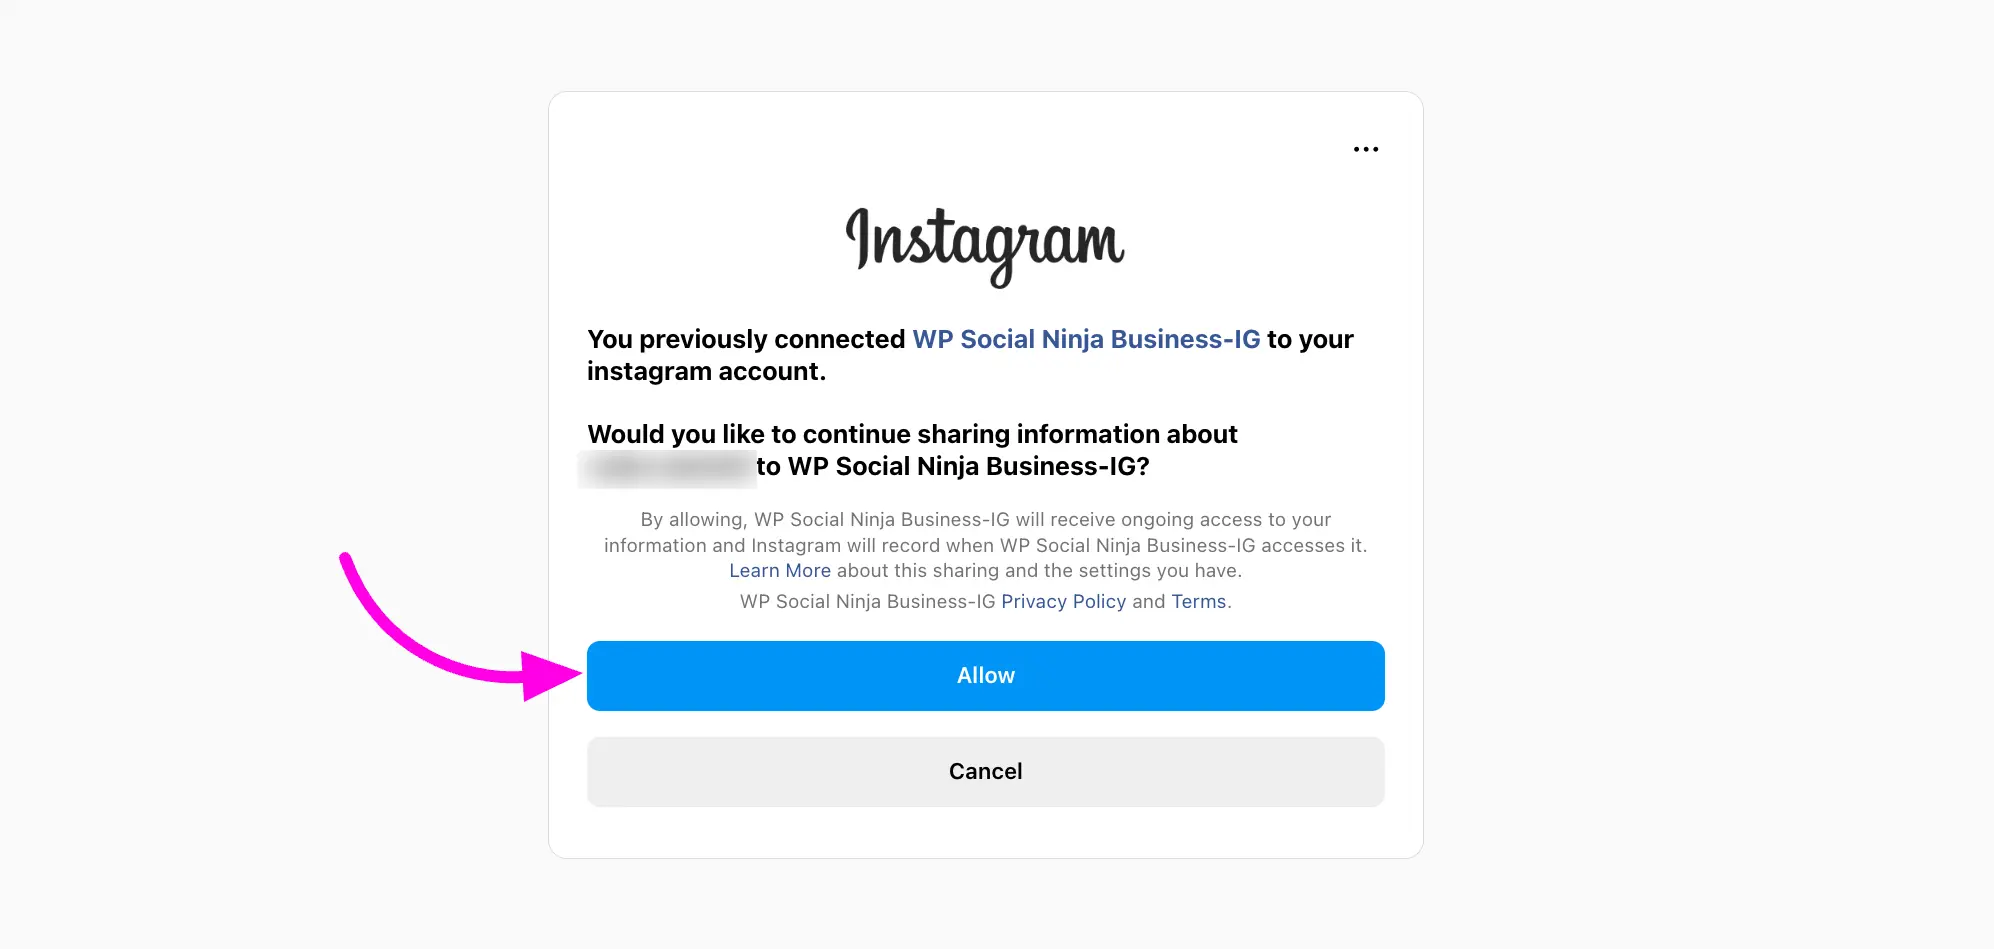
Next, you’ll be asked to grant the necessary permissions. Click the Allow button to proceed.
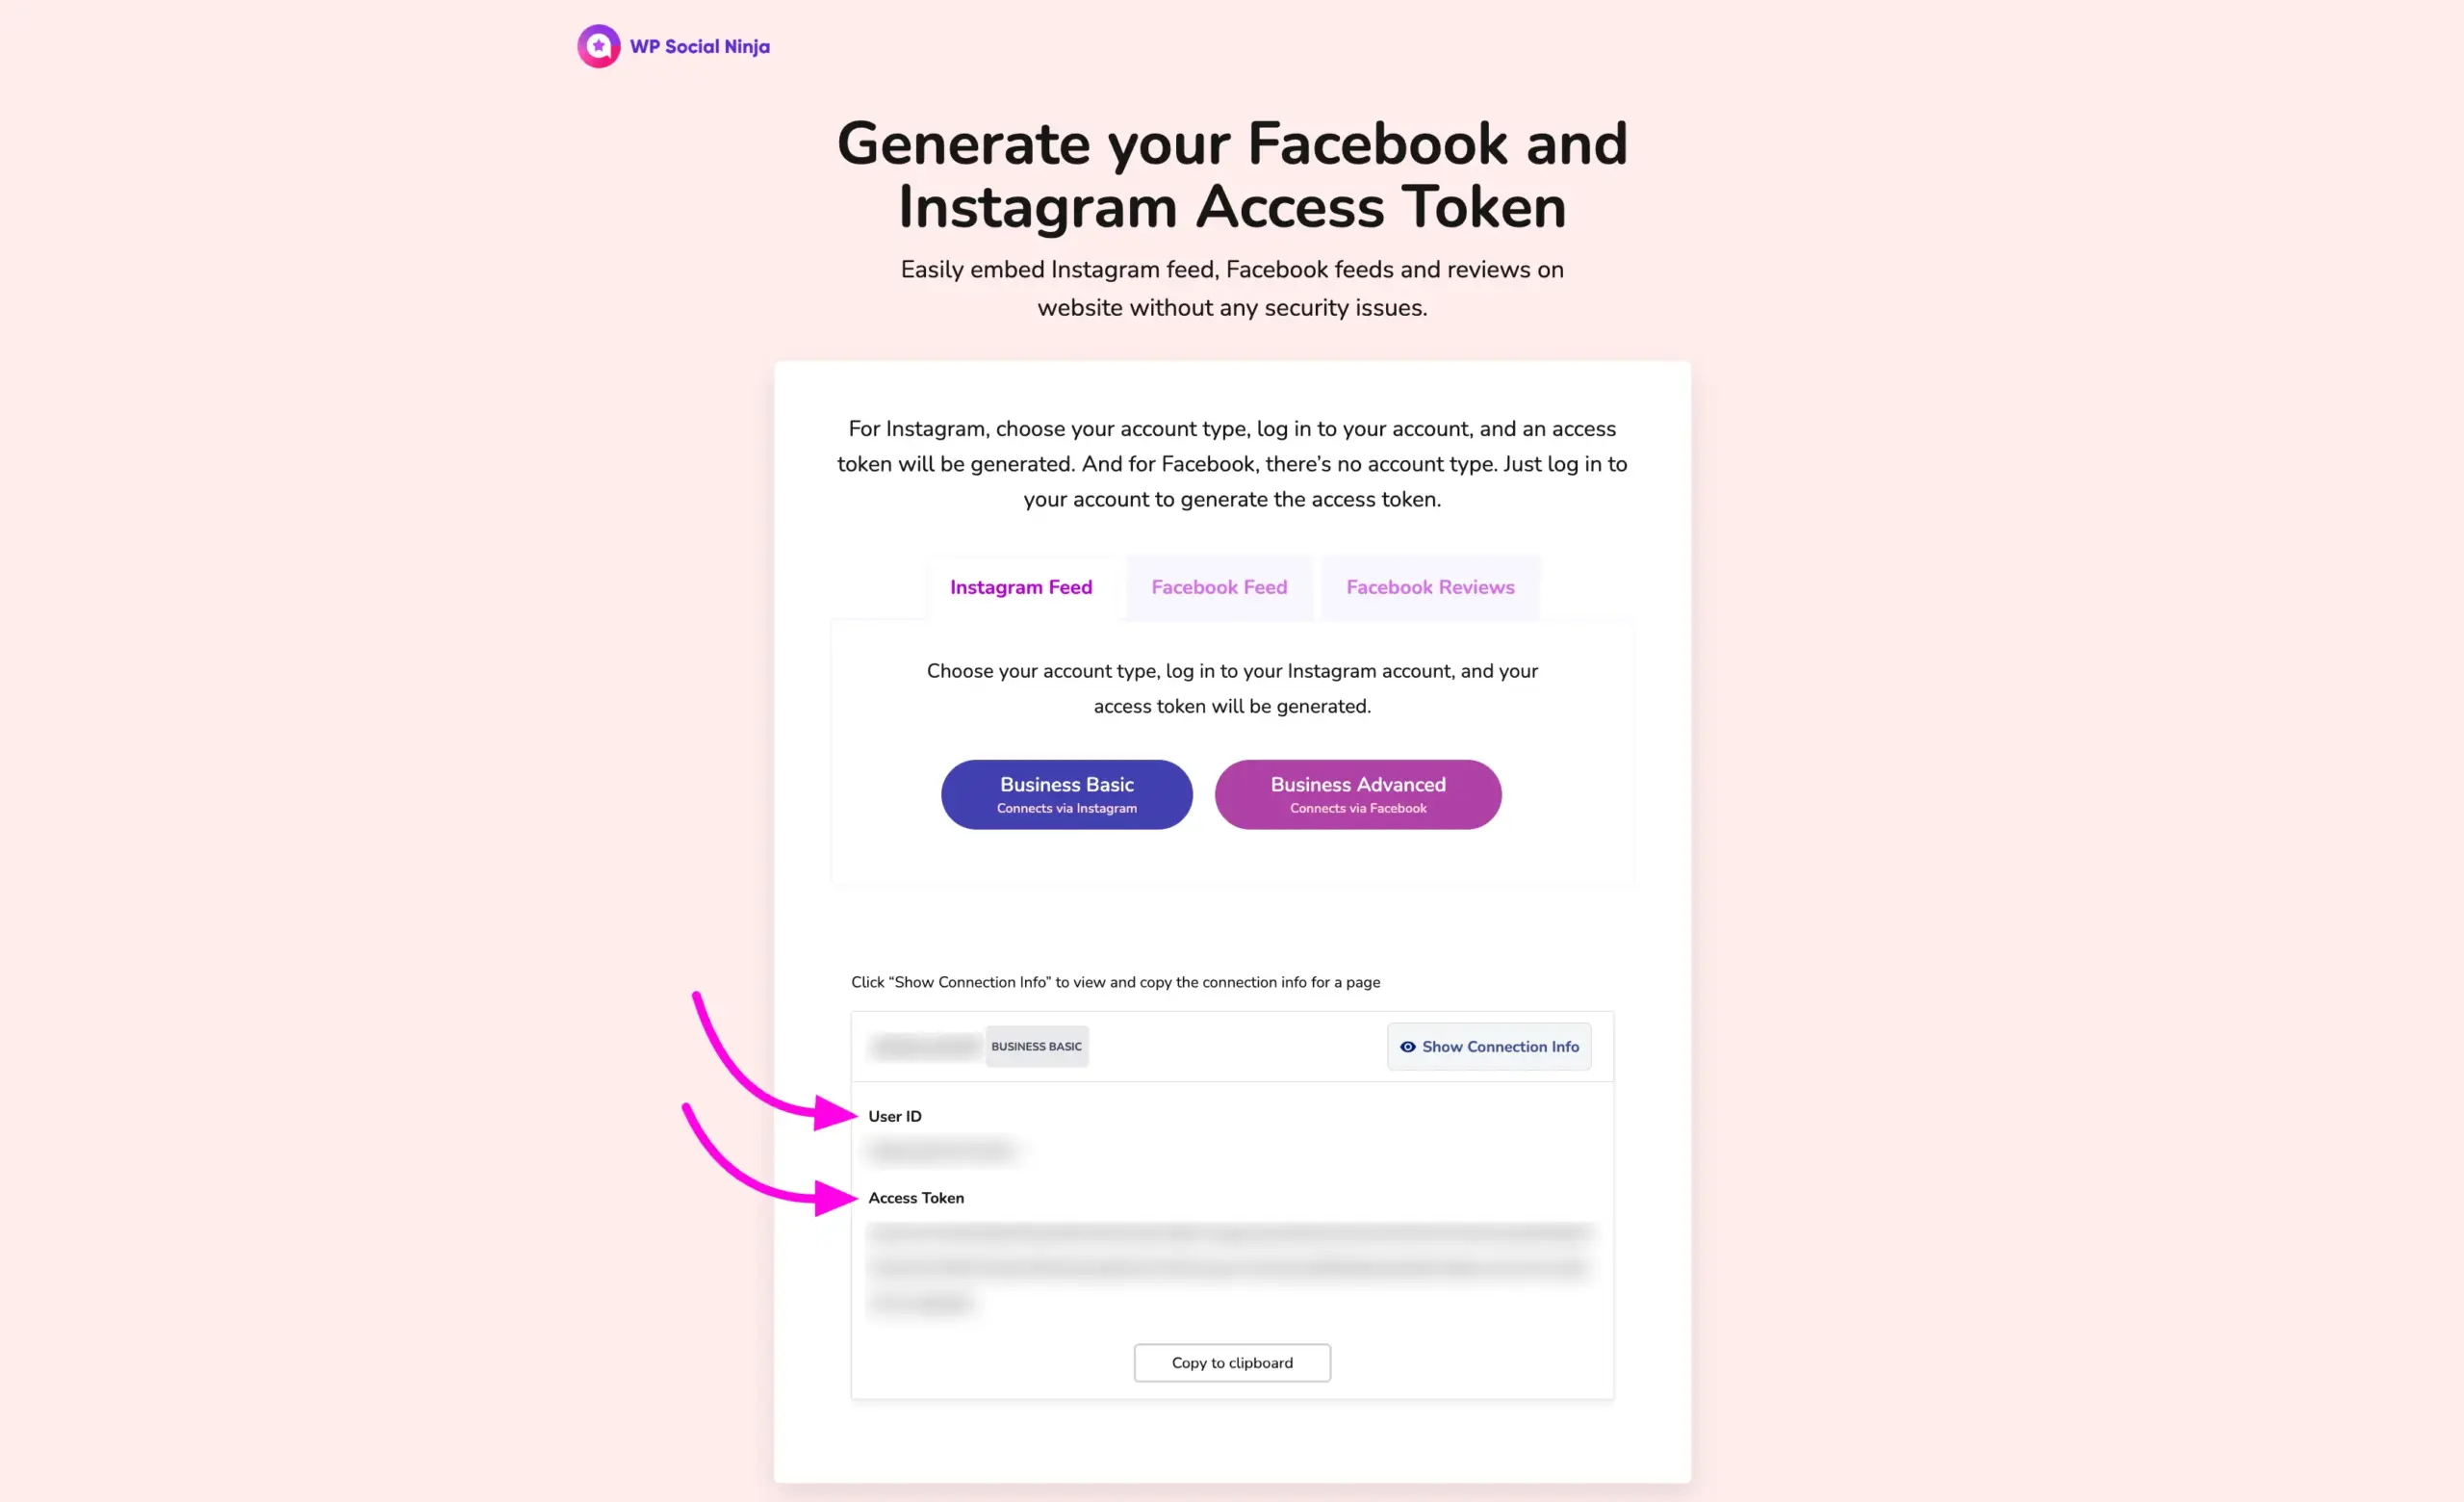
Once you’ve granted the permissions, you’ll receive your Access Token and User ID. Be sure to copy them for later use.
Paste the Access Token and User ID into the respective fields in the WP Social Ninja configuration popup, then click on the Connect This Account button.
Your account will now be successfully connected to WP Social Ninja. To add another account, click the Add More Account button. If you want to create or modify your Instagram Platform Template, click the Add New Template button.
Troubleshooting: Instagram Accounts Not Appearing? #
If you have successfully connected your Instagram Business Account (especially using the Business Advanced method) but your accounts are not appearing in the selection list, you may have a previously registered WP Social Ninja app in your Facebook Business Integrations.
To fix this, please remove the old app and then re-integrate WP Social Ninja by following these steps:
- Go to your Facebook Business Integrations settings.
- Find and Remove the old “WP Social Ninja” app.
- Return to this page and follow the connection steps again to re-authorize the connection.
Important (Meta/Facebook Policy): Please note that when you delete a registered app, the connected WP Social Ninja access token will be disconnected from all sites where it is used. This is a Meta (Facebook) policy, not an issue from our end. You will need to re-authorize the connection on every site where you use this Facebook account.
If you have any further questions about this article, feel free to reach out to our support team.
You can also check out how to convert an Instagram personal account to a business account


